[ Projek Y EE 014 ] Diy Automatic Dustbin || Arduino Nano || Ultrasonic Sensor || Servo Motor
Summary
TLDRIn this video, the creator demonstrates how to build an automatic trash can using an Arduino Nano, ultrasonic sensor, and a servo motor. The project involves assembling components like a mini blackboard, wires, and a 9V battery to create a functional trash can lid that opens automatically. After completing the wiring and uploading the code to the Arduino, the functionality is tested. The project is housed in a mini trash can and a project box, with a motor that pushes the lid open when activated. The tutorial is aimed at DIY enthusiasts looking to create a simple, automated trash can solution.
Takeaways
- 😀 The project involves creating an automatic trash can using an Arduino Nano and various components.
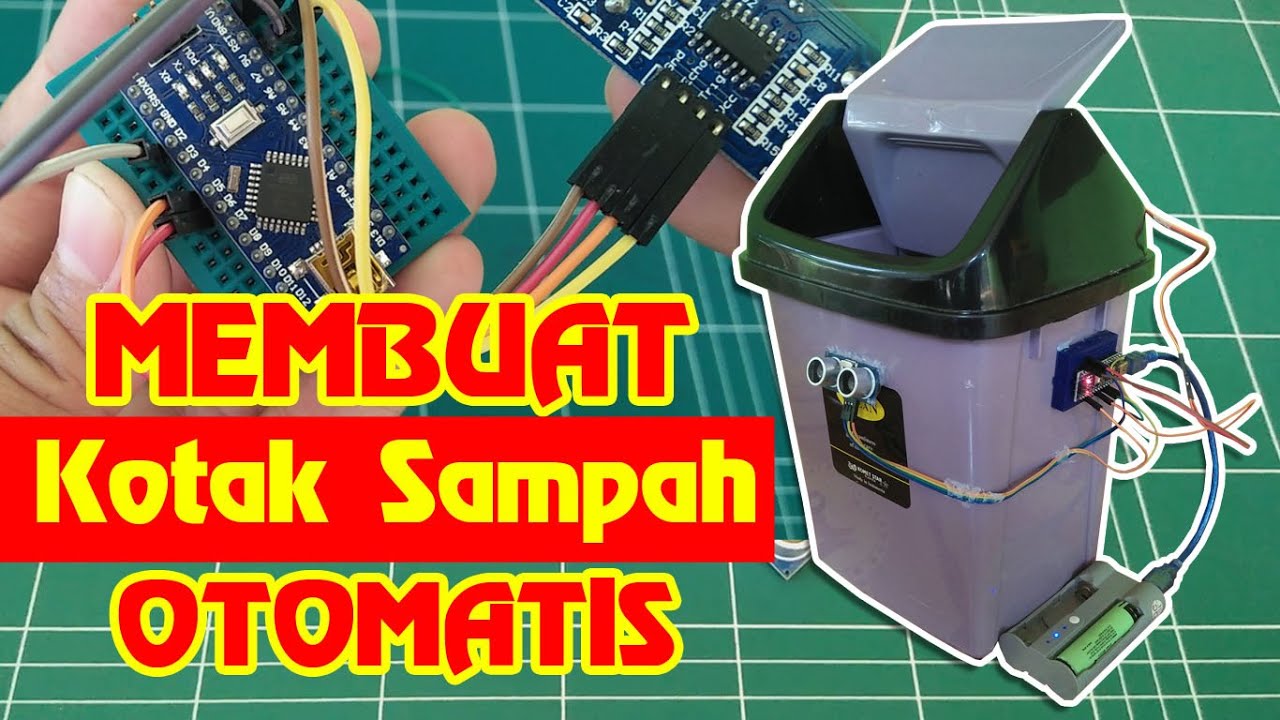
- 😀 Key materials for the project include an Arduino Nano, ultrasonic sensor, servo motor, mini blackboard, and a 9V battery.
- 😀 The Arduino Nano is mounted on a blackboard to facilitate the connections.
- 😀 The servo motor has three wires: brown (negative), red (positive), and yellow (control). These are connected to the Arduino.
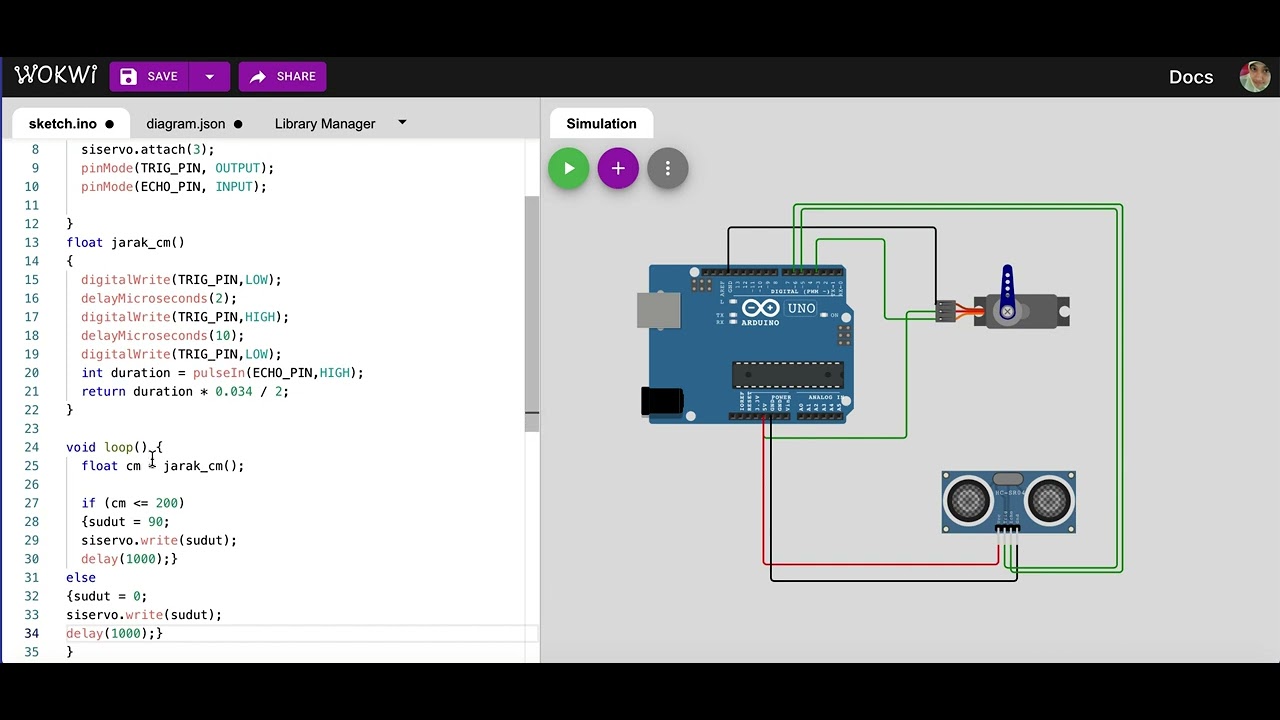
- 😀 The ultrasonic sensor has four pins: VCC, Echo, Trig, and Ground. VCC is connected to the 5V pin, Echo to pin 4, Trig to pin 3, and Ground to the Ground pin on the Arduino.
- 😀 The wiring process involves making sure each component is connected to the correct pin on the Arduino Nano.
- 😀 The necessary code for the Arduino Nano is provided in the description, and after uploading, testing is done to ensure the system works properly.
- 😀 The trash can's functionality is tested to ensure it opens and closes automatically when the sensor detects objects.
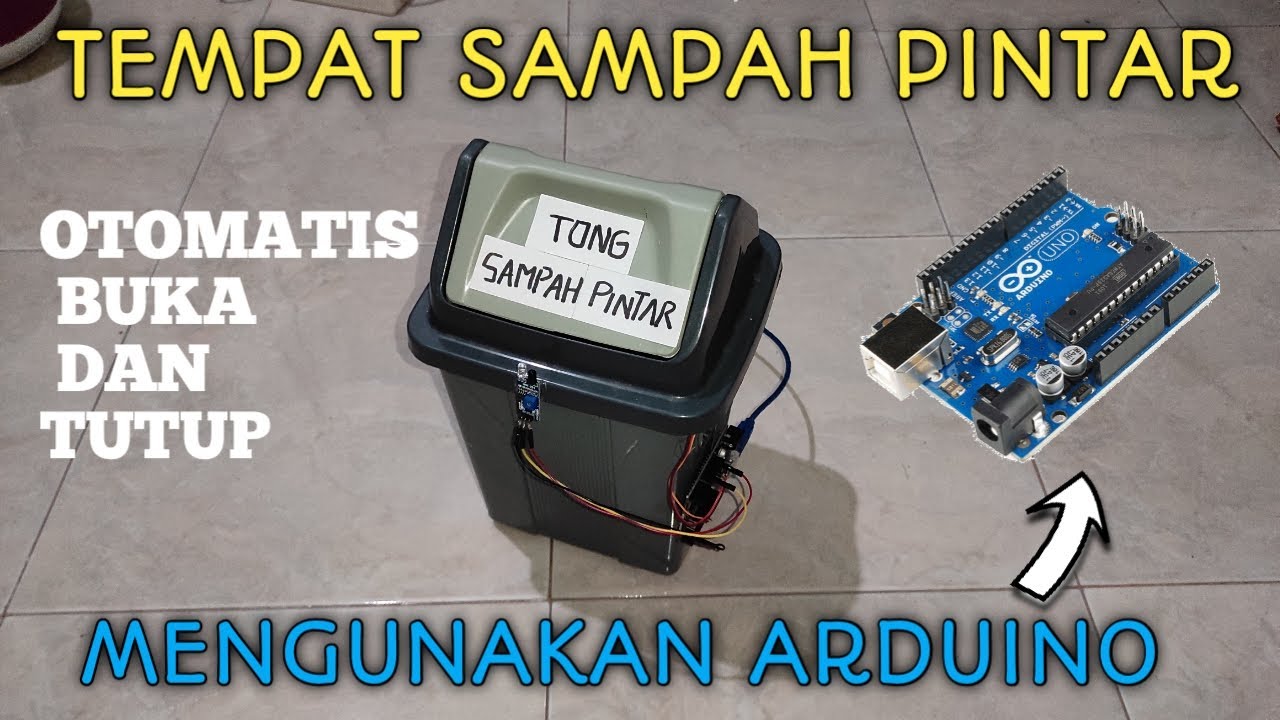
- 😀 The project housing is a mini trash can, and a project box is used as the casing to hold all the components.
- 😀 After successful testing, the final project is assembled, and a demonstration shows the trash can opening and closing as intended.
Q & A
What is the main purpose of this project?
-The main purpose of this project is to create an automatic trash can using an Arduino Nano, ultrasonic sensor, and servo motor to open and close the lid based on object detection.
What components are needed for this project?
-The required components include an Arduino Nano, ultrasonic sensor, servo motor, mini blackboard, 9V battery, jumper wires, and a project box.
How is the Arduino Nano connected in the circuit?
-The Arduino Nano is connected to a mini blackboard where the connections for the servo motor and ultrasonic sensor are made. The servo motor is connected with three wires: brown to ground, red to pin 5V, and yellow to pin 9.
How is the ultrasonic sensor wired to the Arduino Nano?
-The ultrasonic sensor is connected with four pins: VCC to 3.3V, Echo to pin 4, Trigger to pin 3, and GND to ground.
What happens after the wiring is completed?
-Once the wiring is completed, the next step is to load the Arduino code onto the Arduino Nano to enable it to control the system's behavior, such as detecting objects and opening the trash can lid.
What is the purpose of the ultrasonic sensor in this project?
-The ultrasonic sensor's role is to detect the presence of objects near the trash can and trigger the servo motor to open or close the lid accordingly.
What happens after uploading the code to the Arduino Nano?
-After uploading the code, the project is tested to ensure that the trash can opens and closes automatically when the ultrasonic sensor detects an object.
How is the final assembly of the project done?
-The final assembly involves placing the Arduino Nano, servo motor, and ultrasonic sensor inside a project box, connecting all necessary components, and securing the trash can's lid mechanism to make it functional.
What is used for the housing of the project?
-The housing for the project is a project box, which holds the components together and protects them from external damage.
How does the project ensure that the trash can lid opens automatically?
-The ultrasonic sensor detects objects approaching the trash can, sending a signal to the Arduino Nano, which then activates the servo motor to open or close the lid based on the sensor's input.
Outlines

This section is available to paid users only. Please upgrade to access this part.
Upgrade NowMindmap

This section is available to paid users only. Please upgrade to access this part.
Upgrade NowKeywords

This section is available to paid users only. Please upgrade to access this part.
Upgrade NowHighlights

This section is available to paid users only. Please upgrade to access this part.
Upgrade NowTranscripts

This section is available to paid users only. Please upgrade to access this part.
Upgrade NowBrowse More Related Video
Dijamin Bisa | Membuat Kotak Sampah Otomatis

Project Membuat Palang pintu otomatis Jalan tol
Cara Membuat Tempat Sampah Pintar Otomatis Menggunakan Arduino Uno
Simulasi kontrol gerakan servo dengan sensor ultrasonik | mikrokontroler arduino di wokwi.com

Membuat Pintu geser otomatis | automatic sliding door

DIY Arduino ultrasonic Sonar - Radar on TFT display
5.0 / 5 (0 votes)