CARA MEMASANG END MILL CUTTER PADA MESIN FRAIS YANG BENAR
Summary
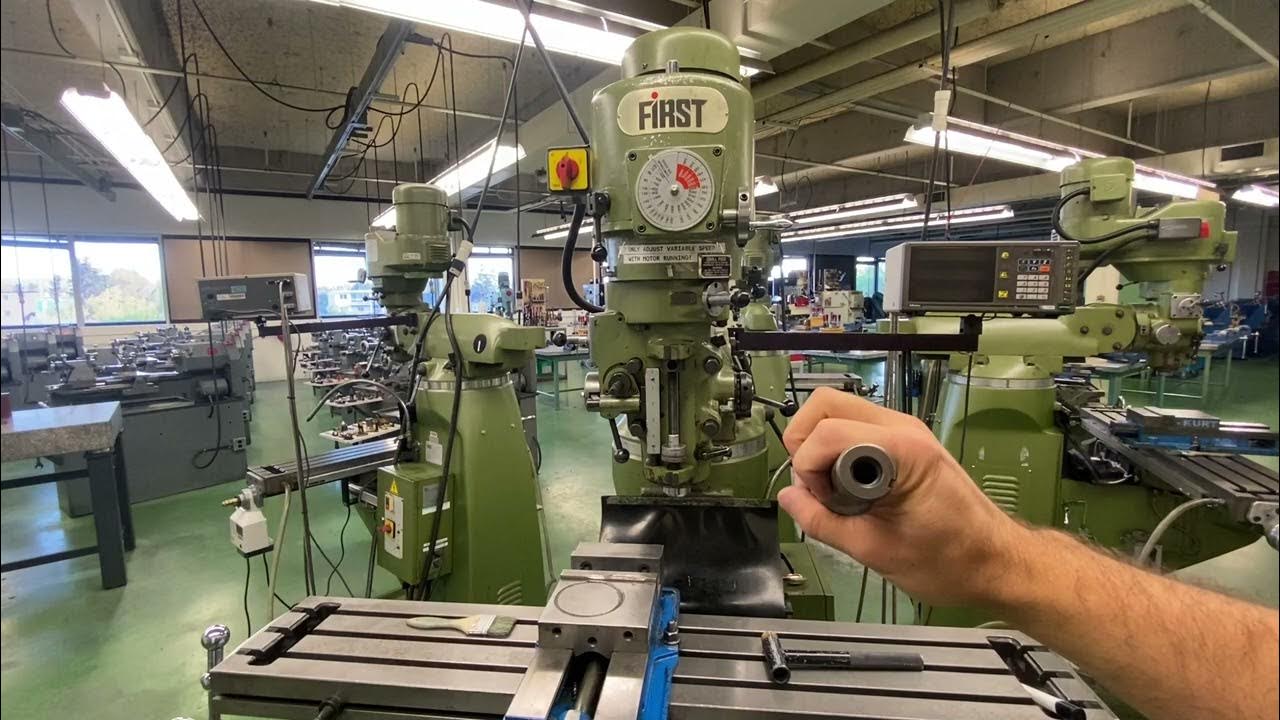
TLDRThis video demonstrates how to install an end mill cutter on a vertical milling machine. The process starts with fitting the arbor and attaching the end mill cutter, ensuring it is positioned close to the top groove to minimize vibration. The video emphasizes the importance of using a key to secure the cutter and applying hand strength to tighten the arbor nut, avoiding the use of a hammer. The tutorial is concluded with a brief reminder to subscribe, like, and comment, with the aim of providing practical guidance for users working with milling machines.
Takeaways
- 😀 The video introduces the process of installing an end mill cutter on a vertical milling machine.
- 😀 The presenter greets the audience with a friendly 'Assalamualaikum' and encourages viewers to subscribe, like, and comment.
- 😀 The end mill cutter diameter used in the demonstration is 20mm.
- 😀 The first step is to install the arbor onto the machine before attaching the end mill cutter.
- 😀 It is essential to place the end mill cutter close to the top groove to prevent unnecessary vibration.
- 😀 The presenter emphasizes that the cutter should not be positioned too far or too long to avoid instability.
- 😀 Once the cutter is in position, the presenter shows how to secure it by rotating to the right.
- 😀 A tool (possibly a wrench) is used to tighten the cutter, but it should not be struck with a hammer to prevent damage.
- 😀 The presenter advises tightening the arbor nut by hand, applying about three to four strong turns.
- 😀 After securing the cutter, the machine is powered on to test the installation.
- 😀 The video ends with a polite closing, wishing the audience well and hoping the video is useful.
Q & A
What is the purpose of the video?
-The purpose of the video is to demonstrate how to properly install an end mill cutter on a vertical milling machine.
What is the first step in installing the end mill cutter?
-The first step is to install the 'tuk' (collet) onto the machine before attaching the end mill cutter.
Why is it important to place the end mill cutter close to the upper groove position?
-Placing the end mill cutter as close as possible to the upper groove position helps minimize vibration and ensures better performance of the machine.
What tool is used to secure the end mill cutter in place?
-A wrench (or key) is used to secure the end mill cutter in place by tightening the screw.
What should not be used to tighten the arbor nut?
-A hammer should not be used to tighten the arbor nut. Instead, it should be tightened by hand or with a wrench.
How many times should the wrench be turned to secure the cutter?
-The wrench should be turned three or four times to secure the cutter firmly.
What is the importance of not using a hammer to tighten the nut?
-Using a hammer can damage the machine or the components, so it’s recommended to use manual force with the wrench instead.
What action is taken after securing the end mill cutter?
-After securing the end mill cutter, the machine is turned on to test its functionality.
What should viewers do after watching the video?
-Viewers are encouraged to subscribe, like, and comment on the video.
What is the closing message of the video?
-The closing message includes gratitude and a wish that the tutorial was beneficial, followed by a greeting of peace ('assalamualaikum warahmatullah wabarakatuh').
Outlines

Dieser Bereich ist nur für Premium-Benutzer verfügbar. Bitte führen Sie ein Upgrade durch, um auf diesen Abschnitt zuzugreifen.
Upgrade durchführenMindmap

Dieser Bereich ist nur für Premium-Benutzer verfügbar. Bitte führen Sie ein Upgrade durch, um auf diesen Abschnitt zuzugreifen.
Upgrade durchführenKeywords

Dieser Bereich ist nur für Premium-Benutzer verfügbar. Bitte führen Sie ein Upgrade durch, um auf diesen Abschnitt zuzugreifen.
Upgrade durchführenHighlights

Dieser Bereich ist nur für Premium-Benutzer verfügbar. Bitte führen Sie ein Upgrade durch, um auf diesen Abschnitt zuzugreifen.
Upgrade durchführenTranscripts

Dieser Bereich ist nur für Premium-Benutzer verfügbar. Bitte führen Sie ein Upgrade durch, um auf diesen Abschnitt zuzugreifen.
Upgrade durchführenWeitere ähnliche Videos ansehen


5.0 / 5 (0 votes)
