Hello world video using Xilinx Zynq, Vivado 2020, and Vitis
Summary
TLDRIn this tutorial, we explore the process of creating a 'Hello World' application using the Xilinx Vivado and Vitus tools on the Avnet MiniZed board featuring a Zynq FPGA with an ARM Cortex-A9. The session covers project setup, block design creation, synthesis, and implementation, culminating in the generation of a bitstream. After exporting the hardware configuration to Vitus, the tutorial guides viewers through modifying the standard I/O settings and building the application project. Finally, the application runs successfully, demonstrating the tools' functionality and providing a comprehensive overview of FPGA programming.
Takeaways
- 😀 The tutorial demonstrates how to create a 'Hello World' application on a Xilinx Zinc FPGA using Vivado and Vitis IDE.
- 🛠️ Tools used include Vivado HLX Edition (2020), the Xilinx Vitis tool, and the Avnet Mini Zed board.
- 📁 The project is named 'Hello World Mini Zed' and utilizes the board-aware feature in Vivado for easy board selection.
- 📊 A block design is created by instantiating the Zynq processing system, which includes an ARM Cortex-A9 core.
- ⚙️ Block automation in Vivado simplifies the configuration of IP blocks and interconnections.
- ✅ Design validation ensures that there are no issues before moving to synthesis and implementation.
- 🔗 An HDL wrapper is created for the block diagram to prepare the design for synthesis.
- 📈 The synthesis process generates a flattened netlist, followed by implementation and bitstream generation.
- 📤 The generated hardware specification is exported for use in Vitis, including the bitstream file.
- 💻 In Vitis, a hardware platform project is created, and modifications are made to ensure correct UART mapping for standard I/O.
- 📜 The application project is built using a 'Hello World' template, successfully running the application and displaying the message in the terminal.
Q & A
What is the primary objective of the video?
-The primary objective is to demonstrate how to write a simple 'Hello World' program on a Xilinx Zinc FPGA using the Vivado HLx Edition software.
What tools are used in the project demonstration?
-The tools used are Vivado HLx Edition (version 2020), Xilinx Vitis for application development, and the Avnet Mini Zed board.
What type of processor is used in the project?
-The project uses a Xilinx Zinc FPGA with an ARM Cortex-A9 processor.
What steps are involved in creating the Vivado project?
-The steps include creating a new project, selecting the target board, instantiating the processing system block, running block automation, validating the design, creating an HDL wrapper, and generating output products.
Why is block automation useful in Vivado?
-Block automation simplifies the configuration of IP blocks and interconnects by automatically setting parameters and connections, reducing manual setup time.
What is the significance of the bitstream file?
-The bitstream file is crucial as it contains the configuration data that programs the FPGA to implement the designed functionality.
How does the Vitis IDE relate to the Vivado project?
-Vitis IDE is used for developing the firmware application that runs on the hardware configured in Vivado, allowing users to interface with the hardware resources.
What modification is made to the standard I/O in the Vitis environment?
-The modification involves changing the standard I/O port from UART0 to UART1, which is the correct console port for the Mini Zed board.
What does the 'Hello World' application in this context do?
-The 'Hello World' application prints a simple message to the console terminal, demonstrating the successful interaction between the software and hardware.
What does the presenter indicate about the speed of project runs in Vivado?
-The presenter notes that certain aspects of the project run slowly, particularly synthesis and implementation, and mentions that they will be cutting these portions from the demo for brevity.
Outlines

Dieser Bereich ist nur für Premium-Benutzer verfügbar. Bitte führen Sie ein Upgrade durch, um auf diesen Abschnitt zuzugreifen.
Upgrade durchführenMindmap

Dieser Bereich ist nur für Premium-Benutzer verfügbar. Bitte führen Sie ein Upgrade durch, um auf diesen Abschnitt zuzugreifen.
Upgrade durchführenKeywords

Dieser Bereich ist nur für Premium-Benutzer verfügbar. Bitte führen Sie ein Upgrade durch, um auf diesen Abschnitt zuzugreifen.
Upgrade durchführenHighlights

Dieser Bereich ist nur für Premium-Benutzer verfügbar. Bitte führen Sie ein Upgrade durch, um auf diesen Abschnitt zuzugreifen.
Upgrade durchführenTranscripts

Dieser Bereich ist nur für Premium-Benutzer verfügbar. Bitte führen Sie ein Upgrade durch, um auf diesen Abschnitt zuzugreifen.
Upgrade durchführenWeitere ähnliche Videos ansehen

Design, Implement, and Visualize: XADC IP for FPGA Temperature Monitoring in Vivado

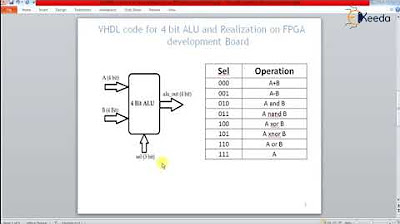
VHDL code for 4 bit ALU and Realization on FPGA development Board

Vivado01 1 Familiarizacao com o Vivado e Simulacao de uma AND2

Zynq Part 2: Zynq Vitis Example with PL Fabric GPIO and BRAM

Creating a Hello World Application | How-to | Flowable

Creating a Hello World Case | How-To | Flowable
5.0 / 5 (0 votes)
