Obstacle Avoiding Robot Car Using An Arduino
Summary
TLDRIn this tutorial, viewers learn how to build an Arduino-based obstacle-avoiding robot using an ultrasonic sensor and a DC motor driver shield to control four geared motors. The video details the assembly process of a custom 3D-printed chassis, including attaching the motors, sensor, and battery. It also covers coding the robot to navigate its environment by measuring distances and adjusting movements accordingly. The presenter emphasizes troubleshooting tips for motor direction and servo calibration, ultimately showcasing the robot's effective operation on various surfaces.
Takeaways
- 😀 An Arduino-based obstacle-avoiding robot uses an ultrasonic sensor and a DC motor driver shield to navigate around objects.
- 🔧 A DC motor driver shield utilizes two L293D chips and a shift register to control four geared DC motors, one for each wheel.
- 📦 Components can be purchased via links provided in the video description for convenience.
- 🛠️ The chassis for the robot is designed to be 3D printed using black PLA and consists of a top and bottom section along with a holder for the ultrasonic sensor.
- 💡 Assembly involves gluing various components in place, including the servo and ultrasonic sensor, ensuring proper positioning and wiring access.
- 🔌 Proper wiring of the DC motors to the motor driver shield is crucial; connections must be checked to ensure correct functionality.
- 🔋 When using a rechargeable battery, it should be securely positioned to optimize space and avoid obstruction of the sensor's movement.
- 📊 The code begins by importing necessary libraries, defining sensor pins, and setting motor speed variables.
- 🔄 Functions for motor control include forward movement, stopping, and turning left or right based on sensor input.
- 🛡️ Testing involves checking wheel rotation and making necessary adjustments to ensure proper operation before full deployment.
Q & A
What is the main function of the ultrasonic sensor in the robot?
-The ultrasonic sensor detects objects by sending out ultrasonic sound waves and measuring the time it takes for the waves to bounce back after hitting an object. This information helps the robot avoid obstacles.
How many motors are used to drive the robot, and what type are they?
-The robot uses four geared DC motors, with one motor for each wheel.
What is the purpose of the DC motor driver shield?
-The DC motor driver shield is used to control the four DC motors, allowing them to be driven using two L293D chips and a shift register.
What components are necessary for assembling the robot's chassis?
-You will need a 3D-printed chassis (top and bottom sections) and a holder for the ultrasonic sensor, which can all be printed using black PLA.
How is the ultrasonic sensor mounted on the robot?
-The ultrasonic sensor is glued into a housing that is attached to the servo, which allows it to rotate and scan for obstacles.
What should you do if the motors turn in the wrong direction when first testing the robot?
-If any motors turn in the wrong direction, you can simply swap the two wires connected to the motor terminals to correct their direction.
What programming functions are mentioned for controlling the robot's movements?
-The script includes functions for moving forward, stopping, turning left, and turning right, with specific logic to manage acceleration and deceleration.
Why is it important to manage the wires during assembly?
-It's important to keep the wiring organized and away from the wheels to prevent them from getting caught or damaged when the robot moves.
What additional feature could enhance the robot's ability to navigate tight spaces?
-Incorporating more movement to the ultrasonic sensor during forward motion can help the robot detect nearby obstacles and gently steer away from them.
How does the robot decide which direction to turn when it encounters an obstacle?
-The robot compares the distance measurements from the ultrasonic sensor on both sides and turns towards the direction with more space. If both sides are blocked, it will turn around.
Outlines

Dieser Bereich ist nur für Premium-Benutzer verfügbar. Bitte führen Sie ein Upgrade durch, um auf diesen Abschnitt zuzugreifen.
Upgrade durchführenMindmap

Dieser Bereich ist nur für Premium-Benutzer verfügbar. Bitte führen Sie ein Upgrade durch, um auf diesen Abschnitt zuzugreifen.
Upgrade durchführenKeywords

Dieser Bereich ist nur für Premium-Benutzer verfügbar. Bitte führen Sie ein Upgrade durch, um auf diesen Abschnitt zuzugreifen.
Upgrade durchführenHighlights

Dieser Bereich ist nur für Premium-Benutzer verfügbar. Bitte führen Sie ein Upgrade durch, um auf diesen Abschnitt zuzugreifen.
Upgrade durchführenTranscripts

Dieser Bereich ist nur für Premium-Benutzer verfügbar. Bitte führen Sie ein Upgrade durch, um auf diesen Abschnitt zuzugreifen.
Upgrade durchführenWeitere ähnliche Videos ansehen
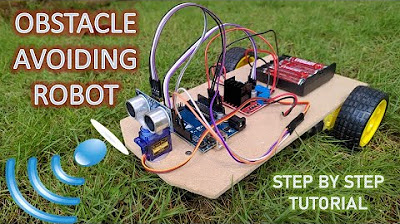
Intelligent Obstacle Avoiding Robot || Step by Step Tutorial || Arduino Project
How to Build a Line-Following Robot | Complete Robotics Tutorial for Beginners

Project Membuat Palang pintu otomatis Jalan tol
Dijamin Bisa | Membuat Kotak Sampah Otomatis

Membuat Pintu geser otomatis | automatic sliding door

handsanitizer otomatis menggunakan arduino UNO R3 CH340. baca deskripsi ya
5.0 / 5 (0 votes)
