Exploring Interactive Grid in Oracle APEX - Part 6
Summary
TLDRThis video tutorial guides viewers through installing a sample interactive grid application in Oracle Apex, exploring its features such as column groups, editing capabilities, and data manipulation. It covers advanced functionalities like scroll paging, master-detail relationships, and protecting rows from DML operations. The tutorial also demonstrates changing column types and leveraging Apex's auto-generated processes for efficient data management.
Takeaways
- 😀 Install the sample application for interactive grid in Oracle Apex by clicking the install button from the gallery, which simplifies the process compared to previous versions.
- 📚 After installation, the required tables for the sample interactive grid application can be viewed in the SQL Workshop's Object Browser.
- 🛠️ Learn to create a new page with an interactive grid in Oracle Apex, setting properties like page number, name, and enabling local database as the data source.
- 🔍 Understand how to use column groups to organize and display data in the interactive grid, and how to set properties for these groups in the page designer.
- 🔄 Discover the editing capabilities of the interactive grid, including enabling data manipulation operations and customizing toolbar buttons for user interactions.
- 🔑 Learn to resolve common errors like defining a primary key column for editing in the interactive grid and understanding its importance in data manipulation.
- ⚙️ Explore the various column types available in interactive grids, such as radio groups, pop-up lists of values, date pickers, and switches, and how to apply them to enhance user experience.
- 🔒 Get insights on protecting certain rows from DML operations by implementing a control column and setting allowed row operations in the interactive grid.
- 🔄 Experience the scroll paging feature, also known as infinite scrolling or virtual paging, which allows for efficient data rendering as the user scrolls.
- 🌐 Master the creation of master-detail relationships in interactive grids, enabling the display of related data across multiple regions based on user selection.
- 📈 Comprehend the auto-generated processes by Apex Wizards for handling DML operations, which simplifies the process of data manipulation without writing SQL code.
Q & A
How do you install the sample application for the interactive grid in Oracle Apex?
-To install the sample application, go to the gallery, click on 'Sample Apps', find and click the 'Install' button for the 'Sample Interactive Grid Application'. The application will be installed directly to your workspace without needing to download a zip file.
What are the two required tables for the interactive grid sample application in Oracle Apex?
-The two required tables for the interactive grid sample application can be viewed in the 'SQL Workshop' under the 'Object Browser' option once the application is installed.
How do you create a new page with an interactive grid in Oracle Apex?
-To create a new page, click the 'Create Page' button, select the 'Interactive Grid' option, enter a page number (e.g., 100), and a column group name for the page name.
What is the purpose of setting the 'Source Type' to SQL query for the interactive grid's data source in Oracle Apex?
-Setting the 'Source Type' to SQL query allows you to define a custom SQL statement that will be used to fetch data for the interactive grid, as provided in the source code link in the video description.
How can you enable editing in an interactive grid page in Oracle Apex?
-To enable editing, click the interactive grid region in the 'Page Designer', go to the 'Attributes' tab in the 'Properties' pane, turn on the 'Enabled' attribute, and ensure that data manipulation operations (create, update, delete) are also enabled.
What is the function of the 'Reset' and 'Save' buttons in the interactive grid's toolbar?
-The 'Reset' button removes any customizations such as filters, column width, ordering, and reloads the report definition from the server. The 'Save' button saves changes made to the interactive grid without needing to save the whole page.
How do you handle the error related to the primary key column not being defined for editing in the interactive grid?
-To resolve this error, select the 'Amp Number' column in the 'Page Designer' and turn on the 'Primary Key' property in the 'Source' section.
What is the interactive grid's 'Single Row View' feature in Oracle Apex?
-The 'Single Row View' feature allows the interactive grid to display data in a single row at a time, which also supports editing.
How does the 'Scroll Paging' or 'Infinite Scrolling' feature work in the interactive grid?
-With 'Scroll Paging' enabled, the interactive grid appears to carry the entire result set, but rows are rendered on demand as you scroll. Data is fetched from the server as needed by the view.
What is the process of creating a master-detail relationship in the interactive grid in Oracle Apex?
-To create a master-detail relationship, you need to create regions that act as masters and details, set primary key properties, and associate detail regions to their master regions using the 'Master Region' and 'Master Column' properties.
How can you protect certain rows from DML operations in the interactive grid?
-To protect rows from DML operations, you can add a control column to your SQL query that implements a rule, such as not allowing managers and presidents to be edited or deleted. Then, set the 'Allowed Row Operations' property to use this control column.
Outlines
😀 Installing Sample Application for Interactive Grid
This paragraph outlines the initial steps to install a sample application in Oracle Apex, which is necessary for hands-on experience with the interactive grid feature. Users are guided to access the gallery, select the sample app, and install it directly to their workspace. The process has evolved from downloading zip files in previous versions to a more streamlined installation. After installation, users are directed to the SQL Workshop to verify the presence of the required tables and to explore the installed application's interface, including the use of column groups to organize data in the grid view.
🛠️ Enabling and Customizing Interactive Grid Editing
The second paragraph focuses on enabling editing capabilities within the interactive grid on page 100. It details the process of toggling the 'enabled' attribute and ensuring that data manipulation operations such as add, delete, and edit are permitted. The toolbar customization is also covered, including the reset and save functionalities. The paragraph addresses potential errors related to primary key columns and provides a solution. It further explains the interactive grid's features, such as column reordering, freezing, hiding, and inline data editing. The introduction of selection actions and row selectors as part of the editing feature is also highlighted.
📝 Advanced Interactive Grid Features and Data Manipulation
This section delves into more advanced features of the interactive grid, including adding and editing rows, handling mandatory fields, and managing unsaved changes. It discusses the automatic row processing DML type process that facilitates data manipulation without SQL code. The paragraph also covers changing column types, such as radio groups and pop-up lists, and how to implement them with SQL queries. The process of protecting certain rows from DML operations through a control column is explained, along with the activation of infinite scrolling or scroll paging for handling large datasets.
🔄 Implementing Master-Detail Relationships and Data Views
The fourth paragraph introduces the creation of master-detail relationships within the interactive grid. It describes the process of uploading and executing SQL scripts to create necessary tables and data for demonstration. The steps for creating a new page to display data from the continent table and associating it with detail regions for countries, cities, and population are outlined. This includes setting up hidden columns, primary keys, and master-detail associations to enable a hierarchical data view that updates dynamically as users select different options in the grid.
🌐 Master-Detail Relationships and Dynamic Data Interaction
Building upon the previous paragraph, this section continues the discussion on master-detail relationships, focusing on the dynamic interaction between different levels of data. It details the process of selecting a continent, which then populates the countries region, and subsequently, selecting a country populates the cities region. The final step is selecting a city to display its population. The paragraph also covers the techniques learned in the video, such as installing sample applications, using column groups, enabling editing features, performing DML operations, and protecting rows from edits.
📚 Conclusion and Summary of Learned Techniques
The final paragraph concludes the video by summarizing the techniques covered, including the installation of sample applications in Apex, the use of column groups, enabling and customizing the interactive grid's editing features, exploring advanced interactive grid capabilities, implementing DML operations, utilizing auto-generated processes, protecting rows from edits, and understanding scroll paging and master-detail relationships. The paragraph serves as a recap and a thank you to viewers for watching the tutorial.
Mindmap
Keywords
💡Tech mining
💡Interactive Grid
💡Sample Application
💡SQL Workshop
💡Column Groups
💡DML Operations
💡Primary Key
💡Master-Detail Relationship
💡Scroll Paging
💡Data Types
💡Authorization
Highlights
Introduction to the interactive grid feature in Tech mining with a sample application.
Installation process of the sample application directly into the workspace in the new version of Apex.
Exploration of the SQL Workshop for the required tables after installing the sample application.
Use of column groups to associate columns together in the grid and single row view.
Creating a new page with an interactive grid and setting up the data source with a SQL query.
Enabling and configuring the interactive grid for editing with data manipulation operations.
Handling errors related to primary key column definition for editing in the interactive grid.
Interactive grid capabilities such as sorting, freezing columns, and hiding columns.
Data manipulation through direct cell editing in interactive grids, not available in interactive reports.
Use of selection actions menu and row selector features after enabling editing.
Notification of unsaved changes when attempting to leave the page.
Single row view and report view options in interactive grids for data display.
Auto-generated processes by Apex Wizards for DML operations in interactive grids.
Changing column types to other types like radio group, pop-up LOV, date picker, and switch.
Protecting rows from DML operations by implementing a control column in the interactive grid.
Introduction to scroll paging or infinite scrolling feature in interactive grids.
Creating master-detail relationships in interactive grids using SQL Workshop.
Building a master-detail screen manually with multiple regions and their associations.
Demonstration of master-detail functionality with continent, country, city, and population data.
Summary of techniques learned in the video, including installing applications, enabling editing features, exploring interactive grid features, and creating master-detail relationships.
Transcripts
a very warm welcome to Tech mining
explore features of interactive grid
to get Hands-On exposure you need a
couple of tables that come with a sample
application
execute these following steps to install
the sample application to get the
required tables click gallery
then click on Sample apps
scroll down a bit
to sample interactive grid application
in previous versions of Apex these
applications were downloaded to your
computer in zip format then we've used
to import these downloaded zip
applications to our workspace
but in this new version of Apex directly
click the install button
[Music]
leave these advanced settings to default
I can install application button this
will install the application directly to
your workspace
foreign
this application ID and name is
auto-generated
in the SQL Workshop menu click the
object browser option see the two
required tables
[Music]
this is the view of our installed sample
interactive grid application
groups are used to associate columns
together in the grid and single row View
open sales web application
[Music]
create a new page by clicking the create
page button
select interactive grid option
enter 100 for page number
column groups for page name
[Music]
set page mode to normal because it's a
normal page
don't include form page
on the data source screen select local
database
set Source type to SQL query
source code link is provided in video
description
after downloading open part 5 folder
you'll get files used in video
[Music]
foreign
keep the default off value of editing
enabled
expand navigation breadcrumb is turned
on by default
[Music]
set breadcrumb parent entry to no parent
entry
[Music]
navigation is also turned on by default
leave these values to default
[Music]
click create page button
in the page designer under the column
groups region right-click the column
groups node select create column group
in the properties pane set the heading
attribute for this new group to Identity
under these groups columns will be
placed at runtime
create two more groups
enter compensation notes for their
headings attribute
[Music]
save your work
expand the columns node
click the amp number column
[Music]
set its type to Hidden foreign
clicky name column
[Music]
scroll down to the layout section
and set this group property
this step will place a name column under
identity group at runtime
set group property for remaining columns
as performed in video
[Music]
foreign
[Music]
foreign
[Music]
hit save and run page button
this is Page 100 in which columns are
displayed in specified group
[Music]
execute these following steps to enable
editing in the interactive grid page
100.
click the column group's interactive
grid region
in the properties pane click the
attributes tab
turn on the enabled attribute
make sure all these three data
manipulation operations are also enabled
scroll down to the toolbar section to
ensure that the show property is turned
on
also the two toolbar buttons reset and
save are also enabled
reset removes any customizations such as
filters column width ordering and so
forth and reloads the report definition
from the server
save will only save changes made to this
interactive grid without needing to save
the whole page
the save button will be displayed only
when the interactive grid is editable
and the end user has the authorization
to add update or delete records
after making these changes save and run
the page
[Music]
if you encounter this error interactive
grid column groups doesn't have a
primary key column defined which is
required for editing or in a master
detail relationship
[Music]
then click the amp number column in the
page designer and turn on the primary
key property in the source section
foreign
run the page
[Music]
note that now all the data manipulation
buttons are enabled
[Music]
this selection actions menu is added
automatically after enable editing
this is row selector it indicates the
current selected row these all features
are added automatically after enabling
the edit feature of the interactive grid
interactive grid is a page component
which is used to display data in row and
column Matrix
rows have fixed height and columns have
a specific width that can be adjusted by
dragging the border between column
headers
[Music]
columns can be reordered with drag and
drop by dragging the handle at the start
of a column heading
[Music]
data in columns can be sorted in
ascending and descending order using the
buttons in the column heading
foreign
[Music]
columns can be frozen using the freeze
button in the column heading pop-up menu
[Music]
to hide a column click this hide button
in the menu
this action vanishes the name column
the toolbar includes a reset button by
default which restores all the report
settings to their defaults
interactive grid also allows you to
manipulate data simply by clicking on a
cell and editing its value which is not
available in interactive reports
to enter edit mode press the edit button
test it by doing some changes
[Music]
this option is a menu select delete row
this row is now marked as deleted
[Music]
use the revert changes option from this
menu to revert a record marked as
deleted
select duplicate row option it
duplicates the selected row
use add row option to add a new row
type any name
if you try to leave the page while there
are unsaved changes you will be notified
any action that causes refreshing the
data such as changing a filter or
sorting will warn if there are unsaved
changes page Nation does not affect
changes
[Music]
add another row
Type n in on leave column because it is
mandatory column
[Music]
all edits are stored locally until you
press the save button
[Music]
click single row view option
as its name suggests it displays single
row at a time
editing is also supported in this View
[Music]
click report view to switch back
[Music]
this is processing tab a process named
save interactive grid data is added to
processing tab
with an interactive grid automatic row
processing DML type process to perform
DML operations without writing any SQL
code
data manipulation language or DML
operations are insert update and
deletion of Records which we performed
in previous steps
this process is added by default when an
interactive grid is made editable
in this step you will change default
types of some columns to some other
types
with page 100 being displayed in page
designer click rendering tab
[Music]
expand columns node click job column
set its type attribute to radio group
[Music]
when you select radio group type you are
asked to associate a list of values to
populate item
for list of values type attribute select
SQL query
[Music]
enter source code query in SQL query box
foreign
[Music]
query fetches distinct job IDs from
table then shows them in the job column
using radio group type
turn off display extra values property
turn off display null values property
[Music]
next click MGR column change its type to
pop-up Lov foreign
SQL query for list of values type enter
statement in SQL query box
[Music]
click higher date column make sure that
type attribute of this column is set to
date picker
[Music]
click on leave column set its type to
switch
this will display on or off state for
this column
[Music]
only click tags column
change its type from text area to
shuttle
set list of values type to static values
by clicking display 1 display 2 text
next to the static values property enter
following static values
[Music]
foreign
[Music]
specified a pair of static display and
return values
here you didn't use return value because
return value is optional
if a return value is not included then
return value equals display value
click OK button to close static values
screen
foreign
run page button
[Music]
double-click on any record under job
column to see values in a radio group
do same as for manager column this will
display a drop down list in selected
cell carrying names of President and
managers
press Tab Key of your keyboard the
cursor's focus will move on to higher
date column and date picker window will
pop up
keep pressing Tab Key to access on leave
column which will now show on and off
switch
column which should come up with a
shuttle carrying five static values
defined in previous step
using Arrow key named move all move
these values to right pane click save
button to write your changes to database
[Music]
in this step you will see how to protect
rows from DML operations in interactive
grid
[Music]
with page 100 being displayed in page
designer click column groups region in
SQL query section change query and use
source code query
[Music]
SQL query adds a column named control to
implement a simple rule that managers
and presidents cannot be edited or
deleted
this column is then selected in allowed
row operations column property under
attributes tab expand columns node
after amending the SQL query you will
see control column click this column set
its type to Hidden
[Music]
also turn on the query only property
under source this way control column
will query only and will not be
displayed at runtime
click the column group's interactive
grid region
then click attributes tab in the
property pane in the edit section for
allowed row operations column property
select control column
[Music]
save page and run it
[Music]
click edit button in edit mode
rows that cannot be edited or deleted
are grayed out
DML operations will not Implement on
rows marked in gray color
another exciting feature of interactive
grid is scroll paging also known as
infinite scrolling or virtual paging
you need a database table with lots of
Records to assess this feature
[Music]
in this feature you will use this table
[Music]
foreign
which carries more than 4000 records
for this feature implementation we need
to create a new page
[Music]
click interactive grid option
[Music]
set page number to 111.
[Music]
page name to scroll paging
[Music]
thank you
enter following select statement
[Music]
rest of the page properties will remain
same
[Music]
click create page button
[Music]
in page designer click scroll paging
region then in properties pane click
attributes tab
make sure under pagination Section type
is set to scroll and show total row
count is turned on
click save and run page button
[Music]
scroll down using your mouse wheel to
test this amazing feature
after enabling this feature region
appears to carry entire result set but
rows are rendered on demand as you
scroll
when you scroll down in interactive grid
model fetches data from server as it is
needed by View
you can even drag scroll bar handle all
the way to bottom and then scroll up
you will see total number of records at
the bottom of interactive grid
[Music]
foreign
makes it effortless to create master
detail relationships you can create all
types of Master detail screens very
easily from SQL Workshop menu select SQL
scripts option
[Music]
click upload button
in upload scripts screen click choose
file button
in open dialog box from source code in
part 5 folder select Master detail SQL
file
click upload button
in SQL scripts interface click run
button appearing in last column
on runscript screen click run now button
[Music]
four tables along with relevant data
will be created
all statements should be successful and
should displaying zero errors
foreign
T will execute to create four tables MD
continent country City and population
tables along with relevant data to
demonstrate Master detail feature you
can view these tables from SQL Workshop
in object browser interface
[Music]
click data button to view data in these
four tables
this data displays at runtime
in app builder interface
[Music]
create a new page by clicking create
page button
this time Select First Option blank page
in blank page we have to create all
components manually
set page number to 112.
name to master detail
page mode to normal
rest of the page properties will remain
same
foreign
click create page button
[Music]
in page designer right-click components
node in rendering tab select create
region
set following properties for new region
this region will display data from
continent table
[Music]
this asterisk query will fetch all
records from this table
after entering SQL query expand columns
node under this region
click continent ID column
set its type to Hidden
[Music]
under Source section turn on primary key
property you must Define a primary key
column for an interactive grid region
which is required to establish a master
detail relationship
create another region under continence
region by right-clicking main components
node
this region will act as detail for the
continent's region
at runtime when you select a continent
this region will display a list of
countries in selected continent
[Music]
expand columns note under countries
region
click country ID column
set its type to Hidden turn on primary
key property under source
you set primary key property to yes
because this region will act as a master
for cities region created in next step
now associate this detail region to its
Master continents
click countries region set master region
property under master detail to
continence
this should be set when this region is
detail region in a master detail
relationship with another region on page
for master detail relationship to work
correctly you must also select column in
detail region which are foreign keys to
master region by setting master column
property
click continent ID column in countries
region set its type property to Hidden
[Music]
Aster column under master detail to
continent ID which references same
column in master region
[Music]
foreign
place it under countries region this
region will show a list of cities when
you select a country from its Master
region
[Music]
foreign
[Music]
columns note under cities region
click City ID column
set its type to Hidden
[Music]
turn on primary key property under
source
click country ID column in this region
set type of this column also to Hidden
cluster column to Country ID to point to
same column in countries region
[Music]
create last region to display population
of a city
[Music]
foreign
[Music]
columns note under population region
click population ID column
set its type to Hidden since this is
last region you do not need to specify
this column as a primary key
however you have to set a couple of
properties for City ID column in this
region to associate it with its Master
set its type property to Hidden Master
column to City ID
[Music]
that's it
save and run page
[Music]
click row representing Europe in first
region
as you click this row second region will
display countries in Europe continent
click Germany in second region this will
refresh third region with a list of
cities in Germany
click Berlin City to see its population
in fourth region
[Music]
do same as for South America continent
[Music]
we've learned following techniques in
video while implementing various
features
installing sample application in Apex
workspace
learned about column groups in Oracle
Apex
enabled editing feature of interactive
grid
changed columns types from default
deeply explored interactive grid
features
edited data by DML operations
learned about auto-generated processes
by Apex Wizards
protected rows from DML operations
learned about scroll paging feature
and master detail relationship in
interactive grid
thanks for watching
تصفح المزيد من مقاطع الفيديو ذات الصلة
How to Upload PDF, Audio, Video, and other Documents in Oracle APEX - Part 9
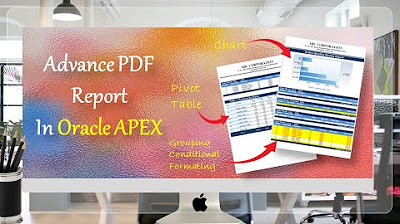
Create Advance PDF Reports in Oracle APEX Comprising Grouping | Chart | Pivot Table - Part 33
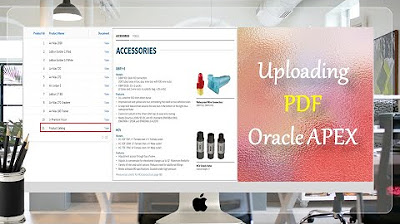
Give a New Look to Interactive Report & Input Form - Part 15(B)
Manage Customers Profile using Interactive Grid and Input Form - Part 5
Learn CSS Grid - A 13 Minute Deep Dive
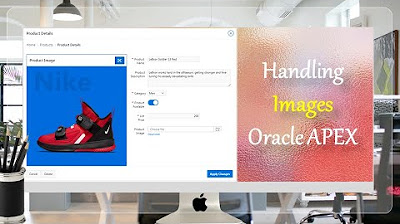
Display Images in Oracle APEX Interactive Reports and Forms - Part 8
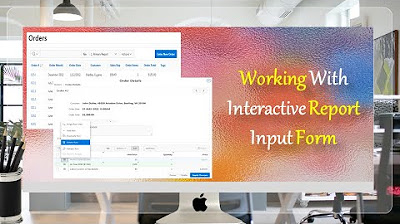
5.0 / 5 (0 votes)