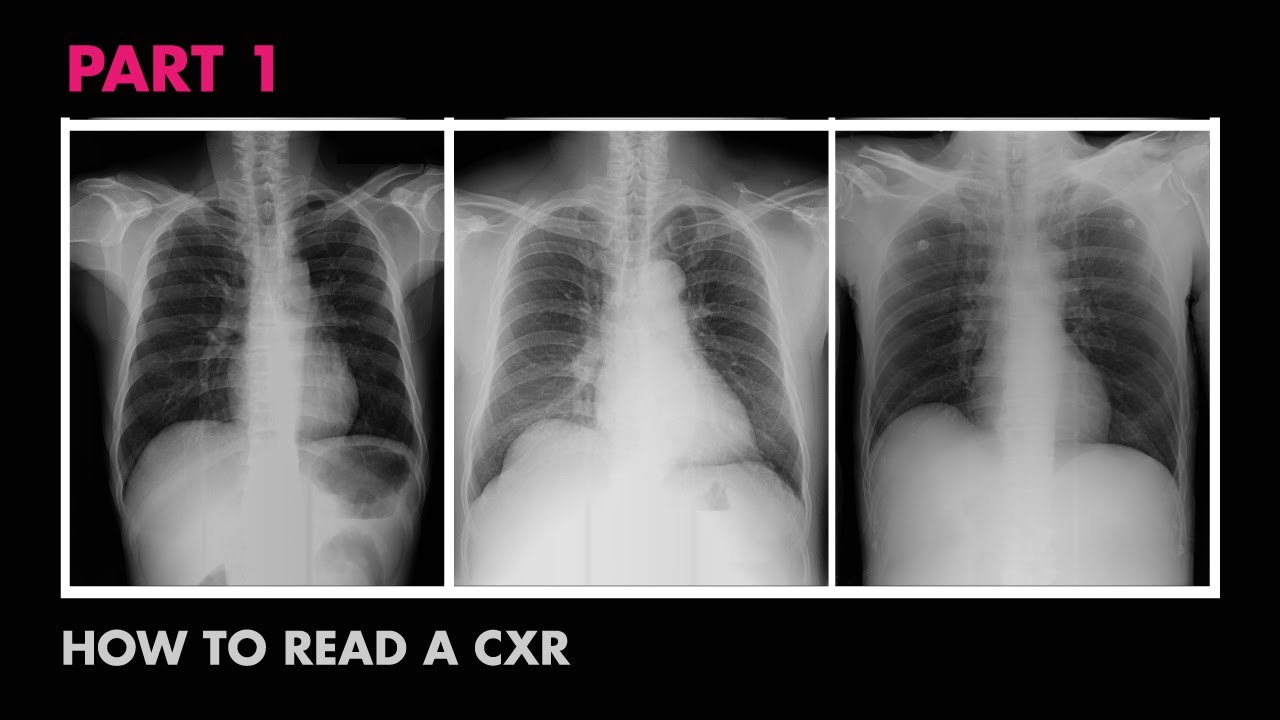
How to Interpret a Chest X-Ray (Lesson 1 - An Introduction)

Strong Medicine
18 Dec 201314:24

Summary

TLDRThis educational series aims to teach chest x-ray interpretation from scratch, covering basics like x-ray physics, systematic analysis, and identifying common abnormalities. The course, suitable for healthcare professionals except radiologists, consists of 10 lessons. It explains how x-rays work, the importance of patient positioning, and the factors affecting x-ray image brightness, such as tissue density, thickness, and exposure duration. The PA and AP views are introduced, with a focus on their clinical relevance and technical quality.

Takeaways

  • 📹 The series aims to teach chest x-ray interpretation to beginners, including future radiologists.
  • 📚 The course consists of 10 videos covering fundamentals, systematic approaches, and specific pathologies.
  • 🔬 Lesson one introduces basic x-ray physics and how x-rays are produced and detected.
  • 🏥 Chest x-rays are a common diagnostic tool used for various medical indications, but not for routine screenings.
  • ⚡ X-rays are a form of electromagnetic radiation that can penetrate tissues and are detected by photographic plates or digital detectors.
  • 👤 The patient's position for a chest x-ray typically involves standing with hands on hips and chest against the detector.
  • 🔍 The brightness of shadows on an x-ray depends on the density, thickness, and exposure time of the x-ray.
  • 🌗 Radiolucent materials allow more x-rays to pass through and appear darker, while radioopaque materials block x-rays and appear lighter.
  • 📈 The thickness of the structure being x-rayed affects the brightness of the image on the film.
  • 🕒 The duration of x-ray exposure influences the brightness of the final image, with short exposures resulting in overexposed images and long exposures in underexposed images.
  • 👁‍🗨 The PA (posterior to anterior) view is the standard for chest x-rays, with lateral views often taken simultaneously.

Q & A

  • What is the primary goal of the chest x-ray interpretation series?

    -The primary goal of the series is to teach people with no prior knowledge about chest x-rays everything they need to know to interpret them while taking care of patients, regardless of their specific healthcare profession, except for radiologists.

  • How many videos does the course consist of?

    -The course consists of 10 videos.

  • What is the content of the first lesson in the series?

    -The first lesson covers the fundamentals of how an x-ray is taken, including the basic physics involved.

  • What is the significance of the PA and AP views in chest x-rays?

    -The PA view (posterior to anterior) is the most important and involves x-rays entering the body from the back and exiting the front. The AP view (anterior to posterior) is commonly used when patients are unable to stand and involves x-rays passing through the patient from front to back.

  • Why are routine chest x-rays prior to surgery not recommended?

    -Routine chest x-rays prior to surgery are not recommended because they are of no benefit to the overwhelming majority of patients and should be avoided.

  • What are the potential risks associated with x-ray exposure?

    -The high-energy photons in x-rays can cause DNA damage, leading to cancer, which is why x-ray exposure should be limited.

  • How do digital detectors improve upon traditional photographic plates or films?

    -Digital detectors allow for real-time viewing and improved post-exposure digital manipulation, replacing traditional photographic plates or films.

  • What are the factors that determine shadow brightness on an x-ray film?

    -The factors that determine shadow brightness are the density of the interposed tissue, the thickness of the structure being x-rayed, and the duration of exposure.

  • Why do x-rays penetrate tissue better than visible light?

    -X-rays penetrate tissue better than visible light because they have higher frequencies and thus higher energies.

  • What does the term 'radiodensity' refer to in the context of x-rays?

    -Radiodensity refers to the ability of different materials to block x-rays; radiolucent materials allow most x-rays to pass through (appear black or near black), while radioopaque materials block most x-rays (appear white).

  • Why is the orientation of the x-ray film flipped horizontally when it is removed from the detector stand?

    -The orientation of the x-ray film is flipped horizontally to match the orientation as if the viewer were standing in front of the patient, making the left side of the film correspond to the right side of the patient and vice versa.

Outlines

00:00

📚 Introduction to Chest X-Ray Series

This video is the first in a series designed to teach the interpretation of chest X-rays to beginners, regardless of their health care profession, with the exception of radiologists. The course will consist of 10 videos covering the basics of X-ray physics, a systematic approach to interpretation, technical quality assessment, common abnormalities, line and tube placement, and self-assessment with clinical vignettes. The goal is to enable viewers to identify the majority of abnormalities visible on a conventional chest X-ray by the end of the series. The first lesson introduces the basic physics of X-ray production, the use of electromagnetic radiation, the role of detectors, and the importance of limiting exposure to reduce DNA damage and cancer risk. It also explains the process of obtaining a chest X-ray, including patient positioning and the difference between PA and AP views.

05:00

🔍 Understanding X-Ray Shadows and Image Formation

The second paragraph delves into the factors that determine the brightness of shadows on an X-ray film, which are crucial for understanding image formation. These factors include the density of the tissue, the thickness of the structure being X-rayed, and the duration of X-ray exposure. The density of the tissue affects how many X-rays are blocked, with radiolucent materials allowing more X-rays to pass through (appearing darker) and radiopaque materials blocking more X-rays (appearing lighter). The thickness of the structure also plays a role, with thicker structures appearing brighter due to more X-rays being blocked. Lastly, the duration of exposure affects the brightness of the image, with shorter exposures resulting in brighter images and longer exposures in darker images. Practical examples are given, such as the difference between PA and AP views and the importance of film orientation for accurate interpretation.

10:02

🏥 Practical Aspects of Chest X-Ray Interpretation

The final paragraph of the script addresses practical aspects of chest X-ray interpretation. It explains how the pattern of white, black, and gray on the film corresponds to different chest structures, such as air-filled lungs and fluid or soft tissue like the heart. The consistency of human anatomy allows for the identification of major lines and shapes on the X-ray. The paragraph also discusses the practical aspects of film orientation, where the film is flipped horizontally to match the patient's actual orientation when viewed directly. Additionally, it distinguishes between the PA view, which is the standard for quality imaging, and the AP view, which is used when patients cannot stand and is of inferior quality. The script concludes with an encouragement for viewers to like or share the video and a预告 of the next video, which will cover systematic interpretation and normal chest X-ray anatomy.

Mindmap

Keywords

💡Chest X-ray

A chest X-ray is a diagnostic imaging procedure that uses X-rays to examine the chest cavity and its structures. It is one of the most common diagnostic tests in medicine. In the video, it is the central theme, with the goal of teaching viewers how to interpret chest X-rays for various health care professions, excluding radiologists.

💡Physics

Physics, in the context of the video, refers to the basic principles that govern how X-rays interact with matter. The video assures viewers that the physics involved in X-ray imaging is fundamental and includes visual aids to make it more comprehensible.

💡Systematic Approach

A systematic approach to chest X-ray interpretation involves a step-by-step method to analyze the X-ray images. Lesson two of the series is dedicated to introducing this approach, which is crucial for identifying and understanding the relationships between X-ray shadows and normal chest anatomy.

💡Pathology

Pathology, in this context, refers to the study of diseases and their causes, processes, and effects on the body. Lessons 4 through 8 of the video series cover subsets of chest pathology that can be identified through X-ray imaging, providing examples of common abnormalities.

💡Technical Quality

The technical quality of an X-ray refers to the clarity and accuracy of the image produced. Lesson three discusses how to assess this quality, which is essential for obtaining reliable diagnostic information from the X-ray.

💡Electromagnetic Radiation

Electromagnetic radiation, including X-rays, is a form of energy that travels in waves. In the video, it is mentioned that X-rays are a type of electromagnetic radiation with high frequencies and energies, allowing them to penetrate tissues effectively.

💡Detector

A detector in X-ray imaging is the device that captures the X-ray image. Traditionally, this was photographic film, but most hospitals now use digital detectors for real-time viewing and improved image manipulation.

💡Radiodensity

Radiodensity refers to the ability of a material to block or transmit X-rays. The video explains that different materials have different radiodensities, which is why they appear differently on X-ray images, ranging from radiolucent (like air) to radiopaque (like bone and metal).

💡Exposure

Exposure, in the context of X-ray imaging, refers to the duration for which the X-ray source is turned on. The video explains that the length of exposure affects the brightness of the image, with short exposures leading to overexposed (too bright) images and long exposures leading to underexposed (too dark) images.

💡Anatomy

Anatomy is the study of the structure of living organisms, including the body's parts and how they are organized. The video series aims to teach viewers how to relate X-ray shadows to normal chest anatomy, which is essential for identifying abnormalities.

💡Indications

Indications are the reasons or justifications for performing a medical procedure, such as a chest X-ray. The video lists various indications for chest X-rays, such as evaluating symptoms like shortness of breath or chest pain, and assessing the placement of medical devices.

Highlights

Introduction to a series on interpreting chest x-rays aimed at beginners.

Course will have 10 videos covering fundamentals to self-assessment.

Lesson one covers the basics of x-ray physics and how it's taken.

X-rays are a form of electromagnetic radiation with higher frequencies and energies than visible light.

The necessity of limiting x-ray exposure due to potential DNA damage.

Detectors for x-rays have evolved from photographic plates to digital detectors.

The patient's position for a chest x-ray and the reason behind it.

Explanation of how x-rays create shadows of internal organs.

Three factors determine shadow brightness on x-ray: tissue density, structure thickness, and exposure duration.

Different materials' radio densities and their appearance on x-ray.

Demonstration of how x-rays interact with air, water, and bone.

The importance of understanding the technical quality of x-ray films.

Indications for getting a chest x-ray include symptoms and signs, but not routine screenings.

Practical note on the orientation of the x-ray film relative to the patient.

Differentiation between PA and AP views in chest x-ray.

The significance of the PA view in chest x-ray interpretation.

The limitations of AP views, often used in portable chest x-rays.

The goal of the series is to enable viewers to identify the majority of abnormalities on a chest x-ray.

Transcripts

play00:00

[Music]

play00:12

hello everyone this is the first video

play00:15

in a series on interpreting chest x-rays

play00:18

my goal of this series is to be able to

play00:19

take people who literally know nothing

play00:21

about chest x-rays and teach them

play00:23

everything they'll need to know while

play00:25

taking care of patients regardless of

play00:27

specific Health Care profession with the

play00:29

one except of a

play00:31

radiologist if any of you happen to be a

play00:33

future radiologist I think these videos

play00:35

will still provide a good very early

play00:37

foundation for you but I suspect you'll

play00:39

want to track down a more robust

play00:42

resource the course will have 10 videos

play00:45

here's the

play00:46

structure lesson one that is this video

play00:49

will cover the fundamentals of how an

play00:51

x-ray is taken and the physics involved

play00:54

please don't let the word physics scare

play00:56

you away it's really basic and includes

play00:58

some pretty pictures

play01:00

lesson two will introduce a systematic

play01:02

approach to chess x-ray interpretation

play01:05

and demonstrate how x-ray Shadows relate

play01:07

to normal chest

play01:09

Anatomy lesson three will discuss how

play01:12

one assesses the technical quality of

play01:13

the

play01:14

film lessons 4 through 8 will then each

play01:17

cover a subset of chest pathology that

play01:20

can be assessed with x-ray these will

play01:22

include plenty of examples of common

play01:25

abnormalities lesson n will discuss how

play01:28

to assess the placement of lines and

play01:30

tubes as well as how to identify devices

play01:33

and findings consequent from prior

play01:34

surgeries such as artificial heart

play01:37

valves finally lesson 10 will be a self

play01:40

assessment where unknown chest films are

play01:42

displayed alongside a brief clinical

play01:44

vignette and after a chance for you to

play01:47

pause the video and study the films on

play01:48

your own I'll review

play01:50

them as I implied a moment ago by the

play01:53

end of these 10it lessons you should be

play01:55

able to identify the overwhelming

play01:57

majority of abnormalities visible on a

play01:58

conventional chest xray

play02:02

the learning objectives of this video

play02:04

lesson one are first to be familiar with

play02:07

the basic physics and method of

play02:09

obtaining chest

play02:10

x-rays and to be familiar with the basic

play02:13

chest X-ray views that is the PA lateral

play02:17

and AP

play02:20

views along with the EKG the chest x-ray

play02:23

is one of the most common diagnostic

play02:25

tests in medicine that does not involve

play02:27

drawing

play02:28

blood there are many indications for

play02:30

getting a chest x-ray they include

play02:32

evaluation of symptoms which can be

play02:34

shortness of breath chest pain cough

play02:37

hemoptisis fever or unexplained weight

play02:40

loss evaluation of signs picked up on a

play02:43

physical exam such as hypoxemia or an

play02:46

abnormal pulmonary

play02:47

exam evaluation of the placement of

play02:50

central lines nasogastric tubes and

play02:52

endotracheal

play02:54

tubes screening for a pneumothorax which

play02:57

is air in the plural space after lung

play02:59

biopsy central line placement and

play03:02

pacemaker

play03:03

placement finally a relatively specific

play03:06

indication is evaluation of suspected

play03:08

pacemaker lead

play03:10

fracture there are a few situations

play03:13

you'll notice are not listed here for

play03:15

example routine chest x-rays prior to

play03:18

surgery in the overwhelming majority of

play03:20

patients are of no benefit and should be

play03:23

avoided also inappropriate are routine

play03:26

screening chest x-rays for lung cancer

play03:28

and smokers Al so there may be benefit

play03:31

in screening chest CT scans but that's a

play03:34

discussion for another

play03:36

day so how does a chest x-ray actually

play03:39

work we need a source of x-rays which

play03:42

themselves are a form of electromagnetic

play03:45

radiation x-rays are carried by photons

play03:48

just like visible light but have higher

play03:50

frequencies and thus higher energies so

play03:53

they penetrate tissue much better

play03:56

unfortunately these high energy photons

play03:58

can cause DNA damage leading to cancer

play04:01

which is why x-ray exposure should be

play04:03

generally be

play04:04

limited to detect the presence of x-rays

play04:06

we'll need something called

play04:08

appropriately enough a detector for the

play04:11

first 100 Years of x-rays in medicine

play04:15

the detector was a photographic plate or

play04:17

film I'll add a sheet of unexposed X-ray

play04:20

film

play04:21

here now however most hospitals have

play04:24

replaced these with digital detectors

play04:26

which allow for real-time viewing as

play04:28

well as improve post exposure digital

play04:32

manipulation finally of course we'll

play04:34

need a patient to stand in between the

play04:36

source and the detector this patient is

play04:38

in the typical position for a chest

play04:40

x-ray she's facing away from the source

play04:43

hands on her hips and chest against the

play04:46

detector the reason to put her hands on

play04:48

her hips is essentially to keep the arms

play04:50

from obscuring the view of the thorax

play04:53

the reason she is standing in a way that

play04:54

intuitively seems backwards will be

play04:57

discussed in lesson five

play05:00

now we have our source our detector and

play05:02

our patient so we'll turn on the X-ray

play05:04

for a very brief predetermined length of

play05:06

time and x-rays that is high energy

play05:09

photons will shoot out of the source

play05:12

some of these will pass right through

play05:13

the patient some will be absorbed by the

play05:15

interposed organs and tissues and some

play05:18

will be scattered for the purpose of

play05:20

examining the X-ray film it's actually

play05:23

the pattern of photons that are blocked

play05:25

which are of Interest as these create

play05:27

the Shadows of the internal organs

play05:30

so what are the factors that determine

play05:32

how many photons pass through a

play05:34

particular spot on a patient to reach

play05:36

the detector in other words the factors

play05:38

which determine Shadow brightness there

play05:41

are essentially

play05:44

three the first is the density of the

play05:46

interposed tissue technically this

play05:49

depends not just on the literal density

play05:52

as mass per unit volume but also

play05:55

independently on the atomic mass of the

play05:57

particles in the interposed tissue

play06:00

let me show you some

play06:01

examples so here is our table and on it

play06:05

I'll place an empty glass

play06:07

jar the jar is filled just with some air

play06:10

on the far side of the jar is our

play06:12

photographic film notice that it starts

play06:14

off white the X-ray source is then

play06:17

brought in we fire some X-rays at the

play06:20

jar which of course aren't in the

play06:22

visible spectrum like this might

play06:25

suggest as the x-rays are traveling

play06:27

across the table the ones that either

play06:29

pass around the jar or through the jar

play06:32

interact with the film here's what's

play06:35

left any part of the film where many

play06:38

x-rays struck has turned black parts of

play06:41

the film where no x-rays struck have

play06:43

remained White and the parts of the film

play06:46

where a modest amount of X-ray struck

play06:48

show various Shades of Gray since air

play06:51

has a very low density x-rays easily

play06:54

pass through the jar and thus the jar

play06:56

appears empty on the film note that the

play06:59

metal lid has blocked nearly all of the

play07:01

x-rays which has left a sharply

play07:03

demarcated rectangular patch of white

play07:06

unexposed

play07:08

film here's some more examples next we

play07:11

can take a jar of water and do the exact

play07:14

same thing expose it briefly to x-rays

play07:17

which also exposes the film behind it in

play07:19

this case water is denser than air so it

play07:22

blocks more X-rays and therefore the

play07:24

jars contents now appear gray on the

play07:27

film it's important to realize that even

play07:29

if the fluid in the jar is completely

play07:31

100% transparent it will still block

play07:34

X-rays and therefore look gray the

play07:37

fraction of X-rays of substance blocks

play07:39

has absolutely nothing to do with its

play07:41

color or degree of translucency within

play07:43

the visible light

play07:46

spectrum and now for a more interesting

play07:48

test subject what happens when x-rays

play07:50

strike a skull you can see that the

play07:53

resulting image is lighter than the jar

play07:55

of water but not Pure White like the

play07:57

image formed from the Jar's metal

play08:01

cap in summary there is a spectrum of

play08:04

radio densities into which different

play08:06

materials fall those that allow most

play08:09

x-rays through are called radiolucent

play08:11

and appear black or near black on x-ray

play08:14

those that block most x-rays are called

play08:16

radioopaque and appear white for medical

play08:20

x-rays there are essentially four

play08:22

classes of material air which is the

play08:24

most

play08:25

radiolucent next is fluid and soft

play08:27

tissue then bone and finally

play08:31

metal the next factor which determines

play08:34

Shadow brightness is the thickness of

play08:35

the structure being x-rayed if we take a

play08:38

single relatively thin glass of water

play08:40

and expose it to x-rays most will pass

play08:43

through resulting in a very dark image

play08:44

on the

play08:45

film If instead of one glass of water we

play08:48

line up two glasses in a row and shoot

play08:50

x-rays through both twice as many will

play08:52

be blocked the resulting image will

play08:55

therefore be more gray because the

play08:57

specific part of the film corresponding

play08:59

to the the shadow of the glasses have

play09:01

been relatively less

play09:03

exposed finally if we shoot x-rays

play09:06

through three glasses of water the image

play09:08

of the glass will be brighter

play09:10

still in summary the thicker the

play09:12

structure the brighter it will appear on

play09:15

the X-ray

play09:17

film the third and last factor is the

play09:20

duration of exposure for the X-ray

play09:23

interpreter this factor is only relevant

play09:25

when trying to understand a technical

play09:27

error in image acquisition

play09:30

imagine we have two glasses of water

play09:32

again and I'm going to give these a very

play09:34

short or brief x-ray exposure during

play09:37

that brief amount of time few x-rays

play09:40

have an opportunity to pass through the

play09:41

water so the film where the glass's

play09:44

shadow was cast is relatively

play09:46

underexposed and thus it's relatively

play09:49

bright if I use a medium exposure the

play09:52

film behind the glass will receive more

play09:54

X-rays and thus the glass appears a

play09:56

little

play09:57

darker finally if I use a very long

play10:01

exposure even though the glasses of

play10:03

water are in the way there's enough time

play10:06

for many x-rays to pass through so the

play10:08

glasses appear fairly dark on the

play10:11

film The Bottom Line short exposures

play10:14

lead to images that are too bright and

play10:17

long exposures lead to images that are

play10:19

too

play10:20

dark this is the opposite of what most

play10:23

people initially expect because

play10:25

intuitively we assume that all film

play10:27

starts off black and turns white after

play10:30

exposure to light but remember x-ray

play10:33

film is the

play10:35

opposite let's return to our patient who

play10:38

has been patiently waiting for us in the

play10:39

radiology

play10:40

department and let's fire some X-rays at

play10:43

her you can see that some pass through

play10:46

some get absorbed and a few even get

play10:49

scattered around the

play10:51

room the result is an image formed on

play10:53

the photographic film of the Shadows

play10:55

cast by the various structures in the

play10:57

patient's chest

play11:00

and here is that

play11:02

result from the pattern of white black

play11:05

and gray we can infer things about those

play11:07

chest structures for one this area here

play11:11

because it is generally relatively dark

play11:13

it must correspond to an airfill

play11:15

structure a

play11:17

lung this area here which is a medium

play11:20

gray in brightness must correspond to a

play11:22

structure composed of either fluid and

play11:25

or soft tissue in this case the

play11:28

heart since the layout of the human body

play11:31

is amazingly consistent from person to

play11:33

person each major line and shape on this

play11:35

x-ray corresponds with a known and

play11:38

identifiable anatomic part I'll review

play11:41

these parts in lesson two but before

play11:44

then there are two quick practical

play11:46

things to point out

play11:48

first it may have happened so fast that

play11:50

you did not notice it but when I removed

play11:53

the film from the detector stand I

play11:55

flipped it around

play11:56

horizontally the consequence of this is

play11:59

that the left side of the film as we are

play12:01

looking at it actually corresponds to

play12:03

the right side of the patient and vice

play12:06

versa this puts the X-ray in the same

play12:09

orientation as if we were standing in

play12:11

front of the patient and looking

play12:12

directly at him or

play12:14

her if that seems a little weird right

play12:16

now it will probably feel intuitive

play12:18

after examining just a dozen or so

play12:21

examples the second practical thing to

play12:24

mention is the idea of chest X-ray views

play12:27

in Radiology the term View view refers

play12:29

to the orientation of the person

play12:32

relative to the beam of

play12:33

X-rays at this point there are three

play12:36

views to know the first view is the most

play12:39

important and the one you've already

play12:40

been shown it's called the PA view which

play12:43

stands for posterior to anterior meaning

play12:46

the x-rays entered the body squarely in

play12:48

the back and exited squarely out of the

play12:51

front in most cases the pi view will

play12:55

automatically be accompanied by the

play12:56

lateral view as the term implies the

play12:59

lateral view is the two-dimensional

play13:01

projection of the patient's internal

play13:02

structures as seen from the

play13:05

side the pi view should be distinguished

play13:08

from another situation common in the

play13:10

hospital where patients may be

play13:11

physically unable to stand due to

play13:13

weakness confusion surgical wounds or

play13:15

invasive tubes in that circumstance when

play13:19

the patient is in a hospital bed a

play13:21

portable x-ray Source will be wheeled

play13:23

into the patient's

play13:24

room an x-ray film will be placed into a

play13:27

metal tray and slid behind the patient's

play13:30

back and the x-rays will be passed

play13:32

through the patient front to back this

play13:35

is forly known as the AP view though

play13:38

more commonly known as a portable chest

play13:41

x-ray AP films are inferior in quality

play13:44

to PA films for a number of reasons some

play13:46

of which will be discussed in lesson

play13:48

three and some in lesson

play13:53

5 that concludes this introduction to

play13:55

chest x-rays if you found it helpful

play13:58

please remember to like or share it the

play14:00

next video will discuss a systematic

play14:02

approach to interpretation as well as

play14:04

normal chest x-ray Anatomy

Rate This

5.0 / 5 (0 votes)

الوسوم ذات الصلة
Chest X-rayMedical ImagingHealthcareEducationalRadiologyPatient CareAnatomyDiagnostic TestsMedical SeriesX-ray Physics
هل تحتاج إلى تلخيص باللغة الإنجليزية؟