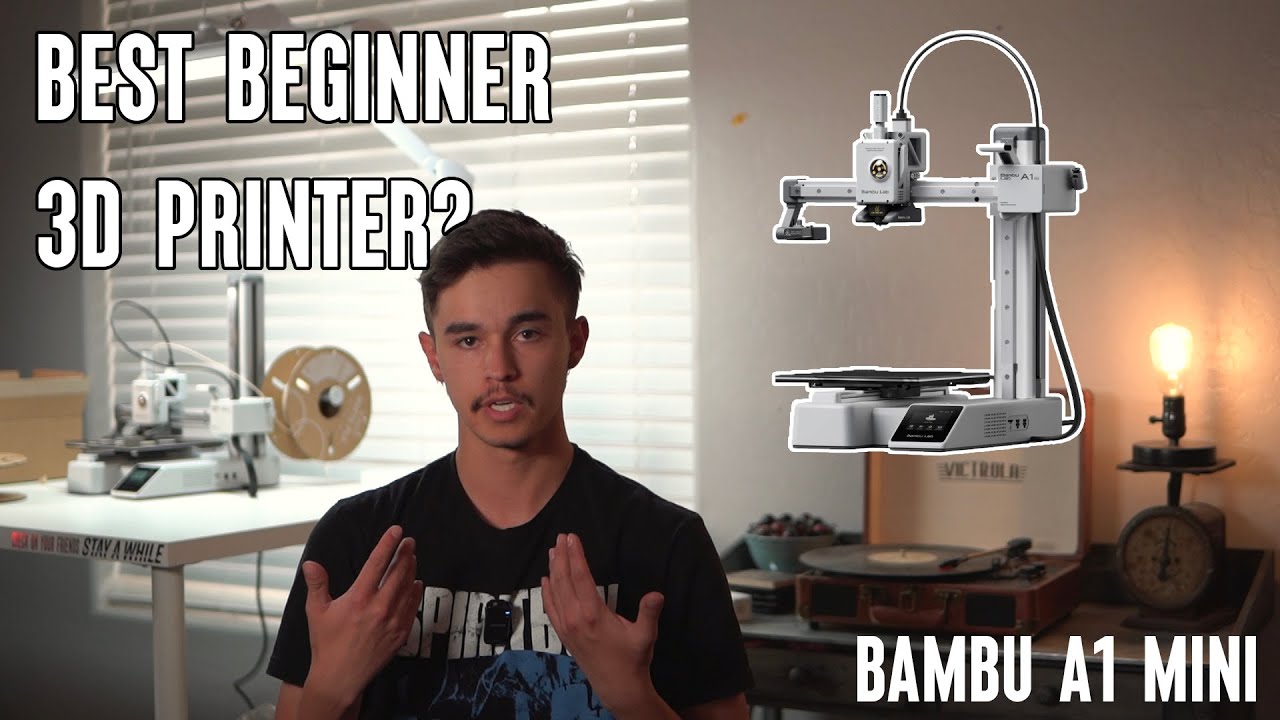
BambuLab A1 Mini, testing with PLA, PETG, TPU. When to use AMS?
Summary
TLDRIn this tech review, the presenter introduces the A1 Mini 3D printer, highlighting its speed, ease of use, and auto-calibration features. With a build volume of 180mm and a max nozzle temperature of 300°C, it's suitable for PLA, PTG, and TPU materials but not for ABS or ASA due to bed temperature limitations. The printer's $249 price point for the base model and $399 for the combo with AMS light is noted. The video explores the printer's capabilities, including color printing and material efficiency, emphasizing the importance of printing multiple objects at once to minimize waste. The presenter also discusses the printer's energy efficiency and its suitability as a second printer for hobbyists, especially in regions where energy conservation is a concern.
Takeaways
- 🖨️ The A1 Mini printer is a fast, beginner-friendly device with full auto calibration and a maximum printing speed of 500 mm/second.
- ⏱️ It boasts a quick benchy print time of only 14 minutes, showcasing its efficiency.
- 💰 The printer is affordably priced at $249, with a combo package including the AMS light available for $399.
- 📦 The build volume is 180 mm in the X, Y, and Z directions, suitable for a variety of small to medium-sized prints.
- 🔥 The maximum nozzle temperature is 300°C, adequate for PLA but not sufficient for ABS or ASA which require higher bed temperatures.
- 🌡️ The bed temperature can be set as low as 80°C, which is suitable for PLA but not for materials like ABS or ASA that need higher temperatures.
- 🎨 The printer is capable of color printing with materials such as PLA, PTG, and TPU, offering creative flexibility.
- 📊 The video emphasizes the importance of material usage efficiency, suggesting strategies to minimize waste during color printing.
- 🏡 The printer's compact size makes it an excellent choice for beginners and as a second printer for more experienced users due to its energy efficiency.
- 🌐 The reviewer highlights the printer's quiet operation, with noise levels at approximately 46 dB from half a meter distance.
- 🔩 The video includes a demonstration of the printer's performance with various materials and a discussion on the printer's suitability for different printing tasks.
Q & A
What is the maximum printing speed of the A1 Mini printer mentioned in the script?
-The maximum printing speed of the A1 Mini printer is 500 mm per second.
What is the maximum acceleration of the A1 Mini printer?
-The maximum acceleration of the A1 Mini printer is 10,000 mm per square second.
What is the build volume of the A1 Mini printer in terms of X, Y, and Z dimensions?
-The build volume of the A1 Mini printer is 180 mm in X, Y, and Z directions.
What is the maximum nozzle temperature for the A1 Mini printer?
-The maximum nozzle temperature for the A1 Mini printer is 300°C.
What is the minimum bed temperature required for printing with ABS or ASA materials on the A1 Mini printer?
-The minimum bed temperature required for printing with ABS or ASA materials is 100-105°C, which is higher than the A1 Mini printer's capability of 80°C.
What is the current price of the A1 Mini printer without the AMS light?
-The current price of the A1 Mini printer without the AMS light is $249.
What additional features come with the combo package of the A1 Mini printer?
-The combo package of the A1 Mini printer includes the printer and the AMS light.
What is the price of the combo package that includes the A1 Mini printer and the AMS light?
-The price of the combo package that includes the A1 Mini printer and the AMS light is $399.
What are the advantages of having a smaller printer like the A1 Mini for beginners?
-Smaller printers like the A1 Mini have the advantage of requiring less energy and having a smaller footprint, making them suitable for beginner users who want to enter the 3D printing world.
What is the AMS light and how does it benefit the printing process?
-The AMS (Automatic Material Switching) light is a feature that allows the printer to switch between different filaments automatically, which can be beneficial for multi-color printing without manual intervention.
What is the recommended bed temperature for printing with PLA material on the A1 Mini printer?
-The recommended bed temperature for printing with PLA material on the A1 Mini printer is 70°C, although the presenter usually raises it a little bit.
What is the user's opinion on when it is worth using the AMS feature for color printing?
-The user believes it is worth using the AMS feature for color printing when the weight of the object itself is heavier than the waste material, suggesting a 50/50% limit as a personal threshold.
Outlines
🖨️ Unboxing and Overview of the A1 Mini 3D Printer
The presenter introduces the A1 Mini 3D printer, highlighting its fast printing capabilities with a maximum speed of 500 mm/second and acceleration of 10,000 mm/s². The printer is plug-and-play with full auto calibration and can print a bench in only 14 minutes. It has a build volume of 180 mm in X, Y, and Z directions and a maximum nozzle temperature of 300°C, suitable for PLA and other recommended materials, but not for ABS or ASA due to the 80°C bed temperature limit. The printer is priced at $249 for the base model and $399 for a combo with the AMS light. The presenter discusses the printer's suitability for beginners and as a second printer for more experienced users, emphasizing energy efficiency and the smaller footprint of smaller printers. The unboxing reveals the printer, an AMS light, tools, spare parts, a user manual, and filament samples. The presenter notes the lack of a spool for sample filaments, which could pose challenges for beginners, and the need for better packaging for the foam inserts.
🔧 Setup and First Impressions of the A1 Mini
The setup process for the A1 Mini 3D printer is described, including the installation of the AMS light, securing the heat bed, and preparing the printer for use. The presenter notes the printer's thermal isolation, which should result in low power consumption. The AMS light is connected, and the printer is networked and calibrated automatically. The presenter opens new filaments and begins printing, discussing the printer's capabilities and the quality of the first prints. The video shows the printer's speed, the quality of overhangs and bridging, and the efficiency of the printer's use of materials. The presenter also discusses the printer's noise level, which is quite low, and the overall quiet operation of the machine.
🎨 Color Printing and Material Efficiency
The presenter explores color printing with the A1 Mini, discussing the efficiency of using multi-color prints versus single-color prints. They analyze the material waste associated with color changes and provide examples of when it might be worth using the AMS for color printing. The video includes a time-lapse of a multi-color print and a discussion on how to optimize print settings to reduce waste. The presenter also demonstrates the use of the AMS for printing objects with different colors and analyzes the material usage and printing time for various scenarios, including printing multiple objects at once versus single objects.
🔩 Testing Print Quality and Filament Performance
The presenter conducts tests on the A1 Mini's print quality using different filaments, including PLA, PTG, TPU, and PG. They perform a bond test to measure the pulling force of printed objects and compare the results with different bed temperatures and filament types. The video shows the successful print of a test object and a discussion on the importance of proper bed temperature for adhesion. The presenter also prints with TPU, noting the need for an external spool holder due to the AMS's incompatibility with TPU. The video concludes with a summary of the printer's performance, the presenter's recommendations for using the AMS, and a call for viewer suggestions on future printer comparisons and reviews.
Mindmap
Keywords
💡3D Printer
💡Plug and Play
💡Auto Calibration
💡Print Speed
💡Acceleration
💡Build Volume
💡Nozzle Temperature
💡AMS Light
💡Material Compatibility
💡Power Consumption
💡Bed Adhesion
Highlights
The A1 Mini printer is a fast and beginner-friendly device with full auto calibration.
It can print a bench in only 14 minutes with a max speed of 500 mm/second.
The printer has a max acceleration of 10,000 mm per square second.
The A1 Mini is priced at $249 for the printer alone and $399 for a combo with the AMS light.
The build volume is 180 mm in the X, Y, and Z directions.
The max nozzle temperature is 300°C, suitable for recommended materials but not for ABS or ASA.
The bed temperature can reach 80°C, which is enough for PLA but not for ABS or ASA.
The printer comes with a user manual, filament swatches, and a stand for the AMS.
The AMS light is capable of accepting carbon spool filaments.
The printer has a nice thermal isolation feature, which results in low power consumption.
The AMS light can be used for color printing, but the video will analyze when it's worth using.
The printer is suitable for beginner users and can be used as a second printer due to its small size.
The unboxing reveals the printer, AMS, tools, spare parts, and filament samples.
The printer's packaging includes a two-sided texture sheet and a securing element for the heat bed.
The AMS light installation is straightforward, with clear markings for cable connections.
The printer comes with an SD card slot and is ready for automatic calibration after setup.
The printer's noise level is approximately 46 dB at half a meter distance.
The video demonstrates the printer's capability with PLA, PTG, TPU, and color prints.
The AMS light is shown to be effective for color printing, but the video discusses strategies to minimize material waste.
The video concludes that the A1 Mini is a great printer for beginners, especially when considering material usage and printing strategies.
Transcripts
hello welcome to my tech fun bam sent me
A1 Mini to present on my channel this is
very fast best Leal C the printer great
for the begin it is Plug and Play
printer with full auto calibration and
it is able to print bench in only 14
minutes the max speed is 500 mm/ second
and 10,000 mm per sare second is the max
acceleration it has a permanent price
drop I think for the printer now
currently it is
$249 and $399 is the combo together with
the AMS
light the build volume 180 mm in X Y and
Z Direction and the max nozle
temperature is 300° celi which is good
enough for these materials which they
recommend to use uh but the bad
temperature is 80° Celsius this is far
enough even for the PG but not enough
for the ABS or ASA so even if you place
this inside the enclosure properly you
are not able to print these materials
because they required 100 105° celius on
the B side interface now my marketing
contact told me that there are many
videos with the technical analyzis and
they asked me just to present the
printing possibilities so this is what I
will do in this video I will just print
with these materials pla ptg TPU and
also I will do some Color Prints and
I'll try to explain you to understand
when I think it is worth to use this AMS
color printing and when I think it is a
little bit waste of the materials I'm
not talking about how to reduce the
purge material something like that but
more like how to spread the Parts in X
and Y Direction try to print more
objects at once and similar I also got
this kit number three this is some kind
of marble run component and then send me
some filaments so let's un box and start
with the printing uh one more thing
smaller printers has the advantage this
size is big enough for beginner users
who wants to enter into CD printing
world but having it as a second printer
uh me personally I always choose to
print something on smaller printer if
possible and actually 95% of my
printings can fit on this size because
smaller bed surface requires less energy
and somehow the energy became quite a
bit luxury at least here in Europe not
sure what is the situation in
us okay let's see what's
inside the packaging is good in this
black foam but I couldn't place it back
to be same as the original form I'm not
sure how they do it but when I remove
the printer and AMS this black foam
packaging requires more space and it
cannot fit into this box anymore so this
printer must have some negative volume
or something like that but we have to
keep this box in case of the return or
warranty problems this is content of the
Box this is the main you the printer and
we have this two-sided texture Pi
sheet this is the AMS and parts this is
a stand for the EMS we have some tools
and spare parts user
manual and then we have this uh filament
swatches these are color sample cards
and we have different types of the pla
but also I can see some PG ABS samples
to
nice the only thing I don't like in this
kit is this sample filament without
spool I mean if this is printed for
beginner user in that case they should
place the sample filament on some small
spool or similar because the beginner
users don't really know that what kind
of problems he may have with this kind
of sample
filaments this black part looks like it
is part of the printer but actually this
is just a securing element
maybe they should do it this in red
color or something like
that I have to tie these three screws to
lock the position of the heat bed here
but I will do this in horizontal
position I also noticed that this bed
has a nice thermal isolation from the
bottom so the power consumption will be
very
low The Purge wiper or nzo
cleaner the spool holder installation
now let's prepare the AMS
light this B will cut the thread into
this
plastic these are marked and each of
them goes to its own place green and
yellow and now connecting the ton tubes
we have two long two middle and one very
short press down inside the tube
and it will lock the position for nicer
Cable
Management plug in the AMS
cable and there is the SD card slot oh
it's already inserted and the hardware
installation is finished maybe I needed
approximately half hours together with
the recording now it's time to turn it
on connect to the network and then to do
some calibration and start with the
printing and with this I socket I can
also measure the power consumption my
wife wanted to move the printer and she
grabbed the first obvious thing and
that's the x-axis so I think definitely
some kind of handle should be added here
on the top or at least some threads and
then the user can print some handle and
attach to it or maybe even a spool
holder if I don't want to use the AMS I
want to have the direct path oh I almost
forgot
[Music]
connected to network and now I will add
it to my
app okay success the app reminds me that
I have to remove few things I already
did this confirm now it will start with
automatic calibration which takes about
12
minutes noise cancellation in X
Direction in y
direction vibration
compensation ready for
printing I not open new filaments I we
use this ones and big advantage of this
AMS light is that it can accept carbon
spos
too AMS loaded it's ready for
printing cleaning the bed with isoy
alcohol speed Bo raise bambo P
mm it starts with the leveling at
cleaning the nuzzle maybe it could level
only the bed on that surface where the
printing will be
placed oh it's even recording the
Timeless but I forget to remove the foil
from the
camera
okay and the last element is the chimney
oh it's
finished Quick Check of the bed adasion
which I know it is rate on this text P
until it's hot the surface cool
down but even now it SS good the quality
is amazing from this small printer this
is really perfect Beni look at this
overhang first layer maybe this bridging
is only uglier on the back
side otherwise perfect Beni one string I
can see on the
front yes when I take a closer look
actually I can see that it is a little
bit more optimized for the speed this
window on the back side should be Circle
well for the Beni it needed a 0.04 KW
hours but I will do now this printing 2
and 1/2 hours the honeycom organizer and
this will give us more accurate
measuring this printing will be 2 and 1
half hours and it uses Approximately 80%
of the build surface not sure is it
visible on camera too but absolutely
perfect for
layer oh it's speed it up
now nice progress the printing is at 45
%
perfect except the
brim interesting there's a three color
Beni but the printing time is only half
hour so maybe that color change is by
layers but we'll
see I can choose the spools now but I'm
not sure which will be where print
it already had the first color
change and this was the second color
change and it looks like this will be
the last color change because it doesn't
use the Prime Tower
anymore and chimney the last element on
the
Beni this is a half hour Beni this means
a good quality because it had only two
color changes this is additional maybe 2
minutes and this is the Vas material
which is not
much interesting bench in it has good
quality too but again I don't really
like that back window it should be more
rounded this is 1 Hour
Printing let's play some
basketball even my daughter wanted to
try this one failed but she will get a
lot of opportunities
later for this kind of printing you
really need a better which you can trust
to
a screw gauge and it looks like it will
be in two
color Okay started with the white color
and this is what I wanted so properly
the numbers will be in Black printed in
45 minutes and this is much more
readable compared to this one which I
printed earlier and this is all the
waste material It
produced so this is M5 screw and the
length is 10 mm a scrapper is the next
one this is a second layer much faster
than the first one this is the view from
the camera we have the picture maybe
every 2 seconds so it is good for the
preview but not good enough for the
YouTube video a great example where it's
printing one object at a
time it finished two objects and now
printing the third one but you have to
be careful with
this one color change and no WI toer
and this is the only waste
material these two color D6 dice will be
my next object after importing into
bamboo Studio I can change the colors or
the filament for some objects and with
this I can get two colors and we will
analyze this material usage later this
is speed up timelaps video and as you
can see the tool head spends more time
to a side than with the printing for for
every flame and change it needs 2
minutes approximately it's finished but
let's take a closer
look the quality is great no question
about that even the first layer but if
you compare this is the waste material
compared to the used material but uh
let's analyze the numbers a little bit
so this is our example from the video I
have two color one object and uh the
weight of the object is approximately 5
G and the VTE material is almost 18 G of
of course if it would be one color then
we don't have the waste but if I would
spread 30 pieces on the bir surface in
that case the waste material will be the
same but the weight of the object is
bigger let's check this on this graph so
if I print only one piece at the time
this is the weight of the object and
this is the waste material but if I
would place a 30 pieces on the Bas
surface this is the weight of the
objects and this is the waste of the
material and look at these times this is
the time per one piece for one color one
piece two colors one piece and two
colors 30 pieces time for one object in
my next example I have this gear bearing
first I will split it to objects and
then I will select some elements to be
in a different color and with this we
have these gears in different material
we will analyze the numbers later this
is only the first layer and this will be
overnight printing good morning
but this is the amount of the Bas
material again we have the same gear
wear ring and this time I'm using the
field tool and I will color only the
bottom and top layers of the gears and
if I slice the object you can see only
first few bottom and top layers are in
different color and here I measured the
color changing time this is the
start and this is the end as you can see
approximately 2 minutes
it's almost
finished more or less the color effect
is similar but now I analyze the amount
of the waste material this is the first
example where those gears were
completely different color and this is
the second example where I use that
field tool and only few top and bottom
layers are in different color and big
differen also in the printing time
another example let's say we want again
that this six Dice and I will use this
gear barar ring to flash material into
it because this is just a fidget toy and
it is not important what color is it and
just to show you why we have less waste
these are Purge materials from the
previous Printing and these are from
this printing we can see the transmiss
of the colors on these
gears the noise from half M distance
approximately 46 DB even for the feeling
it is very quiet machine I'm less than
half m distance from the hot end and
properly you can clearly hear my voice
and the noise is not
disturbing it will be finished in 40
minutes it's finished let's check the
quality no surpris this quality of this
cube is great and as you can see the
colors are clean so definitely this big
object is big enough for the purge
material
waste material when I printed only this
Dice and the Prime
Tower the waste material when I printed
this second cube with the bear ring and
approximately half of the weight I
thought the difference will be bigger
but even then this is good progress this
is a data from the slicer and this is
the first time I experienced bigger
difference between the measured values
and the data from the slicer but even
then the difference in the VTE material
is quite
obvious two more quick examples when I
think it was worth using the EMS these
are my business cards and the background
is two layer thick and even the letters
are two layer thick it was printed in
this position and actually this can be
printed with the one color printer too I
designed and printed this for my wife
she needed a holder for two cards and it
was printed in this position so this is
the first layer and actually for this we
really needed the
AMS and now let's print something from
PG this is the thr sent version and I'm
very about the bed cion on 80°
C it should be enough def setting is 70°
CI usually I raise it a little bit but I
will leave it as it is now this object
is for my regular Bion test maybe you
saw it in earlier videos I will measure
the pulling force in kilogram and
anything between half and 1 kogam is
good value uh I will not go above 1
kilog until the bed surface is hot
because I don't want to damage it the
contact surface is 20 x 10 mm and the
height of the hole for the pulling arm
is 30
mm printing is finished I will set the B
temperature to stay on 70°
CI
0.85 this is good but it could be even
better if I would go up to 80° CI which
is the maximum for this bit
surface let's try to do something simil
similar but with TPU filament I never
tried this B test with the TPU filament
and for the TPU I cannot use the AMS so
I have to place it there to external
spool holder and size it is very hard to
unplug this tubes so in the tool head I
will just use this ton
tube and connect it
here external spool TPU
load I check the different settings and
for the TPU is 30° celius well I change
it to 35 usually I'm going up to 40 the
start is good and I can even see some
retraction okay we're 1 kg so I will
stop
here and TP goes back to the reable bag
don't forget the TP is very hydroscopic
filament and when the bed cool down is
still six good only I forget to enable
the camera but on text tool Pi we don't
need more than 30° celi and it prints
great TPU look absolutely no stringing
in this
hole and as a conclusions for the end I
still think that this is great printer
for beginner users that's why I try to
explain a little bit better when I think
it is worth using the
AMS even if a family members ask me to
print something for them in color even
then I will print it only if the weight
of the object itself is heavier than the
waste material for me that 50/50% is
somehow the limit I hope in near future
the bambol will come out with some tool
changer or idex printer in that case we
don't have that waste material ah yes
another idea for the bigger object uh
you can use the infield to flashh the
filament now small printers have the
advantage less energy is used and also
they have a smaller footprint well here
it's a little bit tricky actually
because the printer itself is quite
small but don't forget we need some
footprint for the AMS and we need some
kind of box or something on the other
side to catch the
poops I think the A1 is a little bit
better from this aspect because there we
have a solution that we can mount the
AMS on the top of that printer and with
that we can uce that footprint actually
I have a one in the Box waiting for the
review and I'm asking you what kind of
review you would like to see there I'm
thinking to compare it with the p1p
which is my number one printer for the
pla material but I'm also waiting your
suggestions down in the comment section
until that thank you for watching and
happy printing
تصفح المزيد من مقاطع الفيديو ذات الصلة
The Bambu Labs A1 Mini: The Ultimate 3D Printer for beginners?
Comgrow T500, the only fast Klipper firmware 3D printer with a 500mm cube print volume, linear rails
Over Hyped & Priced or Worth The Money? - Prusa Mini +
Will this Z axis anti backlash nut improve your 3D printer accuracy?
3D printers are worse than I thought. Time to do something about it!
Dreame A1 im Praxis-Test! Wie schlägt er sich gegen Husqvarna und ECOVACS?
5.0 / 5 (0 votes)