Project iOt || Alat Monitoring Suhu & Kelembapan Jarak Jauh [ NodeMcu - DHT11 ]
Summary
TLDRThis video tutorial demonstrates how to build a simple yet effective temperature and humidity monitoring system using a NodeMCU and a DHT11 sensor. The setup enables remote monitoring through a mobile app, allowing users to check room conditions from anywhere. The video covers the entire process from wiring the components, configuring the Blink app, coding the NodeMCU, to successfully connecting and testing the system. Ideal for DIY tech enthusiasts, this project makes it easy to track environmental factors in real-time, even from abroad, with just an internet connection.
Takeaways
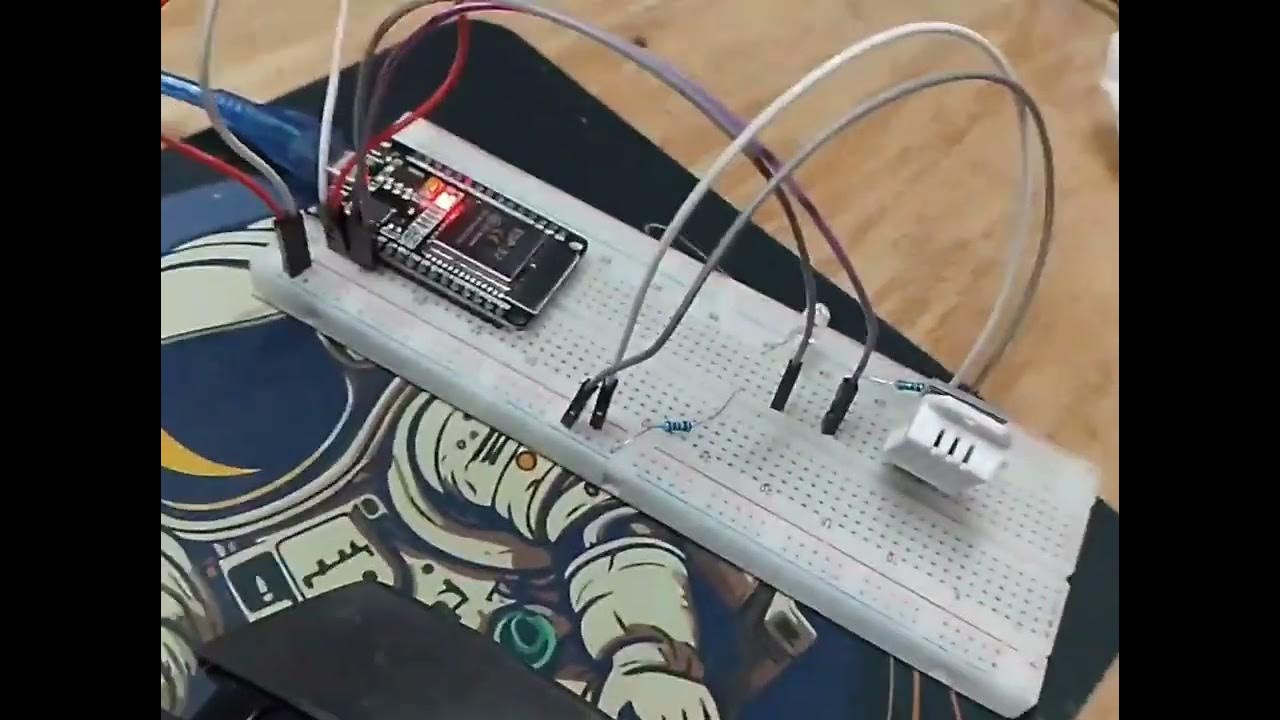
- 😀 The video introduces a project to monitor temperature and humidity in a room using an ESP8266 microcontroller and DHT11 sensor.
- 😀 The setup includes wiring the DHT11 sensor to the microcontroller and connecting it to a mobile app for remote monitoring.
- 😀 The necessary components for the project include the ESP8266, DHT11 sensor, and appropriate wiring for power and data.
- 😀 The user is encouraged to check the project’s description for links to purchase the components used in the project.
- 😀 The video shows the process of configuring the Blink app to monitor the room’s temperature and humidity remotely using the ESP8266.
- 😀 The project involves creating a template in Blink, setting up data streams for temperature and humidity, and generating a unique token for the project.
- 😀 The video includes a walkthrough of the coding process, with a focus on pasting the Blink token and setting up WiFi credentials in the code.
- 😀 It’s important to install the necessary libraries for the DHT11 sensor before uploading the code to the microcontroller.
- 😀 After coding and uploading, the system is tested to ensure it works and can monitor temperature and humidity remotely through a mobile app.
- 😀 Once the system is working, the project is installed in a server room to monitor its temperature and humidity, ensuring it remains cool and stable.
- 😀 The system is accessible from anywhere with an internet connection, providing convenience for remote monitoring of the room's environmental conditions.
Q & A
What is the purpose of the tool discussed in the video?
-The tool is designed to monitor temperature and humidity levels within a room, allowing users to check the conditions remotely from anywhere via a mobile device or even from abroad.
What is the main component used for sending data to the phone?
-The main component used for sending data to the phone is the NodeMCU (a microcontroller) that communicates the sensor data to the user's mobile device.
Which sensor is used for measuring temperature and humidity?
-The sensor used is the DHT11, which is capable of measuring both temperature and humidity levels.
How is the wiring for the DHT11 sensor connected to the NodeMCU?
-The DHT11 sensor is connected as follows: the gray wire (negative) goes to the ground, the red wire (positive) goes to the 3V pin, and the data wire connects to the D5 pin of the NodeMCU.
What is the role of the Blink app in this project?
-The Blink app is used to create a virtual dashboard for monitoring the temperature and humidity data. It allows users to access and view the sensor's readings remotely.
How does one set up the Blink app for this project?
-After logging into the Blink app, users need to create a new template, select the NodeMCU as the device, and set up data streams for temperature and humidity with virtual pins. The user then enters their WiFi details and generates a Blink token for the app.
What is the significance of the Blink token in the coding process?
-The Blink token is essential for linking the NodeMCU to the Blink app. It must be included in the code so that the microcontroller can send data to the app.
What programming environment is used for uploading the code to the NodeMCU?
-The code is uploaded to the NodeMCU using the Arduino IDE (Integrated Development Environment), where the necessary libraries, such as for the DHT sensor, must be installed first.
How can one ensure the NodeMCU is properly connected before uploading the code?
-To ensure proper connection, the user needs to select the correct COM port (e.g., COM6) and the correct microcontroller model (e.g., ESP8266) in the Arduino IDE before uploading the code.
What is the primary benefit of this monitoring system for a server room?
-This system is particularly useful for monitoring temperature and humidity in sensitive environments like server rooms, where maintaining optimal conditions is crucial to prevent overheating and damage to equipment.
Outlines

此内容仅限付费用户访问。 请升级后访问。
立即升级Mindmap

此内容仅限付费用户访问。 请升级后访问。
立即升级Keywords

此内容仅限付费用户访问。 请升级后访问。
立即升级Highlights

此内容仅限付费用户访问。 请升级后访问。
立即升级Transcripts

此内容仅限付费用户访问。 请升级后访问。
立即升级浏览更多相关视频

Alat Pendeteksi Suhu, Kelembaban, dan pH Tanah Berbasis Arduino Uno-Proyek Mandiri

Monitoring Data Suhu dan Kelembapan Sensor DHT11 Menggunakan ESP32 dan BLYNK IOT 2.0
penjelasan keterhubungan antara ESP32 dengan Blnyk web

Monitor Temperature using Augmented Reality & IoT

Smart Wireless IoT-Enabled Food Spoilage Detection Using Arduino with Sensor's and ESP8266 ( Wi-Fi )

SC4 Penjelasan Blynk dan projek simple
5.0 / 5 (0 votes)
