This Social Media AI System Creates Unique Content Daily! (100% Automated)

Helena Liu
25 May 202419:39

Summary

TLDRThe video script introduces a method to automate social media posting using AI and robotic process automation (RPA) tools. It showcases setting up a system on make.com, which triggers AI to read articles from a Google Sheet and generate social media posts in various platforms' tones. The tutorial covers integrating perplexity for real-time web access and summarization, and using cloud-based AI like OpenAI and Claude for crafting engaging posts. It also guides through connecting to social media accounts for automated posting and offers tips for reviewing and refining AI-generated content.

Takeaways

  • 📈 The video introduces a system to automate social media posting using AI and RPA tools.
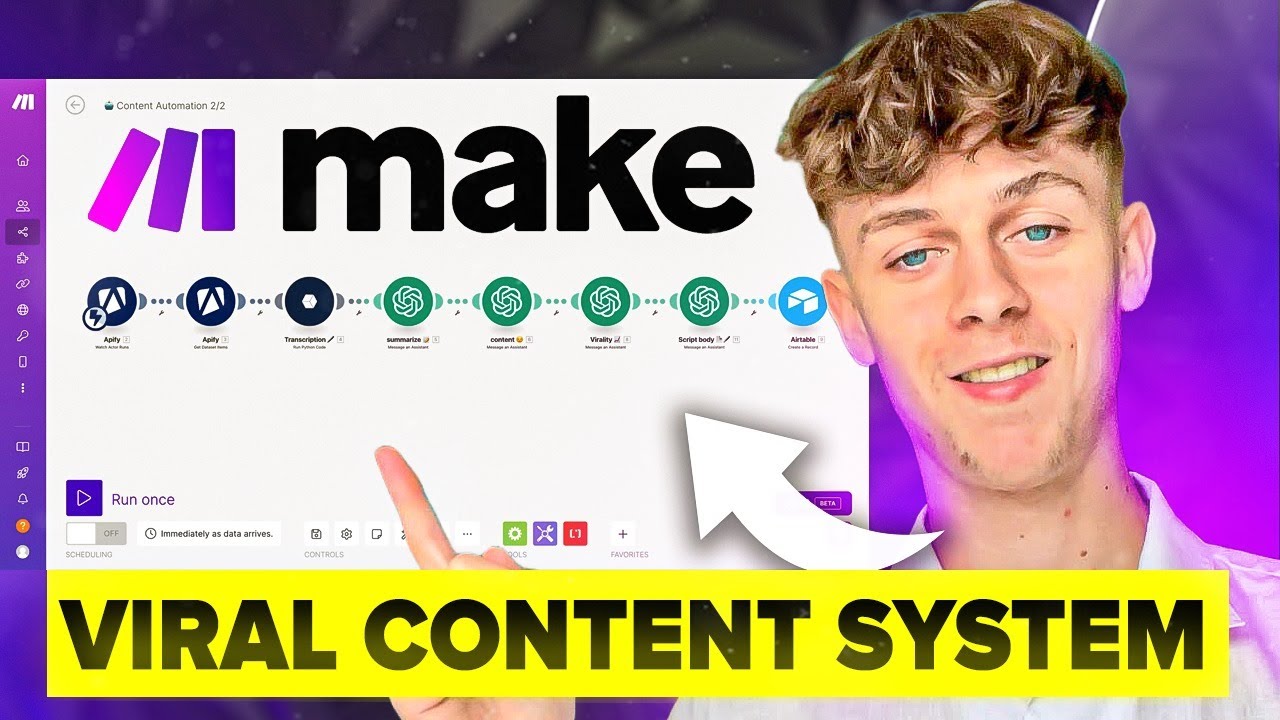
  • 🛠️ The primary tool used for automation is Make.com, which allows chaining different software in a flow.
  • 🔗 The process is initiated by a Google Sheet where URLs of recent articles are stored.
  • 📝 AI, specifically Perplexity, is used to summarize articles from the provided URLs in real-time.
  • 🚀 Perplexity's advantage is its ability to access the web for the latest information, unlike some competitors.
  • 📑 The video demonstrates setting up triggers and modules in Make.com for a no-code automation experience.
  • 📈 The AI then generates social media posts for platforms like Facebook, Instagram, LinkedIn, and Twitter.
  • 🤖 Both OpenAI and Claude are used to create engaging social media content based on article summaries.
  • 🖼️ For Instagram, an image is also generated using OpenAI's DALL-E model to enhance post appeal.
  • ✅ The video emphasizes the importance of testing and adjusting prompts to refine AI-generated content.
  • 🔗 The final step involves connecting the automation to actual social media accounts for posting.

Q & A

  • What is the purpose of the system described in the video script?

    -The purpose of the system is to automate the process of creating and posting social media content using AI, helping to build brand engagement and save time.

  • What tool is used to automate the social media posting process as described in the script?

    -The tool used for automation is called make.com, which is an RPA (Robotic Process Automation) tool that allows for the creation of automated flows.

  • How does the system trigger the automation process?

    -The system uses a Google Sheet as a trigger. When a new row with a news article link is added to the spreadsheet, it initiates the automation process.

  • What is the role of Perplexity in the described system?

    -Perplexity is used to read and summarize the articles from the Google Sheet. It's chosen because it can access the web in real-time, unlike some other language models.

  • Why is Cloud (CLA) preferred over OpenAI for generating social media posts in the script?

    -Cloud (CLA) is preferred because, at the time of the script, it was found to generate better output for social media posts compared to OpenAI.

  • How does the system handle the creation of different social media posts for various platforms?

    -The system uses routers to perform multiple actions at once, creating different posts for Facebook, Instagram, LinkedIn, and Twitter using AI-generated content based on the article summary.

  • What is the significance of setting the scheduling interval to every day in the system?

    -Setting the interval to every day ensures that only one social media post is created and posted per day, preventing overposting and maintaining a consistent schedule.

  • How can the AI-generated content be customized to match the user's tone and style?

    -The AI-generated content can be customized by modifying the prompts given to the AI, allowing for adjustments in length, emoji usage, hashtags, and overall style until it aligns with the user's preferences.

  • What additional module is used to generate images for Instagram posts in the system?

    -The system uses OpenAI's DALL-E model to generate images for Instagram posts, enhancing visual appeal and engagement.

  • How can users review and approve the AI-generated social media posts before full automation?

    -Users can disconnect the automation from directly posting and instead have the posts sent to them via email or a Google doc for review and approval before enabling full automation.

  • What is the final step to ensure the social media AI automation runs smoothly every day?

    -The final step is to ensure that there are enough news links in the Google Sheet, as the automation will take the next available link each day to generate and post content.

Outlines

00:00

🤖 Automating Social Media Posts with AI

The script introduces a system to automate social media posting using AI and robotic processing automation (RPA) tools. It highlights the use of make.com, a no-code platform that allows users to create automated workflows. The process begins by setting up a trigger using a Google Sheet to input URLs of recent articles. The AI then generates social media posts in the user's tone. The tutorial covers setting up triggers, using perplexity AI for real-time web access and summarization, and scheduling the automation to post daily. It also emphasizes the importance of testing the workflow to ensure proper functionality.

05:02

📄 Summarizing Articles and Crafting Social Media Posts

This paragraph explains how to use perplexity to summarize articles from a Google Sheet and then create social media posts for platforms like Facebook, Instagram, LinkedIn, and Twitter. It details the process of setting up routers for multiple posts and using cloud-based AI like Cloud 3 Opus for generating content. The script provides instructions for configuring the AI with specific prompts to create engaging and compliant social media content. It also discusses the importance of testing the system and adjusting prompts to refine the AI's output.

10:02

🖌️ Generating Visual Content for Social Media

The script moves on to describe the process of generating visual content for social media, specifically for Instagram, using AI. It mentions the use of open AI to create images based on prompts, with DALL-E 3 suggested as a powerful model for this task. The paragraph outlines the steps to set up the AI with the correct parameters and prompts to generate an appealing image that complements the social media post. The focus is on ensuring that the image and the post work together to enhance audience engagement.

15:02

🔗 Connecting AI Automation to Social Media Accounts

The final paragraph of the script discusses the process of connecting the AI automation system to social media accounts for posting. It explains how to link the system to platforms like Facebook, Instagram, Twitter, and LinkedIn, and how to authorize the connections. The script also suggests starting with a review process before fully automating the posts, by having them sent to an email or a Google doc for quality assurance. Once confident, the automation can be turned on to post daily at a scheduled time. The paragraph concludes with a reminder to ensure the Google Sheet has enough news links for continuous operation and an invitation to subscribe for more content and a free course on AI automation.

Mindmap

Keywords

💡RPA (Robotic Process Automation)

RPA refers to the technology that allows users to automate repetitive tasks. In the context of the video, RPA is used to automate the process of posting on social media platforms. The tool 'make.com' is introduced as an example of an RPA tool that can string different software together in a flow to operate without manual intervention. The script mentions setting up an automation with RPA to help build a brand and engage with followers.

💡AI Tone of Voice

AI Tone of Voice in the video refers to the ability of artificial intelligence to mimic a human's writing style and personality in text. The script discusses training AI to write in a person's tone of voice, which helps maintain consistency in brand communication across social media posts. This is crucial for personal branding and ensuring that automated posts resonate with the audience as if they were written by the individual themselves.

💡Social Media Automation

Social Media Automation is the process of using technology to automatically create and post content on social media platforms. The video script outlines a method to automate the posting process using AI and RPA tools. It highlights how this can save time and ensure regular engagement with an audience without the need for manual daily posts.

💡Google Sheets

Google Sheets is a web-based spreadsheet program that is part of Google's suite of productivity tools. In the video, Google Sheets is used as a trigger for the automation process. The script describes how to set up a Google Sheet to input URLs of recent articles, which then initiates the AI to generate social media posts, demonstrating its use as a simple and accessible tool for automation triggers.

💡Perplexity

Perplexity, in the context of the video, refers to a language model that can access the web in real-time and summarize articles. It is highlighted as a tool that surpasses other models like OpenAI and Claude in terms of accessing up-to-date information. The script uses Perplexity to summarize articles from a Google Sheet, which is a crucial step in the automation process before generating social media posts.

💡Open AI

Open AI is mentioned in the script as a competitor to Perplexity and is used to generate social media posts. It is one of the language models that can be integrated with the RPA tool 'make.com' to create content. The video script provides an example of setting up Open AI within the automation to write an Instagram post, showcasing its application in the content creation process.

💡Claude

Claude is another language model discussed in the video, which is used to generate social media posts. The script mentions that Claude is preferred by the presenter for generating better output compared to Open AI. Claude is used to create a Facebook post within the automation setup, emphasizing its role in crafting engaging social media content.

💡API Key

An API Key is a unique code used to authenticate requests to an application's API (Application Programming Interface). In the video, obtaining and using API keys for Perplexity, Open AI, and Claude is essential for integrating these services with the 'make.com' automation tool. The script provides a step-by-step guide on how to retrieve and input API keys to enable the functionality of these language models within the automation process.

💡Social Media Platforms

The term 'Social Media Platforms' in the video refers to various online services used for social networking and content sharing, such as Facebook, Instagram, Twitter, and LinkedIn. The script outlines how to set up automation for these platforms using AI and RPA, allowing for the systematic generation and posting of content to engage with followers and build a brand's online presence.

💡Prompt

A prompt in the context of the video is a set of instructions or a template given to the AI to guide the content creation process. The script discusses crafting prompts for AI to generate social media posts that are engaging and tailored to different platforms. For example, prompts are given to create a Facebook post, an Instagram post, and so on, with specific instructions on the style and content of the posts.

Highlights

Introduction to the concept of automating social media posts using AI to save time and build brand engagement.

Overview of using make.com, an RPA tool, for creating automated workflows without coding.

Explanation of setting up a trigger in make.com using Google Sheets to initiate the automation.

Demonstration of creating a new scenario in make.com and its visual, no-code interface.

Tutorial on how to watch a new role in Google Sheets to trigger the automation process.

Description of setting up scheduling for the automation to run once every day at a specific time.

Introduction to perplexity as an AI tool that can access the web in real-time for article summarization.

Instructions on setting up an account with perplexity and obtaining an API key for integration.

Guide on using perplexity to summarize articles from a provided news link in Google Sheets.

Explanation of using routers in make.com to perform multiple actions like creating different social media posts.

Comparison of using cloud AI (Claud) for generating better social media post outputs compared to Open AI.

Process of setting up API keys for both Claud and Open AI within make.com for post generation.

Method for generating Facebook, Instagram, Twitter, and LinkedIn posts using AI with tailored prompts.

Discussion on using Open AI to create an Instagram post with an engaging and visually appealing message.

Guide on generating an image for Instagram posts using Open AI's DALL-E model.

Finalizing the setup by connecting the automation to social media platforms for posting.

Option to review posts before full automation by disconnecting the post trigger and sending drafts via email.

Emphasis on the importance of having enough news links in the spreadsheet for continuous automation.

Encouragement to like, subscribe, and sign up for a free course on AI and automation for further learning.

Transcripts

play00:00

after a long day of work I'm sure the

play00:02

last thing you want to be doing is

play00:03

figuring out where you're going to post

play00:05

on Facebook and Twitter so would it be

play00:07

nice if you can train AI to write in

play00:09

your tone of voice and post for you on

play00:12

automation every single day like

play00:15

clockwork this will help you build your

play00:17

brand as well as engage with your

play00:18

followers and this system is exactly

play00:21

what I'm going to show you how to set up

play00:22

today so the tool that we're going to be

play00:24

using is called make.com make.com is an

play00:27

RPA or robotic processing automation

play00:29

tool that allows you to string along

play00:32

different types of software together in

play00:33

a flow on automation so that they all

play00:36

operate and I'm going to show you how to

play00:37

set this up today so once you get your

play00:40

make.com account you can just go up to

play00:42

the top here and create a new scenario

play00:45

from here you can see that it's actually

play00:47

very visual this whole tool is no code

play00:50

so that means you can set up this whole

play00:52

AI automation without writing one single

play00:54

line of code which is incredible we're

play00:56

going to go here and press the plus

play00:58

button the first thing we're going to

play00:59

set up is trigger this will tell make

play01:01

what is going to trigger what is going

play01:03

to start this Automation and it's

play01:05

actually quite um intuitive you you

play01:08

basically tell it use this tool first

play01:10

then use this tool then use this tool

play01:12

then use this tool in a visual way you

play01:14

can describe how you want this

play01:16

automation to operate so the first thing

play01:18

that's going to trigger our automation

play01:20

is a Google sheet what we're going to do

play01:22

is put in the URL of a recent article

play01:26

about our industry or our niche in there

play01:29

and then AI is going to go into work and

play01:32

then write all of our social media post

play01:34

I'm going to press the plus button here

play01:36

and then I'm going to search for Google

play01:38

Sheets and then after I select Google

play01:40

sheets I'm going to select watch new

play01:42

role so this will trigger whenever I put

play01:44

in a new row a new news article into my

play01:48

spreadsheet I have already made my

play01:50

spreadsheet right over here and as you

play01:52

can see it looks like this it just has a

play01:54

news link and then I put in one article

play01:56

in here for testing purposes and this is

play01:59

a new tic Le that just came out today

play02:01

about Elon Musk and Elon Musk says that

play02:03

AI will take away all of our jobs great

play02:06

so I have this article in here and then

play02:08

I'm ready to turn this article into four

play02:10

social media posts back in make I'm

play02:13

going to select this spreadsheet I'm

play02:15

going to click the blue button here and

play02:18

then find my spreadsheet in my Google

play02:20

Drives folder then I have to select the

play02:24

sheet to use which this spreadsheet only

play02:26

has one sheet which just sheet one so

play02:29

I'm all good to go there and lastly in

play02:31

the limit I'm going to select one

play02:33

because I wanted to write one article at

play02:35

a time now I'm going to press okay and

play02:38

then down at the bottom here we're going

play02:40

to change the scheduling setting by

play02:42

default it's going to run every 15

play02:44

minutes but I don't want a new social

play02:47

media post to be posted every 15 minutes

play02:50

to all of my accounts so I'm going to

play02:52

change this interval to every day

play02:55

because I just want one post every day

play02:57

and then at 8:00 a.m. is fine and I'm

play02:59

going to press okay all right so just

play03:02

like that we have our trigger set up

play03:04

okay now that we have our trigger set up

play03:05

the next step is to have ai read that

play03:08

article and we're going to use a tool

play03:10

called perplexity to do that perplexity

play03:12

is a competitor to open Ai and Cloud but

play03:15

what it does better than these two other

play03:17

language models is that it can actually

play03:20

access the web and be able to return

play03:22

information about different articles to

play03:25

you in real time so as you may know open

play03:28

Ai and CLA actually have a cut update

play03:30

and it only knows information generally

play03:33

from 6 months ago so it doesn't have the

play03:35

latest information as of right now I

play03:37

know that's going to be changing in the

play03:39

next couple months but as of right now

play03:40

perplexity is the only large language

play03:42

model that can access the web in real

play03:44

time you can set up for free account in

play03:47

perplexity and you'll be taken to a

play03:48

dashboard that looks like this and what

play03:50

you'll need to do is to get your API key

play03:53

and connect that into make.com so once

play03:55

you're in prep plexity you want to go

play03:57

down to the bottom and click the gear

play03:59

icon from here you'll be able to see the

play04:02

top menu which is account profile API

play04:06

and Enterprise you're going to go ahead

play04:08

and click on your API key this is where

play04:10

you can add in more additional funds I

play04:13

add in $10 and this lasted me ages and

play04:16

you're going to go down here and copy

play04:18

your API key once you have copied your

play04:21

API key you're going to go back to make

play04:23

and then press add an additional module

play04:26

from here we're going to search for prep

play04:28

plexity and then we're going to select

play04:30

create a chat completion if this is your

play04:33

first time accessing and using

play04:35

perplexity in make you're going to press

play04:37

add right up here and then simply put in

play04:40

your API key and then press save and

play04:42

this will work you can leave the model

play04:45

at llama 3 and if you want to change to

play04:48

different models that's fine as well but

play04:49

find llama 3 works just fine and then

play04:52

here you will just put in what you want

play04:54

prick Plexi to do in the content and

play04:57

then give it a row the rle will always

play04:58

be user I just leave uh the tokens and

play05:01

temperature blank for now so tokens will

play05:04

determine how long the message will be

play05:06

if you leave it to default it's just

play05:07

going to spread as long as it needs to

play05:10

and then temperature tells it how

play05:11

creative it can be I think the default

play05:13

settings for this will be fine here in

play05:16

the content I just tell it to summarize

play05:20

this article and then I'm going to

play05:23

select the news link one the reason I'm

play05:26

selecting news Link in column A is

play05:28

because what this is going to fill out

play05:31

is the link that is already in there

play05:34

because I named the first column in the

play05:36

fresy news link that is what I want

play05:39

perplexity to access I'm going to press

play05:41

okay here save my work really important

play05:44

make thises an auto save so I've uh lost

play05:47

a lot of work over the years over that

play05:49

and then um I'm just going to press run

play05:51

once to see if we're getting the results

play05:54

that we want it's important to

play05:56

continuously test your work so that you

play05:58

can find out the the bugs earlier on all

play06:01

right so just like that we have ran this

play06:03

successfully and then let's just take a

play06:05

look so we make you can see the little

play06:08

pop-up Bubbles at the top and you can

play06:10

press the magnifying glass to dive

play06:13

deeper and then if I go into the input

play06:15

what we input it into make I'm going to

play06:18

expand on messages so you can see we

play06:20

totally to summarize this article see

play06:22

how it

play06:24

autofilled the the value that was under

play06:27

um column one and then it's going to go

play06:29

to the next row the next time we run and

play06:31

then next row and the next row right so

play06:34

we can see that is working perfectly and

play06:36

then in the output I'm going to expand

play06:38

on choices and then message and then

play06:41

content and we can see that yes it did

play06:44

summarize the article here for us that's

play06:47

perfect step one is working so we have

play06:49

summarized the article the next thing

play06:51

that we wanted to do is to write a

play06:54

Facebook Instagram uh LinkedIn and x uh

play06:57

post for us and the way that we're going

play06:59

to do this is to use a router and a

play07:03

router will allow us to perform uh

play07:05

multiple actions at once so I'm going to

play07:07

create four different routers because we

play07:09

want four different posts to be created

play07:11

here and then I'm going to use uh Claud

play07:14

to write these post and the reason that

play07:16

I'm using cloud is because currently I

play07:19

find that CLA is just generating a bit

play07:21

better output than open AI is so I'm

play07:24

going to click on Cloud by the way you

play07:26

can use open AI for this as well um I'll

play07:28

actually show you how set up open AI in

play07:31

the next example so that you can choose

play07:33

which uh large language model that you

play07:35

want I'm going to uh click on create a

play07:38

message and then if this is your first

play07:40

time setting up claw click add and then

play07:43

just put in your API key right over here

play07:46

from your cloud account just go into

play07:47

settings and you'll be able to get your

play07:49

API key okay and under models I always

play07:52

select Cloud 3 Opus which is the highest

play07:56

model that you can use under the row I'm

play07:58

going to select user and then under the

play08:01

content when I expand it um I'm going to

play08:03

put text here and then this is where I

play08:06

can put in my prompt okay I've already

play08:09

pre-written a prompt for this act as a

play08:12

social media manager and generate a

play08:14

Facebook post the post should engage the

play08:16

audience with compelling introduction

play08:18

provide essential details and encourage

play08:20

them to encourage interaction through

play08:22

likes comments and shares and with clear

play08:25

call to action include optional hashtags

play08:27

here's a summary of the article that I

play08:29

want you to write a Facebook post about

play08:31

and this is where I actually enter in

play08:33

the result or the output from the

play08:36

previous step so remember in make the

play08:38

previous step was that we went into prep

play08:40

plexity and we generated the summary of

play08:42

the article now I can go in there and

play08:45

then I expanded on choices then I

play08:47

expanded on message and I clicked on

play08:49

content and now uh this part is going to

play08:53

prefill with the result from the

play08:55

previous step okay and I'm going to

play08:58

press okay right here so just like that

play09:00

we have our Facebook post written now

play09:03

the next part is we're going to Now set

play09:04

up Instagram we're going to follow

play09:06

pretty much the same step but in this

play09:08

case I'll use open AI to write the

play09:10

Instagram post instead of claw just to

play09:12

show you how to do it in using both

play09:14

methods okay so I'm going to press the

play09:16

plus button here I'm going to search for

play09:19

open AI going to click on the open AI

play09:21

module and I'm going to go down here and

play09:23

select the second one which is create a

play09:25

completion and this is where we can

play09:27

actually use open AI off of chat GPT and

play09:31

if this is your first time connecting to

play09:33

Open aai click add at the top and then

play09:35

put in your API key right over here if

play09:38

you're trying to find your API key from

play09:40

your openai account simply go to

play09:42

platform. open.com and then once you log

play09:45

in you can see that the last tab here is

play09:48

API key simply click on that and then

play09:51

create a new key give it a name I'm

play09:54

going to call it test for now then it's

play09:56

going to give you this key you simply

play09:58

copy this key right over here go back to

play10:02

make press add and then put in your key

play10:05

right over here and press save and then

play10:07

this is how you can use open AI off of

play10:10

chat GPT I'm going to close that for now

play10:12

because I already have this connected

play10:14

all right so from our model I'm going to

play10:16

select GPT 4 because I want the most

play10:18

powerful model that I can use at the

play10:21

moment and then once I select chap GPT 4

play10:24

under messages this is where I can give

play10:26

it my prompt now for the roll again I'm

play10:28

going to select user and then for the

play10:31

content I'm going to put in my prompt

play10:32

and I'm also going to attach the summary

play10:34

of the article that we just wrote so

play10:36

this is my simple prompt here as a

play10:38

digital marketing specialist create an

play10:40

Instagram post about the following

play10:41

artificial intelligence article ensure

play10:43

the content is visually appealing and

play10:45

include an inspirational message use

play10:48

emojis to enhance engagement suggest

play10:51

relevant hashtags here's a summary of

play10:53

the article I wanted to write and then

play10:55

now once I click here I can see all of

play10:57

the outputs from the previous step we're

play10:59

going to go to prep lexity expand on

play11:02

choices expand on message and then click

play11:04

on content because this is where the API

play11:08

is storing all of the previous outputs

play11:10

that we just have generated from the

play11:12

article right okay so just like that we

play11:14

finished our Instagram and at the bottom

play11:17

we need to put in a number of tokens so

play11:19

for this I'm going to put in let's say

play11:21

2,000 maximum all right by the way

play11:24

currently the maximum you can put in I

play11:26

think is

play11:28

4,097 96 96 yeah okay now that we have

play11:31

our Instagram set up let's now do the

play11:33

same for for X okay so now we're just

play11:37

repeating the process for Twitter we X

play11:40

so here I've set up the open AI module

play11:43

just as we have previously and I put in

play11:46

my prompt to tell it to write a Twitter

play11:48

post and again I'm going to go under

play11:51

choices under message and then under

play11:53

content to populate to populate the

play11:57

summary of the article I just chos

play11:59

and I'm going to press okay here at the

play12:01

bottom lastly I'm going to set up my

play12:03

LinkedIn and for this one I'm going to

play12:05

do Cloud again so I'm going to press the

play12:07

plus button I'm going to search for

play12:08

cloud and then create a message from

play12:11

here I'm going to select the model I'm

play12:13

going to use which is cloud 3 Opus the

play12:16

most powerful model available so far

play12:18

give it a number of uh tokens for the

play12:20

role I'm going to select user for the

play12:22

content type I'm going to select text

play12:24

and then under text this is where I'm

play12:25

going to put in my prompt again all

play12:28

right I have put in my LinkedIn prompt

play12:30

right here all right great so that's my

play12:32

prompt for LinkedIn and press okay and

play12:35

then last thing before we connected to

play12:36

the actual platforms is uh for Instagram

play12:40

I actually wanted to generate an image

play12:42

as well so from the Instagram uh router

play12:45

here I'm going to press another uh plus

play12:47

symbol which allows me to add an

play12:49

additional um module here and then I'm

play12:52

going to use open AI to generate an

play12:54

image uh you can also use stable

play12:56

diffusion as well um but for this

play12:58

example I'm going to use open Ai and

play13:00

then I'm going to select generate an

play13:04

image from this list this will allow me

play13:07

to generate a image using Dolly and I'm

play13:10

going to use DOL 3 and then this is

play13:12

where I can put in my prompt all right I

play13:15

have put in my prompt for for this image

play13:18

I'm going to press okay so just like

play13:20

that we have our whole system set up

play13:22

let's go ahead and save it and run it

play13:24

and then see if everything's working

play13:26

properly if it is then all we need to do

play13:28

is is connected to all of our social

play13:30

media platforms and then we're good to

play13:32

go all right our testing has finished so

play13:35

let's take a look at the results here at

play13:37

the top for our Facebook output I'm just

play13:40

going to click on the little one and the

play13:42

little B bubble that comes out to see

play13:44

what results are under outputs I'm going

play13:46

to look at content one and then the text

play13:50

and then here is where I can read um

play13:52

what the AI has written for our Facebook

play13:55

post and if you don't like what it has

play13:57

written then modify your prompt until it

play13:59

sounds like you can modify the length

play14:01

you can tell it to include more emojis

play14:03

you can tell it to include more hashtags

play14:06

you can tell it to shorten it you can

play14:07

give it maximum length so you can really

play14:08

play around with the prompt until you

play14:10

get it to exactly what you want and that

play14:12

this is this looks fine to me let's take

play14:15

a look at the Instagram one under

play14:17

outputs I'm going to press on choices

play14:19

and then um look inside the message and

play14:21

the message content and you can see whoa

play14:23

this is a bit too long so I can modify

play14:26

my prompt to actually tell it to shorten

play14:27

it let's take a look at the image that

play14:30

dally has generated here again under

play14:32

outputs I'm going to look at the data

play14:34

and it's giving me this URL so let's go

play14:37

ahead and take a look at it this is the

play14:39

image that it generated for this article

play14:42

not bad I probably will prompt it to not

play14:46

have words on it but generally not bad

play14:49

what you would do in during this step is

play14:51

to fix your prompt until you get the

play14:53

output to be exactly what you need it to

play14:56

be and you can check all of your outputs

play14:58

here once you're happy with those

play15:00

prompts what you would do is to add

play15:02

another module and this is where you

play15:03

would actually start connecting it to

play15:05

your accounts so for the first one I'm

play15:07

going to connect it to Facebook I'm

play15:09

going to search for Facebook you can

play15:11

either connect it to your Facebook page

play15:13

or your particular account I needed to

play15:15

connect it to my uh Facebook page for

play15:18

engagement from my business so I'm going

play15:20

to press Facebook page and then press

play15:22

create a post from here I had to create

play15:25

that connection to my account and press

play15:29

save Facebook is going to pop up the

play15:32

authorization and once I have authorized

play15:35

my Facebook connection I can select the

play15:37

specific page that I wanted to be posted

play15:40

to once I have selected the page here I

play15:43

can put in the exact message that I

play15:45

wanted to post and this would be the

play15:47

output from the previous step so as we

play15:49

can see all of the results from the

play15:51

previous step now from uh entropic or

play15:54

clawed and then under content I'm going

play15:56

to select the text that it just

play15:59

generated and then press okay great and

play16:02

just like that I'll have my Facebook

play16:03

post posting at 8:23 a.m. every single

play16:07

day now I'm going to repeat the process

play16:09

for Instagram under the search app I'm

play16:12

going to look for Instagram for business

play16:14

and then I'm going to create a photo

play16:16

post I'm going to have to add an account

play16:18

here connected to my account after I

play16:21

have connected to my account I need to

play16:23

select the photo URL which was generated

play16:25

from the previous step so I'm going to

play16:27

expand on the data of the previous step

play16:30

and then get that URL of the photo that

play16:32

was just created by D 3 next I need to

play16:35

put in the caption and the caption was

play16:38

generated two steps before right and

play16:40

then we're going to expand on choices

play16:42

under the open AI module again expand on

play16:44

message and then create and then select

play16:46

the content that we have created for the

play16:48

Instagram post and then press okay great

play16:51

remember to periodically save your work

play16:54

next thing you want to do is look for

play16:55

Twitter or X and then we're going to

play16:58

select create the post again again

play17:00

connect to your account and lastly we

play17:03

just want to connect to LinkedIn again

play17:05

same process press the add button and

play17:07

then now look for LinkedIn select create

play17:11

user text post perfect from here connect

play17:14

to your LinkedIn account press save put

play17:17

in your username and password to

play17:18

authorize this connection and then

play17:21

you're all good to go lastly you just

play17:23

need to turn on this automation for

play17:25

everything to run before we go if you

play17:28

don't want to post automatically to

play17:30

start with if you want to start

play17:31

reviewing the work you could actually uh

play17:34

disconnect this by right clicking and

play17:36

press on link have the post sent to you

play17:38

on an email or a Google doc and you'll

play17:41

review it for the first couple of uh

play17:44

days or weeks until you get the prompt

play17:46

down until you feel comfortable having

play17:48

the AI system run on automation you can

play17:50

do so by adding the plus button and then

play17:52

from here if you wanted to send it to

play17:54

you on your email just click Gmail and

play17:57

then you can select send an email you

play18:01

can just send this email to yourself so

play18:03

put in your email address right here and

play18:06

simply put in the result from entropic

play18:10

or open AI in the content section and

play18:14

press okay just like that the AI will

play18:17

send you an email with the content of

play18:20

all your post so you can review it and

play18:23

then maybe modify the prompt until you

play18:24

really get that prompt down and you feel

play18:26

comfortable doing all this on automation

play18:28

lastly to have your social media AI

play18:30

automation running every day make sure

play18:32

in your spreadsheet you have enough news

play18:34

links the way that we have set it up

play18:36

remember is that every single day at

play18:38

8:23 a.m. what this automation will do

play18:42

is that it will be triggered and it will

play18:44

take the next news link URL that's on

play18:47

your spreadsheet and prep plexity is

play18:50

going to read and summarize that and

play18:52

then open a and Claud is going to turn

play18:55

this URL into Facebook Instagram as as

play18:58

well as Twitter and Linkedin posts okay

play19:01

so just make sure you have enough URL on

play19:03

here and then your automation will be

play19:05

all set to go I hope you guys find this

play19:07

as fascinating and as cool as I do it's

play19:10

absolutely mindblowing how much you

play19:12

could do with AI and automations and

play19:14

just like that within 10 20 minutes you

play19:16

have a whole system set up for your

play19:19

social media that will be able to post

play19:21

for you every single day if you liked

play19:23

and enjoyed this video please make sure

play19:25

you like And subscribe to the channel

play19:27

below for more content just just like

play19:29

this also if you're looking to learn

play19:31

more about how to use a on automation

play19:34

sign up for my free course below as well

play19:37

and I'll see you soon

Rate This

5.0 / 5 (0 votes)

相关标签
Social MediaAI AutomationContent CreationBrand EngagementRPA ToolsMake.comPerplexity AICloud AIDigital MarketingNo-Code Setup
您是否需要英文摘要?