COMO CREAR UN EXAMEN CON FORMULARIOS DE GOOGLE 2021
Summary
TLDREste video ofrece una guía detallada sobre cómo crear un examen utilizando Google Forms. El presentador, Miguel Vela, comienza explicando cómo acceder a Google Forms y personalizar el tema de la encuesta con imágenes y colores. Luego, se adentra en la configuración de las preguntas, destacando la importancia de hacerlas obligatorias y establecer la clave de respuesta para cada una. Además, se muestra cómo agregar imágenes, videos y secciones para una mejor organización y presentación. Finalmente, Vela cubre cómo enviar el examen a los estudiantes, analizar los resultados y publicar las calificaciones, subrayando la necesidad de recopilar direcciones de correo electrónico para跟踪 los resultados. El video es una valiosa fuente de información para educadores y cualquier persona interesada en la creación de exámenes digitales.
Takeaways
- 📝 Para crear un examen en Google Forms, inicia sesión en la plataforma e inicia un nuevo formulario.
- 🌟 Personaliza el formulario con un título, descripción y utiliza la opción de 'Custom Theme' para elegir una imagen de encabezado y colores de fondo.
- 🔍 Utiliza la función 'Preview' para visualizar cómo se verá el examen antes de enviarlo.
- ⚙️ En 'Configuration', puedes cambiar opciones como requerir correos electrónicos, hacer que los participantes inicien sesión y activar la evaluación automática.
- 📧 Asegúrate de desactivar opciones que puedan revelar las respuestas correctas a los participantes, como 'Show question answered incorrectly'.
- 💬 En la sección de 'Questions', cada cuadro representa una pregunta y puedes editar, agregar o eliminar preguntas según sea necesario.
- 🔢 Puedes asignar puntajes a las preguntas y Google Forms calculará la puntuación total una vez que se active la 'Automatic evaluation'.
- 📈 Google Forms ofrece estadísticas y resumen de las respuestas, lo que te permite revisar y publicar los puntajes manualmente.
- 📑 Si es necesario, puedes utilizar la función 'Add Section' para dividir el examen en varias páginas o secciones.
- 🔗 Una vez finalizado el examen, puedes compartirlo a través de un enlace o incrustarlo en una página web.
- 💌 También puedes enviar el examen a través de correo electrónico, personalizando el mensaje y el asunto para tus estudiantes o participantes.
- 📊 Al finalizar, puedes exportar los resultados a un archivo de Google Sheets para un análisis más detallado.
Q & A
¿Cómo se puede crear un examen con Google Forms?
-Para crear un examen con Google Forms, inicia sesión en la plataforma, selecciona 'Nueva' y luego 'Google Forms'. Luego, puedes personalizar el título y la descripción de tu examen, agregar preguntas y opciones de respuesta, y configurar opciones como la recopilación de direcciones de correo electrónico y la evaluación automática.
¿Cómo se personaliza el tema de un examen en Google Forms?
-Para personalizar el tema, haz clic en el botón 'Personalizar tema' en la parte superior derecha. Puedes elegir una imagen para el encabezado, seleccionar colores de tema y cambiar la fuente del texto.
¿Qué es la función del botón 'Vista previa' en Google Forms?
-El botón 'Vista previa' te permite ver cómo será la presentación de tu examen antes de enviarlo. Cada vez que hagas cambios, puedes hacer clic en 'Vista previa' para ver la versión actualizada.
¿Cómo se configuran las opciones de preguntas con puntuación en Google Forms?
-Para configurar las preguntas con puntuación, haz clic en el botón 'Configuración' y luego en 'General'. Allí, puedes activar la opción 'Convertir en cuestionario', 'Asignar puntuación a las preguntas' y 'Habilitar evaluación automática'.
¿Por qué es importante recopilar direcciones de correo electrónico en un examen de Google Forms?
-Recopilar direcciones de correo electrónico es importante para asegurar que cada participante solo tome el examen una vez y para poder publicar manualmente los puntajes asociados a cada correo electrónico.
¿Cómo se agregan imágenes a un examen en Google Forms?
-Para agregar imágenes, se hace clic en el botón 'Agregar imagen' y se selecciona la imagen desde Google Drive o se carga una desde el ordenador. Las imágenes se pueden arrastrar y colocar en cualquier parte del examen.
¿Cómo se agregan videos a un examen en Google Forms?
-Para agregar videos, se hace clic en el botón 'Agregar video', se selecciona el video deseado y se agrega a la pregunta correspondiente. El video se puede arrastrar y colocar en cualquier parte del examen.
¿Cómo se crean secciones en un examen de Google Forms?
-Para crear secciones, se utiliza el botón 'Agregar sección'. Esto permite dividir el examen en varias páginas y organizar las preguntas en diferentes secciones con títulos específicos.
¿Cómo se envía un examen de Google Forms a los participantes?
-Para enviar el examen, se hace clic en el botón 'Enviar' y se puede copiar el enlace del formulario o enviarlo directamente a las direcciones de correo electrónico de los participantes.
¿Cómo se publican los puntajes de un examen en Google Forms?
-Para publicar los puntajes, se hace clic en la sección 'Respuestas' y luego en 'Publicar puntajes'. Esto envía un correo electrónico a los participantes con sus puntajes.
¿Cómo se exportan los resultados de un examen de Google Forms a un archivo de hoja de cálculo?
-Para exportar los resultados, se hace clic en la sección 'Respuestas' y luego en 'Crear hoja de cálculo'. Esto crea una hoja de cálculo de Google con los datos ingresados.
¿Cómo se agregan preguntas de opción múltiple a un examen en Google Forms?
-Para agregar preguntas de opción múltiple, se hace clic en 'Agregar pregunta' y se selecciona el tipo de pregunta 'Varias opciones,允许选择一个' (radio button). Luego se ingresan las opciones de respuesta y se indica cuál es la respuesta clave.
Outlines
😀 Creación de un examen con Google Forms
En este primer párrafo, Miguel Vela de El Tío Tech introduce el tema del video: aprender a crear un examen utilizando Google Forms. Explica que el examen se usará para hacer preguntas a estudiantes o para recolectar información de manera eficiente. Comienza la creación de un examen, entrando en Google Forms y personalizando el tema del examen con imágenes y colores de fondo. Se enfoca en la importancia de la presentación y la organización de las preguntas.
📝 Configuración del examen y recopilación de correos electrónicos
Miguel procede a explicar la configuración del examen en Google Forms, incluyendo la opción de recopilar direcciones de correo electrónico y requerir el inicio de sesión con una cuenta de Google para evitar que una misma persona tome el examen múltiples veces. Destaca la importancia de la configuración para el control y la individualización de las respuestas. También menciona la opción de activar una barra de progreso y la conversión del formulario en una encuesta con puntajes y evaluación automática.
🔍 Edición y creación de preguntas en el examen
Seguidamente, se aborda cómo editar y crear preguntas dentro del examen. Cada pregunta se encuentra en un rectángulo separado y se pueden agregar preguntas de diferentes tipos, como respuesta corta o opción múltiple. Se describe cómo hacer que las preguntas sean obligatorias y cómo establecer la clave de respuesta para cada una. Además, se muestra cómo agregar imágenes y videos a las preguntas para hacer el examen más ilustrativo y atractivo.
🖼️ Incorporación de imágenes y secciones en el examen
Este párrafo se enfoca en la adición de imágenes al examen para mejorar la calidad visual y la comprensión de las preguntas. Se explica cómo importar imágenes desde Google Drive y cómo moverlas dentro del formulario para ajustar el diseño. También se menciona la opción de agregar secciones para dividir el examen en múltiples páginas, lo que permite una mejor organización y navegación.
🔄 Envío y compartición del examen
Miguel demuestra cómo enviar y compartir el examen una vez creado. Explica que Google Forms no tiene un botón de guardar, ya que todo se guarda automáticamente. Seguidamente, se muestra cómo personalizar el mensaje de envío, crear un enlace corto para compartir el examen y cómo incrustar el formulario en una página web. Además, se aborda la forma de llenar el examen desde la perspectiva de un estudiante.
📊 Calificación y publicación de resultados
Por último, se discute cómo calificar y publicar los resultados del examen en Google Forms. Se destaca la importancia de recopilar direcciones de correo electrónico para poder enviar los resultados a los estudiantes. Se explica cómo asignar puntajes a las preguntas y publicar los puntajes una vez que se han ingresado. Además, se menciona la opción de exportar los resultados a un archivo de hoja de cálculo de Google para un análisis más detallado.
📧 Envío de resultados y estadísticas del examen
El vídeo concluye con la demostración de cómo enviar los resultados del examen a los participantes por correo electrónico y cómo acceder a las estadísticas generales del examen. Se resalta la importancia de la recopilación de correos electrónicos desde el principio para facilitar este proceso. Además, se ofrece la opción de publicar los puntajes y se muestra cómo los estudiantes pueden recibir sus resultados individuales.
Mindmap
Keywords
💡Google Forms
💡Examen
💡Personalización de tema
💡Vista previa
💡Configuración
💡Puntuación
💡Publicación de resultados
💡Secciones
💡
💡Envío del examen
💡Análisis de resultados
💡Recopilación de direcciones de correo electrónico
Highlights
Aprender a crear un examen con Google Forms de manera fácil y eficiente
Agregar puntuación a las preguntas del examen y habilitar la evaluación automática
Personalizar el tema del examen con imágenes de cabecera y colores de fondo
Previsualizar el examen para ver cómo será la presentación final
Configurar el examen para requerir correos electrónicos y autenticación de Google
Establecer que los respondentes no puedan editar las respuestas
Mostrar u ocultar la barra de progreso en el examen
Randomizar el orden de las preguntas para evitar copias
Configurar un mensaje de confirmación personalizado después de completar el examen
Eliminar la opción de que los respondentes vean sus respuestas incorrectas
Eliminar la opción de publicar calificaciones para evitar filtraciones
Crear preguntas de respuesta corta, opción múltiple y otros tipos
Establecer la respuesta clave para cada pregunta y asignarle un puntaje
Agregar imágenes a las preguntas para una mejor comprensión
Insertar videos en el examen y hacer que las respuestas dependan de ellos
Dividir el examen en secciones para una mejor organización
Enviar el examen a través de correo electrónico o compartir el enlace
Publicar los resultados del examen y enviar los resultados por correo electrónico a los participantes
Ver estadísticas detalladas de las respuestas de cada pregunta
Exportar los resultados al Excel para un análisis más profundo
Transcripts
Welcome to this new video, I am Miguel Vela from your channel El Tío Tech and today we are going to learn how to create an exam with
Google forms . today
we are going to do
the exams that send surveys or ask questions either to your students
or to collect all kinds of information well but in a very easy and efficient way we are going
to start with this once and for all look today let's go to do an exam I
previously made a video where we ask questions but without punctuation now we are going to add punctuation in
the description of this video I leave you the link where we also talk in detail about how
to do these questions well now we are going to make an exam as we agree We are going to enter Google form I
am going to open a new tab here and I am going to put google.com slash driver drive
we are not going to enter Google drive that is written drive we press enter and we are going to have
this little screen we are not going to go to the upper right part where it says go to drive here or click and
now I am going to close the rest of the windows they do not work for me and to access the google forms
we are going to give a click where it says the new one we are going to click here and look here it says
google forms we are going to click here and look now if we are going to have the first presentation to
take our exam I want you to observe let's go first in an orderly way where it says form
without a title here we are going to put the main title that will appear in the header of every exam
I could put the uncle text exam for example we are not going to put a description here for example
solve this exam in less than for example I don't know not ten minutes or any description
actually I'm not just filling in well now yes we already have we already have the title and the
description I want you to observe first before putting the questions and the correct answers to
the upper right hand look at the upper right hand we have three little buttons let's go first with
the customize theme let's click here look and we can choose any image as a header
here and look these theme options are very basic actually and very easy to intuit
no let's go here where it says choose an image one click look you can choose any image to
make it look prettier the test don't look at work school food here there is a series there are
a series of categories you can choose any or you can also upload look you can upload
one image directly from the computer or put the photos that they have in the cloud, that is, in
their Google drive now we are going to go to anyone, to see what it can be I am going to put those notebooks
for example gay looking I select or the one below the one below come this little coffee I select it
and I click on insert a click I wait a few seconds and look it appears below
we have some theme colors for example you can i Enter colors the color is the color the color
you want I'm going to choose I'm going to choose this one with which it is normally look and here if you
want you can also change this one that says background color we are going to give it more black look
more eyes darker I think that there it is in basic look here in font style you
can choose any other font let's see there are four fonts that google form offers us I'm going to
put the basic one it says basic click here to see the selection and look at these these are all the
options that says customize theme that we have here we already saw in a few seconds no
now we go with the second little button that says preview everything you do here everything
you do here you can see it in preview here we go to give a click and look like
this it is going to be this is the presentation that is going to reach the student the student the respondent who
is going to answer no every time you click here in preview a new window will pop up Tanita
about how your exam is going ok in google for it doesn't have it doesn't have the save button everything you
do will be saved automatically so forget about the save button well I'm going to
close this and now if you look now yes let 's go to the most important thing here where it says configuration I am going
to click here look we already had the first button which is customize theme we see
preview now we are going to configuration this is the most important button so that you can change
from questions to questions with punctuation well look here in general here in general we have the first
option if I click here which is to collect e-mail addresses it will skip me
look at a form that requires an e-mail we are going to try it so you can see I am going to
hit save look now I got a question here look if I give it a preview and it already demands
me look it demands me here to put an email ok every time you put a question it will always be
well separated by these blocks it's white ok these rectangles are round with rounded edges
every time you ask a question it will be individual that is that white rectangle is a
question this white rectangle below is also another question we are going
to continue with this we are going to go to configuration with click here and look at this is to collect
email addresses what we are observing here nothing else unless now it requires an email well but if
you like it, do not put it there is no problem do not put it and then here it says it requires to log in
if you give it one click look the respondents must log in to google ok that is this way
you can control that only one person in a computer with an email performs or
solves an exam well that is the most advisable limit to one to one answer I them I recommend
that they start so that they are forced to log in with a gmail email, not in
this way you can control that a single person does not take the same exam many times well it is
recommended look here then it says the respondents can edit no do not activate it I do not recommend
and see the summary graphs text answers I do not recommend that you activate this option we are going
to go to the presentation the presentation and see if you like you can put the progress bar It 's a
little bar, look, let's hit save, let's see it, and the progress bar is this green
that we're looking at, this little green, that helps you or tells you how much you're filling or how much
you're advancing in the exam or when the bar is complete, it means What's up there?
The exam is over; Well, that's just its function, we're going to click again on settings, we're in
presentations, and I'm going to remove the show progress bar, if you like, you can put the
random questions so that some of them come out on top, they don't get messy, or what's recommended, I also tell you.
do not activate it so that the order that you are choosing is maintained confirmation message we are going to
put here thank you for taking the exam and now yes now we are going to look at
what matters most to us no the score is here put questionnaires it's a click look
here it says convert into a questionnaire assign scores to the questions and enable
automatic evaluation here enable this option so that they can put a score and they can say
which answer is correct no and then look at that it says to publish grades right
after each delivery I recommend that you do not activate this option because because they can take
a screenshot and that screenshot they will send to you s other colleagues and they will know what
the correct answers are well after that the respondent can see look
at questions answered incorrectly and I recommend that you deactivate all these options so that
what I am telling you does not happen, no, that is, do not take a screenshot and send it to your other colleagues you
could reactivate this one only the one that says questions answered incorrectly but
better leave it there and that would be all look this way with this configuration you will already have a
score for your google form for not posting scores later after the
manual review we already know and here they deactivate everything we hit save and now yes just now
yes just now we can already create our exam no but look we are going to remove that
holgate email we are going to remove that it was here at the beginning comes compilation collect collect
email address we are going to remove it I remove it I give it to save well now yes look I want you to
understand send something each as I had already told you it's a moment each rectangle is a question each
rectangle is a question if I click on this rectangle then I can access to
edit it well I can access to edit it let's put it first that interests us don't name the
name and surname for the same name and surname come here here look here we are going to click and here
look where it says short answer where it is displayed we click and here we have all
the questions you can ask look we have the first one that says short answer short answer
it's just a line so you can see it we're going to click here and look below where
it says mandatory because it's mandatory that you put your name otherwise we won't know who it is we're going
to activate it well we activate it we're going to test how it's developing We give you
a preview of our exam by clicking here, look, and now if you ask me to give my first and last name, no, and we already have
the name, we're going to put it, we're going to ask how many questions three just for this example
only three questions now yes thousand if you want to add another question we give it to change in here
there is a bar that never disappears the more to add question to import questions to
put texts to put images to put videos and to add sections what interests me most is
to put another question for now well we are going to click here add question look and
another box will appear automatically down here that box if I click above
it is edited look at the one above ok first ask if I click on the second question
obviously the question is edited what are you selecting for example I could buy here the synonym
synonym of heritage is for example we are going to add our questions here we have a
series of options we click there are a series of options but this one that says several options
only allows you to select one this is the radio button the little round one that we are observing we are
going to click on Here and look here, little job asks me for the first option we are going to
write the first option we are going to put ball enter the second option we are going to put divorce
the third option we are going to put a couple between happy ones don't be happy and we are going to put parents
not now if a click outside you don't need to save don't forget now what we need
is to put the key answer of the answers we click here we click here and we are going to
select which is the synonym of marriage we are going to put wedding look we click and
the correct answer will be marked with a citation not how many points it is worth here you have to know
how many points the total answers will reach not assuming that there are 10 answers here in peru
for example the maximum mark is 20 so if there are 10 answers you should put two points do not
look I'm going to put it to see I'm going to put 5 ok to formulate four questions and the
maximum mark that is 20 there we have it 5 already we give it done we give it here a click done and
ah now yes we are going to put another question here another question in the more we are going to click and the second
question we are going to put for example what word is spelled incorrectly that there are you
already put the question mark that you open or we are going to put here for example all viola
let's put raúl let's put daniel and let's put here for example all good now yes
look in my case I have one more option which is option 5 I'm going to delete it here in x
if you want to delete an option we delete it after that look, don't forget to make it obligatory
so that yes or yes they have to respond well here we forget about that but we don't click a click and
we are also going to put a mandatory click here now we are going to click below
again here one click to edit that question one click and where it says answer key we are going to
click here and we are going to select well which word is spelled incorrectly and raúl because it is in
lower case it should start in capital we don't click here and we give it here done well now
we are going to see how our exam is going here preview we click and look it asks me for
a name you can select any and then we click send and then we click send
well let's go let's put the four questions first and then we'll solve the exam and
see how it turns out we're going to hit it again here in add question to add our third
question we're not going to put here let's see let's see I don't know look how much it is the result of I don't know 4x4
a fairly basic question simply to fill out our form here don't forget
to click on several options well let's put here for example to see 54 let's put
16 and let's put 8 well only 4 answers well now yes we are going to make it mandatory
we are going to see that it is mandatory and we are going to go again answer key we are going to
say that it is 16 no obviously now if we give it a fact we give it a fact and we go with our finally with
our last question we click here and we are going to put here I don't know what we could put
let's see let's see let's see let's see let's put another multiplication for example that when it is
the result of two by two not two by two well we are going to put here one two three four five or
only four gay pressing enter we create more options we give the x to see here again
in the x now the four options what we are going to do now is to put
the answer key again and the key the answer is going to be four no obviously we give it a fact we give it
a fact and what we can also add here are images look here if I click it says
add image we are going to add some images let's see let's see let's see from here same google drive I'm going to
select this one to see I'm going here also look at everyone I'm going to put images for you to see
so you can see I'm going to select this one to see the same if there is no problem we are going to select another
image in photos for example this im agen insert and as the last one we are going to see another image what
could it be we are going to see it is ok the same one no more now I already have look I already have
inserted my four images let's see now what happens with the images we do not give
a click on preview or a click and if we go down and down look how it is already more illustrated not with
its image then you can select any question and it will be selected not with its image
we are going to answer look we are going to answer this exam but before yes yes before I forget to be able to
we can also put look import questions that we are going to see later add text we are going to go a
text quickly so that they can see we click here look for example I want to add
a text up here I click on the question I click on the question I give the text here a click on the
tf here we are going to put for example the math exercises we are going to put right now if I
click on preview a click on preview and look where it is there is the text here look this is the
text that I just added and that is the only purpose of the gay text for you to put text and
each text is in its block it is independent and you can also move it freely wherever you want
here there are four little dots look from ago a click on the four of the six dots sorry no let's see if there
are six dots and you can drag it look at the beginning if you want at the beginning here look you give it
a preview and the text appears up here you can send the same to the end look we are going
to send it here at the end that at the end until and we are going to see what happens we preview the text
now it is where at the end well here we have it well there is the text just for that I want the
text if you want to delete it they delete it if you want to duplicate, duplicate it, if it is going to come out exactly
the same, we are not going to eliminate it, and the same thing happens here if you want to duplicate, for example, these
questions, we are going to change to duplicate, here it is clear, look, I am going to move it here, duplicate it, Let 's
click and look, now I have two questions that are exactly the same, don't look here, you can
quickly change the text and avoid putting images, that's not what it's for, but we're going to eliminate
one, I don't want two, it's the same thing, actually we give it here in delete well after that we can also
put images the images as well as the text is exactly the same we are going to click here on
images look ask me from the front I am going to put to see an image an image what could it be for
example We are going to insert this ceviche, look, we wait a few seconds, I wait for home, it
goes up, and there it is, look, there we have the ceviche, not if we click on preview, one click, I want
you to observe, if we go down and down, the image appears at the end. image you can also
move it look I'm going to put it at the beginning you can put it wherever you want at the beginning at the end at the middle I don't
know where you want we're going to give it another preview and I want you to observe that the ceviche now suits
me appears above not as we are observing in the same way I am going to eliminate this well I am going to
eliminate it ok it eliminated it in the same way if we click on add video here in add
video and we can choose the me for example I am not going to choose any For example, we click on this video, we
select the video and I give it to select, I want you to observe, now look
, I have it here in the three dots, enter with a click to see, let's see, we can enlarge a little more,
look, we can enlarge a little more and we give it here where it says previous track and now
a video appears, suddenly you want people to respond according to what has been seen in the
video no for that it is very easy no and here you can also move it to the middle at the beginning at end wherever
you want from that there is no problem no this moves with its block the block is the
white color that we are observing you cannot put it anywhere there is no problem I am going to
delete I am going to delete and as last or option we have this that they say add section add
section is used for this exam to be seen on several pages for example I select here
they come selection here 4x4 how much is no and I go here where it says add section click on add
section and look it appears it appears to me after selecting from here from 4x4 section 2 appears to me
you can give it a title for example second part of the exam let's see it look let's see it until
here look until here it's the first part ok there's no problem if I give it next
look at it I am going to give the next eye it asks me to answer we are going to answer we are going to answer if
not it could not go to the next one that is why it is a mandatory field I give it next and look now I have
another sheet but it is the same exam well that is what the sections are for ok this highlights this
one that says to add section and you can create many sections because there you can suddenly put a
question per section and you can make a lot of pages we are not going to click here a cli c here and
we are going to give it combine with the previous one so that everything is a single sheet combine as previous in
the three dots here in the section three little dots combine with previous now again everything look
it is a sheet well let's now come back here look at our form the last part would be how
we can send how we can send this exam to our people who are going
to fill it out or they are going to solve it not really it is very simple look if we go here the
upper right part here says send let's click here in send look we click on
send and this form will skip well what we are going to do here look we have the
first option which is the little message the icon of the message and we can send it to change in writing
the email of all the people who they are going to fill out this form the message home also look
subject put a subject and here put the message or the description that is going to arrive you can not also
add collaborators and in that way It was going and it will reach your email well after that
here we also have another option in the center look at this icon we are going to click this is
the most used we are not going to give where to shorten the URL so that the link is more little is
English, it copies and they send it to all the people who want to take this exam, not to their students, this
is the classic way, do not send a link, and here too, if you have a web page, look at it, you can
embed it, you can insert it in your web page to that everyone who enters fill out this
form not that simple do not forget with the link it is the classic way of sending it we are going to
try it for example we are going to try it we are going to give here right click copy and I am going to open look I
am going to open the Mozilla another browser and we are going to fill it we are going to fill it from here look we are going
to fill it from here but first look before I already have the link remember that in the upper part
there are the questions and there are the answers ok to which answers I do not have n i still do
n't have one yet but here are the questions yes no but look now that i'm going to solve this exam for
example i'm going to put louis miguel it's not synonymous with marriage we're going to make it fashionable what word
writer this is wrong it's going to put here I am going to confuse assuming that it is 4 and here we should not
confuse enough that it sounds good we give it to send look in the exam it is already solved and
we come here and now yes look I want you to observe in answers one appears what does that one mean
is that there is a person who has answered your survey or has answered your exam as you can
see look here he gives us some data they come here to the magazine we go in order here he says summary in
summary look here we have the distribution of the total score if we download questions in the
that is often failed look at these are two questions that have been answered wrongly here
we have a name we have a name and over here over here we have in the first question that you answered
well colo r green and those are the wrong ones they are not a bar graph don't forget don't forget
look let's go to questions to put the score look to put the score click
click on your question click and after that you you click where it says answer key and here you
put the score look at face scores 5 you leave it there in 5 we are going to go to the second
one you click on your second question you click you go to the answer key one click and the punctuation you
put here in this case 5 also not now yes let's go look eye you have to do it let's do it let
's go to the third question one click on your third question you go to the answer key answer key
and it puts you get your score that is the number 5 we give in fact we are going to go
here again a click on your peers in your question you go to the answer key again look
here you put the score 5 up here we were going to lower it and we give it where it says done well so far all
good the only thing we would need to add here so that you can send the note to the student is to put
the email that is obligatory here look it is not put but do not forget that you have to go look
at this in reality we had to do it at the beginning but for you to see look again configuration
we are going to go to configuration and where it says in general here it says collect collect email
addresses this configuration is needed look to be able to publish the grades manually
that configuration is needed to be able to publish the grades manually we hit save
look now mail and ourselves will appear We are going to answer it, we are going to
send, we are going to copy the link, look, I am going to copy it and I am going to solve it here with this
email that I have guided and I am going to put an email here, for example, I am going to put Luis Vela page@
gmail .com well I'm going to put the name Miguel Vela look at the synonym of marriage wedding what words
spelled incorrectly Raúl how much is 4 x 4 16 and how many results from d for two we are going to put
four that everything is correct don't look we are going to send it we are going to send it and now yes and that's it we already
have two answers we are going to come back here again look where you are creating your form and
we are going to go to answers now look at me they come out number 2 that means that now there are two
answers I click here for answers and look and I already get this option that says scores look it
says publish scores I only get 1 look let's see let's see only 1 comes out
because because the Another does not have Luis Miguel, he does not have email, that is, we have not embedded him, that is
, he did not have this option activated, which is the collection of email addresses, well, we are going to cancel and
then we give it here where it says look, there is my score and the score also appears 20 we don't
give you to publish score look here only one email appears so I only give
send emails and publish a click here now yes if I go to my email there has to
be l legacy the little message look let's see it here it is and look there it says punctuation published
we give a click and I want you to observe that here I get minute 20 of 20 if we click see let
's see look here are my answers I just marked no but eye there is no longer the send form
and in this way look in this way we can send to all our students according to what they
have answered no what they have answered sorry no if we are going to ask ourselves if we are going to ask ourselves
look here we can see the results per question look at two answers 5 and 5 here look raúl
has also answered well here also look here he was wrong here they have been wrong as you can
see 16 was right correct and 4 wrong no and here we also have how many arrested two by
two we have one correct and we have an incorrect one well individual well individual we already have
the questions that have been answered it's not if let's see we're going to try to fill it out we're going to try to fill it out
again how it is but how you can observe and he has already answered he tells me no that is because if he demands
an email well if we go here also to see if we can answer look here it also comes out
you have already answered no and that would practically be all do not forget here we have the statistics
in answers if you want to publish topics here where it says publish score and that's it if you want
to take it to Excel it has taken us to create spreadsheet they want to create a spreadsheet
you give it create and look it will create a Google spreadsheet with the entered data as
you can see look at this it does not have an email and that is why it is not appearing to me it is not
appearing here I was wondering summary look it does not appear to me look here punctuation
the email does not appear why but look here here if Luis Miguel appears no but here your score is missing
why because we did not activate this option at the beginning no I did it on purpose why the importance
of collecting email addresses so that they can do it If your grades arrive and apart
from that they have your score well in the statistics and that would practically be all if you have any
questions if you have any doubts you can comment on this same video to answer you not with me it
will be until here, do not forget to subscribe to the El Tío Tech channel and see you next time.
浏览更多相关视频
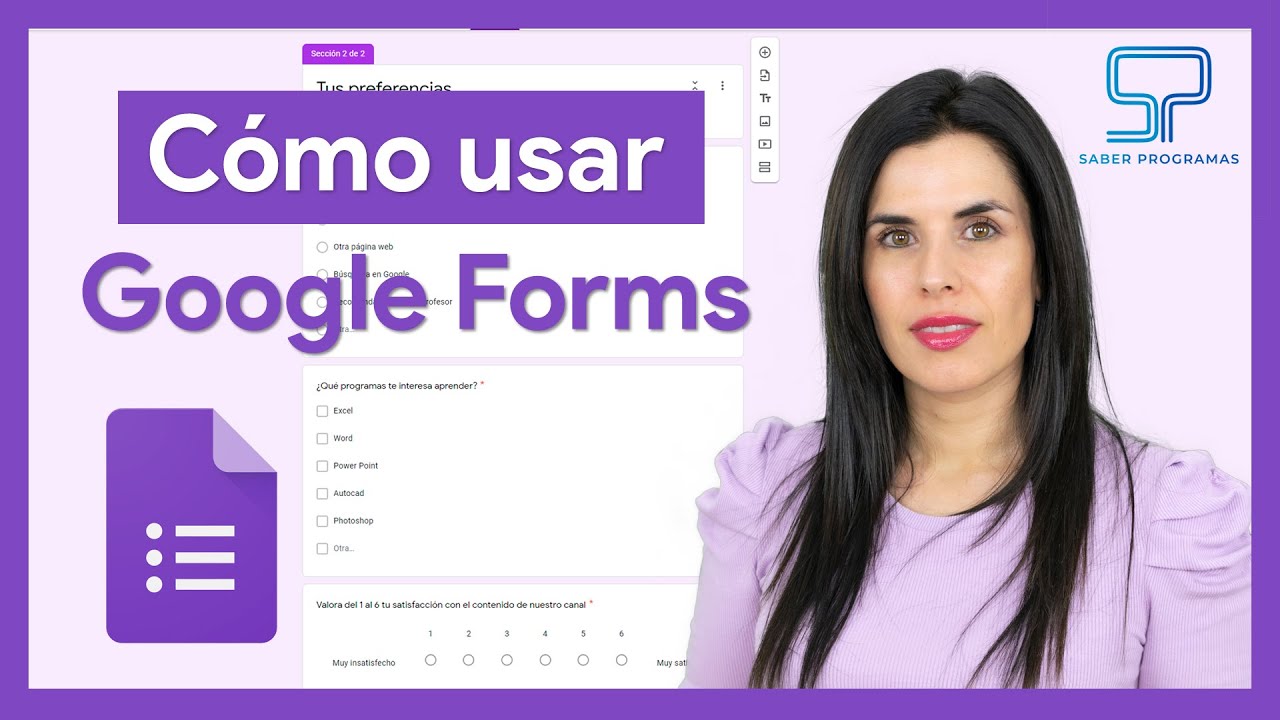
🟣 Cómo usar GOOGLE FORMS [ formularios paso a paso ] 📋
¿Como realizar una Base de Datos en Google Sheets? Base de datos en la nube Gratis
Aprende a Programar tu Primera Calculadora Básica Paso a Paso | Java | NetBeans
FormData en javascript - Obteniendo datos de un formulario - Como cuando y porque usarlo - JS
Función Racional - Ejercicios Nivel 2 - Gráficas
Como crear un Blog en Blogger GRATIS ✅ Paso a paso, fácil y BONITO 😊 🔥 Tutorial español 2022
5.0 / 5 (0 votes)