Computer Basics: Hardware
Summary
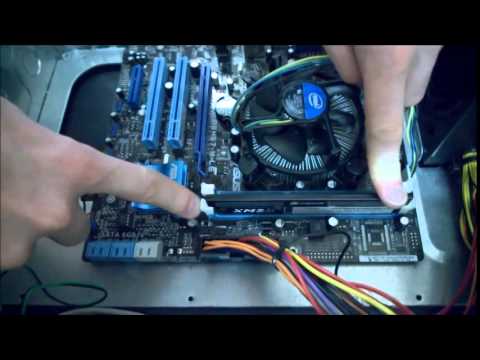
TLDRThis video script offers a comprehensive tutorial on disassembling and reassembling a standard PC. It guides viewers through the process of opening the computer case, removing components such as the power supply, hard drive, and CD ROM, and then taking apart the motherboard. The script meticulously explains the removal and reinstallation of each part, including the processor and memory. It also covers the reconnection of cables, the importance of alignment, and the correct seating of components to ensure the system functions properly once reassembled.
Takeaways
- 🛠️ To access the inside of a computer, lay it down, and remove the case by unscrewing thumb screws and sliding the back off.
- 🔌 The power supply is crucial as it provides power to the system board and components via connectors.
- 💻 The motherboard is the central board that connects all the computer components, including the processor, hard drive, and CD ROM.
- 🖥️ SATA cables are used to connect storage devices like hard drives and CD ROMs to the motherboard and can be detached by squeezing a release pin.
- 🔄 Before removing components, ensure all power cables are disconnected to avoid damage.
- 🔩 To remove the power supply, unscrew it from the back and slide it out, being careful not to lose any screws.
- 💾 Hard drives can be removed by sliding them out after removing the screws that hold them in place.
- 📀 The CD ROM drive is also removed by unscrewing and sliding it out from the front of the computer.
- 🔧 Removing the system board requires disconnecting all cables and components attached to it, including memory and PCI cards.
- 🔠 The motherboard has various ports and connectors for power, data, and peripherals, which need to be matched correctly when reconnecting.
Q & A
What are the steps to open the case of a standard PC?
-To open a standard PC case, locate the thumb screws on the back, unscrew them, slide the back panel off, and then lift it up to remove the case.
How do you disconnect the power supply from the motherboard?
-Disconnect the power supply by squeezing the pin on the power connectors and pulling them out of the motherboard.
What are the SATA cables used for in a computer?
-SATA cables are used to connect storage devices like hard drives and CD ROMs to the motherboard.
How do you remove the power supply unit from a computer?
-To remove the power supply unit, first, remove the four screws on the back with a Phillips screwdriver, then slide the power supply forward and lift it out.
What is the purpose of the processor fan and heatsink in a computer?
-The processor fan and heatsink are used to cool down the microprocessor, preventing overheating and ensuring the system runs smoothly.
How do you remove the hard drive from a computer?
-Remove the screws on either side of the hard drive, slide it forward, and then pull it out.
What is the correct way to remove a PCI card from a motherboard?
-To remove a PCI card, first, unscrew any screws holding it in place, then push down on the lever to release the card and pull it out.
Why is it important to match the notches when installing the processor?
-Matching the notches ensures that the processor is correctly aligned with the socket on the motherboard, preventing damage and ensuring proper function.
What is the purpose of thermal paste when installing a processor?
-Thermal paste is used between the processor and the heatsink to improve heat transfer, keeping the processor cool during operation.
How do you reconnect all the cables to the motherboard after a clean install?
-Reconnect the cables by matching the color-coded connectors to their corresponding ports on the motherboard, ensuring each cable is plugged in correctly and securely.
What is the role of the front panel connectors on a motherboard?
-The front panel connectors on a motherboard are used to connect the power button, USB ports, audio jacks, and other front-panel components to the system.
Outlines

此内容仅限付费用户访问。 请升级后访问。
立即升级Mindmap

此内容仅限付费用户访问。 请升级后访问。
立即升级Keywords

此内容仅限付费用户访问。 请升级后访问。
立即升级Highlights

此内容仅限付费用户访问。 请升级后访问。
立即升级Transcripts

此内容仅限付费用户访问。 请升级后访问。
立即升级浏览更多相关视频
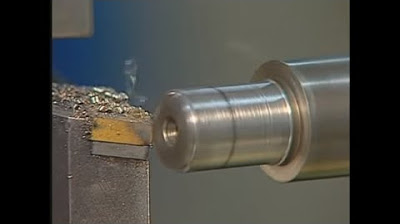
Telecurso 2000 Manutenção 17 Recuperação de elementos mecânicos
How to disassemble and reassemble a basic computer
ME ENGINES AIR STARTING VALVE O'HAUL PROCEDURES

Cara membongkar dan memasang transmisi manual 4 speed...#smkTamtamaKroya.

Industrial Maintenance 101: Electric Motor Disassembly/Reassembly
SERVIS CVT BEAT FI ESP LENGKAP, CARA MEMBERSIHKAN CVT MATIC.
5.0 / 5 (0 votes)
