Premiere Pro Tutorial for Beginners 2023 - Everything You NEED to KNOW! (UPDATED)

Vince Opra
9 Feb 202320:55

Summary

TLDRIn this tutorial, Vince introduces viewers to Adobe Premiere Pro, emphasizing the value of video editing skills for online success. He guides beginners through creating a project, importing media, and organizing clips. The video covers essential editing tools, adding effects, transitions, and text, as well as audio integration. Vince also discusses color grading and the use of LUTs for quick color adjustments. The tutorial concludes with exporting the final video, offering a comprehensive start-to-finish guide for aspiring editors.

Takeaways

  • 🎬 Learning video editing skills, particularly with Adobe Premiere Pro, can be a lucrative skill set for making money online.
  • πŸ’» The first step in using Premiere Pro is to create a new project and organize your files with folders for different types of media like b-roll, drone shots, VFX, and audio.
  • πŸ”„ Staying organized during the editing process is crucial as it's a habit that's hard to develop later on in the workflow.
  • πŸ“½ To import clips, you can either drag and drop them into specific folders or use the Source monitor to select specific parts of the clips to import.
  • πŸ›  Creating a new sequence in Premiere Pro is essential for editing, and you can customize the settings or choose from preset options.
  • πŸ–ΌοΈ Premiere Pro offers different workspaces tailored for various tasks like editing, coloring, and adding effects, which can be accessed and adjusted as needed.
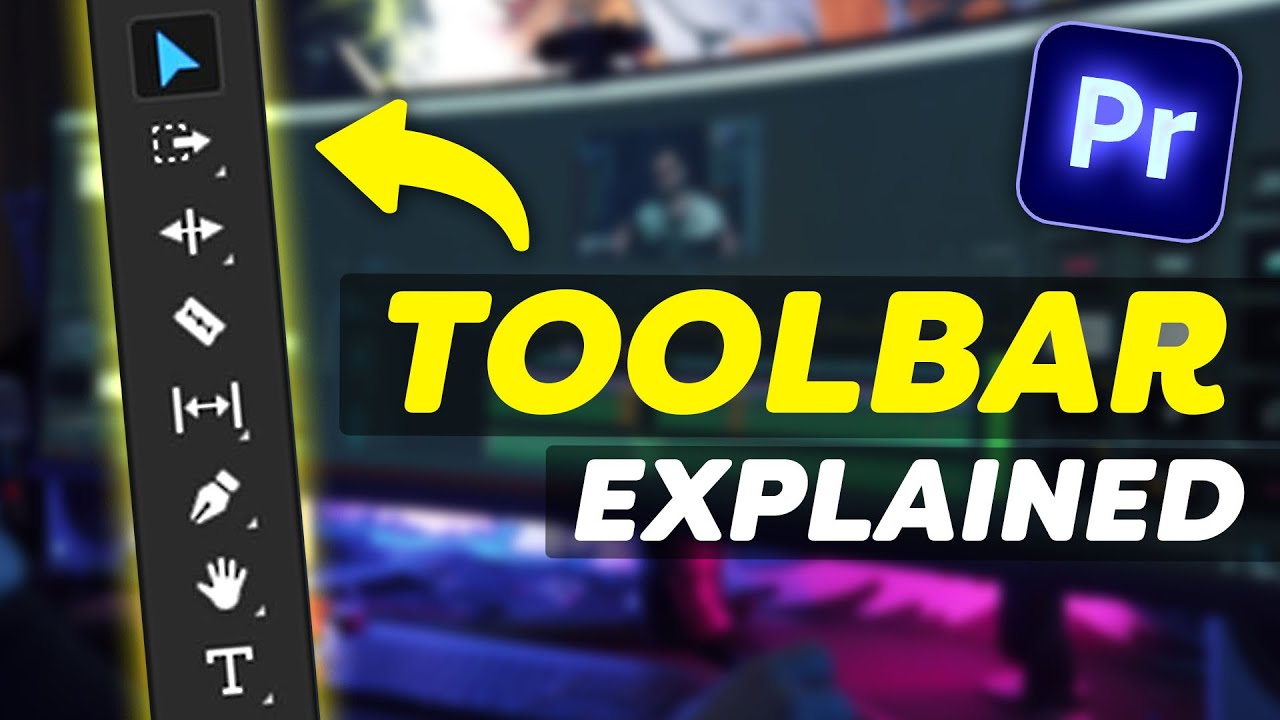
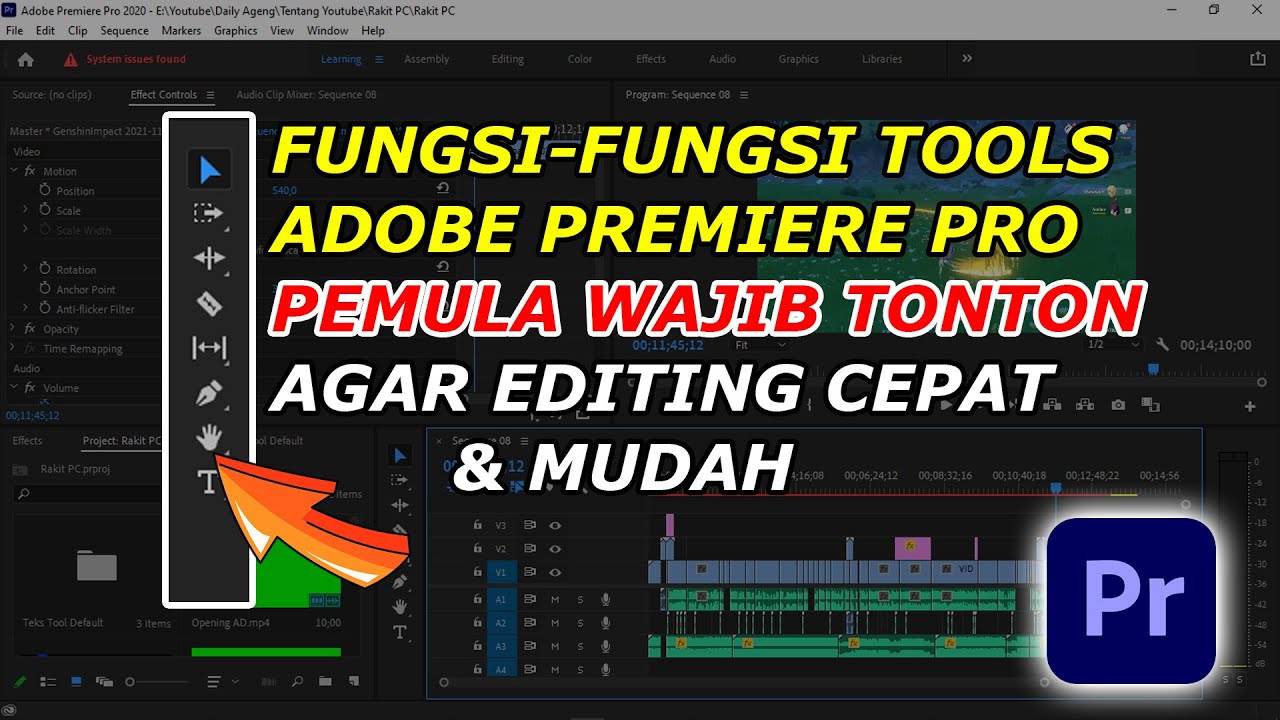
  • βœ‚οΈ The Razor tool is vital for making cuts in your video clips, and the selection tool is used for moving and adjusting settings of clips and other elements.
  • πŸ”„ Adjusting the speed of clips can be done through the speed/duration settings, allowing for slow motion or fast-forward effects.
  • 🎨 Effects and transitions can be added to clips through the Effects panel, with Premiere Pro providing a wide array of pre-installed options.
  • ✍️ Adding text to your video is straightforward with the Type tool, and text properties such as font, size, alignment, and shadow can be customized.
  • πŸ”Š Audio can be added to the timeline by dragging and dropping, and volume levels can be adjusted directly on the audio track or through effect controls.
  • 🌈 Color grading footage can be achieved through adjustment layers and the Lumetri Color tool, with the option to apply LUTs (Look-Up Tables) for quick color grading.
  • πŸ“š For an in-depth understanding of editing in Premiere Pro and Photoshop, there's a premium master class available that provides over 8 hours of step-by-step training.

Q & A

  • What skill set is considered valuable for making money online as mentioned in the script?

    -The script highlights video editing as an invaluable skill set for making money online.

  • What software is the speaker using to edit videos?

    -The speaker is using Adobe Premiere Pro to edit videos.

  • How does the speaker suggest organizing video and audio files in Premiere Pro?

    -The speaker recommends creating folders for different types of clips such as b-roll, drone shots, VFX, and audio to stay organized during the editing process.

  • What is the first step in creating a new project in Premiere Pro according to the script?

    -The first step is to click on 'create new project' and then name the project.

  • How can users import clips into their project in Premiere Pro?

    -Users can import clips by opening the folder containing the files, selecting them, and then dragging and dropping them into the desired folder within the project library.

  • What is a sequence in Premiere Pro and why is it important?

    -A sequence in Premiere Pro is the workspace where the actual editing of the video takes place. It is important because it allows for the organization and arrangement of clips and audio in the editing process.

  • What are workspaces in Premiere Pro and how can they benefit the editing process?

    -Workspaces in Premiere Pro are layout presets designed for different tasks such as editing, coloring, adding effects, audio editing, and graphics. They benefit the editing process by optimizing the software layout for specific tasks.

  • How can one adjust the speed of a clip in Premiere Pro?

    -To adjust the speed of a clip, one needs to select the clip, right-click on it, navigate to 'Speed/Duration', and then set the desired speed percentage.

  • What is the purpose of using an adjustment layer in color grading?

    -An adjustment layer is used in color grading to apply color changes to all clips beneath it in the timeline, allowing for a consistent look without having to adjust each clip individually.

  • How does the speaker suggest adding text to a video in Premiere Pro?

    -The speaker suggests using the 'Type Tool' in the 'Essential Graphics' workspace to add text to a video, allowing for adjustments in alignment, font, size, boldness, tracking, and even adding shadows.

  • What is the role of the 'Razor Tool' in video editing?

    -The 'Razor Tool' is used for making cuts in the video clips, allowing for the separation of clips into different parts or the removal of unwanted sections.

  • How can transitions be applied between clips in Premiere Pro?

    -Transitions can be applied by selecting a transition effect from the 'Video Transitions' panel, and then dragging and dropping it between the clips on the timeline.

  • What is the purpose of the 'Epidemic Sound' service mentioned in the script?

    -Epidemic Sound is a service that provides a subscription-based access to a large library of songs and sound effects for use in video projects, offering an alternative to individual licensing fees.

  • How can one export a video sequence from Premiere Pro?

    -To export a video sequence, one must select the entire sequence by setting in and out points, name the file, choose the location, select the export settings, ensure the format and range are set to 'Source in and out', and then click 'Export'.

Outlines

00:00

πŸ“š Introduction to Video Editing with Adobe Premiere Pro

The speaker, Vince, introduces the video as a tutorial for beginners on using Adobe Premiere Pro in 2023. He shares his personal experience of turning video editing skills into a successful online business. The video aims to simplify the learning process of the software, starting with creating a new project, organizing media, and importing videos and audios into the project. Vince emphasizes the importance of staying organized during the editing process and demonstrates how to create folders for different types of media within the project library.

05:00

πŸ–₯️ Premiere Pro Interface and Basic Editing Techniques

This section provides an overview of the Premiere Pro interface, highlighting the sequence, project library, playback area, and effect controls as essential components. The speaker explains how to import clips and audio onto the timeline, either by dragging and dropping or using the source monitor for more precise selection. Basic editing tools such as the selection tool, razor tool, and speed/duration adjustments are introduced, along with techniques like ripple delete for removing unwanted parts of clips.

10:00

🎨 Adding Effects, Transitions, and Text to Your Video

The speaker demonstrates how to enhance videos by adding effects and transitions. He shows how to apply transitions like cross-dissolve between clips and how to adjust their duration. Effects such as directional blur are added to clips via the effects panel, with adjustments made in the effect controls. The tutorial also covers adding text overlays to clips using the Essential Graphics panel, allowing customization of font, size, alignment, and shadow. Audio effects and transitions are also briefly mentioned.

15:02

πŸ”Š Incorporating Audio and Sponsor Mention

The fourth paragraph focuses on adding audio to video projects, including background music and sound effects. The process of adjusting volume levels and demonstrating how to use audio tracks is explained. The speaker introduces Epidemic Sound as a sponsor, highlighting its subscription service for music and sound effects, and mentions the benefits of using their platform, such as accessing a large library and the ability to customize music with stem downloads.

20:04

🌈 Color Grading and Finalizing the Video Edit

The speaker discusses color grading as a way to enhance footage, using adjustment layers and Lumetri Color to make changes that affect all clips under the layer. He mentions the use of LUTs (Look Up Tables) as a quick way to apply color grades and adjust their intensity. The paragraph concludes with a brief example edit combining the techniques discussed and an invitation to export the final video, with a mention of a more in-depth video on exporting available on the speaker's channel.

πŸ“˜ Conclusion and Promotion of Premium Masterclass

In the final paragraph, the speaker summarizes the video content and invites viewers to learn more through a premium masterclass that covers advanced techniques in Premiere Pro and Photoshop. The masterclass is promoted as an extensive training resource with over 8 hours of video content. The speaker expresses hope for a positive reception of the tutorial and teases the next video in the series.

Mindmap

Keywords

πŸ’‘Video Editing

Video editing is the process of assembling and modifying video shots to create a coherent sequence. It is central to the video's theme as the script discusses the value of this skill set in the digital economy. The script mentions that the speaker's proficiency in video editing led to a multi-six-figure online business, illustrating the impact of video editing skills on career success.

πŸ’‘Adobe Premiere Pro

Adobe Premiere Pro is a professional video editing software used for creating and editing high-quality video content. In the script, it is the primary tool discussed for learning video editing in 2023, highlighting its importance in the video's tutorial on editing workflows and techniques.

πŸ’‘Project

In the context of video editing, a 'project' refers to a collection of media files and sequences that are being edited together. The script instructs viewers to create a new project in Premiere Pro, such as a 'Slovakia trip' project, to organize and start the editing process.

πŸ’‘Importing

Importing in video editing means bringing in video and audio files into the editing software. The script emphasizes the importance of importing media to the project library and organizing them into folders like 'b-roll', 'drone shots', 'VFX', and 'audio' for an efficient editing workflow.

πŸ’‘Sequence

A sequence in Premiere Pro is a timeline where the actual editing of video clips takes place. The script describes creating a new sequence with specific settings and explains that it is the workspace for editing, illustrating the fundamental role of sequences in the editing process.

πŸ’‘Workspaces

Workspaces in Premiere Pro refer to customizable layouts of the software's panels and tools, optimized for different tasks such as editing, coloring, or adding effects. The script mentions accessing workspaces to tailor the interface for specific editing tasks, showcasing the software's flexibility.

πŸ’‘Effects and Transitions

Effects are visual modifications applied to video clips, while transitions are used to bridge two clips together smoothly. The script provides examples of applying a 'dissolve' transition and a 'directional blur' effect, demonstrating how these elements enhance the video's aesthetic and storytelling.

πŸ’‘Text and Graphics

Adding text and graphics to a video involves creating titles, captions, or other visual elements. The script describes using the 'Type Tool' and 'Essential Graphics' to add and style text like 'Mountain Villa' over a drone shot, showing how text can provide context or enhance the visual appeal of a video.

πŸ’‘Audio

Audio in video editing refers to the sound tracks and effects that accompany the visual content. The script discusses importing audio files, adjusting volume levels, and using services like Epidemic Sound for music and sound effects, emphasizing the importance of audio in creating a complete multimedia experience.

πŸ’‘Color Grading

Color grading is the process of adjusting and enhancing the colors of a video to create a specific look or mood. The script briefly touches on using Lumetri Color to adjust an adjustment layer's color settings, affecting all clips beneath it, to demonstrate how color grading can transform the visual style of a video.

πŸ’‘Exporting

Exporting is the final step in video editing where the edited sequence is rendered into a video file. The script details the process of setting in and out points, choosing export settings, and initiating the export, which is crucial for sharing the finished video online or elsewhere.

Highlights

Video editing skills are increasingly valuable and can be monetized online.

Adobe Premiere Pro is a powerful tool for beginners to start making money online.

Staying organized is crucial in the editing process for a professional workflow.

Creating folders in the project library helps in managing different types of clips and audios.

Importing videos and audios into the project is the first step in the editing process.

Creating a new sequence is essential for editing with customizable settings.

Workspaces in Premiere Pro allow for different layouts tailored to specific editing tasks.

Importing clips directly to the timeline is a straightforward process.

Using the 'I' and 'O' keys allows for precise selection and import of clip segments.

The select tool and razor tool are fundamental for basic editing tasks.

Speeding up or slowing down clips can be achieved through the speed/duration settings.

Effects and transitions can be added to enhance the storytelling in a video.

Adding text to videos is simple with the type tool and Essential Graphics.

Adjusting the volume of audio tracks can be done directly on the timeline.

Epidemic Sound offers a subscription service for music and sound effects.

Using adjustment layers and Lumetri Color allows for color grading of footage.

LUTs or Look Up Tables can quickly add color grades to enhance the visual appeal.

Exporting a video involves setting in and out points and choosing the right format and settings.

An exclusive premium masterclass is available for advanced learning in Premiere Pro and Photoshop.

Transcripts

play00:00

I think we can all agree that at this

play00:02

point as we are entering the crater

play00:04

economy more and more the skill set of

play00:07

video editing is insanely valuable this

play00:10

is actually the thing that got me first

play00:12

started making some money online a few

play00:14

years back and I was actually able to

play00:16

turn this skill set into a multi-six

play00:19

figure online business later on so if

play00:21

you want to learn how to use Adobe

play00:23

Premiere Pro in 2023 as a complete

play00:26

beginner then this video is for you I

play00:29

know how overwhelming it can be to start

play00:31

learning a new editing software so I

play00:33

hope this video is going to help my name

play00:35

is Vince and let's get right into it so

play00:37

when you first open up Premiere Pro the

play00:40

first thing you want to do is you want

play00:42

to create a new project so to do that

play00:44

click here create new project and you

play00:46

want to name your project so I'm going

play00:49

to name this Slovakia trip because I

play00:51

want to edit a video from our Slovakian

play00:54

trip a few weeks ago next up you want to

play00:56

select the project location I'm going to

play00:59

leave it as the default that Premiere

play01:01

Pro gives me after this I'm going to

play01:04

click here on Create and create my new

play01:06

project so after that this is kind of

play01:08

what you are going to be greeted with

play01:10

when you open up Premiere Pro and the

play01:13

next thing you want to do is you want to

play01:14

start importing your videos and audios

play01:18

to your project staying organized in

play01:20

your editing process is crucial because

play01:22

it's a habit that is really hard to get

play01:24

into once you didn't you know learn it

play01:27

at the beginning so I like to create

play01:29

some folders in the beginning here in my

play01:33

project Library so I'm going to first

play01:36

create one for b-roll I'm going to

play01:39

create one for my drone shots I'm going

play01:43

to create one for VFX

play01:47

oops and I'm going to create one for

play01:50

audio

play01:52

now next up the way I'm going to import

play01:55

the clips is this you just want to open

play01:58

up the folder that has all your files

play02:02

and audios and after that you just want

play02:05

to go ahead select them right I'm first

play02:08

going to select the stuff that is from

play02:10

my main camera that is the b-roll and

play02:12

I'm just going to drag and drop it into

play02:14

that folder after that I'm going to

play02:16

select my drone Clips I'm going to drag

play02:18

and drop that into this folder after

play02:21

that I'm going to select my overlays

play02:23

that I want to use I'm going to drag and

play02:25

drop that into the VFX folder after that

play02:28

I'm going to drag and drop my audios and

play02:30

uh go and put it into the audio folder

play02:33

so now you can see I have these four

play02:34

folders with all the clips and audios

play02:37

that I want to use in my video next up

play02:39

we want to create a new sequence the

play02:42

sequence is going to be what you can

play02:43

actually edit inside of and inside of

play02:46

one project you can even have multiple

play02:48

sequences if you want to so to do that

play02:51

I'm going to right click here click on

play02:53

new item click on create new sequence

play02:57

right and here you can see I have all

play02:59

these presets I can already choose from

play03:01

or I can also come here to settings and

play03:04

set my exact settings that I want to use

play03:07

so in this case I want to actually use

play03:09

25 frames per second I want to use 1920

play03:12

by 1080 which is full HD resolution and

play03:15

I'm going to leave the rest of these

play03:17

settings on how they are you can also

play03:19

name your sequence right here if you

play03:21

want to

play03:22

then as you can see now this timeline

play03:25

popped up here as well now don't worry

play03:28

if Premiere Pro doesn't look exactly

play03:30

like this for you because I'm going to

play03:32

show you right now how you can get it to

play03:35

look exactly like what I'm showing you

play03:37

in this video premiere pro has these

play03:39

things called workspaces which are

play03:41

basically different kind of software

play03:43

layout presets for different kind of

play03:45

tasks that you are going to be doing

play03:47

inside of Premiere Pro so if you want to

play03:50

access your workspaces come here to the

play03:53

top right corner

play03:54

click on workspaces and you can see they

play03:57

have separate kind of layouts for

play04:00

editing for coloring for adding effects

play04:03

to your video for editing audio for

play04:06

adding like graphics and captions to

play04:08

your video so these are all very

play04:10

beneficial because you know if I'm for

play04:13

example wanting to just edit my sequence

play04:15

now I can click on the editing uh you

play04:18

know workspace and then it's going to be

play04:20

already optimized for that exact kind of

play04:22

task so I'm going to stay inside of the

play04:25

editing workspace for now and next up we

play04:28

want to start importing some videos to

play04:31

our timeline and some audios to our

play04:33

timeline so in terms of importing to

play04:35

your timeline there are basically two

play04:36

routes you can go the first one is super

play04:39

easy you just basically come here and

play04:42

select the clip that you want to put on

play04:43

your timeline and then you go ahead and

play04:45

drag and drop it on your video track

play04:48

right so I just drag and dropped it into

play04:50

video track one and you can see now if I

play04:53

press play it it is here in my sequence

play04:57

now the other way to do it is by double

play05:00

clicking here on the certain clip you

play05:01

want to import like that and then here

play05:05

in your Source monitor you are going to

play05:07

be able to kind of like skim through it

play05:10

before you would even import it right

play05:12

and if I only want to import a certain

play05:15

part of this video or audio onto my

play05:18

timeline I can come to the part where I

play05:20

want the clip to begin for example here

play05:22

press I on my keyboard and then I'm

play05:25

going to scroll to where I want it to

play05:26

end for example here I'm going to press

play05:29

o on my keyboard I can click here and

play05:32

drag and drop it onto my timeline and

play05:35

now instead of importing the whole you

play05:38

know long clip to my timeline I just

play05:40

imported that exact part that I want to

play05:42

have in there now next up let's kind of

play05:45

go over some of the main parts of

play05:47

Premiere Pro so you get a little bit

play05:49

more familiar with the software

play05:51

interface first up you have your

play05:52

sequence right here this is going to be

play05:55

where you are doing the majority of your

play05:57

editing and you can zoom in and out on

play06:00

this sequence by either dragging this

play06:02

little thing here or even using your

play06:04

touchpad or even pressing command or

play06:08

control if you are on Windows and the

play06:09

plus and minus keys on your keyboard

play06:11

this is where you are able to you know

play06:13

drag Clips you know edit them add

play06:15

different text and so on so do the

play06:18

majority of your editing work next up

play06:20

right next to it you have some of the

play06:21

most essential tools that you are going

play06:24

to be able to use again for editing then

play06:26

here on the left you will have you know

play06:28

your project Library your effects info

play06:31

different libraries and so on obviously

play06:34

this can all depend in terms of where

play06:36

they are based on the exact workspace

play06:39

you are in which like I said you can

play06:41

access by coming here to the top and

play06:43

then selecting the certain workspace the

play06:46

next super important part is your

play06:48

playback area which is this so if I

play06:51

press spacebar on my keyboard board I

play06:55

can start the playback and if I stop you

play06:58

know the playback I can just press

play07:00

spacebar again you can also scroll

play07:02

scroll through that here you can select

play07:05

what playback resolution you want to

play07:06

have and so on and the next part which

play07:08

you're going to be using a lot is effect

play07:10

controls right here which is where

play07:12

you're going to be able to set some of

play07:14

the most important parameters of your

play07:16

clips and also adjust your effects that

play07:19

you add on to it later on and so on all

play07:22

right now let's do a little bit of an

play07:25

overview of some of the most essential

play07:26

tools that you are going to use so

play07:28

number one is the select tool which you

play07:31

can access by coming here or pressing a

play07:34

on your keyboard in this case you can

play07:36

also set custom

play07:37

shortcuts if you want for every single

play07:40

thing by coming up here to the top

play07:41

clicking on keyboard shortcuts and

play07:44

setting it up for yourself right here

play07:46

alright so with this you can move things

play07:49

around you can go and click on it change

play07:52

different settings so this is kind of of

play07:54

like your regular mouse cursor on your

play07:58

computer next up this is also a super

play08:00

often used tool if I make this video

play08:03

track one a bit a bit bigger by dragging

play08:06

it out if I press in this case C on my

play08:10

keyboard or uh I go come here to the

play08:13

Razer tool this is also something you

play08:15

are going to use a lot so with this you

play08:19

can basically make cuts to your videos

play08:21

so if I click here you can see it cut it

play08:24

into two separate parts right so for

play08:27

example if I want to cut out this middle

play08:29

part here I can just come back to my

play08:32

selection tool click on that delete it

play08:35

if I want to get rid of this dark space

play08:38

that it left here this blank space I can

play08:41

select that and click delete again and

play08:43

you can see I was able to cut out that

play08:45

middle part from my clip just like that

play08:47

if you want to you uh you know get rid

play08:49

of this part for example and not have to

play08:51

you know manually come here and then

play08:53

delete this blank space but instead just

play08:56

delete this clip that is between these

play08:58

two other Clips with just one click then

play09:01

you can select that press shift and

play09:03

delete and then you are doing what is

play09:05

called a ripple delete which basically

play09:07

gets rid of the space in between at the

play09:10

same time all right next up I want to

play09:12

show you how to speed up or slow down

play09:14

your different clips so to do that you

play09:17

want to select a certain clip you want

play09:19

to change the you know speed settings

play09:21

off then right click on it and then you

play09:24

want to come here all the way down to

play09:26

speed slash duration and you are going

play09:28

to be able to set your speed percentage

play09:31

here so for example if I want to slow

play09:33

down this clip right I can put 50 here

play09:36

if you want to you can also reverse your

play09:39

clip here by the way but uh yeah let's

play09:41

say I just want 50 now I'm gonna press

play09:43

OK and then you can see it's now in nice

play09:47

slow motion and the same thing goes for

play09:50

speeding up your clip you just come here

play09:52

to speed slash duration and make it

play09:55

let's say 300 and you can see now it's

play09:57

you know super fast all right next up I

play10:00

want to show you how to add some effects

play10:02

and transitions to your different clips

play10:04

on your timeline so to do that you want

play10:06

to come here to the effects tab or if

play10:09

you go to the uh you know effects

play10:11

workspace that works as well I'm gonna

play10:13

do that to show you an example and then

play10:15

you can see here now I have the effects

play10:16

panel and if I want to create a

play10:19

transition between these two separate

play10:21

clips for example then I can just go

play10:24

ahead come here to effects and come here

play10:27

to video Transitions and you can see

play10:29

Premiere Pro already comes with a ton of

play10:31

different transitions pre-installed for

play10:33

you so I'm going to use the dissolve one

play10:35

for example and now I can add the cross

play10:39

dissolve one if I want to by dragging

play10:41

and dropping it between these two clips

play10:43

and now if I play it back you can see

play10:46

it's smoothly kind of transitions from

play10:48

one clip to another if you want to

play10:51

change the length of your transition you

play10:53

can zoom in and select the transition

play10:55

and drag it just like this to make it

play10:58

shorter or longer or you can also select

play11:01

it come here to the effect controls and

play11:04

set the duration of it here and same

play11:07

goes for all other kind of transitions

play11:09

as well now if you don't want to add the

play11:11

transition but you want to add an effect

play11:13

you know you are also in the right space

play11:15

just come here to video effects and you

play11:19

know select the effect you want for

play11:20

example I want to add a blur to this so

play11:23

I'm going to add this directional blur

play11:25

let's say onto this clip and then here

play11:27

you can see nothing really changed yet

play11:29

and that is because you need to come

play11:31

here select the clip come here to the

play11:33

effect controls and you can see I have

play11:35

my directional blur right here and if I

play11:38

change up some of the settings of that

play11:40

here I can probably make it blurry just

play11:44

like that you can see that is it if I

play11:48

want to delete this you know effect from

play11:50

my clip I can always just come here to

play11:52

effect controls select it and then press

play11:55

delete on my keyboard and the same goes

play11:57

for also audio effects which you can

play12:00

also find here and audio transitions as

play12:03

well all right now next up I want to

play12:04

show you how to add some cool text to

play12:06

your video so to do that I'm going to

play12:08

come here to workspaces captions and

play12:11

graphics and I'm actually also going to

play12:13

add a drone shot onto my timeline and

play12:16

maybe add like a nice little text to

play12:19

that so I am here and now I have my

play12:23

Essential Graphics where tab here now to

play12:26

add a text I just usually like to come

play12:29

here and click on the type tool click

play12:32

somewhere on my screen and I can

play12:34

um you know type in whatever I want for

play12:37

example I'm going to type in Mountain

play12:38

Villa because that is what this clip has

play12:41

and then I can you know select this I

play12:44

can

play12:45

come here to my Essential Graphics I can

play12:48

change the alignment of it so I can for

play12:51

example automatically click on Alliance

play12:53

Central centrally horizontally and also

play12:56

align Center vertically and now it's

play12:58

right in the middle of my clip I can

play13:01

also come here to the text font and

play13:04

change it to something else for example

play13:06

Monster Rod you know I will need to

play13:08

align it again but that's all right you

play13:10

can also change the the size of your

play13:12

font you can also change how you know

play13:15

bold you want the font to be you can

play13:17

also change the tracking of the

play13:19

different letters so so many different

play13:21

things you can change I'm also going to

play13:24

add a nice little Shadow to it right

play13:26

here

play13:27

you know simple as that you can change

play13:30

the settings of the Shadow as well you

play13:32

know adding text is super basic super

play13:34

simple you can change the again the

play13:37

positioning of it here as well so I'm

play13:39

just going to align it to the center and

play13:42

if you want to change the duration of

play13:44

your text you can always just select

play13:47

this new layer that it created which is

play13:50

your text layer and you know make it

play13:52

longer by dragging it out or make it

play13:55

shorter by trying to get shorter now

play13:57

next up I'm going to show you how to add

play13:59

audio to your video as well and how to

play14:01

add songs and so on so you know I have

play14:04

my uh audio right here in this folder

play14:06

this song so I'm going to drag and drop

play14:08

that on my timeline and uh that is how

play14:12

simple it is if I wanted to add you know

play14:14

a sound effect I can just drag and drop

play14:15

that here and change the positioning of

play14:18

it or add it to a different track just

play14:20

like that so super simple to do if you

play14:23

want to change the volume of your song

play14:25

you can do that by either making your

play14:29

audio track bigger by dragging it out

play14:31

like this and pressing on this white

play14:33

line and lowering it so you can see now

play14:36

it's at minus 20 decibels so that is one

play14:38

way to quickly change the volume of your

play14:40

audio or you can also select it come

play14:43

here to effect controls and change the

play14:46

volume level right here talking about

play14:49

audio and sound effects that actually

play14:51

brings us to the sponsor of this video

play14:52

epidemic sound if you're looking for an

play14:55

amazing solution to get all your music

play14:57

and sound effects from for your own

play14:59

YouTube videos or even client projects

play15:01

epidemic sound might be the best

play15:03

solution for you I have been using their

play15:05

service for over five years at this

play15:07

point and I've used their you know songs

play15:09

and sound effects in countless YouTube

play15:11

videos from my personal brand and also

play15:14

for client projects I love the fact that

play15:16

instead of having to license your songs

play15:18

individually potentially even costing

play15:21

you thousands of dollars in license fees

play15:23

you can just pay a small monthly

play15:25

subscription fee for them and you will

play15:27

get access to over 30 000 incredible

play15:30

songs and over 80 000 amazing sound

play15:33

effects at your fingertips their music

play15:35

is neatly organized into different

play15:37

genres and playlists so you can always

play15:39

find the exact song that fits your

play15:41

videos why perfectly and one of my

play15:43

favorite features about their software

play15:45

is their stem downloads where you can

play15:47

actually get the separate layers of your

play15:50

song that you are trying to add to your

play15:51

video so you can even get more creative

play15:53

control in your editing process now if

play15:56

you sign up with the link in the

play15:57

description below this video then you

play15:59

can get a free 30-day trial and try out

play16:01

their service for yourself and even if

play16:03

you cancel at the end you are not going

play16:05

to get those videos flagged on your

play16:07

channel that you have used their songs

play16:09

in that trial period so there's really

play16:11

no risk on your side to check out their

play16:13

service and try it out for yourself

play16:14

thank you epidemic for sponsoring this

play16:17

video and let's get right back into the

play16:18

tutorial alright so next up I want to

play16:21

color my footage a little bit to make it

play16:23

pop even more so the way I'm going to do

play16:25

that is I'm going to come here first to

play16:27

my project library right click click on

play16:29

new item create a new adjustment layer

play16:33

I'm going to make sure that it's the

play16:35

same settings as my sequence I'm going

play16:37

to click ok

play16:38

and I'm going to drag and drop that and

play16:41

make it you know cover all the footage

play16:43

that I want it to affect now I can click

play16:46

on this adjustment layer I'm going to

play16:47

switch my workspace and come to the

play16:49

coloring workspace and here in lumetri

play16:52

color I can change the look of that

play16:55

however I want and basically by

play16:58

adjusting this adjustment layers color

play17:00

it's going to affect everything that is

play17:02

under it so you don't have to adjust

play17:04

your Clips separately one by one now

play17:06

unfortunately in this video I don't have

play17:08

enough time to go into a super in depth

play17:11

about you know coloring your stuff

play17:13

because you you have so many different

play17:15

options like you can see here but I'm

play17:18

going to show you the easiest way to

play17:20

color your footage fast and that is none

play17:23

other than using Lots or otherwise

play17:25

called look up tables and lots are

play17:28

basically kind of like Instagram filters

play17:30

for your videos if you want to apply a

play17:32

lot to your footage you can come here to

play17:33

the creative and then select your lot

play17:36

that you want to use you can see

play17:38

Premiere over already comes actually

play17:39

installed with a couple different ones

play17:41

so for example this one you can see it's

play17:44

pretty intense and they have a bunch of

play17:47

different looks this one's pretty cool

play17:49

actually you can change the intensity of

play17:51

it so just by you know pressing this one

play17:54

thing I was able to add this cool color

play17:57

grade to my footage now if I want to see

play17:59

the before and after I can always just

play18:01

enable and disable my layer by pressing

play18:04

V on my keyboard and or also you can

play18:07

right click on it and click on enable or

play18:10

disable

play18:11

right here and you can see the before

play18:14

and after I quite like this look so I'm

play18:16

going to move forward with that so now

play18:18

I'm going to use all these different

play18:20

skill sets that I just talked about and

play18:22

I just showed you and I'm going to

play18:23

create an example edit for you combining

play18:27

these separate things that I talked

play18:28

about

play18:43

all right so what do you guys think did

play18:45

you like it I hope you did I just you

play18:47

know put this together in a few minutes

play18:48

so haven't put a ton of effort into it

play18:51

but uh I think it still turned out okay

play18:53

anyways now the next thing we are going

play18:55

to do is export this footage right so to

play18:59

do that what you want to do is you want

play19:01

to make sure that your entire sequence

play19:04

is selected so you want to press I on

play19:08

the beginning of your timeline right

play19:10

here and then you want to come to where

play19:12

you want your video to end and you want

play19:14

to press o on your keyboard so this way

play19:17

you can set the in and out points if you

play19:19

messed up something you can always just

play19:21

right click here press on clear in and

play19:24

out and then you know you can redo the

play19:26

whole process basically This way

play19:28

everything that is selected is going to

play19:30

be in your export and everything that

play19:32

isn't is not going to be included now

play19:34

next up you want to come here to export

play19:37

and then here you can name your file

play19:40

whatever you want so I'm gonna name it

play19:42

Slovakia video you can choose the

play19:45

location of it right here so I'm just

play19:47

going to leave that my desktop

play19:49

you can select your preset and your

play19:54

export settings here you can select the

play19:56

format and here in range you want to

play19:59

make sure it's selected on Source in and

play20:01

out and you want to make sure the source

play20:04

settings and your output settings kind

play20:07

of match up especially on the resolution

play20:09

and frame rate side of things and after

play20:12

that you can basically just click on

play20:13

export and it's going to export this

play20:16

clip that you edited I have a more

play20:19

in-depth video about exporting as well

play20:21

so if you want to check that out watch

play20:23

that video on my channel as well so if

play20:25

you feel like you learned a lot from

play20:26

this video and you want to learn even

play20:28

more from me about how to use Premiere

play20:30

Pro and also Photoshop to create amazing

play20:32

social media content then go ahead and

play20:35

click the link in the description below

play20:38

to check out my exclusive premium master

play20:40

class which teaches you how to create

play20:43

amazing content in Premiere Pro and also

play20:45

how to edit photos in Photoshop with

play20:47

over 8 hours of videos and step-by-step

play20:50

training so check that out hope you guys

play20:52

enjoy this video and I will see you in

play20:54

the next one

Rate This
β˜…
β˜…
β˜…
β˜…
β˜…

5.0 / 5 (0 votes)

Related Tags
Video EditingAdobe PremiereOnline BusinessTutorialSkill SetContent CreationEditing SoftwareMulti-Figure IncomeMedia ProductionCreative Workflow