Create VirtualBox Virtual Machine & Install Oracle Linux - Hands-On Experiments for Oracle DBAs

YouVolve
5 Aug 202125:11

Summary

TLDRThis tutorial series introduces viewers to Oracle technologies, guiding them through setting up an Oracle VirtualBox virtual machine and installing Oracle Linux. Aimed at aspiring or current Oracle DBAs, it covers essential topics like Oracle Database installation, DNS configuration, and Oracle Enterprise Manager. The video demonstrates creating a VM, configuring network settings, and installing Oracle Linux, with a focus on practical, hands-on learning to enhance career prospects and problem-solving skills in real-world scenarios.

Takeaways

  • πŸ–₯️ The series 'You, the Oracle Expert' aims to teach Oracle technologies and products such as Oracle RAC, ASM, Exadata, OEM, GoldenGate, Data Guard, and Unix through hands-on experiments.
  • πŸ“¦ The first tutorial focuses on creating an Oracle VirtualBox virtual machine and installing Oracle Linux OS, essential for those looking to build or enhance their Oracle DBA career.
  • 🧠 Staying updated with Oracle technologies and gaining hands-on experience is crucial for building confidence and solving real-world problems, leading to better career opportunities.
  • πŸ’Ύ Before starting, ensure your host computer has at least 50GB of free space, 16GB of RAM, a multi-core processor, and virtualization enabled in the BIOS.
  • βš™οΈ The demonstration uses a custom-built server with Windows 10 Professional, featuring dual 8-core Xeon processors, 64GB of RAM, and 1TB of SSD storage for optimal performance.
  • πŸ“₯ The Oracle VirtualBox software is free to download and straightforward to install, with the latest version being 6.1.
  • πŸ”§ The process involves creating a virtual machine, allocating resources, and configuring settings such as memory, processors, and storage for optimal performance.
  • 🌐 Networking setup is crucial, with the tutorial demonstrating how to configure a bridged adapter for the virtual machine.
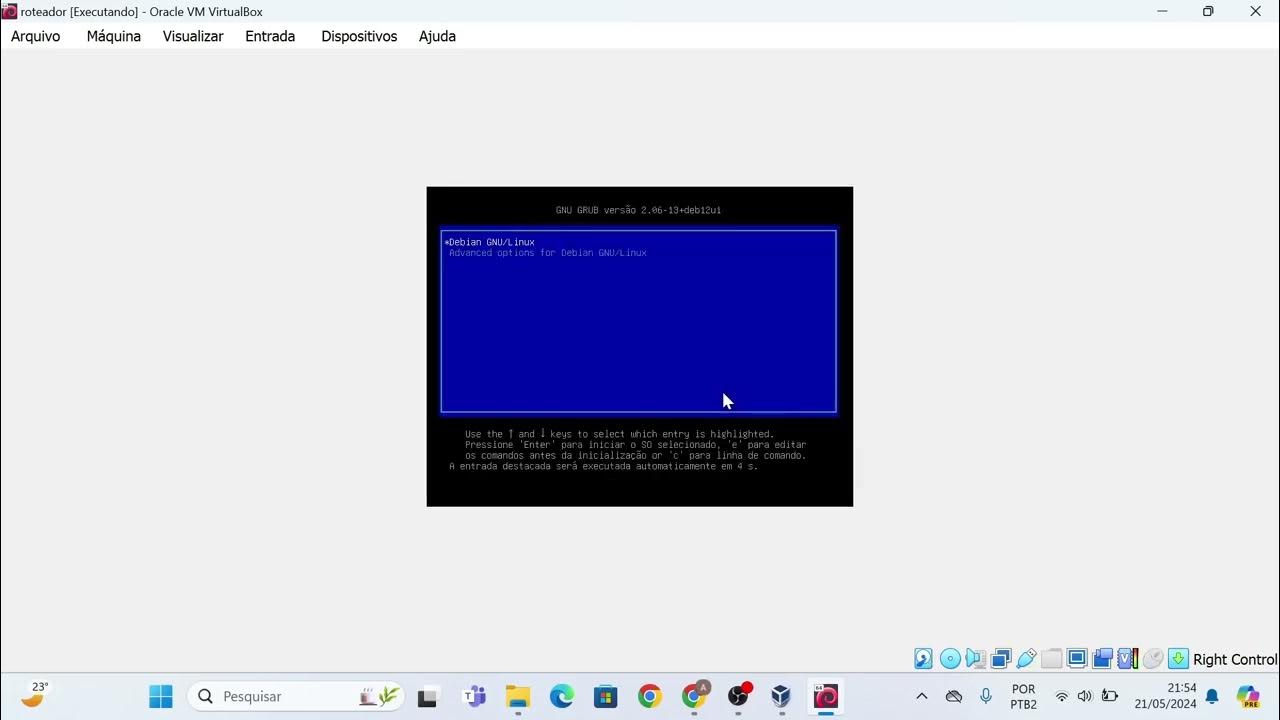
  • πŸ’Ώ Oracle Linux 7.9 is downloaded and installed on the virtual machine, with guidance on setting up the system, including user accounts and network configurations.
  • πŸ”œ The next tutorial will cover installing VirtualBox Guest Additions, resizing virtual disks, changing IP addresses, creating snapshots, and cloning virtual machines.

Q & A

  • What is the purpose of the 'Oracle Expert' video series?

    -The purpose of the 'Oracle Expert' video series is to educate viewers on Oracle technologies and products, including Oracle VirtualBox, Oracle Linux, and other related software, with a focus on hands-on experiments to help viewers become expert Oracle DBAs.

  • What are some of the Oracle technologies and products covered in the series?

    -The series covers Oracle technologies and products such as Oracle VirtualBox, Oracle Linux, Oracle ASM, Exadata, OEM, GoldenGate, Data Guard, and also Unix.

  • Why is it important for Oracle DBAs to keep up to date with Oracle technologies?

    -It is important for Oracle DBAs to keep up to date with Oracle technologies to build confidence, enhance their skills, achieve a brighter career, get better job opportunities, and to solve real-world problems more effectively.

  • What are the system requirements for the host computer that will be hosting the virtual machines?

    -The host computer should have at least 50 GB of free space, at least 16 GB of RAM, a multi-core processor with at least four logical processors, and the virtualization option enabled in the host's BIOS.

  • What is the recommended configuration for the virtual machine's network adapter in the Oracle VirtualBox?

    -The recommended configuration for the virtual machine's network adapter is to use a bridged adapter, which allows the virtual machine to connect to the network as if it were a separate physical device.

  • How can one verify if the host is ready to install VirtualBox and create virtual machines?

    -One can verify the readiness of the host by checking the Task Manager for the number of logical processors, ensuring the virtualization option is enabled, and confirming sufficient memory and storage capacity.

  • What is the process for downloading Oracle Linux from Oracle's software download page?

    -To download Oracle Linux, one must have an Oracle account, visit edelivery.oracle.com, search for 'Oracle Linux', select the desired version and architecture, accept the terms of use, and download the ISO image using the provided download manager.

  • What are the steps to create a new virtual machine in Oracle VirtualBox?

    -To create a new virtual machine in Oracle VirtualBox, go to 'Machine' > 'New', specify the name and folder for the machine, select the type and version of the operating system, allocate memory, create a virtual hard disk with either dynamic or fixed allocation, and configure the settings as needed.

  • How can one enable the bi-directional clipboard and drag and drop between the host and the virtual machine?

    -To enable the bi-directional clipboard and drag and drop, go to the virtual machine's 'Settings', then 'Advanced', and check the options for both features.

  • What is the significance of installing Oracle Linux 7.9 in the virtual machine for the tutorial?

    -Installing Oracle Linux 7.9 in the virtual machine is significant as it provides a platform to demonstrate the setup and configuration of an Oracle environment, which is essential for learning Oracle DBA skills.

  • What are some of the topics covered in the next video of the series?

    -The next video of the series will cover topics such as installing VirtualBox Guest Additions, resizing a virtual disk, changing the IP address and hostname of a virtual host, creating a virtual machine snapshot, and cloning an existing virtual machine.

Outlines

00:00

πŸ˜€ Introduction to Oracle DBA Training Series

This paragraph introduces the Oracle DBA training series, aimed at teaching Oracle technologies and products such as Rack ASM, Exadata, OEM, Golden Gate, Data Guard, and UNIX, with practical experiments using Oracle VirtualBox. The tutorial series is designed to help viewers build a career as an Oracle DBA or enhance their existing skills. It covers topics like creating an Oracle VirtualBox virtual machine, installing Oracle Linux, and configuring various Oracle services. The presenter emphasizes the importance of staying updated with Oracle technologies for career advancement and problem-solving in real-world scenarios. The video also provides system requirements for the host computer, suggesting at least 50 GB of free space, 16 GB of RAM, and a multi-core processor with virtualization enabled.

05:00

πŸ› οΈ Setting Up Oracle VirtualBox for Oracle DBA Training

The second paragraph guides viewers through the process of downloading and installing Oracle VirtualBox on a Windows host. It details the steps to access the VirtualBox website, select the appropriate version for the host OS, and follow the installation wizard. The presenter then demonstrates how to create a new virtual machine named 'vm linux one' with specific settings, such as allocating 4 GB of memory and creating a 50 GB virtual hard disk with a fixed size. The paragraph also explains how to configure the virtual machine's properties, including enabling bi-directional clipboard and drag-and-drop, and setting up the network adapter with a bridged connection.

10:01

πŸ” Configuring Virtual Machine Settings and Downloading Oracle Linux

This paragraph focuses on configuring the virtual machine's system settings, such as memory allocation, boot order, and processor options. It also covers how to enable PAE/NX, which is important for running 64-bit operating systems. The presenter then discusses the display settings, opting for VBox VGA without 3D acceleration. Network configuration is highlighted, with a single bridged adapter being enabled. The paragraph concludes with instructions on how to download Oracle Linux from Oracle's eDelivery website, requiring an Oracle account and navigating through the software download process to select the appropriate ISO image for Oracle Linux 7.9.

15:03

πŸ’Ώ Installing Oracle Linux on the Virtual Machine

The fourth paragraph describes the process of installing Oracle Linux 7.9 on the newly created virtual machine. It starts with mounting the downloaded ISO image to the virtual machine's optical drive and launching the installation process. The video script outlines the steps for selecting the installation language, agreeing to the license, and configuring the network settings. It also covers the selection of software packages for installation, choosing a minimal installation with additional components for a virtualization host. The paragraph details setting the host name, root password, and creating a user account, concluding with the initial boot sequence and login to the new Oracle Linux installation.

20:04

πŸ”„ Completing the Oracle Linux Installation and Initial Setup

This paragraph details the final stages of the Oracle Linux installation, including accepting the license agreement, configuring the system's locale and time zone, and setting up user accounts. The presenter chooses to keep location services on and skips connecting online accounts, opting to focus on the core installation. The user is guided through setting a username, full name, and password for the initial user account. The paragraph concludes with the first login to the Oracle Linux server and the completion of the basic setup, preparing the system for further configuration and use in the Oracle DBA training series.

25:04

πŸ“Ί Wrapping Up and Inviting Viewers for More Oracle DBA Training

The final paragraph serves as a conclusion to the video, summarizing the installation of Oracle Linux 7.9 on a virtual machine and setting the stage for future tutorials. The presenter expresses hope that viewers found the content useful and encourages them to like and subscribe to the channel for additional Oracle DBA training videos. The paragraph creates anticipation for upcoming topics such as installing VirtualBox guest additions, resizing virtual disks, changing IP addresses and hostnames, creating snapshots, and cloning virtual machines.

Mindmap

Keywords

πŸ’‘Oracle

Oracle is a major multinational technology corporation known for its database management systems, cloud-engineered systems, and enterprise software products. In the context of the video, Oracle is the source of the technologies and products being taught, such as Oracle Linux and Oracle VirtualBox, which are central to the tutorial series aimed at training viewers to become Oracle DBAs.

πŸ’‘Oracle VirtualBox

Oracle VirtualBox is a free and open-source virtualization software that allows users to create and manage virtual machines. In the video, it is the primary tool used to create an Oracle Linux virtual machine, demonstrating its importance for setting up a hands-on learning environment for Oracle technologies.

πŸ’‘Oracle Linux

Oracle Linux is a free and open-source operating system developed by Oracle Corporation. It is used as the base OS in the video to create a virtual machine, showcasing its role in Oracle's ecosystem and as a platform for Oracle DBAs to gain practical experience.

πŸ’‘Oracle DBA

An Oracle DBA, or Database Administrator, is a professional who manages Oracle databases. The video aims to educate viewers on how to build a career as an Oracle DBA by providing hands-on training with Oracle technologies, emphasizing the importance of practical skills in this role.

πŸ’‘Virtual Machine

A virtual machine is a software-based simulation of a physical computer that executes programs like a physical machine. In the script, creating an Oracle Linux virtual machine is a key step in the tutorial, illustrating the process of setting up an environment for learning Oracle technologies.

πŸ’‘Installation

Installation refers to the process of making software or hardware ready for use. The video script details the step-by-step installation of Oracle Linux on a virtual machine, which is a fundamental part of the learning process for Oracle DBAs.

πŸ’‘Configuration

Configuration is the arrangement of settings and options for a system or software. The video script discusses configuring the virtual machine settings in Oracle VirtualBox, such as memory allocation and network adapter settings, which is crucial for the proper functioning of the virtual environment.

πŸ’‘Bi-directional Clipboard

Bi-directional clipboard refers to the ability to copy and paste data between the host computer and the virtual machine. The video mentions enabling this feature for ease of use, highlighting the convenience it provides for users working with virtual machines.

πŸ’‘Oracle Enterprise Manager (OEM)

Oracle Enterprise Manager is a comprehensive solution for managing Oracle software and systems. The video script lists it as one of the topics to be covered, indicating its significance in the Oracle DBA's toolkit for monitoring, managing, and troubleshooting Oracle environments.

πŸ’‘Oracle Golden Gate

Oracle Golden Gate is a software package used for real-time data integration and replication. The video mentions it as part of the curriculum, showing its importance in the Oracle DBA's skill set for managing data movement and synchronization across systems.

πŸ’‘Exadata

Exadata is an Oracle engineered system that is optimized for running Oracle software. The script includes configuring a virtual Exadata environment as a topic, emphasizing its role in the advanced skillset of an Oracle DBA, particularly for managing high-performance database systems.

Highlights

Introduction to the series 'You, the Oracle Expert' focusing on Oracle technologies and products.

Emphasis on the importance of staying updated with Oracle technologies for career growth and problem-solving.

Overview of topics to be covered, including Oracle VirtualBox, Oracle Database 18c/19c, DNS configuration, and more.

Requirements for the host computer: at least 50GB free space, 16GB RAM, multi-core processor, and virtualization enabled.

Demonstration of a custom build server with high capacity configuration for hosting virtual machines.

Instructions on enabling virtualization in the host computer's BIOS based on the motherboard's make and model.

Verification process of the host's readiness for VirtualBox installation through Task Manager.

Step-by-step guide to downloading and installing Oracle VirtualBox from virtualbox.org.

Creation of a new Oracle Linux virtual machine in VirtualBox with specific settings for memory and hard disk.

Explanation of the difference between dynamically allocated and fixed size storage for virtual hard disks.

Configuration of the virtual machine's settings, including system options, processor, and network adapter.

Setting up a shared folder and preferences for input in VirtualBox for ease of use.

Downloading Oracle Linux 7.9 from Oracle's software download page with an Oracle account.

Installation process of Oracle Linux 7.9 on the virtual machine, including software selection and host naming.

Instructions for setting the root password and creating a user account during the installation.

Completion of the Oracle Linux installation with acceptance of the license agreement and initial configuration.

Upcoming tutorial topics in the series, such as installing VirtualBox Guest Additions and managing virtual machine snapshots.

Closing remarks encouraging viewers to like, subscribe, and follow for more educational content.

Transcripts

play00:00

hello viewers welcome to the series you

play00:02

the oracle expert

play00:03

where you will learn oracle technologies

play00:06

and products

play00:06

such as rack asm exadata oem

play00:10

golden gate data guard etc and also unix

play00:13

with hands-on experiments using oracle

play00:15

virtualbox and start

play00:17

your journey towards becoming an expert

play00:19

oracle dba

play00:30

in today's tutorial of this series we

play00:32

are going to learn

play00:33

how to create an oracle virtualbox

play00:35

virtual machine

play00:36

and install oracle linux operating

play00:39

system

play00:40

if you have a desire to build your

play00:41

carrier as an oracle dba with unique

play00:43

skills

play00:44

or you are already an oracle dba then

play00:46

it's really important

play00:48

to keep yourself up to date with the

play00:50

oracle technologies

play00:51

and build your confidence with hands-on

play00:53

experiments with it

play00:56

this confidence will not only help you

play00:57

achieve a brighter career

play00:59

and get better job opportunities but

play01:01

also it will help you solve real-world

play01:04

problems

play01:05

i am preparing this series of videos to

play01:06

help you achieve your goal

play01:08

where we will cover the following topics

play01:12

oracle virtualbox virtual machine

play01:14

concepts

play01:16

oracle database 18c and 19c installation

play01:20

dns or domain name system server

play01:22

configuration

play01:24

oracle enterprise manager or oem 13c

play01:27

installation

play01:29

oem target discovery promote and

play01:31

grouping

play01:33

oem incident rule sets and alert

play01:35

configuration

play01:37

oracle real application cluster physical

play01:40

standby

play01:41

snapshot standby and active data guard

play01:44

golden gate replication both uni or

play01:47

bi-directional configuring a virtual

play01:51

exa-data environment

play01:55

please note that each of these topics

play01:57

may take one or more episodes

play01:59

for the covers also i will go into only

play02:02

that much depth

play02:03

from where you can then take it forward

play02:06

for the computer that will be hosting

play02:08

the virtual machines

play02:09

you may have windows linux or mac

play02:12

operating system installed

play02:15

in this demonstration i am using a

play02:16

custom build server with windows 10

play02:18

professional install

play02:21

before we start please make sure that

play02:23

your host computer has

play02:24

at least 50 gigs of free space at least

play02:28

16 gigs of ram or physical memory a

play02:31

multi-core processor

play02:32

with at least four logical processors

play02:34

from where you can take

play02:36

one or two processors for the virtual

play02:38

machines

play02:40

the virtualization option is enabled in

play02:42

the host

play02:44

in this demonstration i am using my

play02:45

personal server

play02:47

that i made with very high capacity

play02:49

configuration

play02:51

this is a windows 10 professional server

play02:53

with

play02:54

two eight core geon processors resulting

play02:57

in 16 total cores

play02:59

and with hyper trading enabled it has a

play03:01

total of 32 logical processors 64 gigs

play03:04

of physical memory

play03:06

and at least one terabyte of free space

play03:08

available on a bunch of solid state

play03:10

drives

play03:11

or ssds for better performance

play03:14

i will explain how i made this home

play03:17

server for all my gaming

play03:19

oracle unix practice and media related

play03:22

needs spending less than 1200 dollars

play03:25

in a future video you can find how to

play03:28

enable virtualization option

play03:30

in your host computer's bios based on

play03:32

the make and model of your motherboard

play03:35

of your computer the virtualization

play03:37

option can be found under advanced tab

play03:40

if the virtualization option in your

play03:42

bios is not set

play03:44

then there is a possibility that going

play03:46

forward you will encounter issues with

play03:48

your virtual machines

play03:52

to verify if your host is ready to

play03:53

install virtualbox

play03:55

and create virtual machines right click

play03:57

on the taskbar

play03:59

and go to the task manager

play04:04

then go to the performance tab

play04:08

click on the cpu where you will be able

play04:10

to see how many logical processors are

play04:12

there

play04:12

in my server you'll be able to see there

play04:14

are 32 logical processors

play04:17

and the virtualization option is also

play04:20

enabled

play04:20

then go to memory it has around 46 gigs

play04:24

of

play04:25

memory in use and around gigs of memory

play04:29

available making it a total of around 64

play04:32

gigs

play04:33

so i have enough capacity in my host

play04:35

machine

play04:36

to accommodate multiple virtual machines

play04:42

so let's start with the oracle

play04:43

virtualbox virtual machine installation

play04:46

you can download it free from

play04:48

virtualbox.org

play04:50

once you are in the virtualbox.org

play04:52

website click on the download virtualbox

play04:55

6.1

play04:56

which is the latest version of

play04:58

virtualbox software

play05:00

then based on your host operating system

play05:03

select the option here in this

play05:06

demonstration

play05:07

i am using the windows hosts click on

play05:09

that windows host

play05:13

and it will take a few seconds to

play05:14

download the installation program

play05:17

the installation is quite

play05:18

straightforward once you download the

play05:20

installation program

play05:22

just click on the downloaded program and

play05:26

it will start the

play05:27

virtual box software installation wizard

play05:31

let it take all the default settings and

play05:33

click next

play05:34

click next again it will temporarily

play05:37

disable the network interfaces

play05:39

click yes

play05:42

and click install

play05:46

it will ask for confirmation to

play05:49

install the device software from oracle

play05:51

corporation

play05:53

click install

play05:56

and then click finish so once your

play05:59

installation is done you will get an

play06:01

interface like this

play06:04

this is the oracle virtual box software

play06:07

console

play06:08

where we will create our virtual

play06:10

machines

play06:12

right now there is no machine and you

play06:14

have a blank pen

play06:15

at the left your virtualbox interface

play06:19

will look a little different than mine

play06:21

because i already have a bunch of

play06:22

virtual machines created

play06:24

and grouped under different titles here

play06:28

so first we'll create one oracle linux

play06:31

virtual

play06:31

machine to do that we'll go to machine

play06:36

new let's put the name of the new

play06:40

virtual machine as

play06:42

vm linux one

play06:45

and you have to specify the machine

play06:47

folder where

play06:49

the virtualbox related files will be

play06:52

copied

play06:53

and you can choose the location from

play06:55

here so i have selected

play06:57

my d drive which i have created for all

play07:00

my virtual machines the type will be

play07:03

linux and the version

play07:07

will be

play07:11

oracle 64-bit

play07:14

click next we'll allocate a memory of

play07:18

4gb 4096

play07:21

megabytes

play07:25

click next we'll create a virtual hard

play07:29

disk now

play07:32

click create select the first option

play07:35

that is the vdi virtualbox disk image

play07:39

click next there are two options here

play07:43

how the storage will be allocated to the

play07:45

virtual disk

play07:46

dynamically allocated and fixed size if

play07:49

it is dynamically allocated

play07:51

so it will be initially created with a

play07:54

minimal size

play07:55

and it will be extended as and when

play07:56

required going forward

play07:59

but that will compromise the performance

play08:01

a little so

play08:02

we will select our option as the fixed

play08:05

size

play08:06

and the location of the virtual disk

play08:08

file will be

play08:10

as specified earlier d colon virtual

play08:12

machines

play08:13

and i'm specifying one folder created

play08:16

for this particular virtual machine that

play08:20

is the vm linux one

play08:22

and uh all the files related to this vm

play08:24

linux one virtual machine will be

play08:26

created under the folder

play08:27

vm linux one then

play08:31

we'll specify the size of the file as 50

play08:33

gb

play08:38

create it will take a couple of minutes

play08:41

to create

play08:43

the first disk file

play08:51

so our first virtual machine is created

play08:53

with the name vm linux1

play08:56

and it is created under the group

play08:57

exadata and

play08:59

i'll simply drag it to the template

play09:01

group

play09:04

and it's under the template group now

play09:09

now we have to define certain properties

play09:11

of this virtual machine

play09:13

before we start installing the operating

play09:16

system

play09:17

right now it's a blank virtual machine

play09:19

without any operating systems installed

play09:23

so when the virtual machine is selected

play09:25

click on settings

play09:31

go to advanced and

play09:34

we will enable the bi-directional

play09:38

clipboard and drag and drop

play09:43

from the host to the virtual machine and

play09:45

virtual machine to the host

play09:47

and the snapshot folder it's already

play09:49

taking the default location

play09:51

it means whenever we are going to create

play09:53

any snapshots for this particular

play09:54

virtual machine that snapshot will be

play09:57

saved in this

play09:58

folder if you want you can specify a

play10:01

different folder

play10:04

description if you want any description

play10:05

of this virtual machine you can

play10:07

write it here this encryption will not

play10:09

enable this encryption at this time

play10:12

click on the system options

play10:15

and it is taking the base memory as we

play10:18

specified during the

play10:20

beginning steps as 4gb

play10:24

the boot order is taking as floppy

play10:26

optical drive and hard disk

play10:27

let it take that that way

play10:31

and all the other options let it take

play10:33

the default ones

play10:34

under motherboards go to processor

play10:38

we'll look at two processors here for

play10:41

this

play10:42

virtual machine

play10:45

let the execution kept 100

play10:48

and enable

play10:51

pae nx check this option here

play11:00

under acceleration let it take the

play11:03

default options

play11:06

go to display video memory will be 16 mb

play11:10

monitor count will be one

play11:14

and the graphic controller will specify

play11:18

vbox vga do not enable the 3d

play11:21

acceleration

play11:25

and in the storage options it has only

play11:27

one sata interface with one hard disk

play11:30

that we created with the 50gb size

play11:35

audio let it take the default options

play11:39

then the network this is

play11:42

a very important part here and

play11:46

it can take up to four different network

play11:48

interfaces

play11:50

and for this virtual machine we will

play11:52

take only one

play11:53

the first one will enable network

play11:56

adapter

play11:57

and the type of the network adapter will

play12:00

be bridged

play12:01

adapter and let it take the name

play12:05

by default as microsoft network adapter

play12:07

multiplexer driver

play12:09

click on the advanced options

play12:13

adapter type it will take automatically

play12:15

from the system the promiscuous mode

play12:17

will be

play12:18

allow all mac address let it take the

play12:21

default one

play12:22

cable connected should be on

play12:26

and this is what the basic configuration

play12:29

of the

play12:30

network adapter all other network

play12:32

adapters will be

play12:33

in disable state because we need only

play12:35

one for this virtual machine

play12:39

usb let it take the default options

play12:42

shared folder will define a shared

play12:44

folder later on

play12:46

and will keep all the other things as it

play12:48

is

play12:50

now click ok just ignore this

play12:54

warning message below in valid settings

play12:56

detected because this is basically

play12:57

saying about the

play12:59

type of the display that we have

play13:00

selected here but

play13:03

we'll stick to our this selection vbox

play13:05

vga

play13:06

now before we start first of all go to

play13:08

preferences

play13:10

under input select a virtual machine tab

play13:13

and in the host key combination make

play13:16

sure that you

play13:17

select some keys which will help you to

play13:19

switch between the host machine

play13:20

and the virtual machine in this

play13:22

demonstration i am using the left window

play13:24

button

play13:25

in my keyboard that is the host key

play13:29

for me to be able to switch between the

play13:31

host computer

play13:32

and the virtual machine so if you want

play13:35

to change it

play13:36

simply click on that first clear

play13:38

whatever is there

play13:39

if you want to change it then press the

play13:42

button that you want to be your host key

play13:44

for example when i cleaned it now it is

play13:48

none it means no keys have been assigned

play13:52

now i press the left window button

play13:56

and the left window button has been

play13:57

selected as my host key

play14:00

click ok and now we are going to

play14:02

download oracle linux

play14:04

from oracle corporation we will go to

play14:06

oracle's

play14:07

software download page which is

play14:10

edelivery.oracle.com

play14:12

i have given the link to this url in the

play14:15

description of this video below

play14:17

and to be able to download oracle

play14:20

software you must have an account

play14:22

created with oracle

play14:23

you sign in with your account and then

play14:27

in the search box we will put

play14:30

oracle linux click search

play14:35

it will give you a list of downloadable

play14:38

oracle linux iso images

play14:41

and from here we'll select the oracle

play14:43

linux 7.9

play14:45

and it will be added to your queue

play14:49

then click continue

play14:55

and in the next page select

play14:59

the x8664 bit version of this oracle

play15:02

linux 7.9

play15:05

and click continue

play15:08

you have to accept the terms of uses

play15:17

click continue and it will ask for a

play15:20

survey

play15:21

you can simply submit your survey or you

play15:23

can do it later on

play15:24

in this space we'll get a lot of options

play15:27

to install the oracle linux

play15:29

7.9 we are mainly interested on the

play15:32

first one

play15:33

here that says oracle linux release 7

play15:36

update 9

play15:36

for x8664 with 4.5 gigs

play15:41

we'll uncheck all the other boxes here

play15:45

and select only the first one

play15:48

click download

play15:52

and it will download a small program

play15:55

called

play15:56

download manager we'll click that

play16:00

and it will simply ask for the download

play16:02

location by default it will be your

play16:04

system's download folder

play16:06

click next it will take a couple of

play16:09

minutes to download 4.5 gigs of data

play16:12

and your download is complete now to

play16:15

install oracle linux on our virtual

play16:17

machine we'll select the virtual machine

play16:18

then go to settings

play16:22

then go to storage and if you see

play16:27

that this controller is the first one is

play16:30

the optical this controller is empty and

play16:32

here

play16:34

we will select the downloaded iso image

play16:37

of

play16:38

oracle 7.9

play16:49

this is the file that we downloaded the

play16:51

first one

play16:53

click open

play16:57

and then click ok

play17:03

and you can simply start

play17:06

the virtual machine

play17:10

so this screen is simply asking you to

play17:13

map your optical device with the virtual

play17:16

machine

play17:18

so this is actually the f drive in my

play17:20

system

play17:21

so else it is by default selected i'll

play17:23

simply

play17:24

click start

play17:34

the reason behind the error message just

play17:36

we have seen

play17:38

is because we mapped the optical drive

play17:40

after

play17:41

selecting the iso image so the iso image

play17:45

was actually cleaned up from here

play17:47

so all you need to do is to select it

play17:49

again

play17:56

now this is populated again

play17:59

and then we will start installation of

play18:02

the

play18:02

oracle linux 7.9 in our partial machine

play18:19

in this screen it will ask for

play18:20

confirmation about installation of

play18:22

oracle linux 7.9

play18:24

and we will select the first option you

play18:27

can navigate between the options using

play18:28

the

play18:29

up and down arrow buttons in your

play18:30

keyboard so i selected the first option

play18:32

install oracle linux 7.9 and press

play18:40

enter

play18:50

let's maximize the window

play19:02

please note that we maximize only the

play19:04

parent window

play19:05

but the actual virtual machine window is

play19:07

still a very small one and we'll fix

play19:10

this by installing

play19:11

virtualbox guest additions after our

play19:14

installation is complete

play19:23

i will select english united states

play19:26

it is selected by default and one more

play19:29

thing i would like to mention here is

play19:31

when you click

play19:32

inside this window you are actually

play19:34

clicking on the virtual machine

play19:36

so you will not be able to click outside

play19:37

of this window once you are inside

play19:39

in my machine the key that will help me

play19:42

to go out of this virtual machine or

play19:44

take control to the host machine is the

play19:46

windows key in my keyboard

play19:48

and if i click again inside of the

play19:49

virtual machine then this mouse is

play19:51

kind of imprisoned between this window

play19:54

now we'll

play19:55

simply click continue it will gather

play19:57

some information and take a couple of

play19:59

seconds

play20:00

where we see some kind of exclamation

play20:01

marks it means it's still working on

play20:03

that

play20:05

so installation source has been selected

play20:08

software selection we have to select the

play20:10

software options here

play20:11

and the installation destination

play20:15

we'll go to the installation destination

play20:17

and we'll select

play20:19

our 50 gb virtual hard disk that we

play20:21

created

play20:23

click again so that this check mark

play20:26

comes there

play20:28

then click done

play20:31

under software selection will select

play20:34

everything except the dns name server

play20:37

and email server

play20:43

let's go to the minimal installation tab

play20:46

select everything infrastructure

play20:49

accept dns and email

play20:52

we'll select everything file and print

play20:55

server

play20:56

let's select everything basic web server

play20:59

we don't need to install mariadb

play21:02

let's select everything else

play21:06

now the postgresql database client is

play21:08

not needed

play21:10

let's select the python and web servlet

play21:14

engine

play21:16

virtualization host select everything

play21:23

under this we have already selected

play21:24

everything and accept dns name server

play21:27

and email server

play21:28

click done the next thing we need to do

play21:32

is to set a name for the host

play21:43

let's put the host name as

play21:46

vm linux 1

play21:50

all in small letters

play21:54

and enable the ethernet connection

play22:00

and it has taken an ip addresses 192 168

play22:04

157

play22:05

click done

play22:12

let it complete the remaining tasks of

play22:15

checking the software dependencies

play22:16

and installation source

play22:20

now begin installation

play22:23

and when the installation is in progress

play22:25

we can set the root password here

play22:29

see the root password will be the same

play22:31

as the host name

play22:35

just for simplicity and you can change

play22:37

it later on

play22:40

so the root password will be vm

play22:43

linux 1 vm

play22:46

linux 1. as we set

play22:49

a very weak password here it's

play22:51

complaining about

play22:53

its complexity and just asking us to

play22:56

confirm that we accept this weak

play22:58

password

play23:00

click done and done again

play23:04

and at this time we will not create any

play23:06

additional users

play23:07

because we can anyway take care of that

play23:09

later on and let the installation

play23:11

proceed

play23:17

after the first reboot it will ask for

play23:20

accepting the license agreement

play23:23

click on license information

play23:26

scroll down to the end check that i

play23:30

accept

play23:31

check box and click done

play23:34

then click on finish configuration

play23:40

so english united states is selected by

play23:43

default

play23:44

you can switch off the location services

play23:46

if you want i'm keeping it on

play23:49

then the time zone it is selected as new

play23:52

york

play23:53

united states you can select your time

play23:55

zone accordingly

play23:56

click next

play24:00

connect your online accounts you don't

play24:02

have to do that now and you can skip

play24:03

it

play24:06

and here you have to specify your

play24:09

username

play24:10

full name and the username say i'm

play24:13

putting my name here

play24:15

and username will be the same

play24:18

and click next password

play24:24

click next and click on the start using

play24:28

oracle linux server

play24:29

and it will take a couple of seconds to

play24:31

give you the initial screen

play24:35

we'll simply close this first window

play24:39

and here is your new virtual box virtual

play24:41

machine

play24:42

with linux 7.9 installed in the next

play24:45

video of this series we will learn how

play24:47

to install virtualbox guest additions

play24:49

to extend its capabilities resize a

play24:52

virtual disk

play24:52

change the ip address of a virtual host

play24:54

and its hostname create a virtual

play24:56

machine snapshot cloning an existing

play24:58

virtual machine etc

play25:00

so viewers i hope you enjoyed the video

play25:02

and found it useful

play25:04

and if you did please hit the like

play25:06

button and subscribe to my channel

play25:08

for more similar videos

Rate This
β˜…
β˜…
β˜…
β˜…
β˜…

5.0 / 5 (0 votes)

Related Tags
Oracle DBAVirtualBoxOracle LinuxVM SetupLinux InstallationOracle TechHands-OnDatabase TutorialTech EducationIT Training