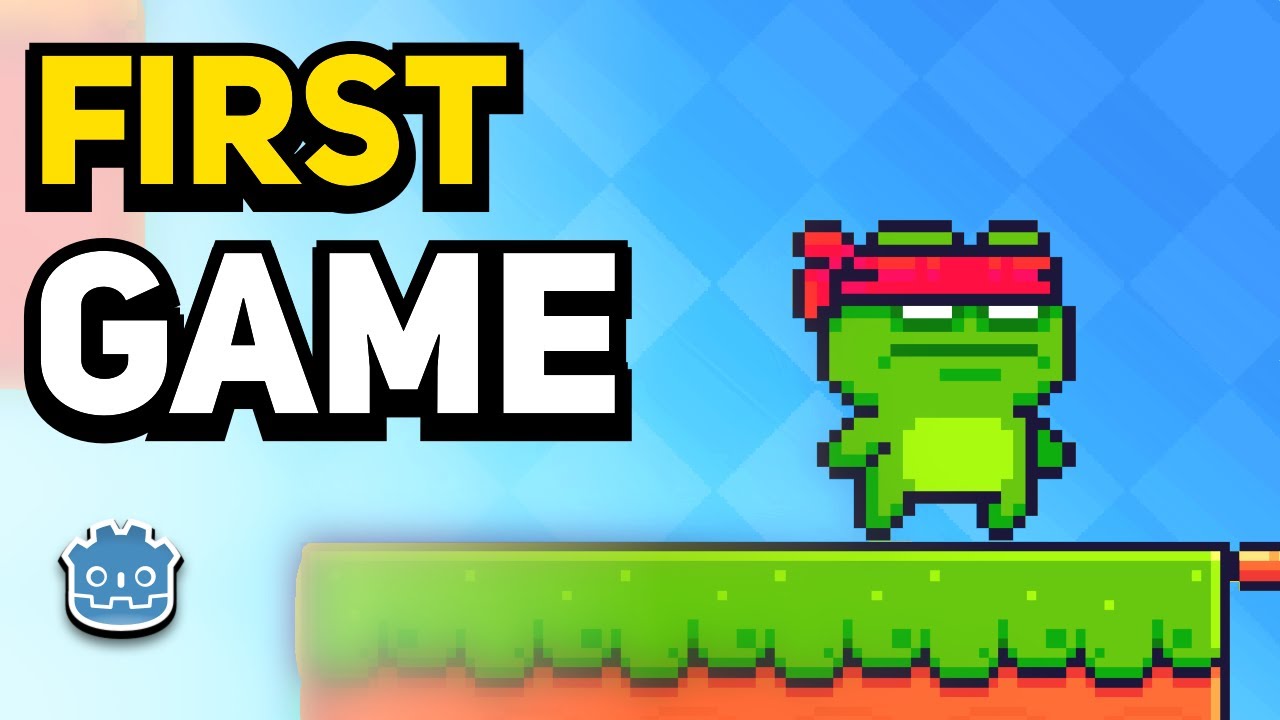
How To Make A Video Game - GDevelop Beginner Tutorial

GDevelop
3 May 202428:04

Summary

TLDRThis tutorial video showcases the creation of a 2D platformer game using GDevelop, an open-source game engine. It highlights the engine's no-code system, making game development accessible through intuitive event-based programming. The video guides viewers through character creation, level building with tile sprites, enemy implementation, and adding UI elements. It also covers essential game mechanics like scoring, animations, camera controls, and sound effects, providing a comprehensive foundation for beginners to jump into game development.

Takeaways

  • ๐Ÿš€ The video is a tutorial on using GDevelop, an open-source game engine, to create a platformer game.
  • ๐Ÿ“š GDevelop is praised for being fast, lightweight, and user-friendly due to its no-code system and event-based programming.
  • ๐Ÿ•น๏ธ The platformer game created in the tutorial features a character with animations and behaviors for movement and jumping.
  • ๐ŸŽจ The assets used in the video are CC0, meaning they are free to use without any restrictions.
  • ๐Ÿ” The tutorial covers creating a new project, importing assets, and setting up the game scene with pixel art optimization.
  • ๐Ÿงฉ It demonstrates adding objects and behaviors to the game, such as the platformer character behavior and platform behavior for level elements.
  • ๐Ÿ”„ The video explains how to use tiled sprites for level design and how they differ from regular sprite objects in terms of scaling.
  • ๐ŸŽฎ The tutorial includes setting up enemy behavior with a walking animation and collision detection to move back and forth.
  • ๐Ÿ“Š It shows how to implement scoring mechanics with a variable and updating UI text to reflect the score.
  • ๐Ÿ’€ The script includes creating death animations for the player character and resetting the scene upon death.
  • ๐ŸŽต Finally, the video discusses adding sound effects, music, and background elements to enhance the game experience.

Q & A

  • What is the main focus of the video tutorial?

    -The video tutorial focuses on creating a platformer game using GDevelop, an open-source game engine, and explains the process step by step.

  • Why is GDevelop considered advantageous for game development?

    -GDevelop is advantageous because it is fast, lightweight, and user-friendly due to its no-code system, allowing users to create games using a more human-readable event system.

  • What type of assets are used in the video, and what does CCO mean in this context?

    -The video uses CCO (Creative Commons Zero) assets, which means they are completely free to use without any restrictions or requirements.

  • How does GDevelop handle character animations?

    -GDevelop handles character animations by allowing users to import individual frames and set the time between frames to create a loop for animations like idle, running, or jumping.

  • What is the purpose of the platformer character behavior in GDevelop?

    -The platformer character behavior in GDevelop provides settings for character movement and jumping, and it enables characters to interact with platforms and ledges in the game.

  • How does the tutorial handle scaling issues with pixel art in GDevelop?

    -The tutorial suggests selecting 'Optimize for pixel art' when creating a new project, which adjusts default settings to better accommodate pixel art scaling.

  • What is the role of the tiled sprite object in building game levels?

    -Tiled sprite objects in GDevelop are used to build game levels by repeating the sprite image instead of stretching it, which is ideal for creating platforms and backgrounds in a level.

  • How does the tutorial implement enemy behavior in the game?

    -The tutorial duplicates the player object and modifies it to create an enemy, using events to flip the enemy's direction upon collision with a wall and to deactivate the player's controls for the enemy.

  • What is the significance of the smooth camera behavior in the game?

    -The smooth camera behavior in GDevelop is used to make the camera follow the player smoothly around the game scene, enhancing the gameplay experience.

  • How does the tutorial handle scoring and displaying the score in the game?

    -The tutorial creates a bitmap text object for displaying the score and uses a scene variable to track the score, updating the text object's text to reflect the current score each time the player collects a coin.

  • What are the different types of platforms created in the tutorial, and how do they function?

    -The tutorial creates solid platforms, jump-through platforms, and moving platforms. Solid platforms do not allow characters to pass through, jump-through platforms can be jumped through but not walked on, and moving platforms shift back and forth, carrying characters with them.

  • How does the tutorial implement death mechanics for the player character?

    -The tutorial uses an event that triggers when the player collides with an enemy or falls below a certain boundary. It changes the player's animation to 'death', deactivates the platformer behavior, and resets the scene after a short wait.

  • What is the purpose of the boundary object at the bottom of the screen?

    -The boundary object is used to set a limit for the camera movement downward, preventing the player from falling out of view and ensuring the camera stops at the top of the boundary.

  • How does the tutorial address the issue of the character going behind other objects?

    -The tutorial suggests adjusting the Z order of the objects. By setting a higher Z order value for the character, it ensures that the character appears in front of other objects in the scene.

  • What is the role of the animator behavior in character animation?

    -The animator behavior in GDevelop is used to manage character animations according to specific conditions and actions, allowing for smooth transitions between different animations like idle, running, and jumping.

  • How does the tutorial add sound effects and music to the game?

    -The tutorial uses the 'play a sound' action to add sound effects when the player interacts with objects like coins. It also uses the 'play a music file on a channel' action to add background music to the game scene.

  • What is the recommended text object to use for pixel art games in GDevelop?

    -For pixel art games, the tutorial recommends using the bitmap text object, which provides clearer rendering compared to the basic text object that can appear blurry due to smoothing effects.

Outlines

00:00

๐Ÿ•น๏ธ Introduction to GDevelop and Starting a New Project

The script introduces a tutorial on using GDevelop, an open-source game engine, similar to GDAU but with a no-code system that uses events for game creation. It emphasizes GDevelop's ease of use, speed, and lightweight nature. The video will guide viewers through creating a platformer game with CC0 assets. The process starts with creating a new project, optimizing settings for pixel art, and setting up the game scene with a blank slate and an event sheet. The first task is to add a platformer character using a Sprite object and importing animation frames.

05:02

๐Ÿ”„ Configuring the Platformer Character and Setting Up the Game World

The tutorial continues by detailing how to configure the platformer character with behaviors for movement and jumping. It explains how to adjust the character's scale for pixel art and set up the game's grid for level design using Tiled Sprites. The script covers creating a dirt platform, adjusting its properties, and adding a platform behavior for interactivity. The camera setup is also discussed, including zoom and centering on the player at the beginning of the scene.

10:03

๐Ÿ—๏ธ Building the Level and Implementing Different Types of Platforms

The script moves on to building the game level using Tiled Sprites, which are efficient for creating levels and UI elements. It demonstrates duplicating objects and assigning platform behaviors. The video introduces different platform types, such as solid, jump-through, and moving platforms, each with unique behaviors. The character's movement speed is fine-tuned, and a smooth camera behavior is added to follow the player. The level construction includes creating a bridge and setting up a moving platform with rectangular movement behavior.

15:05

๐Ÿ’ฐ Adding Collectibles and Creating an Enemy for the Game

The tutorial describes adding collectible items, like coins, to the game using a Spray object with an animation. It covers setting up collision events to delete the coin upon collection and incrementing the player's score. The script then explains creating an enemy by duplicating the player object and modifying its behavior for walking back and forth between boundaries. The enemy's movement is scripted using events and points for collision detection with the environment.

20:05

๐Ÿ‘พ Implementing Death Mechanics and Boundary Collisions

The script discusses implementing death mechanics for the player character, including setting up animations and events for death when colliding with enemies or falling off-screen. It explains using a boundary object to define the level's limits and preventing the camera from moving below this boundary. The tutorial also covers creating events to handle death animations and scene resets after player death.

25:07

๐Ÿ“ Adding Text for UI and Animations for the Player Character

The tutorial guides on adding text to the game for UI elements, such as scores and tutorials, using Bitmap Text objects suitable for pixel art. It explains adjusting text scale and positioning it on a separate UI layer. The script covers setting up a variable to track the score and updating it when coins are collected. Additionally, it describes using the Animator behavior to add and manage animations for the player character, such as idle, running, and jumping.

๐ŸŽจ Final Touches: Backgrounds, Sound Effects, and Music

The final part of the script focuses on enhancing the game's visuals with background elements and adding sound effects and music. It explains setting the Z-order for background objects and using the built-in sound creation tool in GDevelop to add sound effects for interactions. The tutorial also shows how to play background music and set it to repeat for continuous playback. The video concludes by encouraging viewers to explore further customization and additional features through GDevelop's resources.

Mindmap

Keywords

๐Ÿ’กGDevelop

GDevelop is an open-source game engine designed for creating 2D and 3D games without the need for writing code. It is characterized by its no-code system, which allows users to create games using events written in a more human-readable format. In the video, GDevelop is used to demonstrate the creation of a platformer game, showcasing its ease of use and capabilities.

๐Ÿ’กPlatformer Game

A platformer game is a type of video game that requires players to navigate through levels by jumping between platforms and avoiding obstacles. The video focuses on creating a platformer game using GDevelop, where the character can jump, run, and interact with various elements like coins and enemies.

๐Ÿ’กAssets

In game development, assets refer to the various elements such as images, animations, sounds, and music that are used to build the game's content. The script mentions using CC0 assets, which are free to use without any restrictions, for the video's platformer game.

๐Ÿ’กSprite Object

A sprite object in game development is a two-dimensional image or animation that is integrated into a game. In the script, the character and various game elements like coins are created as sprite objects, which are then animated and given behaviors for game interactions.

๐Ÿ’กBehavior

In GDevelop, a behavior is a set of predefined properties and actions that can be attached to objects to define how they function within the game. The script discusses adding behaviors like 'platformer character' to the player and 'platform' to create specific game mechanics.

๐Ÿ’กTiled Sprites

Tiled sprites in GDevelop are used to create repeating patterns or large surfaces without stretching the image. They are ideal for building game levels, as demonstrated in the script where they are used to create platforms and backgrounds for the platformer game.

๐Ÿ’กEvent Sheet

The event sheet in GDevelop is a visual programming interface that allows users to create game logic using a flowchart-like system. The script describes using the event sheet to set up game events, such as starting the scene, camera movements, and object interactions.

๐Ÿ’กCamera Boundaries

Camera boundaries in game development define the limits within which the camera can move. In the script, the camera boundaries are set to ensure that the camera does not move below a certain point, which is crucial for the platformer game's visual consistency.

๐Ÿ’กBitmap Text

Bitmap text is a type of text rendering that uses a predefined set of characters as images, often used in pixel art games to maintain a consistent visual style. The script explains using bitmap text for the game's UI to ensure that the text fits well with the pixel art aesthetic.

๐Ÿ’กZ-Order

Z-order refers to the stacking order of objects in a 2D game, determining which objects appear in front of or behind others. The script discusses adjusting the Z-order to ensure that the player character does not appear behind other objects in the game scene.

๐Ÿ’กSound Effects and Music

Sound effects and music are essential components of game audio that enhance the gaming experience. The script describes adding sound effects for actions like picking up coins and setting up background music to play at the start of the game scene, contributing to the game's atmosphere.

Highlights

Bracki returns to the internet with a tutorial on GDAU, an open-source game engine.

The video follows a similar format to previous tutorials but uses the GDevelop game engine.

GDevelop is praised for being fast, lightweight, and user-friendly with its no-code system.

GDevelop allows for the creation of 2D and some 3D games with ease.

The tutorial focuses on making a platformer game using assets that are free to use.

Creating a new project in GDevelop involves selecting a template or starting from scratch.

Pixel art optimization settings are available for projects in GDevelop.

Adding a platformer character involves importing images and setting up animations.

Behaviors can be added to objects in GDevelop to define how they function in the game.

The platformer character's movement speed and jump settings can be adjusted in the behavior settings.

Tiled Sprites in GDevelop are useful for creating levels without stretching images.

Different types of platforms, such as solid and jump-through, can be created with specific behaviors.

The camera can be set to follow the player smoothly in GDevelop.

Pickups like coins can be added to the game with animations and collision events.

Enemies can be created by duplicating the player object and adjusting their behaviors.

Death animations and events can be set up for the player character.

Boundaries can be set at the bottom of the screen to define the playable area.

Text objects in GDevelop can be used for UI elements like scores.

Bitmap text is recommended for pixel art games in GDevelop to avoid blurriness.

Scene variables can be used to track scores and update UI text dynamically.

Z-order can be adjusted to control which objects appear in front of others.

Background elements can be added to enhance the visual appeal of the game scene.

Sound effects and music can be integrated into the game for a more immersive experience.

GDevelop's built-in sound creation tool, jfxr, can be used for creating sound effects.

The tutorial concludes with suggestions for further customization and expansion of the game.

Transcripts

play00:00

recently bracki returned to the internet

play00:02

with a tutorial video about gdau a very

play00:05

popular open- Source game engine and in

play00:08

this video we're going to be following a

play00:09

similar format and using the same assets

play00:12

but we'll be using G develop another

play00:14

popular open source game engine and even

play00:16

though G develop doesn't have people

play00:18

writing songs about

play00:24

it it does have its advantages G develop

play00:27

is fast lightweight and super approach

play00:30

because of its no Code system instead of

play00:32

needing to learn and write lines of code

play00:35

gdevelop events are written in a much

play00:37

more human way things like if this key

play00:39

is pressed do this

play00:42

thing making it really easy to just jump

play00:44

in and start making games with G develop

play00:47

you can make basically any 2D game that

play00:49

you can imagine and even some in

play00:53

3D but in this video we're going to be

play00:56

making a platformer game the assets in

play00:59

this video are CCO which means that

play01:01

they're entirely free to use with no

play01:03

strings attached and we'll link to those

play01:06

assets in the description now the first

play01:08

thing you need to do when making a

play01:09

project is create a new project you can

play01:13

pick one of the template games and build

play01:15

off of one of those if you want to but

play01:17

we're going to start from a new project

play01:19

so we're going to click to create a

play01:20

project pick our default size give it a

play01:24

name pick where you're going to save

play01:27

it and then for this video we're going

play01:29

going to be using pixel art so we're

play01:31

going to select optimize for pixel art

play01:34

all this is going to do is change some

play01:35

of the default settings in the game

play01:38

project and now we create the project we

play01:41

start off with a blank scene with no

play01:44

objects our starting game scene and then

play01:47

our event sheet in the

play01:49

background so the first thing we need to

play01:51

do for a platformer game is ADD our

play01:53

platformer

play01:54

character so we'll click to create a new

play01:56

object there are over a dozen different

play01:59

object types pick from but we're going

play02:01

to start with a Sprite object for the

play02:04

character we're going to click to import

play02:06

some images into this

play02:08

object in this case I already have them

play02:10

broken up into individual frames from

play02:12

the pack online so we'll select the

play02:15

frames for the anal animation and add

play02:17

them in and then change the time between

play02:21

frames to find something that's at a

play02:23

good

play02:26

pace and we'll click here to make it

play02:28

Loop so this this is the idle animation

play02:30

for the

play02:31

player and we'll name that animation

play02:34

idle now the next thing we need to do to

play02:36

make it a platformer character is go to

play02:39

behaviors add a

play02:41

behavior and then select the platform or

play02:43

character Behavior which starts off at

play02:45

the top of the

play02:47

list in here there are a bunch of

play02:49

settings for how fast the character

play02:51

moves and jumps and whether or not they

play02:53

can grab onto Ledges or things like that

play02:57

and lastly we'll change the object's

play02:58

name to player

play03:00

and press

play03:01

apply now we can drag this into the

play03:04

scene and you can see it's really tiny

play03:06

because this is pixel art to scale so if

play03:09

I preview the game you'll see the tiny

play03:11

character fall off the screen the first

play03:13

thing we're going to do is go into the

play03:15

event sheet and click to add an event

play03:17

the way the events work is really simple

play03:20

on the left are conditions and on the

play03:22

right are actions so if a condition is

play03:25

true then an action will

play03:27

happen so we'll start with a condition

play03:30

beginning of scene so if it is the

play03:33

beginning of scene something will happen

play03:36

and in this case we're going to set the

play03:37

camera to zoom in and we're going to set

play03:39

it to four and base layer so it will

play03:41

zoom in four times the initial scale on

play03:43

the base layer and then we'll use

play03:46

another action to Center the camera on

play03:48

the player at the beginning of the scene

play03:50

so we'll use the action center the

play03:52

camera on an object and select the

play03:54

player object for the base layer so now

play03:57

when the scene starts we'll be zoomed in

play03:59

and the camera will start centered on

play04:00

the player and then they'll fall off

play04:03

screen again so now the next thing to do

play04:06

is set up the grid to be 16 by

play04:09

16 and we'll add a tille Sprite

play04:15

object and we'll start with a dirt

play04:17

platform and this image is 16x 16 so

play04:20

we'll set that as the default width and

play04:22

height and rename the object as platform

play04:25

dirt and then press apply then we can

play04:29

drag that platform into the scene and

play04:31

here it is now tiled Sprites expand

play04:34

differently than regular Sprite objects

play04:36

a regular Sprite object will grow in

play04:38

scale when you try to expand it but a

play04:41

tiled Sprite will actually repeat

play04:44

instead of stretching which makes them

play04:46

great for building out levels and doing

play04:48

lots of different things with UI if I

play04:51

double click on this I'll open up the

play04:53

object and then I can go to behaviors

play04:55

and add the behavior

play04:58

platform and then press Supply now this

play05:01

is a platformer character and this is a

play05:03

platform object so if I press preview

play05:07

now the character will land on the

play05:08

object and because this has the

play05:10

platformer character Behavior I can use

play05:13

the arrow keys in spacebar to move it

play05:15

around and launch it off the platform

play05:17

obviously that movement is too fast so I

play05:20

need to open up the player object go to

play05:22

Its Behavior and in the platform or

play05:25

object Behavior I need to adjust these

play05:27

values to find something that makes

play05:28

sense for this character

play05:30

at this

play05:43

[Music]

play05:54

scale now the next thing I'm going to do

play05:56

is build out the level with G develop

play05:59

you can use tiled a third party tile

play06:02

editor or LDK another third party level

play06:06

editor but for a level this size it's

play06:09

actually easier to just use til Sprites

play06:11

like the platform we have here so I'm

play06:13

going to add in more objects like this

play06:15

one and then build out the level

play06:27

[Music]

play06:39

when I have an object in scene already

play06:41

that I want to copy I can just press

play06:43

control and drag it to create a new copy

play06:45

of that

play06:51

object and because I duplicated these

play06:54

objects instead of creating new ones

play06:56

from scratch they came with the platform

play06:58

Behavior already on them

play07:00

so I don't need to add that for every

play07:01

single one next I'll add a new kind of

play07:05

platform and I'll call this one

play07:08

[Music]

play07:10

bridge what's different about this one

play07:13

is I'm going to go to the behaviors and

play07:15

instead of it being a basic platform or

play07:17

ladder I'm going to select jump through

play07:22

platform so now this object if I preview

play07:25

the game can be walked through and

play07:28

jumped through whereas the other ones

play07:30

are solid and can't be jumped through so

play07:32

I can jump on the top of this one and

play07:34

use the down key to go down below

play07:36

it and now that we're building the level

play07:38

out a little more we're going to want to

play07:40

make the camera follow the player so

play07:42

we're going to go to the player object

play07:44

and add a new behavior and this time

play07:47

we'll look for the smooth camera

play07:48

behavior and we'll pick the one for the

play07:50

platformer

play07:51

character again there are a bunch of

play07:53

values in here that you can change but

play07:55

for now I'm going to just press

play07:57

apply and now in the game scene the

play08:00

camera smoothly follows the player

play08:03

around next we'll add one more kind of

play08:05

platform and this will be one that can

play08:07

move so we'll duplicate the bridge and

play08:10

we'll call this moving for platform

play08:13

moving and we'll change the

play08:17

image this one's dimensions are 32x 9 so

play08:21

we'll change this information and put it

play08:23

here into the game now in behaviors

play08:27

again we'll add a behavior for for

play08:30

rectangular

play08:31

movement and in this Behavior we have

play08:33

two settings for width and height so if

play08:36

we change the height to zero then it

play08:38

will be a straight line instead of a

play08:40

rectangle and we can change how long it

play08:43

takes in each Direction but for now

play08:45

we'll just press apply and so now if I

play08:47

go up to that platform you'll see it

play08:49

moving back and forth and stopping for 1

play08:51

second on either side of its

play08:53

range and if the character jumps on the

play08:55

platform it'll move back and forth with

play08:57

it

play09:02

[Music]

play09:06

and there we go next we'll add some

play09:08

pickups to the game so the only 2D

play09:10

object with animations is a spray object

play09:13

so I'm going to create a new spray

play09:15

object and call it coin and then import

play09:18

those images

play09:19

in so I'll set it to Loop and press

play09:21

preview to see the speed of this

play09:23

animation and since it's a bit too fast

play09:25

I'm going to slow it down there we

play09:28

go and now with that done I can drag it

play09:30

into the scene and with control and the

play09:32

mouse I can create a bunch of copies and

play09:34

put them into the

play09:38

scene now the next thing we're going to

play09:40

do is go to the event

play09:41

sheet and create a new event and for

play09:44

this one we're going to add the

play09:45

condition for collision with the player

play09:47

and the coin so we're going to use the

play09:50

general object

play09:52

Collision of the

play09:54

player with the coin object so if the

play09:57

player runs into the coin

play10:00

we'll use the action delete and we'll

play10:02

select the

play10:03

coin so now if we take the player object

play10:06

and run it into the coin the coin will

play10:08

get deleted it's a really simple

play10:11

mechanic and now the next thing we're

play10:13

going to do is create an enemy for this

play10:15

character so the first thing I'll do is

play10:17

make a spot for

play10:23

that where we're going to use these

play10:25

walls to check for Collision to make the

play10:27

enemy walk back and forth so for this

play10:29

one I'm actually going to duplicate the

play10:31

player object because it has the

play10:32

platform of behavior and we've already

play10:34

set up the movement speed to make sense

play10:36

with this scale so instead of this idle

play10:39

animation we're going to add in one for

play10:41

the walking

play10:44

enemy we're going to select these images

play10:46

and delete them and then we have the

play10:49

enemies walk animation

play10:52

instead so to prevent the player from

play10:54

being able to control this we're going

play10:56

to go to the behavior and turn off

play10:58

default controls

play11:00

so now the arrow key in space won't

play11:02

affect this object and now I can put it

play11:04

into the

play11:06

scene before I preview the game though I

play11:08

need to take away its smooth camera

play11:10

Behavior because that will conflict with

play11:12

the player's smooth camera

play11:15

Behavior now if I preview the game

play11:17

you'll see that they fell down just like

play11:19

the player because they have the

play11:20

platformer object

play11:22

Behavior so now for the enemy I'm going

play11:24

to add a new

play11:25

event and use the condition horizontally

play11:28

flip

play11:30

because when the enemy runs into the

play11:31

ground in its path we're going to use an

play11:33

action to flip the character so it'll go

play11:35

in the other direction so we have one

play11:38

condition for is flipped and then we'll

play11:40

invert this one as the condition for not

play11:43

flipped so if the enemy is flipped we'll

play11:46

use the platform behaviors controls to

play11:49

simulate left key

play11:51

pressed so Movement platform Behavior

play11:55

platformer controls simulate left key

play11:57

pressed

play12:00

and then if it's not flipped we'll do

play12:01

the opposite we'll simulate the right

play12:03

key being

play12:04

pressed and then finally we'll go to the

play12:07

enemy

play12:08

object edit points so we're going to put

play12:12

a point on the

play12:13

object add the point and call it

play12:16

anything that we want to in this case

play12:17

I'm going to call it

play12:20

Checker and put it here in front of the

play12:22

character as long as it's in front of

play12:24

the character and it will collide with

play12:26

the

play12:27

wall so now that we have that point

play12:30

we can create a new event and check if

play12:32

the point is inside of an object and the

play12:35

object is going to be the platform Stone

play12:37

because that's what's on either side of

play12:39

the

play12:40

enemy and then we need the expression

play12:42

enemy so select the enemy first point x

play12:47

cuz this is the X position and this is

play12:48

the Y position along the grid and then

play12:51

we'll put in quotation marks and the

play12:53

autocomplete will show us the different

play12:54

points in that object and since all

play12:57

there is is Checker we can select that

play13:00

and there we

play13:02

go so this will check the exposition of

play13:05

that new point that we made on the enemy

play13:08

and then I can copy that

play13:09

down and change it to the Y Point

play13:13

instead so if that point is inside the

play13:20

stone we will set it to flip the

play13:23

object but now we need to do that again

play13:26

for the other direction

play13:29

so if the enemy is horizontally flipped

play13:32

and this point goes inside the stone

play13:34

platform inside

play13:38

this then we want to change it to the

play13:42

opposite so if it is flipped we're going

play13:44

to change it to no not be

play13:47

flipped and then if it's not flipped

play13:49

we'll use the flip horizontally action

play13:52

and set it to yes to

play13:54

flip so let's see that in action if we

play13:57

go over to the enemy we'll see it going

play13:59

back and forth way too fast but it's

play14:09

[Music]

play14:13

working there we go and now that we have

play14:16

an enemy that walks back and forth we

play14:18

need a way to die to it because

play14:20

otherwise it's not really a threat but a

play14:23

decoration so we'll go to the player

play14:26

object and include the animation for

play14:28

death

play14:35

we'll set the duration and this time we

play14:37

won't set it to

play14:39

Loop and then we'll go to the event

play14:41

sheet and create a new

play14:43

event and we can just copy this event

play14:45

from above where if the player is in

play14:47

collision with but change the coin to

play14:50

the enemy

play14:53

object we'll change the animation of the

play14:55

player based on its name to that death

play14:59

animation we just

play15:01

added and then we'll create a new event

play15:04

and check if the animation is that death

play15:08

animation check the animation by name

play15:11

select the player object and if it's

play15:13

equal to death

play15:16

[Music]

play15:18

then we'll use the action to deactivate

play15:21

the behavior of the player object and

play15:23

select the platformer object behavior

play15:25

and set it to

play15:27

no so now when the play's animation is

play15:29

equal to death we deactivate that

play15:32

behavior and then we'll change the scene

play15:34

to the current one to reset the scene so

play15:37

we'll use the action to change the

play15:39

scene and select the one that we're

play15:41

currently

play15:43

in but if we left it like this we

play15:45

wouldn't get to see the death animation

play15:47

play because it would set the animation

play15:49

making this condition true and then

play15:51

immediately afterwards resetting the

play15:54

scene so we'll use the action for wait X

play15:57

seconds

play15:59

and we'll make it wait 2

play16:01

seconds before resetting the scene and

play16:05

to prevent this event from triggering

play16:06

multiple times we'll use the condition

play16:10

trigger

play16:11

once there we go now if I bring the

play16:14

player character over to the enemy and

play16:15

run into it we die and then 2 seconds

play16:19

later the scene

play16:20

resets now let's do the same thing if we

play16:23

fall off the screen so what we want to

play16:25

do here is set a boundary for the bottom

play16:27

of the screen and the quickest way to do

play16:30

that is to just add an object and place

play16:32

it at the bottom of the screen so we'll

play16:35

create a spray object call it

play16:38

boundary and then we'll create one with

play16:41

piscal piscal is the built-in image

play16:43

editing software in G develop that can

play16:45

be really handy for small tasks like

play16:47

this one so we'll use the bucket tool

play16:51

and fill it with red and then name the

play16:54

image

play16:56

boundary and then save and now we have

play16:58

Red Square as the image for this object

play17:02

now Place boundary into the scene and

play17:05

use it to Mark the bottom of the level

play17:08

then I'll add a condition to check the Y

play17:11

position of the player

play17:13

object so condition for y position of

play17:16

the player

play17:17

object if it is greater than because the

play17:21

Y AIS is inverted so if the player Falls

play17:24

beyond the boundary the number will

play17:26

actually be greater than the boundary's

play17:28

position

play17:29

so we use the boundaries y

play17:33

position and then we want this to happen

play17:36

for both of these so I'm going to use

play17:39

the or condition to check for either of

play17:42

these

play17:44

conditions so now if the player is in

play17:46

collision with an enemy

play17:49

or the Y position of the player is

play17:52

greater than the boundry we change the

play17:54

animation to

play17:56

death and then if the animation is death

play17:59

we reset the

play18:01

scene so now if the player goes below

play18:04

that there we

play18:07

go although we don't actually want to

play18:09

see the boundary or the player stopping

play18:12

in midair when they fall so we're going

play18:14

to set the camera to no longer go below

play18:16

that

play18:17

point and we're going to do that by

play18:19

adding an

play18:21

event and using the action enforce

play18:24

camera

play18:26

boundaries but since the only hard

play18:28

boundary is the bottom which is this

play18:31

value here we'll set this to boundary y

play18:34

position so the camera will stop at the

play18:37

top of the

play18:38

boundary then we'll use the player's

play18:40

position for the other values so for the

play18:43

left bound we'll use the player's

play18:45

Exposition minus 1,000 for the right

play18:48

bound we'll use the exposition plus

play18:50

1,000 and then for the top boundary

play18:53

we'll use the player's y position minus

play18:56

1,000 because again minus is up and

play18:59

pluses

play19:02

down so now the camera works properly in

play19:04

all directions except for down and it

play19:08

will stop where that boundary is hiding

play19:10

both the boundary and the player

play19:12

stopping in midair the next thing you

play19:14

probably want to do is add text to your

play19:16

game now with gev develop there are

play19:18

three different types of text objects

play19:21

the basic text object works well at

play19:23

higher resolutions with softer edges but

play19:26

when you're working with pixel art it

play19:28

render is blurry because of that same

play19:30

smoothing effect that makes it look nice

play19:32

at higher

play19:33

resolutions so if you're adding text to

play19:36

a pixel art game you want to use the

play19:38

bitmap text

play19:40

object and for this I've already created

play19:42

a bitmap font there are lots of tools

play19:44

out there to do this but I used snow

play19:47

be.org and once you get that you'll get

play19:49

two files one being the font

play19:55

file and the other being the atlas image

play20:00

and you can just add both of those in

play20:02

and then drag your text into the

play20:04

scene you can change the scale of that

play20:07

text in the object with the text scale

play20:10

option and now we can use this text for

play20:13

lots of things in game whether it be

play20:15

in-game tutorials or onscreen UI to tell

play20:18

you how many coins you've picked

play20:20

up so we'll set one of these to be the

play20:22

tutorial text and we'll put text into

play20:25

the game

play20:30

and then we'll duplicate that and make

play20:33

this the UI

play20:37

text so since the camera is zoomed in

play20:40

four times for the UI this is the actual

play20:43

size of the

play20:44

screen so for the UI score we'll need to

play20:48

change the scale to fit the size of the

play20:49

screen

play20:56

[Music]

play21:00

and then to make this stick as UI on

play21:02

screen we need to have it on a separate

play21:04

layer from the camera that's moving with

play21:06

the player so we'll open up the layers

play21:09

panel and add a new layer call it the UI

play21:13

layer and then in the properties panel

play21:16

set that text object to be on the UI

play21:19

layer so now all of this in game is on

play21:22

the base

play21:23

layer and the UI text is on the UI layer

play21:28

so so if you preview the game you'll see

play21:31

that this text is in the game on the

play21:33

base

play21:34

layer and this text is stuck to the

play21:37

screen on the UI layer and now we need

play21:40

to make that score text actually do

play21:42

something so we're going to make that

play21:44

count up as we pick up coins so I'm

play21:47

going to right click on the screen and

play21:48

go to scene properties and then go to

play21:50

edit scene

play21:52

variables from here I'm going to add a

play21:56

variable I'm going to set that variable

play21:58

to be a number number variable and call

play22:00

it

play22:02

score so now in the event sheet where

play22:06

the player runs into and picks up coins

play22:09

we're going to add an action to make

play22:10

that score variable go up by one each

play22:13

time we do so we're going to go change

play22:16

number variable for a scene

play22:19

variable pick that score variable that

play22:22

we just

play22:23

added and change the modifier to

play22:26

add and then one as has the

play22:29

value and press

play22:32

okay now when the player collides with

play22:34

the coin we delete that coin and add one

play22:37

to the score but on top of that we also

play22:39

want to change the

play22:41

text so we'll select the UI score bitmap

play22:44

text

play22:45

object select text to modify the text

play22:50

and then we'll set that text to be the

play22:53

score and then plus combines two things

play22:56

together and then we'll type in score

play22:59

for the variable so this is the variable

play23:01

score that we just set

play23:04

up so it's the text score plus the

play23:09

variable and press

play23:12

okay so now we'll pick up the coin

play23:14

delete the coin change the variable and

play23:17

then set the text to show that

play23:20

variable and there we

play23:25

go and now we want to animate the player

play23:28

there are a bunch of different

play23:29

conditions and actions related to the

play23:32

platform Behavior but it's faster to use

play23:34

the animator behavior for it so if we go

play23:37

to the player object and go to behaviors

play23:40

we can search

play23:41

animate and we can find the platformer

play23:43

character

play23:45

animator which is a behavior that flips

play23:47

the character and animates it as long as

play23:50

we follow the naming scheme in the

play23:52

behavior so now I'll add two more

play23:54

animations to the character

play24:01

[Music]

play24:02

one for

play24:05

jumping make sure to name that

play24:12

jump and then one for running and I'll

play24:15

set that one to

play24:22

Loop and then I'll press

play24:25

apply now when I walk around the anim

play24:28

changes to the Run

play24:30

animation and when I jump the animation

play24:33

changes to the jump

play24:35

animation now you might have noticed

play24:36

that the character goes behind these

play24:38

objects in scene and that's because

play24:40

every time you add an object to the

play24:41

scene in G develop it adds one to the

play24:44

next object's zv value so the higher

play24:47

your Z order is the further ahead in the

play24:50

scene you are compared to other objects

play24:51

in the scene so if I change this up and

play24:54

down you can see the character going

play24:55

behind and in front of the objects so if

play24:58

I just put that up to a higher number

play25:00

and then preview the game the character

play25:03

will no longer go behind those

play25:06

objects now the last thing to do is make

play25:08

the scene look a little prettier and

play25:10

then add sound effects so I'm going to

play25:13

add a series of tile sprayed objects to

play25:15

use as the background

play25:45

[Music]

play25:50

I'll set the zorder of these objects

play25:52

down to -10 just so they're definitely

play25:54

in the background

play26:00

and then I'm going to add sound effects

play26:01

to the game and all I need to do for

play26:03

that is use the action to play a

play26:06

sound so when the player collides with

play26:08

the coin object use the action play a

play26:13

sound and then I can choose a

play26:16

file or create one with jfx

play26:19

r jfx r is the sound creation tool built

play26:23

directly into G develop and it's really

play26:25

useful for little sound effects to put

play26:27

throughout your game

play26:29

but since the asset pack that we're

play26:30

using already comes with sound effects

play26:32

I'm going to just pick one of

play26:36

those then I can set the

play26:38

volume and the

play26:40

pitch now whenever I pick up a coin it

play26:44

plays a

play26:45

sound and then every game wants to have

play26:48

some music of course so at the beginning

play26:50

of the scene I'm going to set up music

play26:52

to play so I'm going to use the action

play26:55

play a music file on a channel

play26:59

and pick the music that's in this asset

play27:02

pack again setting the volume and the

play27:06

pitch as well as the channel identifier

play27:09

that lets you pick which channel music

play27:11

is being played on and of course we want

play27:13

the music to continue playing so I'm

play27:15

going to select repeat the

play27:18

sound now when the game starts we have

play27:22

[Music]

play27:24

music and sound effects that get played

play27:27

when that character interacts with

play27:31

things now from here you can make any

play27:33

number of changes to the game to make it

play27:35

your own whether you want to add new

play27:37

enemies or any number of more

play27:39

complicated mechanics the gdevelop

play27:42

YouTube channel is full of tutorials to

play27:45

help you do just that

play27:48

[Music]

play28:03

he

Rate This
โ˜…
โ˜…
โ˜…
โ˜…
โ˜…

5.0 / 5 (0 votes)

Related Tags
GDevelopGame DevelopmentPixel ArtPlatformerTutorialOpen SourceGame EngineNo-CodeLevel DesignCharacter AnimationEvent Sheet