Figma To Real Website | Responsive Homepage | HTML, CSS & JavaScript | Part 3

GTCoding
13 Dec 202123:12

Summary

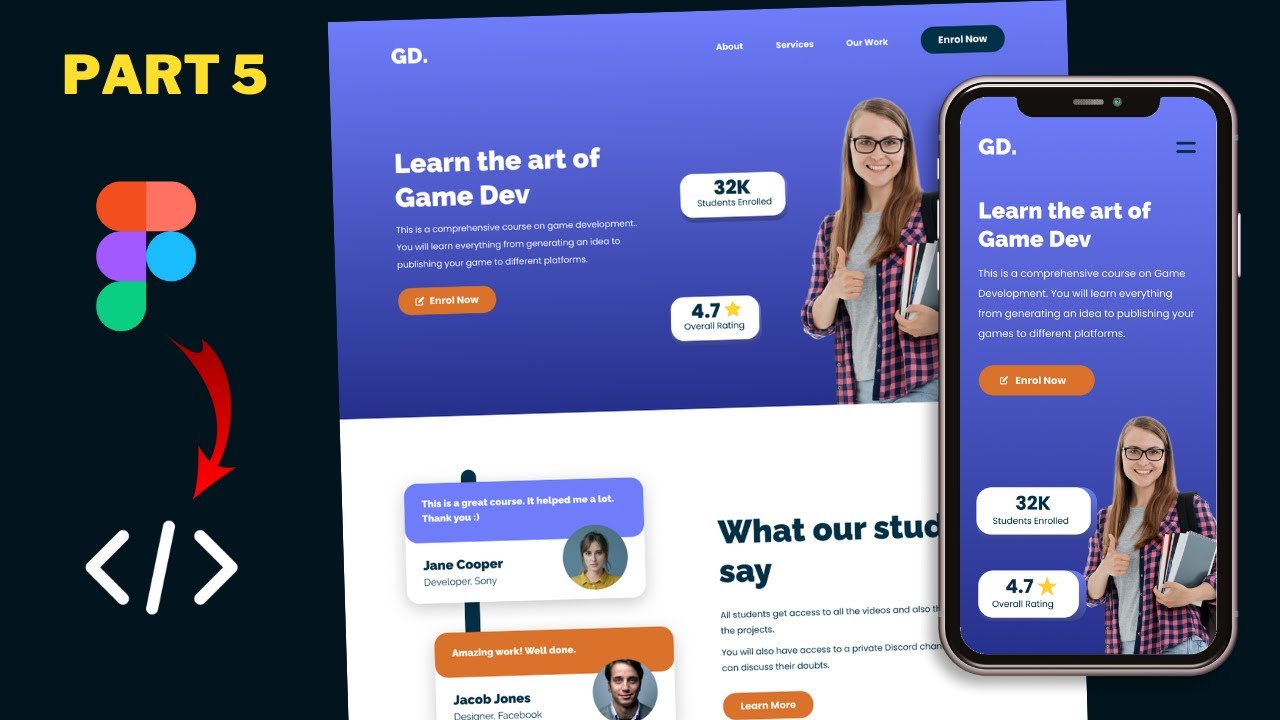
TLDRThis tutorial series guides viewers through transforming a Sigma design into a functional website using HTML, CSS, and JavaScript. The instructor demonstrates setting up the project in VS Code, creating necessary files, and adding CSS variables. The video focuses on writing HTML for the website's header, navigation, hero section, and other elements, while also showing how to export images from Figma. Viewers learn to structure the HTML to match the design, including responsive navigation for mobile views, setting the stage for subsequent CSS development.

Takeaways

  • 🌐 The tutorial series is focused on converting a Figma design into a real website using HTML, CSS, and JavaScript.
  • πŸ“ The project setup in VS Code includes HTML, CSS, and JavaScript files along with CSS variables.
  • πŸ–ΌοΈ Images are exported from the Figma file and placed in an 'images' folder for the project.
  • πŸ“ HTML structure starts with a header section, containing a logo, navigation menu, and a full-width gradient background.
  • πŸ”— The navigation menu includes links and a button styled with 'btn' and 'dark' classes for different appearances.
  • πŸ† The hero section features a left part with a heading, text, and button, and a right part with an image.
  • πŸŽ“ Achievement cards display statistics with headings, numbers, and a background rectangle styled in CSS.
  • πŸ’¬ The testimonials section includes two parts: left with testimonial cards containing text, name, company, and image; right with a heading, text, and button.
  • πŸ“š The courses section displays course cards with images, info, duration, and a 'View All' button to navigate to more courses.
  • πŸ“± The 'Get Our App' section promotes the app with a heading, paragraph, and buttons leading to the App Store and Google Play.
  • πŸ”— The footer contains links organized into sections with headings, social media icons, a subscription form, and copyright information.

Q & A

  • What is the main focus of this tutorial series?

    -The main focus of this tutorial series is to convert a sigma design into a real website using HTML, CSS, and JavaScript.

  • What is the first step shown in the video for setting up the project?

    -The first step shown in the video is creating HTML, CSS, and JavaScript files and adding CSS variables in the project.

  • How does the instructor demonstrate the export of images from the Figma file to the project?

    -The instructor shows the export of images by copying and pasting the images that were exported from the Figma file into the project's 'images' folder.

  • What is the purpose of the 'Live Server' extension in VS Code mentioned in the video?

    -The 'Live Server' extension in VS Code is used to open the HTML file in a browser, allowing for a live preview of the website as it is being developed.

  • What is the first section of the website that the instructor starts coding in HTML?

    -The first section of the website that the instructor starts coding is the header section, which includes the logo and menu items.

  • How many menu items are initially added to the navigation menu in the video?

    -Initially, three menu items are added to the navigation menu: 'About', 'Services', and 'Our Work', along with an 'Enroll Now' button.

  • What is the significance of the 'wrapper' class in the header section?

    -The 'wrapper' class in the header section is used to contain all the elements within the header and to set a max width for the contents inside the header, different from the full width background.

  • What are the two types of buttons mentioned in the video, and how are they differentiated in the code?

    -The two types of buttons mentioned are 'dark' and 'light'. They are differentiated in the code by adding a class of 'btn' for the button and an additional class of 'dark' for the dark button.

  • How does the instructor handle the creation of the hero section in the HTML?

    -The instructor creates a 'hero section' class division and within it, adds a 'left' class division for the heading, text, and button, and a 'right' class division for the image.

  • What is the method used in the video to add line breaks in the HTML for the heading text?

    -The method used to add line breaks in the HTML for the heading text is by inserting a 'br' tag after the text that should be on a new line.

  • What is the process for adding the testimonials section in the HTML as shown in the video?

    -The process involves creating a 'testimonials section' class division, within which two parts are created: a 'left' class division for the testimonial cards, each containing content, info, and an image, and a 'right' class division for additional text and a button.

  • What are the two types of headings mentioned for the courses section, and how are they applied in the code?

    -The two types of headings mentioned are 'light' and 'dark'. They are applied in the code by adding a class of 'light' to the 'h2' tag for the light heading.

  • How does the instructor approach the creation of the 'Get Our App' section in the HTML?

    -The instructor creates a 'wrapper' division and within it, a 'section' with the class 'app section'. It includes a heading, a paragraph, and two 'app btn' class divisions, each containing an 'img' tag for the icon and a 'span' for the text.

  • What components are included in the footer section of the website as per the video?

    -The footer section includes a 'wrapper' division, three 'links' class divisions each with a heading and list of links, social media icons, an input field for email subscription, and copyright information.

  • How does the instructor plan to handle the mobile version of the website in terms of HTML changes?

    -For the mobile version, the instructor mentions that no changes are needed in the HTML as the elements are the same, but implies that CSS will be used to adapt the layout for mobile viewing.

  • What is the final step shown in the video for completing the HTML structure of the website?

    -The final step shown in the video is adding comments in the HTML code to mark the end of each section, such as 'end of header section', 'end of testimonials section', 'end of courses section', and 'end of app section'.

Outlines

00:00

πŸ“ HTML Setup and Initial Structure

The tutorial begins with an introduction to converting a design into a functional website using HTML, CSS, and JavaScript. The presenter shows the project setup in Visual Studio Code, including the creation of HTML, CSS, and JavaScript files, and the incorporation of CSS variables. It also covers the export of images from Figma into the project's image folder. The focus then shifts to writing HTML code for the website, starting with the header section, which includes a full-width background with a container for the logo and navigation menu items. The menu items and a button are added, and the presenter demonstrates how to view the website in a browser using the Live Server extension.

05:01

🌐 Building the Header and Hero Sections

This section continues the HTML coding process, focusing on the header and hero sections of the website. The presenter creates a 'wrapper' division to contain the header's contents and adds a logo and navigation items, including an 'enroll now' button with specific styling. The hero section is composed of two parts: a left side with a heading, text, and a button, and a right side featuring an image. The presenter details the process of adding HTML elements for these sections and ensures that the layout is displayed correctly in the browser.

10:02

πŸ† Creating Achievements and Testimonial Sections

The tutorial moves on to constructing the achievements and testimonials sections of the website. The presenter adds HTML for displaying cards that highlight student enrollment numbers and overall ratings, complete with headings, text, and background styling. For the testimonials section, the process involves creating content divisions for text, info divisions for names and company names, and image tags for profile pictures. The section also includes a heading, paragraphs, and a 'learn more' button on the right side.

15:02

πŸ“š Developing the Courses Section

The presenter now works on the 'Our Courses' section, starting with a 'wrapper' division and a heading. Course cards are created, each containing an image, course info, duration, and a unique class for styling. The process involves copying and pasting the course card structure while modifying the image sources and course details for each card. A 'light' button is added at the end of the section to navigate to all courses, and the presenter checks the display in the browser to ensure everything is rendered correctly.

20:05

πŸ“² App Section and Footer HTML Structure

The tutorial proceeds with the 'Get Our App' section, which includes a heading, a paragraph, and two app buttons for the App Store and Google Play, each with an image and text. The presenter then moves on to the footer, detailing the creation of a 'wrapper' division, links container, and individual link sections with headings, list items, and anchor tags for navigation. Social media icons are added with their respective anchor and image tags, followed by a subscription form with an input field and a submit button. The footer concludes with a copyright notice in a paragraph.

πŸ”š Finalizing the Footer and Mobile Navigation

In the final part of the script, the presenter completes the footer by adding the necessary HTML elements and ensuring the layout is correct in the browser. The focus then shifts to preparing the website for mobile viewing, which involves adding a mobile navigation menu, icons for opening and closing the menu, and hiding the desktop menu items for mobile users. The presenter emphasizes that no changes are needed for the iPad version as the elements are the same. The video concludes with a summary of the HTML coding completed and a teaser for the upcoming CSS development in the next tutorial.

Mindmap

Keywords

πŸ’‘HTML

HTML, or HyperText Markup Language, is the standard markup language used to create web pages. It defines the structure and layout of a webpage by using a variety of elements and attributes. In the video's context, HTML is used to write the code for the website's structure, including the header, navigation menu, and other sections, ensuring that the content is organized and displayed correctly in the browser.

πŸ’‘CSS

CSS stands for Cascading Style Sheets, a stylesheet language used for describing the presentation of a document written in HTML or XML. In the video, CSS is mentioned as the next step after HTML, where it will be used to style the website, giving it the visual appearance shown in the design mockup. CSS variables mentioned in the script are a way to manage and reuse values throughout the stylesheet, contributing to a more maintainable and scalable design.

πŸ’‘JavaScript

JavaScript is a high-level, interpreted programming language that is commonly used to enhance web pages with interactive elements. Although not extensively discussed in the script, JavaScript files are mentioned as part of the project setup, implying that it will be used to add functionality to the website, such as handling user interactions or dynamic content updates.

πŸ’‘Figma

Figma is a cloud-based interface design tool and digital design platform used for creating, collaborating, and sharing user interface designs. In the script, Figma is used as the source of the design that the tutorial series aims to convert into a real website. Images are exported from Figma and used in the HTML to match the design.

πŸ’‘VS Code

VS Code, or Visual Studio Code, is a popular source-code editor made by Microsoft for Windows, Linux, and macOS. It includes support for debugging, embedded Git control, syntax highlighting, intelligent code completion, snippets, and code refactoring. In the video, VS Code is used as the integrated development environment (IDE) for creating and editing the HTML, CSS, and JavaScript files for the project.

πŸ’‘Live Server

Live Server is an extension for VS Code that launches a local development server and provides live reloading. In the script, the Live Server extension is mentioned as a tool to preview the website in a browser as development progresses, allowing for immediate visual feedback on changes made to the code.

πŸ’‘Header Section

The header section of a webpage typically contains the logo, navigation menu, and possibly other elements like a sign-in button or search bar. In the video, creating the header section is one of the first tasks, and it includes setting up the full-width background with a linear gradient and a container for the contents, such as the logo and navigation items.

πŸ’‘Navigation Menu

A navigation menu is an interactive element on a webpage that allows users to access different pages or sections of the site. In the script, the navigation menu is constructed using HTML list items and anchor tags, and it includes menu items like 'About', 'Services', 'Work', and a 'Enroll Now' button, which are essential for directing users through the website.

πŸ’‘Hero Section

The hero section of a webpage is a prominent area typically at the top of the page, designed to attract attention and make a strong first impression. In the video, the hero section includes a heading, descriptive text, a call-to-action button, and an accompanying image, all of which are coded in HTML to match the design from Figma.

πŸ’‘Achievements Cards

Achievements cards are a design element often used to display statistics or accomplishments in an engaging way. In the script, these cards are part of the webpage's design, featuring headings, numbers, and text, such as '32k Students Enrolled' and '4.7 Overall Rating', and are coded using HTML div elements with appropriate classes for styling.

πŸ’‘Responsive Design

Responsive design is an approach to web design that makes web pages render well on different devices and screen sizes, from desktops to mobile phones. Although not explicitly mentioned in the script, the need to consider the iPad and mobile versions implies the importance of responsive design in the development process.

Highlights

Introduction to the tutorial series on converting a sigma design into a real website using HTML, CSS, and JavaScript.

Setting up the project in VS Code with HTML, CSS, and JavaScript files, and adding CSS variables.

Exporting images from the Figma file into the project for use in the website design.

Starting the HTML coding for the website by creating the header section with a full-width background.

Creating a container division for the header content and adding a logo and navigation menu items.

Using the Live Server extension in VS Code to preview the website in a browser.

Adding menu items and a button with different styling for desktop view navigation.

Creating the hero section with a left part for heading, text, and button, and a right part for an image.

Copying and pasting the text content from Figma to HTML for accurate representation.

Building the achievements cards section with headings, text, and a unique styling for each card.

Adding a testimonial section with left and right parts including cards, text, and a button.

Creating the courses section with course cards, each containing an image, info, and duration.

Integrating a 'Get Our App' section with a heading, paragraph, and app store buttons.

Designing the footer with a wrapper division, links container, and social media icons.

Adding a subscribe form with an input field and a submit button in the footer.

Finalizing the HTML structure for the desktop version of the website.

Discussing the need for mobile-specific navigation and icons for the mobile version of the website.

Previewing the footer in the browser to ensure all elements are correctly displayed.

Upcoming steps in the series to write CSS and make the design visually match the Figma prototype.

Transcripts

play00:00

hi everybody welcome to gt coding in

play00:02

this tutorial series we are converting

play00:03

this sigma design into a real website

play00:05

using html css and javascript now in the

play00:08

previous video i showed you how to set

play00:09

up the project and

play00:11

if you go to our

play00:13

vs code

play00:14

here we can see we have created these

play00:17

files over here

play00:18

html css and javascript files

play00:21

and we also added some css variables

play00:23

over here and

play00:25

this is our html file we have added some

play00:27

boilerplate html code and also the link

play00:29

of the font

play00:31

and i have shown you how to export the

play00:32

images from the figma file into our

play00:35

project so here we can see we have

play00:37

exported these two images now you can

play00:39

use the same method to export all the

play00:41

other images

play00:42

so i'll just go ahead and copy and paste

play00:45

all the images that i exported into this

play00:46

images folder alright so here i have

play00:48

copied all the images that i exported

play00:50

from the figma file now in this video we

play00:53

will start writing the html for our

play00:54

website so let's get started

play00:57

[Music]

play01:02

all right let's go back to our figma

play01:03

file and

play01:05

let's see how to get started so the

play01:07

first thing we will do is we'll create

play01:09

this header section so for that let's go

play01:11

back to our html and let's create a

play01:14

header tag

play01:15

so here i'll just type header

play01:18

and in the header we need to have

play01:20

a division to contain everything so here

play01:22

we can see we have a max width for all

play01:24

the elements but the header has

play01:27

full width so here we can see for the

play01:29

header we have this linear gradient

play01:30

background but we have a max width for

play01:33

all the contents inside the header so we

play01:35

have to create a container division for

play01:37

that so for that let's create a division

play01:38

of the class of wrapper

play01:41

and in this will create a nav element to

play01:43

hold all these menu items and also this

play01:45

logo

play01:47

so let's create a nav element

play01:50

and in that we will create a division of

play01:52

the class of logo for this logo

play01:54

so let's create a division with the

play01:55

class of logo

play01:58

and here i'll just type gd dot

play02:03

so this is our logo

play02:04

and the next thing we need to do is add

play02:06

these menu items now for this i'll just

play02:09

create an unordered list so let's create

play02:12

an unordered list over here so i'll just

play02:13

type ul

play02:15

and for each of the menu items we'll

play02:16

create a list item so let's type li

play02:19

and here i'll just create an anchor tag

play02:21

for the menu items

play02:22

and for the stuff i'll just tap hash for

play02:24

now

play02:25

and here in the anchor tag the first

play02:28

menu item we need to have is about so

play02:30

i'll just type about over here

play02:32

and let's open this in our browser and

play02:34

let's see how it looks so i have this

play02:36

extension called live server installed

play02:38

in vs code so you can go ahead and

play02:39

search for live server and once you

play02:41

install it you can simply right click

play02:43

over here in the html and click on open

play02:45

with live server

play02:47

and here we can see our

play02:49

design is opened in the browser so here

play02:52

we can see we have the logo and the

play02:53

first menu item

play02:55

so let's go back to our vs code

play02:57

and i'll just copy this list item

play03:00

and we need to have two more menu items

play03:02

and we also need to have this button

play03:04

so let's copy it three more times

play03:07

so just paste it down here

play03:10

and for the second menu item we have

play03:11

services and then we have our work

play03:15

so i'll just type that over here

play03:16

services and

play03:18

our work

play03:21

and for the last menu item we have a

play03:23

button and for the button we have a text

play03:25

of enroll now so here i'll just type

play03:28

enroll now

play03:30

and since this is a button we need to

play03:32

style it differently so i'll just add a

play03:33

class over here so let's type class

play03:36

and we will add a class of btn for the

play03:39

button and we will style it in the css

play03:41

now if you go back to our design we can

play03:43

see that we have two types of buttons we

play03:45

have a dark button and also a light

play03:47

button

play03:47

so we'll also add a class called dark

play03:49

over here for the dark button

play03:51

or that's it with the menu items of our

play03:53

desktop version so here after this nav

play03:55

element i'll just create a comment so

play03:57

you can just press command forward slash

play03:59

and you will have this comment and here

play04:01

i'll just type end of desktop navigation

play04:03

menu

play04:07

right now the next thing we need to add

play04:08

is this hero section

play04:10

so for that let's create a division with

play04:12

the class of hero section

play04:15

so here i'll just type dot heroes

play04:17

section and press tab

play04:19

and now in the hero section we need to

play04:21

have two parts one for the left path

play04:23

which is

play04:24

the heading and this text and this

play04:26

button and then for the right part we

play04:28

have this image so let's create a

play04:30

division with the class of left

play04:32

and in this left division we will have

play04:33

an h1 for this text

play04:36

so let's type h1

play04:38

and you need to have this text so i'll

play04:40

just copy this double click over here

play04:42

and copy this from here

play04:44

and let's paste it over here

play04:47

and we need to have a line break over

play04:48

here because we can see we have this

play04:51

learn the art of in one line and we have

play04:53

game dev in the next line so here after

play04:56

off i'll just create a br tag to add a

play04:59

line break now if you go back to our

play05:00

browser we can see that we have two

play05:02

lines over here for the heading

play05:04

or let's go back to our figma file

play05:07

and the next thing we need to add is

play05:09

this text so i'll just copy this from

play05:11

here

play05:12

and let's go back and here i'll just

play05:14

create a paragraph so i'll just type p

play05:17

and here i'll just paste the text

play05:20

or now the next thing we need to have is

play05:21

a button so i'll just create an anchor

play05:24

tag for that

play05:25

and

play05:26

in the edge of i'll just type hash and

play05:29

for the button we will have a class of

play05:30

btn

play05:34

and this is a light button so i'll just

play05:35

type light over here as well and here in

play05:37

the text we need to type enroll now so

play05:39

i'll just type it over here

play05:43

all right that's it with the left part

play05:45

of our hero section now on the right

play05:46

part we need to have this image

play05:49

so let's create a division of the class

play05:50

of right

play05:53

and here let's create an img tag

play05:56

and in the source i'll just type images

play05:58

slash and i have saved it as hero image

play06:01

so here we can see heroimage.png

play06:05

all right so let's go back to our

play06:06

browser and here we can see we have the

play06:09

image and everything is displayed

play06:10

correctly let's go back to our figma

play06:13

file

play06:14

and now the next thing we will do is

play06:16

we'll create the html for these two

play06:18

elements over here so for these i'll

play06:20

just create a division of the class of

play06:22

achievements cards

play06:24

so let's go back

play06:25

and let's go outside this

play06:28

right division and here i'll just create

play06:30

a division of the class of achievement

play06:32

cards

play06:35

and in this will create a division of

play06:37

the class of achievement card

play06:39

so i'll just type achievement

play06:42

card

play06:43

and we need to have two cards one for

play06:45

this

play06:46

students enrolled

play06:48

so for that i'll just create a class

play06:51

so just type students enrolled

play06:57

so that we can style them differently in

play06:59

the css now here in this division we

play07:01

need to have the heading

play07:03

so this is the heading and then we need

play07:05

to have this text

play07:07

and then for the second card we have a

play07:09

heading and we also have an image over

play07:10

here and then we have this text so let's

play07:13

go back

play07:14

and i'll just create a division of the

play07:15

class of content

play07:17

and here i'll just create an s3

play07:20

and here this tab

play07:22

is 32k so i'll just type 32k

play07:26

and then we need to have this paragraph

play07:28

so for that let's create a p tag over

play07:29

here after the heading

play07:32

and i'll just type students enrolled

play07:38

and then we have this background

play07:40

rectangle over here so we also have a

play07:41

rectangle behind this main rectangle now

play07:44

to style that will create a division

play07:45

with a class of bg

play07:47

so here after this content i'll just

play07:49

create a division of the class of bg

play07:52

and we'll style it using css right now

play07:54

let's copy this achievement card

play07:57

and let's paste it down here

play08:00

and here instead of students enrolled

play08:02

i'll just type overall rating

play08:09

and then here we have this number 4.7 so

play08:12

i'll just type that over here

play08:15

and after that we need to have this star

play08:16

image

play08:18

so what i will do is i'll just create a

play08:20

division for this heading so i'll just

play08:21

type div over here

play08:23

and i'll just add this heading inside

play08:25

this division

play08:26

now let's do the same over here as well

play08:28

so just type div

play08:31

and i'll just add this heading inside

play08:33

the division

play08:34

now after this heading let's create an

play08:36

img tag

play08:37

and here in the src i'll just type

play08:39

images slash and i have named it star

play08:42

icon.svg

play08:45

and then here instead of students

play08:46

enrolled i'll just type overall rating

play08:52

right that's it with the header section

play08:53

so if you go back to our figma file we

play08:55

can see that all the elements have been

play08:57

covered if you go back to our

play09:00

google chrome

play09:01

here we can see all the elements are

play09:03

displayed over here

play09:04

right now let's go back to our vs code

play09:06

and here after the header i'll just

play09:08

create a comment

play09:10

and i'll just tap end of the header

play09:13

section

play09:16

right now let's go back to figma file

play09:18

and the next section we need to add is

play09:20

this testimonial section and it is also

play09:23

inside this fixed width so let's create

play09:27

a wrapper division for this so i'll just

play09:29

type dot wrapper

play09:31

and we are adding this class called

play09:33

wrapper

play09:34

and here also we have added this class

play09:36

called wrapper

play09:37

now when we style this using css we will

play09:39

have the same styles applied to this

play09:40

division and also

play09:43

this division right here because they

play09:45

both have the same class

play09:46

so both of them will have the same max

play09:48

width right now for the testimonials

play09:50

section i'll just create a section and

play09:52

i'll just give it a class of

play09:53

testimonials section

play09:57

and let's go back to our figma file

play09:59

and here also we have two parts we have

play10:01

the left part where we have these two

play10:03

cards

play10:04

and on the right part we have this text

play10:06

and this button

play10:07

so let's go back to our html and here

play10:09

let's create a division of the class of

play10:11

left

play10:12

and we will have a division of the class

play10:13

of testimonial cards for each of these

play10:15

testimonial cards so let's create a

play10:17

division of the class of testimonial

play10:19

card

play10:20

and in that the first thing we need to

play10:22

have is the content of the testimonial

play10:23

which is this text

play10:25

so just copy this

play10:28

and let's create a division of the class

play10:29

of content

play10:31

and i'll just paste it over here

play10:33

and then we have this info where we have

play10:35

the name and the company name

play10:37

so for that i'll just create a division

play10:38

of the class of info

play10:40

and then for the name i'll just create

play10:41

an h4

play10:43

and we have the first name as jane

play10:45

cooper so i'll just type

play10:47

jane cooper over here

play10:49

and then we have the company name so

play10:51

i'll just copy this from here

play10:53

and i'll just create a paragraph with

play10:54

the class of company

play10:57

and i'll just paste it over here

play10:59

and now the next thing we need to add is

play11:01

this image so let's go outside this info

play11:03

division

play11:05

and here i'll just create an img tag and

play11:07

in the src i just type imageslash and i

play11:10

have saved it as testimonial1.png

play11:13

right now let's copy this testimonial

play11:14

card

play11:16

and i'll just paste it down here

play11:18

and we'll change the details over here

play11:19

so let's go back and i'll just copy this

play11:21

text

play11:22

and let's go back and paste it over here

play11:26

let's go to figma file and let's copy

play11:28

this name

play11:31

and let's paste it over here instead of

play11:33

the previous name

play11:36

and then lastly we have this

play11:38

company name

play11:40

so i'll just copy this and paste it over

play11:42

here

play11:44

and then we'll change the image to

play11:45

testimonial two dot png

play11:48

or that's it with the left part of our

play11:49

testimonials section right now let's uh

play11:52

fold this left division over here

play11:54

so i'll just click on this button

play11:57

and let's create a division of the class

play11:58

of right

play12:01

and in here we need to have a heading so

play12:03

i'll just create an h2 for that

play12:05

and let's copy this text

play12:07

and let's paste it over here and now we

play12:10

need to have two paragraphs so i'll just

play12:11

copy this

play12:13

and let's go back and create a paragraph

play12:16

and i'll just paste it over here

play12:18

and let's create one more paragraph

play12:22

and i'll just copy this text

play12:25

and i'll just paste it over here

play12:27

and then lastly we need to have this

play12:29

button

play12:30

so for that i'll just go outside

play12:33

this right division and let's create an

play12:35

anchor tag and we'll just type hash for

play12:38

the sref

play12:40

and let me just give it a class of btn

play12:42

and it is a light button so i'll just

play12:44

give it a class of light

play12:46

and we have a text of learn more

play12:50

or that's basically it with the

play12:51

testimonial section so i'll just create

play12:52

a comment over here

play12:54

and i'll just type end of

play12:57

testimonials section

play13:01

and let's go back to our chrome

play13:04

and we can see everything looks all

play13:06

right we have all the elements displayed

play13:07

over here

play13:10

right now let's go back to our figma

play13:11

file and if we scroll down we have the

play13:14

our courses section

play13:16

so for that let's create a section so

play13:18

here i'll just type

play13:20

section and we'll just give it a class

play13:22

of

play13:23

courses section

play13:27

and in here we need to have a wrapper

play13:29

class because we need to have fixed

play13:31

width

play13:32

so let's type dot wrapper over here

play13:35

and in this we need to have the heading

play13:37

first of all

play13:39

so let's create an edge too

play13:41

and let's type our courses

play13:45

and just like the button we also have

play13:46

two types of headings we have a light

play13:48

heading and also a dark heading

play13:50

so for the light heading we will have a

play13:52

class of light for the h2

play13:55

so here i'll just type

play13:57

class and set it to light

play14:00

all right now the next thing we need to

play14:01

have are these course cards

play14:03

so for that let's create a division of

play14:05

the class of course cards

play14:08

and in that for each of the cards we'll

play14:10

create a division of the class of course

play14:11

card

play14:14

and in here we need to have an image so

play14:17

let's create img tag and in the source

play14:19

i'll just type images slash and i have

play14:21

named it as course1.png

play14:24

and then we need to have the info about

play14:26

the course so i'll just copy this

play14:28

and let's go back and let's create a

play14:30

division of the class of info

play14:34

and for the heading i'll just create an

play14:35

s3 and i'll just paste it over here

play14:38

and then we have the duration so for

play14:40

that let's create a division of the

play14:41

class of duration

play14:44

and here i'll just type 8 hours

play14:49

right now let's copy this course card

play14:52

and let's paste it down for the next

play14:53

course

play14:56

and here i'll just change the details so

play14:59

for the image i'll just type course2.png

play15:02

and i'll just copy this heading

play15:05

and paste it over here

play15:10

and then we have eight hours i'll just

play15:12

change this to 15 hours

play15:15

right now the last thing we need to have

play15:16

in this course section is this button

play15:20

so here just after

play15:22

the end of the course cards section i'll

play15:24

just create a button so just create an

play15:26

anchor tag

play15:28

and i'll just give it a class of btn

play15:32

and it is a light button so i'll just

play15:34

type light over here

play15:36

and for the text we have all courses

play15:40

all right that's basically with the

play15:42

course section so i'll just create a

play15:43

comment over here

play15:45

i'll just tap end of courses section

play15:49

right now let's go to our browser and

play15:50

let's see whether everything is being

play15:52

displayed correctly so here we can see

play15:54

we have the images and the details so

play15:56

everything is working all right

play15:59

let's go back to our figma file and the

play16:01

next thing we need to create is the get

play16:03

our app section

play16:05

so let's go back to our vs code and

play16:07

let's create a wrapper division

play16:10

and in that we'll create a section with

play16:11

the class of app section

play16:16

and in this we need to have a heading so

play16:19

we need to type get our app so just

play16:21

create an edge too and let's tap get our

play16:23

app

play16:25

and then we need to have a paragraph so

play16:27

i'll just copy this text

play16:29

and let's go back and create a paragraph

play16:32

and i'll just paste the text over here

play16:34

and then we need to have these two

play16:36

buttons so for the buttons i'll just

play16:38

create a division of the class of app

play16:40

buttons

play16:46

and for each of the button i'll just

play16:47

create a division of the class of app

play16:49

btn

play16:52

now in the button we need to have this

play16:53

image and we need to have this text so

play16:56

let's create an img tag

play16:58

and i'll just type images slash

play17:01

and it is called app store icon dot svg

play17:05

and then we need to have a text called

play17:07

app store so for that let's create a

play17:09

span

play17:11

and here i'll just type app store

play17:14

right now let's copy this and let's

play17:16

paste it down here

play17:19

and we'll just change the

play17:21

image to

play17:24

google play icon

play17:26

and for the text we need to have google

play17:28

play

play17:32

all right that's it with the app section

play17:34

so let's create a comment over here and

play17:36

i'll just tap end of the app section

play17:41

right now let's go to our browser and

play17:42

let's see whether everything is being

play17:44

displayed over here and here we can see

play17:46

we have the heading the text and also

play17:49

the icon and the text over here so

play17:51

everything is working all right let's go

play17:53

back to our figma file and the last

play17:55

thing we need to have is this footer so

play17:57

let's go back to our vs code and here

play18:00

let's create a footer tag

play18:02

for the footer

play18:03

and even for the content of the footer

play18:05

we need to have a max width so let's

play18:07

create a wrapper division

play18:09

now for all these links over here we'll

play18:11

create a division of the class of links

play18:12

container

play18:14

so let's create a division with the

play18:16

class of links container

play18:20

and now for each of these links section

play18:22

i'll just create a division of the class

play18:23

of links

play18:28

and the links we need to have a heading

play18:30

for this text so just create an s3 and

play18:33

the first heading is quick links

play18:38

and then for all these links let's

play18:39

create an unordered list

play18:41

so let's create a ul

play18:43

and in that we will have list items

play18:46

and we'll have anchor tags for the links

play18:49

and the first one is about us so just

play18:51

type about us over here

play18:53

and we need to have three more links so

play18:55

just copy this list item

play18:57

and paste it three more times

play19:01

and let's change the text to contact us

play19:03

privacy policy and terms and conditions

play19:13

all right that's it with the first set

play19:14

of links

play19:15

now let's copy this links division

play19:19

and we need to paste it two more times

play19:20

for these two links section

play19:23

so i'll just copy this and paste it down

play19:25

here

play19:26

and paste it one more time

play19:29

right now for the second heading we have

play19:30

course

play19:31

so just type course over here

play19:35

and then for the links we have login

play19:37

download and all courses

play19:48

and we have just three links over here

play19:49

so i'll just delete this list item

play19:53

and then for the third link we have a

play19:55

heading of contact us

play19:59

and you need to have this email id

play20:01

so i'll just remove this anchor tag

play20:04

and i'll just type the email id over

play20:06

here

play20:07

and now we can delete the rest of the

play20:09

list items so i just delete all of this

play20:11

from here

play20:13

and then for these

play20:15

social media icons let's create a

play20:17

division of the class of social

play20:19

so here i'll just type social

play20:22

and in here we need to have these two

play20:24

icons so let's create an anchor tag for

play20:26

that

play20:28

and let's create an img tag and for the

play20:30

first image we need to have the facebook

play20:32

icon so i'll just type images

play20:34

slash facebook logo.svg

play20:37

and i'll just copy this anchor tag

play20:41

and paste it down here

play20:44

and let's change this to

play20:47

instagram

play20:49

and then we need to have this input

play20:50

field over here and also this button so

play20:53

let's go outside this division

play20:56

and let's create a form

play20:58

and for the action i'll just type hash

play21:00

for now

play21:01

and in the form we need to have an input

play21:03

field and the type will be text and

play21:05

we'll also add a placeholder and for the

play21:08

placeholder we will type email address

play21:13

and then we need to have a button

play21:15

so let's create a button

play21:18

and for the button we will give you the

play21:19

class of submit button

play21:25

and here let's tab subscribe

play21:29

right now the last thing we need to do

play21:30

is add this text so i'll just copy this

play21:35

and let's go outside this

play21:39

links container division so i'll just

play21:41

fold this

play21:43

and here i'll just create a paragraph

play21:45

and let's give it a class of copyright

play21:48

and i'll just paste the text over here

play21:50

all right that's basically it with the

play21:52

footer

play21:52

so with that we have written the html

play21:54

for the desktop version of our website

play21:57

so if you go back to our sigma design we

play21:59

can see that we have added all these

play22:01

elements in our html

play22:03

now for the ipad version we don't need

play22:04

to change anything in the html because

play22:06

we can see that all the elements are the

play22:08

same

play22:09

but for the mobile version we need to

play22:10

add this

play22:11

navigation menu for the mobile version

play22:13

and we also need to add

play22:15

this icon and this close icon and we

play22:17

need to hide these menu items from here

play22:20

all right so let's go to our

play22:22

browser

play22:23

and let's see whether the footer is

play22:25

being displayed correctly

play22:26

and here we can see all the links are

play22:28

displayed over here we also have the

play22:30

input field

play22:31

the button and the copyright information

play22:34

so everything looks alright so that's

play22:36

basically it with this video we have

play22:38

written the html of our design now from

play22:40

the next video we will start writing the

play22:42

css and we'll make it look like this so

play22:44

that's it for this video if you have any

play22:46

doubts you can ask in the comments below

play22:47

and if you like this video please click

play22:49

on the like button and subscribe to this

play22:50

channel to get the latest video updates

play22:52

thanks a lot for watching have a nice

play22:54

day

play22:57

[Music]

play23:11

bye

Rate This
β˜…
β˜…
β˜…
β˜…
β˜…

5.0 / 5 (0 votes)

Related Tags
Web DevelopmentHTML CodingCSS StylingJavaScriptDesign ConversionWebsite TutorialFigma ExportResponsive DesignCoding ProjectLive Server