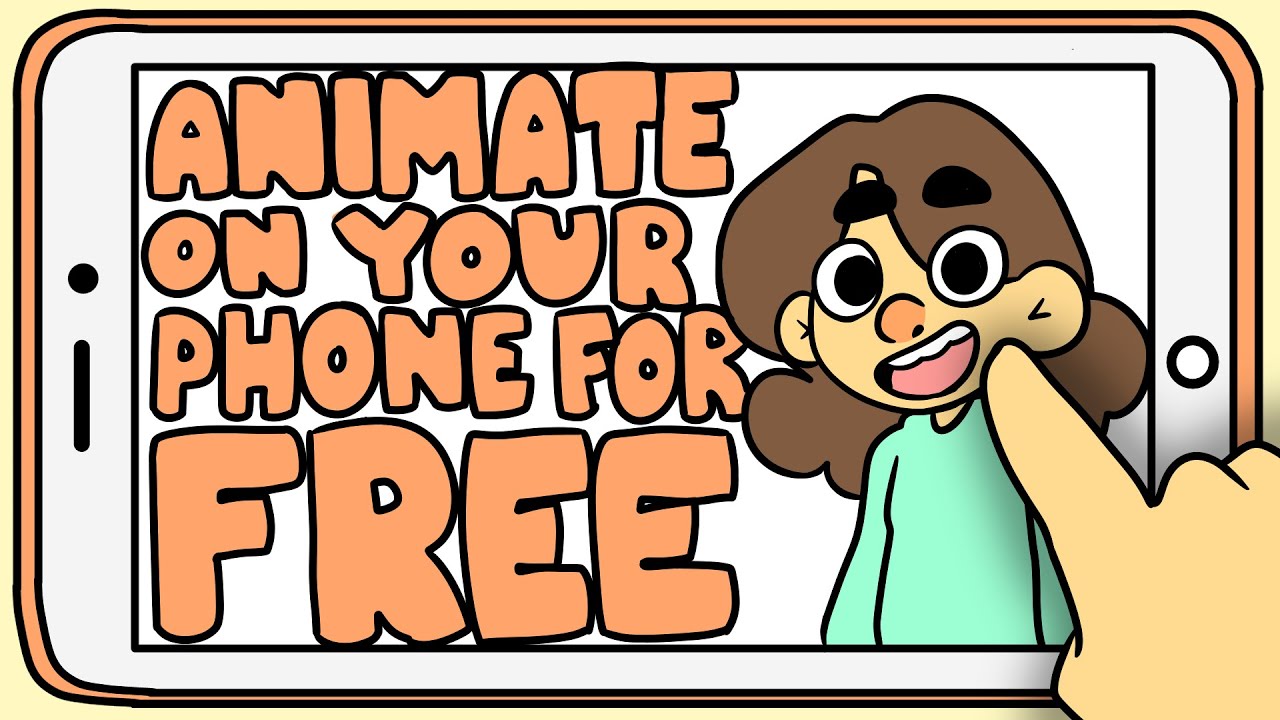
How to Animate on FlipaClip Tutorial for Beginners (FREE!)

Jesse J. Jones
29 Oct 202016:21

Summary

TLDRIn this tutorial, you'll learn how to create animations using just your phone with the Flipaclip app. The instructor walks you through downloading and setting up the app, creating a new project, and using various tools and features like layers, onion skin, and the lasso tool. You’ll animate a bouncing ball and learn about key animation principles like squash and stretch. The tutorial also covers adding audio and syncing mouth movements for character animation. By the end, you’ll know how to animate and export your creations for YouTube.

Takeaways

  • πŸ“± You can animate using just your phone, with apps like Flipaclip, Rough Animator, and Procreate.
  • πŸ“₯ Flipaclip is free and accessible, making it a good choice for beginners.
  • πŸ“² To start, download Flipaclip from your app store, install it, and open the app.
  • πŸ”§ Familiarize yourself with Flipaclip's default tutorial to understand its tools.
  • 🎨 Create a new project, name it, choose a background, and set your canvas size and frame rate.
  • πŸ–ŒοΈ Use the tools on the left for drawing, with the animation timeline at the bottom and layers on the bottom right.
  • πŸ‘† Zoom in and out using two fingers, and use the undo and redo buttons as needed.
  • ✏️ Select drawing tools, adjust their size, and choose colors from default palettes or create your own.
  • πŸ”„ Use the lasso tool to select, transform, rotate, and move parts of your drawing.
  • πŸ—‚οΈ Utilize layers to organize your sketches, inks, and colors, and adjust their opacity and visibility.
  • πŸ€ Practice animating with a simple bouncing ball exercise, using squash and stretch principles.
  • 🎬 Export your animation by making a movie and sharing it on YouTube or other platforms.
  • πŸ”Š Add and edit audio for lip sync animations, using a phenome chart as a guide.
  • πŸ—£οΈ Create and animate mouth shapes for lip sync by copying and pasting frames to match the audio.
  • πŸŽ₯ Review and play your animation to ensure smooth transitions and correct lip syncing.

Q & A

  • What app is recommended for animating on phones in this tutorial?

    -The tutorial recommends using the Flipaclip app for animating on phones.

  • Can the Flipaclip app be used on both Android and iPhone devices?

    -Yes, the Flipaclip app can be used on both Android and iPhone devices.

  • What are some other animation apps mentioned in the tutorial?

    -Other animation apps mentioned in the tutorial include Rough Animator and Procreate.

  • How do you start a new project in Flipaclip?

    -To start a new project in Flipaclip, click on the plus button to create a new project, give it a name, choose a background, select a canvas size, and set the frames per second.

  • What canvas size is recommended for the highest resolution in this tutorial?

    -The tutorial recommends selecting YouTube 1080p for the highest resolution.

  • What is the recommended frames per second (FPS) setting for a smooth animation in Flipaclip?

    -The tutorial recommends setting the project to 12 frames per second (FPS) for a smooth animation.

  • How can you zoom in and out on the canvas in Flipaclip?

    -You can zoom in and out on the canvas in Flipaclip using two fingers to pinch or spread on the screen.

  • How do you add a new layer in Flipaclip?

    -To add a new layer in Flipaclip, click the layers panel on the bottom right, then click the plus button to add a new layer.

  • What tool is used to create a bouncing ball animation in the tutorial?

    -The tutorial uses the pen tool and the lasso tool to create a bouncing ball animation.

  • How do you export your animation from Flipaclip to YouTube?

    -To export your animation to YouTube, click the three dots on the top right, select 'make movie,' then 'make movie' again, and finally click the share button and select YouTube.

  • What principle of animation is demonstrated by the bouncing ball example?

    -The bouncing ball example demonstrates the principle of squash and stretch.

  • How do you add audio to your animation in Flipaclip?

    -To add audio to your animation in Flipaclip, click the music note on the bottom left, then click the plus button on the bottom right to either add downloaded audio or record your own audio using the microphone icon.

  • What feature allows you to see the previous frame while drawing the next one in Flipaclip?

    -The 'onion skin' feature allows you to see a ghost image of the previous frame while drawing the next one in Flipaclip.

  • What tool is used to transform and move parts of a drawing in Flipaclip?

    -The lasso tool is used to select, transform, and move parts of a drawing in Flipaclip.

  • How do you copy and paste frames in Flipaclip?

    -To copy a frame in Flipaclip, hold down your finger on the frame, select the copy button, then go to the desired frame and hold down your finger again to paste it.

Outlines

00:00

πŸ“± Introduction to Mobile Animation

This tutorial covers animating using phones, specifically an Android phone, but it also works for iPhones. The app 'Flipaclip' will be used, which is free and accessible to everyone. Other recommended apps include 'Rough Animator' and 'Procreate.' The tutorial starts by downloading Flipaclip from the app store and setting it up. Users are advised to follow the in-app tutorial to get familiar with the tools. The first step is creating a new project, naming it, choosing a background, and setting the canvas size to YouTube 1080p. The frames per second (fps) is set to 12 for a smooth animation while minimizing the number of frames to draw.

05:01

πŸ”§ Setting Up Your Workspace

The video explains how to open Flipaclip and navigate the interface. Tools are on the left, the animation timeline is at the bottom, layers are on the bottom right, and the play button is on the right. To zoom and rotate the canvas, use two fingers. The pen tool is selected by default, and users can undo or redo actions. The tutorial covers selecting different drawing tools like the pencil, paintbrush, and highlighter, adjusting brush size, and choosing colors. The eraser tool and its options are explained, along with the paint bucket tool for filling shapes.

10:02

βœ‚οΈ Using Advanced Tools and Layers

The tutorial introduces the lasso tool for selecting and transforming parts of the drawing, such as scaling and rotating. The concept of layers is explained, comparing them to stacks of paper. Users can add, delete, lock, copy, and adjust the opacity of layers. Naming layers is encouraged for organization. An example of using layers is shown by adding a color layer beneath an ink layer. The tutorial then demonstrates creating a basic animation of a bouncing ball, utilizing the onion skin feature to see previous frames and copying frames to create smooth motion. The importance of squash and stretch in animation is highlighted.

15:04

πŸ€ Animating a Bouncing Ball

The video shows how to animate a bouncing ball, a fundamental exercise in animation. Starting with a ball at the top of the canvas, the tutorial uses the onion skin feature to draw successive frames of the ball moving downward, applying squash and stretch principles for a realistic effect. The tutorial explains how to copy and paste frames to reverse the ball's motion for the bounce back up. Adding in-between frames is demonstrated to smooth out the animation. The video emphasizes that more drawings lead to smoother animations but also increase the work required. The completed animation is then played back.

🎬 Exporting and Lip Syncing

After finishing the animation, the tutorial shows how to export the project for YouTube by selecting 'Make Movie' and sharing it directly to YouTube. The video then shifts focus to lip-syncing, adding audio to the animation. Users can record their own audio or add a pre-recorded clip, trim the audio, and sync it with the animation. The tutorial explains creating hold frames for consistent character positions and introduces a phenome chart for drawing mouth shapes corresponding to different sounds. Copying and pasting mouth shapes for different frames is demonstrated to achieve accurate lip-syncing. The finished lip-sync animation is played back to show the results.

πŸ‘ Final Tips and Farewell

The video concludes by encouraging viewers to like and subscribe for more tutorials. The importance of sharing the video and leaving comments with questions or project updates is emphasized. The tutorial wraps up with a thank you message and well wishes, inviting viewers to check out future content and continue practicing animation on their phones.

Mindmap

Keywords

πŸ’‘Flip a Clip

Flip a Clip is an animation app used for creating animations on mobile phones. It is highlighted in the video as the primary tool for learning animation due to its accessibility and free availability. The tutorial walks through downloading, setting up, and using Flip a Clip to create a simple animation.

πŸ’‘Animation

Animation refers to the process of creating motion and shape change illusion by means of the rapid display of a sequence of static images that minimally differ from each other. In the video, animation is created using Flip a Clip, demonstrating the fundamental steps such as setting up a project, drawing, and using tools to animate a bouncing ball and a character lip-sync.

πŸ’‘Layers

Layers in animation are used to separate different elements of the artwork, similar to sheets of transparent paper stacked on top of each other. The video explains how to add, rename, and organize layers, demonstrating their use in keeping sketches, ink, and color separate, and adjusting their opacity for better workflow management.

πŸ’‘Frames per second (fps)

Frames per second (fps) indicates the number of individual frames or images that are displayed per second in an animation. The tutorial recommends starting with 12 fps for smoother animation while balancing the amount of work required. The choice of fps affects the animation's smoothness and the workload.

πŸ’‘Onion skin

Onion skin is a feature in animation software that shows a ghosted image of previous frames to help animators see the progression of motion. This tutorial uses onion skin to aid in creating consistent motion for the bouncing ball animation, demonstrating how it helps in drawing the next frame in the sequence.

πŸ’‘Squash and stretch

Squash and stretch is an animation principle that gives the illusion of weight and volume to characters as they move. The tutorial demonstrates this principle using a bouncing ball, showing how to squash it when it hits the ground and stretch it as it moves fast, emphasizing the realistic movement.

πŸ’‘Lasso tool

The lasso tool is used to select parts of the drawing to transform, such as moving, scaling, or rotating the selected area. The tutorial shows how to use the lasso tool in Flip a Clip to adjust parts of the animation, such as the ball’s position and shape during the animation process.

πŸ’‘Lip sync

Lip sync in animation involves matching the mouth movements of a character with spoken audio to create the illusion of speech. The video demonstrates how to add audio to an animation and create different mouth shapes to sync with the audio, enhancing the realism of character animation.

πŸ’‘Brush size and hardness

Brush size and hardness are settings in drawing tools that determine the width and edge sharpness of the brush strokes. The tutorial explains how to adjust these settings in Flip a Clip to achieve different drawing effects, such as creating fine details or broader strokes, and adjusting the eraser for soft or hard edges.

πŸ’‘Export

Exporting is the process of saving the final animation in a specific format to share or upload it, such as to YouTube. The tutorial guides through the steps of exporting the completed animation from Flip a Clip, including adjusting settings and selecting the format for the final video output.

Highlights

Learn how to animate using just your phone with Flipaclip.

The tutorial uses an Android phone, but it works for iPhones too.

Flipaclip is free and accessible, making it the chosen app for this tutorial.

Other recommended apps include Rough Animator and Procreate.

Step-by-step instructions for downloading and installing Flipaclip.

Importance of checking out Flipaclip's default tutorial to get familiar with the tools.

Create a new project, choose a background, and set canvas size to YouTube 1080p for high resolution.

Explanation of frames per second (fps) and recommendation to start with 12 fps.

Overview of Flipaclip's interface: tools on the left, timeline on the bottom, layers on the bottom right, and play button on the right.

Detailed guide on using the pen tool, including size and color options.

Explanation of the eraser tool and its options, including size, hardness, and transparency.

Introduction to the paint bucket fill tool and how to use it.

How to use the lasso tool for selecting and transforming parts of your drawing.

Importance and functionality of layers in animation, including adding, deleting, and renaming layers.

Animating a bouncing ball as a basic exercise, including squash and stretch principles.

Instructions for copying and pasting frames to create smoother animations.

Guide to exporting your animation for YouTube.

Adding and editing audio for lip-sync animation, including recording your own audio.

Creating and using hold frames for lip-sync animations.

Using a phenome chart to draw accurate mouth shapes for lip-sync.

Final lip-sync animation demo with audio.

Encouragement to like, subscribe, and share the video if the tutorial was helpful.

Transcripts

play00:00

in today's tutorial we will learn how to

play00:02

animate using nothing but

play00:04

our phones

play00:06

[Music]

play00:12

and the example i'll be using is an

play00:14

android phone but this will work for

play00:16

iphones as well

play00:17

so the app i'm going to be using for

play00:19

animating on our phones is called flip a

play00:21

clip

play00:21

there's also other apps that i would

play00:23

recommend like rough animator which is

play00:25

about five dollars and is also a very

play00:27

good app and also procreate but in this

play00:29

tutorial flip a clip is free and pretty

play00:31

much accessible to everyone so that's

play00:32

the one we're going to use

play00:34

so we're going to open up our app store

play00:35

and we're going to type in flip a clip

play00:37

to download it

play00:38

then click the install button so now

play00:41

that you've got flip a clip downloaded

play00:43

let's open it and i'll just turn my

play00:45

screen horizontal so we can see what

play00:47

we're working on

play00:48

it'll ask some questions when you're

play00:49

first installing i don't want to give

play00:51

away how old i am

play00:52

34 but um and then when it first starts

play00:55

up there's a little tutorial

play00:57

i recommend checking out its default

play00:58

tutorial just so you get familiar with

play01:00

how to use all the tools but we'll also

play01:02

go over the tools in this video

play01:03

so i'm going to click dismiss for now so

play01:05

to start a new project we're going to

play01:07

click on the plus button to create a new

play01:09

project

play01:09

give a name to your project we'll call

play01:12

this one first

play01:13

animation click done and then we can

play01:16

choose a background for our animation

play01:18

so it comes pre-installed with all these

play01:20

backgrounds already loaded onto it

play01:22

or you can use the paint bucket to

play01:24

select a color use the

play01:26

image gallery or you can take a photo

play01:28

with your camera button here

play01:29

but we'll just leave it blank for now

play01:31

and then for the canvas size

play01:33

you can select all these different

play01:35

default options

play01:36

i'm going to select youtube 1080p

play01:38

because that'll give us the highest

play01:40

resolution for our project

play01:41

then click the check mark to say ok and

play01:43

for frames per second

play01:45

you can think of this as how slow or how

play01:47

fast your animation is

play01:49

so for this project we're going to do 12

play01:51

frames per second

play01:52

i recommend starting this way because

play01:54

it'll give you a nice smooth animation

play01:56

but you also won't have to draw as many

play01:58

frames

play01:58

if you're okay with drawing a lot of

play02:00

frames 24 frames per second is pretty

play02:03

standard as well

play02:04

and will give you a nice smooth

play02:05

animation so we'll set our project to 12

play02:07

frames per second

play02:09

press the check mark and we're all ready

play02:11

to go so select create project

play02:14

and we have our project created so for

play02:16

some phones you'll be able to rotate

play02:18

your canvas using your two fingers and

play02:20

rotating

play02:21

some phones will not be able to support

play02:23

this but we'll turn it on for this

play02:24

example

play02:25

just so you can see what that looks like

play02:27

and when you first open up flip a clip

play02:29

all your tools are on the left side your

play02:32

animation timeline is on the bottom

play02:34

your layers is on the bottom right and

play02:36

your play button for your animation is

play02:38

on the right

play02:39

then you have your tools for your canvas

play02:41

on the top right

play02:42

to move around your canvas and flip a

play02:44

clip you can use two fingers to zoom

play02:46

in and out and you can also rotate it if

play02:49

you enabled that

play02:50

option before so zooming in can be

play02:52

really useful for drawing like fine

play02:53

details for example

play02:55

and to zoom back out you can select this

play02:57

four arrows on the top right here

play02:59

and that'll reset your view back to a

play03:01

hundred percent so the pen

play03:03

is selected by default when you first

play03:04

start out and if you select with your

play03:06

finger and just start drawing

play03:07

it'll start drawing for you if you want

play03:09

to undo just click the backwards button

play03:12

here

play03:13

and to redo select the forward button if

play03:15

you select any of the tools after it's

play03:17

been clicked

play03:18

on already you'll get your options for

play03:20

your tools

play03:21

so this top option if we click it we can

play03:23

select

play03:24

pencil paint brush or highlighter and

play03:27

then the next option is the size of your

play03:28

brush

play03:29

so if you press and hold you can see a

play03:31

little size option and then if you drag

play03:33

up you can get a bigger brush and if you

play03:36

select that circle

play03:37

and drag down you can get a smaller

play03:39

brush

play03:40

and then the square below that is how

play03:42

you select your color

play03:43

so you'll see that it has all these

play03:45

default color palettes

play03:46

next to it i like selecting the sketches

play03:49

palette personally

play03:50

and then you'll see these colors appear

play03:52

on the right so you can select

play03:54

different colors on your palettes or you

play03:56

can create your own palette by clicking

play03:58

this add palette button at the bottom of

play03:59

it

play04:00

or you can select what color you want on

play04:02

the outside ring

play04:04

and then selecting how dark or how light

play04:06

it is in the middle

play04:07

my next tool is my eraser so i can

play04:10

select that

play04:10

and then select it again for the options

play04:12

and again you have

play04:14

the size as your first option and then

play04:16

you have the hardness of eraser as the

play04:17

next option

play04:18

so it'll have either a really soft

play04:21

outline so you can get

play04:22

really soft edges or if you drag it all

play04:25

the way to the bottom

play04:27

you'll have really hard edges for really

play04:29

solid erasing

play04:30

and then the next option is the

play04:32

transparency amount so if i didn't want

play04:34

to erase it completely i could set this

play04:36

to say 50

play04:37

and then erase it and it'll only erase

play04:39

our drawing 50 percent of the way

play04:42

there's also the paint bucket fill tool

play04:44

so if i create a shape

play04:45

and then use my paint bucket tool and

play04:47

press in the middle it'll fill it in

play04:49

and again you can click on it again and

play04:52

then press the color button to select

play04:53

what color you'd like it to fill in with

play04:56

the next tool i want to go over is the

play04:57

lasso tool so the lasso tool is very

play04:59

useful

play05:00

so what you can use it for is selecting

play05:02

a part of your drawing

play05:03

and then you'll see this transformation

play05:05

box around it so we can select our

play05:07

corners to scale our drawing

play05:08

or we can select the sides to scale it

play05:10

only on one side

play05:12

or we can select the circle to rotate

play05:13

our drawing and we can also move this

play05:15

anchor point in the middle here

play05:17

so that it rotates along a certain point

play05:20

of the drawing

play05:21

so this is good for say moving arms

play05:22

around or moving the head around on the

play05:25

point where the pivot would be which

play05:26

would be the neck

play05:27

and you can also select flip horizontal

play05:30

on the side here or flip vertical

play05:32

or delete it entirely with the trash can

play05:34

when you're done transforming your

play05:35

drawing

play05:36

just select off of it and the lasso tool

play05:38

will disappear

play05:39

so the next thing i want to go over is

play05:41

layers for your animation

play05:42

so your layers panel is on the bottom

play05:44

right here right where this stack of

play05:46

paper is

play05:47

and that's kind of what you can think of

play05:48

layers as is stacks of paper

play05:50

so if i select it my sketch layer is on

play05:53

the bottom here and then my ink layer is

play05:55

on the top

play05:56

if i want to add a layer i can just

play05:58

click this plus button on the bottom

play05:59

here

play06:00

and it'll add a layer to delete a layer

play06:02

i can swipe

play06:04

to the left and i'll get options to

play06:06

either lock the layer

play06:07

copy the layer or delete the layer if i

play06:10

want to change the opacity for a layer

play06:11

like i did with my sketch layer here

play06:13

i can press and hold and i'll get the

play06:15

same opacity

play06:16

slider so i can drag up to make it more

play06:19

opaque

play06:20

or drag it down to make it more

play06:22

transparent

play06:23

so i have it at 50 right now and if i

play06:26

want to make it invisible

play06:27

i can tap it instead of holding it and

play06:29

you'll see a little eyeball with a cross

play06:30

through it showing that it's invisible

play06:32

but it's still there and to rename a

play06:34

layer i can tap on the name

play06:36

and rename it it's important to name

play06:38

your layers just so you have everything

play06:39

nice and organized

play06:41

always a good habit to get into so for a

play06:43

quick example of how layers work i can

play06:45

add a layer

play06:47

call it color so if i color in this

play06:49

layer

play06:50

you can see the color is appearing

play06:52

behind the ink layer

play06:53

but if i take that layer and drag it on

play06:55

top you'll see my color is now in front

play06:57

of my ink layer

play06:58

so this is typically how i like to

play07:00

arrange my layers i like to have the

play07:01

sketch on the bottom at about fifty

play07:03

percent

play07:04

my color layer in the middle and then my

play07:06

ink layer on top

play07:07

so now that we know how to draw and flip

play07:09

a clip let's animate something

play07:10

so the example we're going to use when

play07:12

we animate is a bouncing ball

play07:14

it's a really great exercise when you're

play07:15

first learning to animate and it's kind

play07:17

of a cool thing to show off once you're

play07:18

done

play07:19

so to start off draw a small ball at the

play07:21

top of your canvas

play07:22

or if you're having trouble drawing a

play07:24

ball you can use this ruler tool

play07:26

at the top here and these are the shapes

play07:28

that you can draw with the ruler

play07:30

so we'll select circle bring in the

play07:32

sides to make the circle smaller

play07:34

and then drag it in place using the

play07:35

square in the middle and then whatever

play07:37

tool you have selected in your drawing

play07:39

tools

play07:40

you can trace around the circle like so

play07:42

and you'll get a perfect circle

play07:44

then just click the ruler icon to get

play07:46

rid of the ruler so to add a new frame

play07:48

in your animation simply click the plus

play07:50

button down in your animation timeline

play07:51

at the bottom

play07:53

and this will add a new frame you'll see

play07:55

a ghost of the image before

play07:57

this is called onion skin and it allows

play07:59

us to see where we need to draw the next

play08:00

position

play08:01

in our animation to turn the onion skin

play08:04

on and off

play08:04

you can click the three dots on the top

play08:07

right and select this toggle for onion

play08:09

skin

play08:10

and the way animation works is we're

play08:12

basically drawing the same thing

play08:14

just in a slightly different position so

play08:16

for this next drawing

play08:18

you can either draw the next circle or

play08:21

you can go back to frame one by

play08:22

selecting it like so

play08:24

and then clicking this copy button on

play08:26

the top and then go to frame two

play08:29

and click the paste which is this little

play08:30

clipboard icon

play08:32

and it'll paste the same drawing but

play08:34

we'll need to move it into position

play08:36

so we'll select our lasso tool select

play08:39

our drawing

play08:40

and we'll move it just slightly down

play08:43

so the way a bouncing ball works is

play08:45

gravity slowly affects something right

play08:48

so these first few drawings are going to

play08:50

be really close to each other

play08:51

this is called an ease in so we'll

play08:53

select off of it

play08:55

we'll go to our next frame by clicking

play08:57

the plus button to add a new frame

play08:59

we'll press paste again to paste that

play09:01

same ball select it again

play09:03

and this time we want to move it even

play09:05

further down

play09:06

so we'll do this a couple more times i'm

play09:08

going to add another frame

play09:10

paste it again lasso around and then

play09:12

move it down

play09:14

but this time we're going to do what's

play09:16

called a stretch drawing

play09:17

to stretch this ball we're going to

play09:19

squeeze it in on the sides by selecting

play09:22

the side transform

play09:23

squeezing it in a bit and then for as

play09:25

much as you want to squeeze it in

play09:27

you want to create an equal amount of

play09:29

stretch on the opposite side so we'll

play09:31

stretch it out

play09:32

a little bit that way and then the next

play09:34

drawing is going to be

play09:36

even more extreme this will be our last

play09:38

stretch drawing

play09:39

so squash and stretch is a very

play09:41

important principle in animation

play09:43

most everything moves with squash

play09:45

stretch and it's a very important thing

play09:47

to

play09:47

practice and a bouncing ball is a very

play09:49

basic example of it

play09:51

so for our last drawing we'll have it

play09:53

stretch all the way at the bottom like

play09:55

so

play09:56

and then when it finally impacts the

play09:58

floor we'll have this ball

play09:59

do a squash drawing so instead of

play10:02

stretching out because it's moving so

play10:03

fast

play10:04

it's squishing down because it's

play10:06

impacting the ground so we'll have it

play10:07

squished down like so

play10:09

so now that the ball is squashed on the

play10:11

ground we want to have it bounce back up

play10:13

in reverse order

play10:14

so we can draw the frames again or we

play10:16

can copy and reuse the frames we've

play10:18

already drawn

play10:19

so go back one frame hold down your

play10:21

finger on that frame and you'll see a

play10:22

bunch of options for it

play10:24

you can insert blank frames by selecting

play10:26

the plus buttons on the left or the

play10:28

right

play10:29

this is good for adding in betweens we

play10:31

can delete the frame with the trash can

play10:33

or we can copy it with the copy button

play10:35

right here

play10:36

so once we selected that we have that

play10:38

frame copied then we go back to our last

play10:40

frame

play10:41

hold down our finger again and select

play10:43

the paste button with the arrow pointing

play10:45

to the right

play10:46

and that'll paste that same drawing onto

play10:48

the right side

play10:49

then we want to go back one more frame

play10:51

which is frame four in this case

play10:53

hold down our finger copy that go to the

play10:56

end of our animation hold down our

play10:57

finger

play10:58

and paste to the right and we just

play11:00

repeat this process until we finish

play11:02

copying and pasting our animation to the

play11:04

right

play11:04

and i won't copy and paste the first

play11:06

drawing since that's the first drawing

play11:08

in our loop

play11:09

to test out our animation we can click

play11:10

the play button on the right here

play11:12

and you'll see we have our bouncing ball

play11:15

if we wanted to add an in-between

play11:17

between any of these frames to smooth it

play11:18

out

play11:19

say for example from the squash drawing

play11:21

up to this stretch drawing

play11:23

we can add a blank frame in between by

play11:25

holding down our mouse button

play11:27

and clicking the plus with the arrow

play11:29

pointing to the right and that'll add a

play11:31

blank frame

play11:32

in between then we can put an in-between

play11:34

by

play11:35

pasting our ball again and then just

play11:37

putting a little in between so we can

play11:39

smooth it out a little bit

play11:43

and now you'll see when we play our

play11:44

animation it's been smoothed out for

play11:47

that frame so that's how you can add

play11:48

more in-betweens to kind of smooth out

play11:50

your animation

play11:51

remember that the more drawings you do

play11:54

the smoother your animation is gonna be

play11:55

but also the slower it's gonna be

play11:57

so now that we're finished with our

play11:58

animation let's export it for youtube

play12:01

so to export your animation click the

play12:03

three button up on the top right

play12:05

select make movie and we're gonna leave

play12:07

all these options the same but you can

play12:09

change them and then to start exporting

play12:10

it we're going to select make movie

play12:14

and now our video has been created if

play12:16

you want to upload it to youtube just

play12:18

click the share button

play12:19

and select youtube from the selection

play12:21

here so now that we know how to do a

play12:23

very basic animation

play12:24

and flip a clip let's talk about how to

play12:26

do a lip sync character

play12:28

so we have our character already colored

play12:30

in but we haven't done a mouth animation

play12:32

yet

play12:32

to add audio to your animation click the

play12:35

music note on the bottom left of your

play12:36

screen then to add audio

play12:39

click the plus button on the bottom

play12:40

right and with the album picture

play12:43

you can add a downloaded piece of audio

play12:45

or with the microphone

play12:47

you can press the microphone and press

play12:49

and hold to record your own audio

play12:51

let's record something right now why

play12:54

hello there

play12:55

and you can play to preview your audio

play12:58

why hello there

play12:59

and then press the check mark to add the

play13:01

audio to your animation

play13:03

and then drag it in to where you want it

play13:04

to be and we don't need the silence at

play13:06

the beginning so

play13:07

click the audio to select it and then

play13:09

drag this bar

play13:10

to get rid of the beginning silent part

play13:13

and then click and drag and move your

play13:14

audio back to the beginning

play13:16

and you can also trim the silence at the

play13:18

end here when you're done editing your

play13:20

audio

play13:21

press the down arrow on the top left of

play13:23

your screen and you'll see the waveform

play13:25

down at the bottom of your animation

play13:26

timeline

play13:27

and if you click and drag your timeline

play13:31

you'll hear your audio do what's called

play13:33

scrubbing so this is how you can see

play13:36

what sounds you need to animate to for

play13:38

example in

play13:39

y you might start with an o shape like y

play13:43

and go into a and then i

play13:47

so let's do that but first off we need

play13:48

to make this frame hold for as long as

play13:50

we want so we need to copy this frame by

play13:52

pressing and holding

play13:54

clicking copy and then paste to the

play13:55

right and keep doing that until you

play13:57

covered your entire

play13:58

animation this is how you create a hold

play14:01

frame

play14:02

if you wanted your character moving you

play14:04

would want to animate your moving

play14:05

character before doing any lip sync

play14:07

lip sync is really something you should

play14:09

do at the very end of your animation

play14:11

so now that we have our hold frame all

play14:13

created

play14:15

let's create a new layer so click our

play14:17

layers button press the plus to create a

play14:19

new layer and we'll call this layer

play14:21

mouth and for the first frame we'll do a

play14:23

closed mouth shape with just a smile

play14:25

and then we'll scrub through our audio

play14:26

to see what frame number two sounds like

play14:30

so we're going to make an o shape and we

play14:33

can zoom

play14:34

in to better draw our mouth so we can

play14:36

see better what we're doing

play14:37

and to give an example for which mouth

play14:39

shapes would be best to draw

play14:41

here is an example of a phenome chart if

play14:43

you don't know what kind of mouth shape

play14:44

to draw try doing the sound in a mirror

play14:46

and see what shape your mouth makes

play14:49

and then for frame number three

play14:52

it's like an open a shape so i'll draw a

play14:55

mouth where you can see the teeth and

play14:57

the tongue

play14:59

and then i'll use my paint bucket tool

play15:00

to fill in the color of his mouth

play15:03

and then for frame four

play15:07

it's sort of an e shape why and if you

play15:10

ever want to reuse any of these mouth

play15:11

shapes don't forget to use the copy

play15:13

button up at the top here and then paste

play15:15

it where you want to reuse it

play15:17

so we'll go through and we'll complete

play15:18

this entire lip sync animation

play15:21

a few moments later

play15:24

so now we have our lip sync all finished

play15:32

and if we play it why hello there why

play15:35

hello there

play15:37

we now have a talking character and

play15:39

that's how you animate and flip a clip

play15:41

i hope this was helpful to you if it was

play15:43

please leave a like and subscribe to my

play15:45

youtube channel for

play15:46

future animation tutorials don't forget

play15:48

to share this video with friends or

play15:49

family who would also like to learn how

play15:51

to animate on their phone

play15:52

leave a comment down below to tell me

play15:54

what you're working on or if you have

play15:56

any questions at all

play15:57

thanks for checking out this tutorial on

play15:58

how to animate on your phone and hope

play16:00

you have a good day

play16:01

take care guys i'll see you next time

play16:20

you

Rate This
β˜…
β˜…
β˜…
β˜…
β˜…

5.0 / 5 (0 votes)

Related Tags
Mobile AnimationFlipaClip AppAnimation TutorialLip SyncCharacter DesignAnimation BasicsVideo TutorialCreative ProcessDigital ArtYouTube Guides