ENGINEERING DRAWING DOUBTS SESSION 1 | ENGINEERING GRAPHICS COMMENTS REPLY 1
Summary
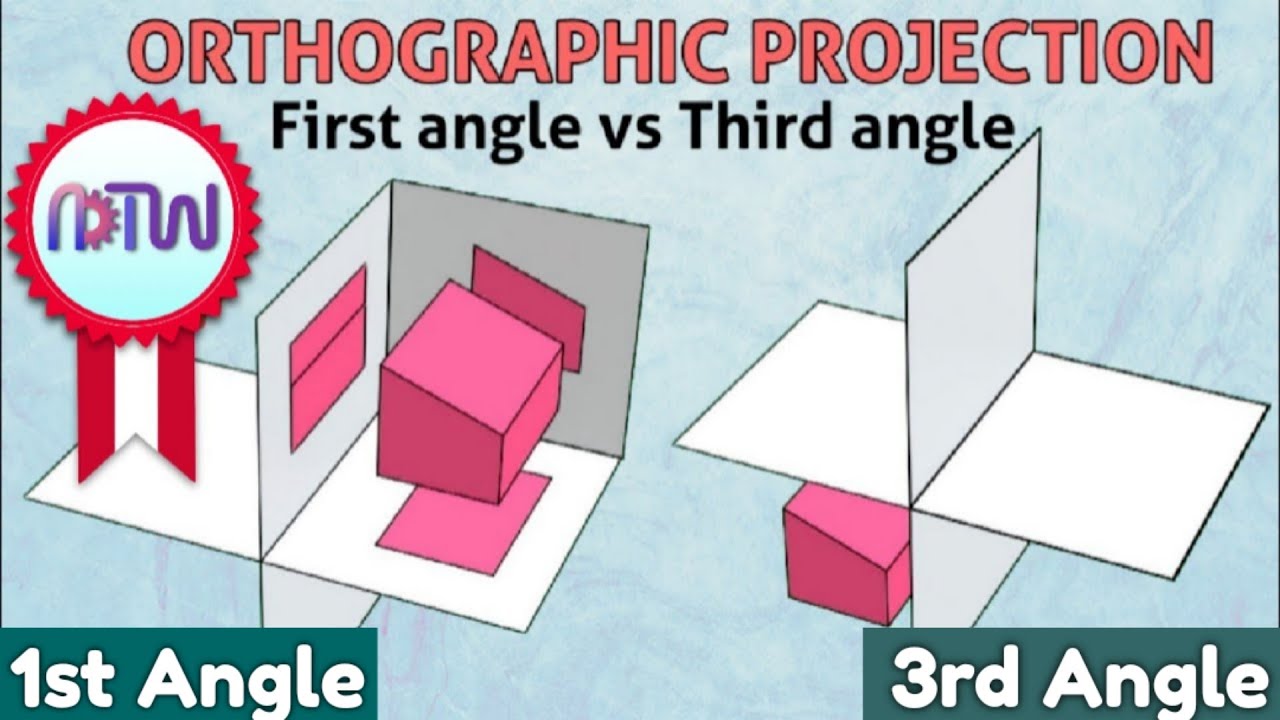
TLDRThe video script addresses common doubts in engineering drawing, focusing on projection methods and the use of scales. It clarifies the absence of second and fourth angle projections, explaining the overlap issue that renders them impractical. The script also tackles questions about converting units, the placement of dimensions in orthographic and isometric views, and the challenges of engineering drawing, emphasizing the importance of practice. It provides insights into calculating the 'R' value in drawings and discusses the significance of the 'Resting on Base' concept in solid projection, ensuring a comprehensive understanding of the subject.
Takeaways
- 😀 The video will clear doubts about engineering drawing and reply to comments.
- 😀 First comment addresses why second and fourth angle projection methods are not used in engineering drawing.
- 😀 Explanation of first and third angle projection methods and their usage.
- 😀 Discussion on quadrant system and projection methods in engineering drawing.
- 😀 Reason why second and fourth angle projections are not used: projections overlap making it difficult to draw.
- 😀 Second comment about converting inches to centimeters for drawing.
- 😀 Explanation that using inches directly is acceptable without converting to centimeters.
- 😀 Third comment about drawing front and top views in projections.
- 😀 Importance of practicing drawing to make engineering drawing easier.
- 😀 Detailed explanation of how to use representative fraction in drawing.
- 😀 How to place side views correctly in projections to avoid mistakes.
- 😀 Importance of correct placement of front, top, and side views in orthographic projections.
Q & A
Why are there no second angle projection and fourth angle projection methods in engineering drawing?
-In engineering drawing, first angle projection and third angle projection are used because they avoid overlap in the front and top views when the horizontal plane (H.P.) is rotated 90°. Second and fourth angle projections would result in overlaps, making it impossible to draw clear and distinct views.
What is the purpose of quadrants in first angle and third angle projection methods?
-Quadrants help in organizing the views in engineering drawings. The first quadrant is where the front view is placed in third angle projection, the second quadrant is for the side view, and the fourth quadrant is for the top view. In first angle projection, these views are arranged differently but still use the concept of quadrants to avoid confusion.
Why is it important to practice drawing in engineering?
-Practice is essential in engineering drawing because it helps students understand the concepts better and apply them accurately. Without practice, students may find it difficult to visualize and draw the correct views of an object.
What is the significance of the horizontal plane (H.P.) and vertical plane (V.P.) in projections?
-The horizontal plane (H.P.) and vertical plane (V.P.) are fundamental in creating projections. The H.P. is where the front view is drawn, and the V.P. is where the top view is drawn. Rotating the H.P. by 90° helps in generating the side view without overlaps.
How should dimensions be handled when converting from inches to centimeters in engineering drawings?
-When converting dimensions from inches to centimeters, it is not mandatory to perform the conversion if the scale provided is in inches. However, if needed, one can convert the length given in inches to centimeters using the conversion factor that 1 inch equals 2.54 centimeters.
What is the correct placement of the side view in relation to the front view in first angle projection?
-In first angle projection, the side view should be placed to the right of the front view. This placement ensures that the observer is looking from the left side of the object, which is consistent with the rules of first angle projection.
Why might engineering drawing be considered difficult by some students?
-Engineering drawing may be considered difficult due to the lack of practice. It requires a good understanding of geometric principles and the ability to visualize objects in different orientations. Regular practice and starting with simple problems can make the learning process easier.
What is the formula for calculating the representative fraction (R) in engineering drawing?
-The formula for calculating the representative fraction (R) is the length used in drawing divided by the actual length. It does not involve the square root, contrary to what might be commonly misunderstood.
How should dimensions be marked in isometric views or 3D drawings?
-In isometric views or 3D drawings, dimensions are typically marked outside the view to avoid confusion and maintain clarity. This practice helps in accurately representing the object's dimensions without obstructing the view.
What is the correct way to mark dimensions in orthographic projections?
-In orthographic projections, dimensions are usually marked outside the view lines. This helps in keeping the drawing uncluttered and ensures that the dimensions are easily readable and understood.
Why is it important to know the placement of views in orthographic projection problems?
-Knowing the correct placement of views in orthographic projection problems is crucial for accuracy. Incorrect placement can lead to misinterpretation of the drawing and loss of marks in assessments.
Outlines

This section is available to paid users only. Please upgrade to access this part.
Upgrade NowMindmap

This section is available to paid users only. Please upgrade to access this part.
Upgrade NowKeywords

This section is available to paid users only. Please upgrade to access this part.
Upgrade NowHighlights

This section is available to paid users only. Please upgrade to access this part.
Upgrade NowTranscripts

This section is available to paid users only. Please upgrade to access this part.
Upgrade NowBrowse More Related Video

Orthographic Projection_An Introduction_Engineering Drawing_Engineering Graphics_English

First angles vs Third angle method | Orthographic projections animation

Orthographic Projection from isometric view in Engineering drawing

Drawing by Hand (Module 1-1B) - Tools Part B by Jin Xuan Liu and Terry Baxter

First angle and Third angle method of projections

Module 3.1 - Essential Drawing (Autodesk Inventor 2024)
5.0 / 5 (0 votes)