membuat program sederhana CNC Milling
Summary
TLDRThis video tutorial demonstrates how to create a simple CNC milling program. It covers the essential steps for setting up a machine, defining coordinates, and controlling the tool's movements to cut a workpiece into a desired shape. The speaker explains concepts such as tool paths, cutting depths, G-codes, and coordinate systems. The program utilizes an absolute programming approach, emphasizing precise movements along the x, y, and z axes. Additionally, it showcases how to handle tool parameters, speed settings, and spindle control for effective machining. Ideal for beginners, this guide simplifies CNC programming fundamentals.
Takeaways
- 😀 Basic CNC program involves using both X and Y axes for tool and workpiece positioning.
- 😀 Z-axis is used for setting the cutting depth of the tool.
- 😀 The program begins with defining the initial coordinates (e.g., X15, Y0) and cutting depth (e.g., Z-4).
- 😀 G-code commands like G1 (linear move), G0 (rapid move), and M codes (like M3 for spindle start) are used for movement and tool control.
- 😀 The tool begins by moving above the workpiece (e.g., Z5) to avoid collision with the material.
- 😀 The tool cuts along the X-axis and may also move along the Y-axis to define the shape being cut.
- 😀 The program involves multiple passes, gradually increasing the cutting depth (e.g., Z-4).
- 😀 A key part of the program is the precision in defining coordinates and tool movements to achieve the desired shape.
- 😀 The program ends with returning the tool to its starting position using G28 and stopping the spindle (M5).
- 😀 Tool commands like M6 (tool change), M3 (spindle on), and M30 (end of program) are crucial for the workflow.
- 😀 The simplicity of the program is aimed at a basic milling operation, with straightforward cutting paths and tool movements.
Q & A
What is the purpose of the simple program described in the script?
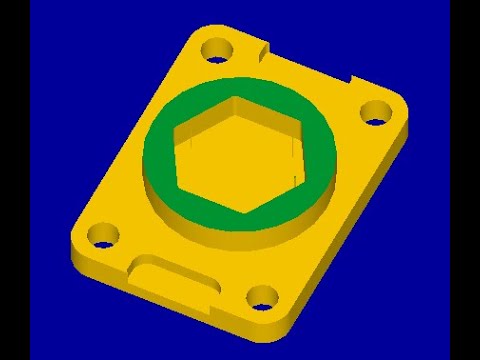
-The purpose of the program is to create a shape resembling an ashtray by moving a tool (Emil) around a workpiece using specific G-code instructions for CNC machining.
What is the significance of the 10mm diameter in the program?
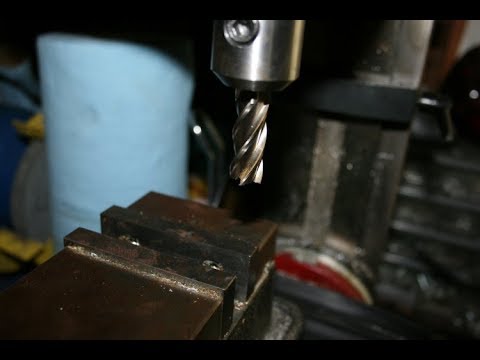
-The 10mm diameter represents the size of the cutting tool (Emil) used in the machining process. It helps determine the movement and position of the tool relative to the workpiece.
How is the x and y-axis movement explained in the script?
-The x-axis movement refers to the horizontal direction (left or right), while the y-axis movement is vertical (up or down). The script explains the tool's movement along these axes to cut and shape the workpiece.
What does the script mean by 'giving free distance' between the tool and the workpiece?
-Giving free distance refers to ensuring that the tool does not immediately contact the workpiece but instead starts with a slight gap, allowing for safe and controlled cutting.
Why is the G-code for movement in the program important?
-G-codes control the movements and actions of the CNC machine, such as specifying the direction, speed, and distance of the tool, ensuring accurate and efficient cutting of the workpiece.
What is the purpose of the 'Z5' setting in the program?
-The 'Z5' setting specifies the tool's position above the workpiece at a distance of 5mm, ensuring it doesn't cut into the material initially and moves safely to the starting point for cutting.
How does the program handle tool movements during the cutting process?
-The program uses G1 codes to define straight-line movements, including both vertical and horizontal movements, allowing the tool to precisely follow the desired cutting path and depth.
What does the 'G28' command do in the program?
-The 'G28' command returns the tool to the home position, typically at Z0 and X0, marking the end of the machining program and ensuring the tool is safely moved away from the workpiece.
What is the significance of the 'M5' command in the program?
-The 'M5' command stops the spindle rotation, indicating that the cutting process is complete and the tool is no longer rotating.
Why does the program specify cutting in 1mm increments?
-The program specifies cutting in 1mm increments to gradually remove material in controlled steps, preventing excessive cutting depth that could damage the workpiece or tool.
Outlines

This section is available to paid users only. Please upgrade to access this part.
Upgrade NowMindmap

This section is available to paid users only. Please upgrade to access this part.
Upgrade NowKeywords

This section is available to paid users only. Please upgrade to access this part.
Upgrade NowHighlights

This section is available to paid users only. Please upgrade to access this part.
Upgrade NowTranscripts

This section is available to paid users only. Please upgrade to access this part.
Upgrade NowBrowse More Related Video


5.0 / 5 (0 votes)