Wild Tricks for Greenscreen in Blender

IanHubert
27 Jul 202009:50

Summary

TLDRThis tutorial explores the process of integrating green-screen footage into a 3D scene using Blender, an open-source software. It covers keying out the green screen, placing pre-keyed elements, and stabilizing footage with motion tracking. The video also delves into techniques for projecting footage onto geometry, creating realistic camera movements, and matching lighting to seamlessly blend the composited elements with the original scene. The summary concludes with exporting tips and a nod to the creative potential of such technology for indie filmmakers.

Takeaways

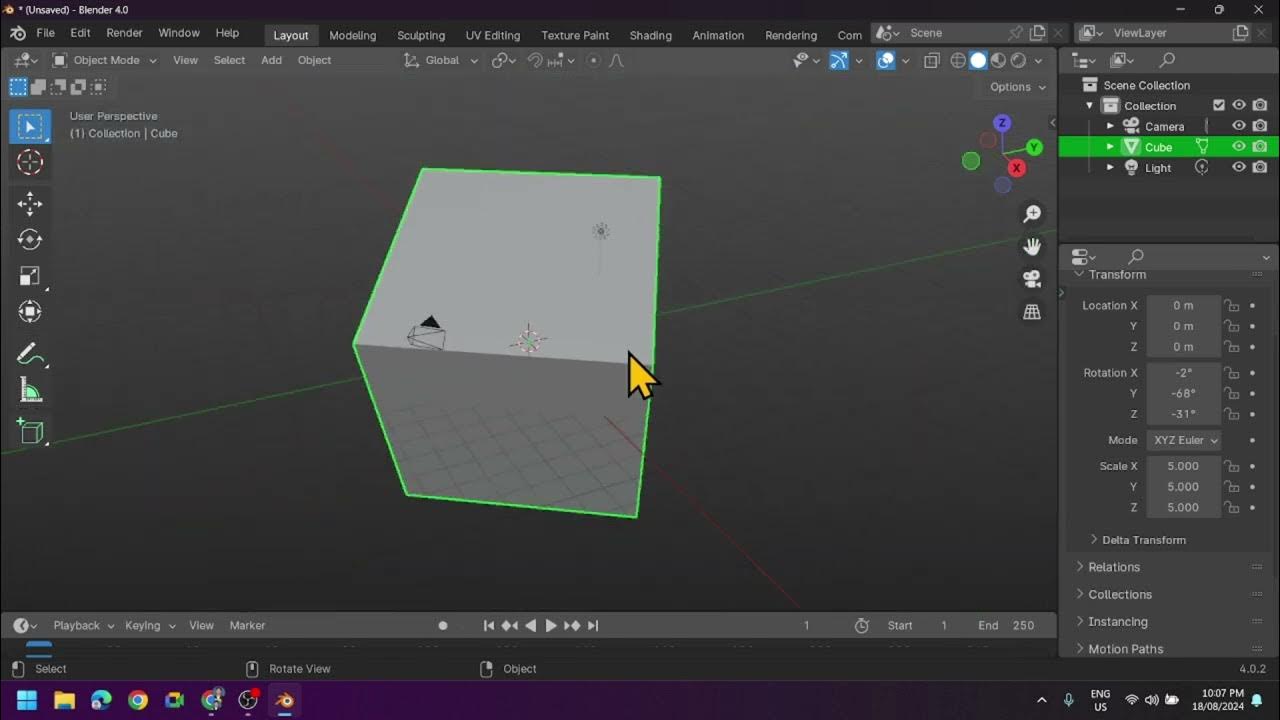
  • 🎨 Key Takeaway 1: The tutorial focuses on using Blender, a free and open-source software, for green screening and compositing techniques.
  • 🔍 Key Takeaway 2: The compositor is used to key green screens by placing a key node between the movie clip and composite, adjusting settings for optimal results.
  • 📸 Key Takeaway 3: Pre-keyed images can be imported as planes in Blender for easy placement in a scene, with natural shadows, reflections, and occlusions.
  • 🚶 Key Takeaway 4: Animating the camera can create issues with the illusion of depth when subjects walk away, so keeping the subject stationary or using reference empties is recommended.
  • 🔄 Key Takeaway 5: Motion tracking can be applied to stabilize footage by parenting it to a camera, effectively canceling out the camera's motion.
  • 🌐 Key Takeaway 6: Footage can be projected onto 3D geometry using an emissive material and UV project modifier, making it appear as part of the scene.
  • 📹 Key Takeaway 7: The process of normalizing footage involves adjusting the scale to maintain the illusion of the subject's original motion and size.
  • 🏙️ Key Takeaway 8: The digital environment can be extended or modified to create the illusion of a larger space or different camera movements.
  • 💡 Key Takeaway 9: Lighting is crucial for integrating the green screen subject into the scene, with adjustments made in Blender's Eevee render engine.
  • 🎞️ Key Takeaway 10: The final compositing step involves keying out the green screen and masking the subject, with the use of an alpha channel for transparency in the export format.

Q & A

  • What is the purpose of the script?

    -The script is a tutorial on how to use Blender, an open-source software, to create a shot involving green screening and compositing.

  • What is the first step in the green screening process mentioned in the script?

    -The first step is to place a key node between the movie clip and the composite in the compositor and click on the green screen to begin the keying process.

  • How can one import footage into Blender as planes?

    -To import footage as planes in Blender, you can press F3, type in 'import images as planes', find the footage, select 'Emission', and it will be imported.

  • Why is it important to activate 'Images as Planes' in the preferences?

    -Activating 'Images as Planes' in the preferences allows the user to consistently import images as planes without having to do it manually each time.

  • What is the issue with animating the camera when the subject walks away from the camera?

    -Animating the camera can disrupt the illusion of the scene because as the subject moves away, they appear to rise and shrink, which does not match the original footage's perspective.

  • How can motion tracking be applied to stabilize footage in Blender?

    -By applying the motion tracking data to a camera, and then parenting the footage to the front of the camera, the footage motion cancels out the camera motion, stabilizing the scene.

  • What is the advantage of using a UV project modifier for projecting footage onto geometry?

    -Using a UV project modifier allows the footage to stick to the geometry and move with the camera, even if the original footage was handheld.

  • How does the script suggest dealing with footage where the person walks away from the camera?

    -The script suggests selecting the footage, parent it to the camera, and then scaling it up and down to normalize the size difference as the person walks away.

  • What is the purpose of adding a new camera in the compositing process?

    -Adding a new camera allows for additional camera movement and the ability to look around and tweak the camera angles while maintaining the existing camera movement.

  • How does the script suggest improving the integration of the green screened subject with the digital environment?

    -The script suggests matching the lighting by adding digital lights to the scene and adjusting the material settings to better integrate the subject with the environment.

  • What is the recommended export format for pre-keyed green screen footage in Blender?

    -The recommended export format is uncompressed TIFFs, which include an alpha channel for transparency data, providing the best quality for pre-keyed footage.

Outlines

00:00

🎨 Green Screen Compositing in Blender

This paragraph introduces a tutorial on using Blender, a free and open-source 3D creation suite, to composite green screen footage. The author discusses the process of keying out the green screen using the compositor and suggests a proper tutorial will follow. They emphasize the importance of good green screen setup and demonstrate how to import images as planes for pre-keyed characters in a scene. The tutorial also covers the use of reference empties for motion tracking and stabilizing footage, as well as the creation of 3D objects that integrate with the green screen footage to create a realistic composite.

05:01

🚀 Advanced Green Screen Techniques and Environment Setup

The second paragraph delves into advanced techniques for working with green screens in Blender, including the use of F-curves for animation, the creation of masks for isolating subjects, and the integration of lighting to match the green screen footage. The author explains how to manipulate camera angles and movements to create dynamic shots, such as having the character appear on an elevator or flying around a scene. They also discuss the importance of matching the lighting in the digital environment to that of the green screen footage for a seamless composite. The paragraph concludes with tips on exporting the final composite with an alpha channel for transparency and the benefits of using Blender for indie filmmakers.

Mindmap

Keywords

💡Blender

Blender is an open-source 3D creation suite that supports the entirety of the 3D pipeline—modeling, rigging, animation, simulation, rendering, compositing, and motion tracking, even video editing, and game creation. In the video's context, it is the primary software used to demonstrate how to create a shot with a green screen, highlighting its compositing and 3D modeling capabilities.

💡Green Screening

Green screening, also known as chroma keying, is a technique used in video production to superimpose actors or objects onto a different background. The script describes how to key green screens in Blender, which is essential for creating realistic composites where the subject appears to be in a different environment than where the footage was actually shot.

💡Key Node

In the context of the script, a key node is a component in Blender's compositor used to isolate certain colors (in this case, green) from the footage. It's a fundamental part of the green screen process, allowing the removal of the green background to replace it with another scene.

💡Pre-multiply

Pre-multiply refers to a method in compositing where the green screen footage's color channels are pre-multiplied by its alpha channel, which is crucial for correctly handling the edges and transparency when keying out the green screen. The script mentions converting to pre-multiply to improve the visual outcome of the keyed image.

💡Emission

Emission in Blender refers to a material property where an object emits light as if it were a light source. The script describes using emission to project the green-screened footage onto 3D geometry, making the 2D image appear as part of the 3D scene.

💡UV Project Modifier

A UV project modifier in Blender is used to project an image or texture onto a 3D model based on the model's UV coordinates. The script mentions using this modifier to make the green-screened footage stick to the geometry, adjusting the scale to match the camera's perspective.

💡Motion Tracking

Motion tracking is the process of analyzing video footage to determine the position, orientation, and motion of objects within the scene. The script refers to a previous tutorial on motion tracking in Blender, which is used to stabilize footage and integrate it with 3D elements, ensuring that the green-screened subject appears to interact naturally with the 3D environment.

💡Eevee

Eevee is Blender's real-time rendering engine that allows for quick previews and final renderings with advanced lighting and material features. The script mentions using Eevee to match lighting color and intensity, which is crucial for integrating the green-screened subject with the digital environment.

💡Masking

Masking in video compositing is the process of selecting a part of an image or footage to isolate it from the rest. The script describes using a masking workspace in Blender to refine the green screen key by manually isolating the subject from unwanted background elements.

💡Compositor

A compositor in Blender is a node-based editor used for combining various elements of a scene into a final image or sequence. The script details the process of setting up a compositor to key out the green screen, add masks, and composite the final shot.

💡Alpha Channel

The alpha channel in video and image editing refers to the transparency information that allows for the separation of an object from its background. The script emphasizes the importance of choosing a format with an alpha channel for exporting the pre-keyed footage to preserve the transparency data.

Highlights

Introduction to using green screens in Blender and basic keying process.

Emphasis on starting with the fun part: placing pre-keyed people in your scene.

Using the 'Import Images as Planes' feature to integrate footage with emission settings.

Instructions to activate the 'Images as Planes' add-on in Blender preferences.

Detailed explanation of aligning feet and integrating natural shadows, reflections, and occlusions.

Challenges with animating the camera and maintaining the illusion of stationary subjects.

Using motion tracking to stabilize footage and apply camera motion.

Leveraging the point cloud from motion tracking to model geometry that aligns with footage.

Projecting footage onto geometry using emissive surfaces and image textures.

Utilizing the UV project modifier for accurate projection and integration.

Parenting footage to the camera for dynamic scaling and consistent alignment.

Techniques for normalizing handheld footage and adding new camera movements.

Importance of lighting and matching digital lighting with on-set conditions.

Tips for masking out unwanted areas using Blender's masking workspace.

Exporting pre-keyed elements with alpha channels for transparency data.

Optimizing viewport performance with lower resolution proxies.

Recommendations for lighting green screens: ensuring flat and even illumination.

Encouragement for indie filmmakers to explore the potential of Blender and similar technologies.

Transcripts

play00:00

okay part two of me trying to explain

play00:01

how to make a shot like this in in free

play00:03

open source software blender and uh

play00:06

today is green screening here we go so

play00:08

i'll have a proper tutorial on how to

play00:10

key green screens in blender at the end

play00:11

here because look okay in the compositor

play00:13

just stick a key node between the movie

play00:15

clip and the composite and click on the

play00:17

green oh and convert pre-multiply to

play00:18

make it actually look good and if it

play00:21

doesn't you probably didn't like your

play00:22

green screen good but i want to start

play00:23

with the fun stuff because there's a

play00:25

bazillion green screen tutorials already

play00:27

out there so how to place pre-keyed

play00:29

people in your scene so hit f3 type in

play00:32

import images as planes find your

play00:34

footage select emission and there you go

play00:36

if you don't have images as planes

play00:38

already activated open the preferences

play00:40

activate it in the add-ons tab and then

play00:41

maybe save preferences to keep it on by

play00:43

default so i don't have to say this

play00:44

every time now you can line up the feet

play00:46

and yeah yeah i've gotten a haircut

play00:48

since then but you have natural shadows

play00:50

reflections occlusions you can you can

play00:52

even animate the camera a little bit

play00:53

until the subject walks away from the

play00:55

camera and then things get weird nothing

play00:57

lines up anymore and that makes sense

play01:00

because as far as the footage is

play01:01

concerned as they go into the distance

play01:03

they're just rising up and shrinking and

play01:04

animating the camera blows the whole

play01:06

illusion so you can just have your

play01:08

person stay stationary and it can be as

play01:10

simple as that or you can set up two

play01:12

reference empties and try to animate the

play01:13

footage so it cancels out the person's

play01:14

motion parent it to another you can try

play01:15

to match up the person's original motion

play01:17

that's annoying and not good and don't

play01:18

do that instead i i recently did a

play01:20

motion tracking tutorial uh link links

play01:23

below so let's build off of that first

play01:25

off if you track footage apply that

play01:26

motion to a camera then parent that

play01:28

footage to the front of the camera it

play01:30

stabilizes the footage because the

play01:31

footage motion cancels out the camera

play01:33

motion because i mean if you think about

play01:34

it of course it would in fact okay so

play01:36

this is a tangent but remember the point

play01:38

cloud we got from the motion tracking

play01:39

tutorial model some geometry based on

play01:42

that so it just intersects the reference

play01:43

points now it'll line up with the

play01:45

footage but this is still just a camera

play01:47

overlay wouldn't it be cool to actually

play01:48

stick that footage to the geometry give

play01:51

the object a new material give it an

play01:52

emissive surface and make the base color

play01:54

an image texture just loading your

play01:56

footage set the vector to window that'll

play01:58

make it fill the camera view oh and

play02:00

don't forget to give it enough frames

play02:01

and turn on auto refresh now projects

play02:03

right onto the geometry as long as

play02:05

you're in the camera view it always

play02:07

projects from wherever you are that's

play02:08

kind of weird we want it to stick so

play02:10

just use a uv project modifier using a

play02:12

uv map and the camera now if you go back

play02:14

to materials and use uv instead of

play02:16

window it'll project the footage from

play02:18

the coordinates of the camera although

play02:19

you might have to change the modifier

play02:21

scale to match your footage a little bit

play02:22

and subdivide the object but now it's

play02:24

stuck to the geometry even if your

play02:26

footage was handheld now it's normalized

play02:29

you can add a second camera and animate

play02:30

some new camera movement uh obviously

play02:32

works best if you stay close to the

play02:33

position of the original camera but this

play02:35

can be super useful technique you can

play02:37

digitally extend out your tiny practical

play02:39

set put in a big crane move that'd be

play02:40

impossible to film in your garage this

play02:42

is this is one of my favorite things

play02:44

because it really lets you rework almost

play02:46

every aspect of a shot in post it makes

play02:48

compositing easier too because you're

play02:49

not just dealing with 2d layers of 3d

play02:51

life it's actually there in 3d space

play02:53

which is a lot easier for my brain to

play02:55

wrap around oh and since it's an

play02:57

emissive texture radiating light if you

play02:59

have an object in there the texture will

play03:00

actually light the object with

play03:02

directional accuracy within reason what

play03:04

that also means is if you shot your

play03:05

footage handheld you track it and mount

play03:07

the foot to the front of the camera your

play03:08

person will be stationary he's still the

play03:10

same issue as before though if they walk

play03:12

away they'll shrink up into the air so

play03:13

here's what we do select the footage

play03:15

then shift-click on the camera hit

play03:17

control p to parent the footage to the

play03:19

camera then control c copy both the

play03:21

location and the rotation you might you

play03:23

might have to activate the copy

play03:24

attributes add-on if you haven't already

play03:25

it's a very good add-on now tab in it

play03:27

edit mode hit gzz to slide the plane out

play03:30

along its local z-axis go into the

play03:32

camera view and scale it to fit the

play03:34

frame perfectly now since the origin is

play03:36

on the camera when you scale the footage

play03:38

it gets bigger and further away in a way

play03:39

that perfectly cancels itself out from

play03:41

the camera's point of view cool huh so

play03:43

what do we do with this well scale it up

play03:45

and down so the front of the foot is

play03:46

just almost clipping into the ground

play03:48

turn on auto keyframing go a few frames

play03:50

later and uh and scale it again do the

play03:51

whole shot this process goes pretty

play03:53

quick if you can't see their feet give

play03:54

it your best guess it's really forgiving

play03:56

and because of trigonometry or something

play03:59

like that the scaling is actually

play04:01

normalized and you have your person

play04:02

walking around the way they actually

play04:04

were on set in fact look at this this is

play04:06

from the dynamo dream teaser and because

play04:07

of this process you can see the footage

play04:09

not only automatically scales to cancel

play04:11

out her size difference as she walks

play04:12

away it also correctly places her in the

play04:14

right place in the scene crazy just from

play04:16

lining up the feet once you start 3d

play04:18

tracking everything just clicks into

play04:20

place that's a lie a lot of things don't

play04:22

but this this thing did so so let's

play04:24

start laying out the environment i'm

play04:26

going to start with some walkways

play04:27

intersecting those tracking markers

play04:29

everywhere she goes maybe maybe block in

play04:30

some future buildings this is keying not

play04:32

modeling so we're going to go fast and

play04:34

loose and let's cheat a little so at one

play04:36

point caitlyn stops and backs up a few

play04:38

steps in the digital environment i have

play04:40

this happen right after she walks behind

play04:41

a wall and i can just add a couple

play04:43

keyframes to the camera to make it

play04:44

continue moving forwards as she walks

play04:46

backwards when she pops back out we can

play04:47

use that same bit of green screen again

play04:49

so we have it feel like she's exploring

play04:50

a larger space it's cheap but it's fun

play04:52

or oh okay at one point i have her kind

play04:54

of rotating in place on her heel i'm

play04:56

going to add an empty right under her

play04:57

feet parent the camera to it and

play05:00

okay so constraints can get funky so i'm

play05:02

going to convert it to an f curve here

play05:04

now it's actually animation data instead

play05:06

of a constraint and now it lets you

play05:07

parent the camera to the empty and

play05:09

keyframe it at the start of her turn

play05:11

rotate the camera add another to the end

play05:13

and now it looks like she's staying

play05:14

still but the camera's moving just just

play05:16

a fun trick if you want we could parent

play05:17

that empty to a platform and now she's

play05:19

on an elevator

play05:21

[Music]

play05:27

this is also a great time to start

play05:28

matching up the lighting you can see she

play05:29

passes a light source here so i'm going

play05:30

to add a digital light to the scene to

play05:32

help integrate her a bit if you figure

play05:34

this out ahead of time you can have

play05:35

digital objects casting actual light on

play05:37

your actors eevee also makes it really

play05:39

easy to match lighting color and

play05:40

intensity random tip if you're setting

play05:42

up lights and stuff in eevee and notice

play05:43

your footage is casting big shadows go

play05:45

into the material settings and change

play05:47

shadow to alpha hash and it works a lot

play05:49

better now so a very exciting thing is

play05:51

that this process gives you a ton of

play05:52

freedom to tweak the camera if you want

play05:54

i like shooting a bit wide so i can more

play05:56

easily line up the actor's feet with the

play05:57

floor and then zooming in a bit with the

play05:59

virtual camera or add a whole new camera

play06:01

flying around while the original is

play06:02

still doing its thing obviously you have

play06:04

to stay in front of the footage you can

play06:05

tell it's 2d but it's more forgiving

play06:07

than i expected what i usually end up

play06:09

doing is just parenting a new camera to

play06:10

the tracked camera so i get all the

play06:12

existing camera movement but i can also

play06:14

still look around and tweak the camera

play06:15

however i like well okay ian you say

play06:17

with the voice of an old man who's seen

play06:18

more than we can ever dream how do you

play06:20

get this green screened element super

play06:23

easily open a compositing workspace

play06:25

reusing nodes add a movie clip and

play06:27

loading your footage ignore the render

play06:28

layers we're going to connect straight

play06:30

to the composite the composite knows the

play06:31

final node it's what will be saved when

play06:33

we hit render if you control shift click

play06:35

on a node it pops up a viewer node that

play06:37

shows us what we're doing v and alt v

play06:39

zoom in and out and the alt plus scroll

play06:41

wheel lets you pan it's not very

play06:42

intuitive but you get used to it under

play06:44

matte add a keying node and slide it on

play06:46

in there you'll have to update the

play06:48

viewing node to see what you're doing

play06:49

and this is the big green screen bit

play06:50

select some mid to darker green now just

play06:53

slide up the clip black to get rid of

play06:54

stuff you want to get rid of and slide

play06:55

down clip white to preserve stuff you

play06:57

want to keep ideally you want to keep

play06:58

these numbers as close to default as

play07:00

possible doesn't look good let's add

play07:03

some sauce add an alpha convert note hey

play07:05

hey sometimes that's all you need but

play07:07

often you'll have to tighten things up

play07:08

by eroding the mat a couple of pixels to

play07:10

get rid of like that fringe and this is

play07:12

usually enough for me but you can tweak

play07:14

all the other stuff screen balance and d

play07:16

spill balance can be great to tweak and

play07:18

a negative feather distance can

play07:19

sometimes help if you have a really

play07:20

messy key just try not to overdo it i

play07:22

don't know what kernels do if you slide

play07:24

something in direction it looks better

play07:26

do it okay but what about all this stuff

play07:28

around the borders we have to mask it

play07:30

out which is also easy open a new

play07:32

masking workspace uh loading your

play07:34

footage and control click to add a mask

play07:36

circle your subject and click toggle

play07:38

cyclic to close it you've just created a

play07:40

mask with control handles and you can

play07:41

move them just like anything else in

play07:42

blender hit a to select them all or b to

play07:44

box select g to grab arch rotate s scale

play07:46

all that good stuff hit i to add a

play07:48

keyframe then go a few frames later move

play07:50

the mask and hit i to add another keep

play07:52

going surrounding your actor it doesn't

play07:53

have to be perfect you're just trying to

play07:54

isolate the actor from all that other

play07:56

garbage hit alt s and you can control

play07:59

the feathering if you want under mask

play08:00

display you can turn on overlay to see

play08:02

what it'll look like if you want to add

play08:03

another mask be sure you add it to a new

play08:05

mask layer you can even make them

play08:06

negative oh yeah also okay if you hit

play08:09

tab you're in the tracker what can you

play08:11

just control click on a distinctive

play08:13

point track it tab back to masking

play08:15

select points you want to attach and hit

play08:17

control p to parent them to the tracker

play08:19

yes try to do that in after effects no i

play08:22

oh no i know you can it's just slightly

play08:24

easier here i didn't mean to please now

play08:26

jump back into the compositor and add a

play08:27

mask node using our mask and drag it

play08:29

into the garbage matte input if it

play08:31

appears off make sure your project

play08:33

resolution matches that of the footage

play08:34

this is important also they assume

play08:36

you're rotoring out the garbage instead

play08:38

of what you want to keep so use an

play08:39

invert node to flip it all around and

play08:41

there we go looks gorgeous

play08:43

now we export it the trick is picking

play08:45

the right format since we're pre-keying

play08:46

this we need a format with an alpha

play08:48

channel included that's that's

play08:49

transparency data i'm not an expert but

play08:51

i did try every combination i could

play08:53

think of and uh uncompressed tiffs gave

play08:55

me the best frames per second what i

play08:57

recommend is using two versions one full

play08:59

res and another at like one third

play09:00

resolution so your viewport doesn't get

play09:02

bogged down when it's time to do the

play09:03

final render just replace the textures

play09:05

with the full res version and it's all

play09:06

good oh and i should have mentioned this

play09:08

earlier but if you're importing an image

play09:09

sequence just select all the images and

play09:11

make sure anime image sequence is

play09:13

checked there you go so i i hope this is

play09:16

useful there's a ton of other stuff that

play09:17

can be said about lighting green screens

play09:19

and all that but mostly it comes down to

play09:20

making sure you have enough light and

play09:22

the screen is lit as flat and evenly as

play09:24

possible

play09:25

i'm just always really excited about the

play09:26

possibilities of of technology like this

play09:29

and what it can do for like indie

play09:30

filmmakers huge huge thanks to the folks

play09:32

over on the patreon lots going on over

play09:34

there lots of tutorials i've got a video

play09:35

going through the entire making of this

play09:37

shot and lots of assets you can use

play09:39

rigged photo skin dudes plants rocks

play09:41

burger textures like waterfalls steam

play09:44

fire rain all that it's been we've been

play09:46

nuts it's been really good um so yeah

play09:49

thanks for watching

Rate This

5.0 / 5 (0 votes)

Related Tags
Green ScreeningBlender Tutorial3D CompositingVideo EffectsMotion TrackingEmissive TexturesIndie FilmmakingPost-ProductionAnimation TechniquesDigital Environments