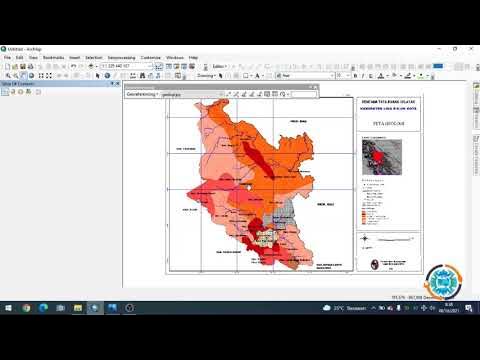
Pembuatan Peta Administrasi Kabupaten Sidoarjo dengan QGIS | UAP MSDL Shif A
Summary
TLDRThis video provides a step-by-step guide on creating an administrative map using the QGIS software. The process includes downloading and extracting necessary files, adding layers, and customizing maps with district, subdistrict, and administrative boundaries. The video explains how to apply styles, label regions, and refine map details. Additionally, the tutorial covers grouping layers, adjusting scale, adding grids, and including map elements like legends and coordinates. Finally, the video demonstrates how to save and export the completed map, offering a thorough overview for users interested in cartography and GIS tools.
Takeaways
- 😀 Step 1: Download and extract the project file shared by the assistant, specific to your group and region.
- 😀 Step 2: Open the QGIS application and create a new project by clicking 'Project' and selecting 'New File'.
- 😀 Step 3: Add the administrative layers by selecting 'Add Vector Layer', browse the downloaded files, and open the corresponding map files.
- 😀 Step 4: For the administrative boundaries, add the district and subdistrict layers, ensuring to show the names of the subdistricts.
- 😀 Step 5: To filter out unwanted regions, use the 'Properties' tab and apply specific styling settings, such as categorizing by subdistrict.
- 😀 Step 6: Add further vector layers like 'Administrative Line' and 'Road' layers to include additional geographical features.
- 😀 Step 7: Adjust the visual style of the layers, changing colors and adding labels to enhance map clarity.
- 😀 Step 8: Organize the layers into two groups for better management: Group 1 (District layers) and Group 2 (Administrative Lines and Roads).
- 😀 Step 9: Print the map layout by using the 'Print Composer' and adjusting settings like map scale, grid, and coordinates.
- 😀 Step 10: Finalize the layout by adding labels, symbols, a legend, and the map creator's details before exporting the final map as an image.
- 😀 Step 11: Save the completed administrative map with a meaningful file name for future use or submission.
Q & A
What is the first step in creating an administrative map?
-The first step is to download the file provided by the assistant, which is specific to each group based on their assigned region.
How do you open a new project in QGIS?
-To open a new project in QGIS, click on the 'Project' menu in the top left corner and then select 'New File.'
What is the process for adding the administrative map layer of the Kabupaten (Regency)?
-Click on the 'Layer' menu, then choose 'Add Layer' followed by 'Add Vector Layer.' Browse to the downloaded map file, select the administrative map of the Kabupaten, and click 'Open.'
How can you label the Kecamatan (District) layer in QGIS?
-Right-click on the Kecamatan layer, select 'Properties,' then go to the 'Labels' tab. Change the setting from 'No labels' to 'Show labels for this layer,' and set the label to display the district name.
How can you remove irrelevant districts from the Kecamatan map?
-To remove irrelevant districts, right-click on the Kecamatan layer, select 'Properties,' go to the 'Style' tab, and change the symbol type to 'Categorized.' Click 'Classify' and remove any districts that do not belong to the target region.
What should be done after adding administrative boundary lines and roads?
-Once you add the administrative boundary lines and roads, you can customize their appearance by changing their color and style. For example, change road lines to black and boundary lines to purple.
How do you organize layers into groups in QGIS?
-To organize layers into groups, simply drag and drop the layers into a new group in the Layers panel. For example, group 'Kecamatan' and 'Kabupaten' layers together in Group 1, and 'Administrative Boundary Lines' and 'Roads' layers in Group 2.
What are the steps to prepare the map for printing in QGIS?
-Click on the 'Project' menu and select 'Print Composer.' Create a new print layout, choose an A4 landscape format, and add the map to the layout. Adjust its position using the 'Move Item Content' tool.
How do you add a grid to the map layout in QGIS?
-In the 'Item Properties' panel of the Print Composer, scroll down and click the '+' symbol next to 'Grid.' Select the coordinate system as 'WG84' and adjust the grid interval settings as needed.
What is the purpose of adding a scale bar and legend in the map layout?
-The scale bar helps represent the map's scale, while the legend shows what each layer or symbol on the map represents, making the map easier to understand for viewers.
Outlines

This section is available to paid users only. Please upgrade to access this part.
Upgrade NowMindmap

This section is available to paid users only. Please upgrade to access this part.
Upgrade NowKeywords

This section is available to paid users only. Please upgrade to access this part.
Upgrade NowHighlights

This section is available to paid users only. Please upgrade to access this part.
Upgrade NowTranscripts

This section is available to paid users only. Please upgrade to access this part.
Upgrade NowBrowse More Related Video

QGIS | Tutorial Membuat Peta Dengan Mudah Menggunakan QGIS v 3.28 Tahun 2024

Tutorial Qgis | Cara Mendownload dan Menginstal Qgis | Terbaru 2022

Cara Mapping Lahan dengan Drone MANUAL tanpa aplikasi MAPPING

How To Train An Employee With No Experience

Georeferencing Dengan Arcgis

Como instalar e usar o Mendeley
5.0 / 5 (0 votes)