Struggling with Apple Log? Watch This! (DaVinci Resolve Tutorial)
Summary
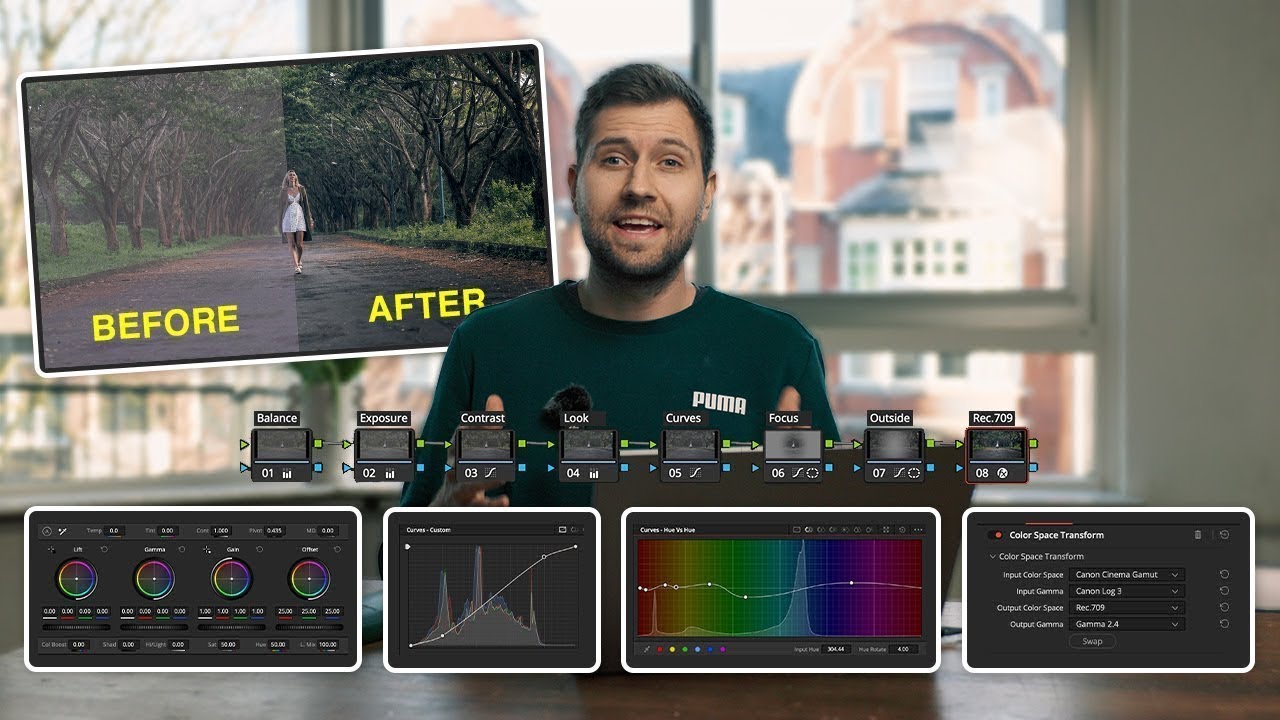
TLDRThis video provides a detailed, step-by-step guide on how to color grade Apple Log footage in DaVinci Resolve. The tutorial covers the essential steps including applying the Color Space Transform effect, adjusting input and output settings, and correcting exposure using HDR tools. It also demonstrates how to add contrast and saturation to enhance the image, giving it a commercial look. For a film-inspired look, the video explains how to apply the Kodak 2383 film look and adjust it for a more cinematic feel. This is a beginner-friendly approach with additional tips for refining your footage.
Takeaways
- 😀 First, drag and drop your Apple log footage onto the timeline in DaVinci Resolve.
- 😀 In the color tab, add a new node by pressing Option + S.
- 😀 Use the 'Color Space Transform' effect from the effects tab to convert the colors to Rec 2020.
- 😀 Apple log uses Rec 2020 and its own log curve, so adjust the input settings accordingly for a more realistic color representation.
- 😀 Set the output color space to Rec 709 and the gamma to 2.4 to achieve proper color grading.
- 😀 Use the HDR tab to fine-tune the exposure settings for underexposed footage.
- 😀 Increase the exposure using the graph in the HDR tab to get a balanced look.
- 😀 Add a contrast node to improve the look of your footage and make it pop by adjusting the contrast dial.
- 😀 Adjust the saturation to enhance the colors and make the image more vibrant and detailed.
- 😀 To create a film-like look, switch the output gamma to 'S-Log' or apply a Kodak 2383 film look with the desired contrast for a more cinematic effect.
Q & A
What is the first step in color grading Apple Log footage in DaVinci Resolve?
-The first step is to drag and drop your footage onto the timeline in DaVinci Resolve.
How do you set up the color grading environment for Apple Log footage?
-After adding the footage to the timeline, go to the Color tab, add another node by hitting Option + S, and then apply the 'Color Space Transform' effect to that node.
Why is it necessary to convert the colors when grading Apple Log footage?
-Apple Log footage uses Rec 2020 color space and its own log curve, so it needs to be converted to a standard color space, like Rec 709, to achieve realistic colors and proper contrast.
What are the key settings for input and output when grading Apple Log footage?
-For the input, set the color space to Rec 2020 and the log curve to Apple Log. For the output, choose Rec 709 for color space and Gamma 2.4 for the output gamma.
How do you address underexposure in Apple Log footage after the color conversion?
-Go to the HDR tab, set the input to Rec 2020, and the gamma to Apple Log. Then, adjust the exposure using the graph to brighten the footage.
What is the purpose of adding contrast in color grading?
-Adding contrast enhances the depth and visual appeal of the footage by making the darks darker and the lights lighter, which is essential for achieving a more dynamic and pleasing image.
How do you adjust the saturation when color grading Apple Log footage?
-You can increase the saturation by adding a node and adjusting the saturation dial to make the colors pop and appear more vibrant.
What does a commercial look typically involve in terms of color grading?
-A commercial look usually features vibrant colors with balanced exposure and contrast, making the footage look more polished and professional.
How can you achieve a film look with Apple Log footage?
-To achieve a film look, you can apply the 'Kodak 2383' film look from the Film Looks section and adjust the output gamma to 'S-Log' or a similar filmic setting. This creates a more cinematic, pastel-style image with an orange-teal contrast.
What is the role of the Kodak 2383 film look in grading Apple Log footage?
-The Kodak 2383 film look adds contrast and color grading reminiscent of traditional film, creating a classic orange-teal look. It already includes a significant amount of contrast, so additional contrast adjustments may not be necessary.
Outlines

This section is available to paid users only. Please upgrade to access this part.
Upgrade NowMindmap

This section is available to paid users only. Please upgrade to access this part.
Upgrade NowKeywords

This section is available to paid users only. Please upgrade to access this part.
Upgrade NowHighlights

This section is available to paid users only. Please upgrade to access this part.
Upgrade NowTranscripts

This section is available to paid users only. Please upgrade to access this part.
Upgrade NowBrowse More Related Video
DaVinci Resolve para Iniciantes - Como Editar Vídeos - Completo 2024
DJI Osmo Pocket 3 is a Fantastic YouTube Studio Camera!
DaVinci Resolve 19 - Complete Beginner Tutorial

DaVinci Resolve Beginners Tutorial 2024: Edit like a PRO for FREE!
The Secret Formula for Cinematic iPhone Videos
80% Of COLOUR GRADING BASICS In ONLY 20 Minutes
5.0 / 5 (0 votes)