Membuat Tabel dan Grafik Laporan Penjualan Dengan Microsoft Word 2016
Summary
TLDRThis tutorial video demonstrates how to create a professional sales report in Microsoft Word 2016, guiding viewers through the steps of document setup, image and shape insertion, text formatting, table creation, and chart inclusion. The presenter uses a simple and practical approach, showing how to create business documents such as sales reports by utilizing various Word features. Viewers are encouraged to follow along and customize the layout, fonts, and visuals to fit their needs, with tips on improving the overall design. The video is aimed at students and beginners seeking to enhance their Word skills.
Takeaways
- 😀 Ensure to use a compatible version of Microsoft Word (2013, 2016, or 2017) to follow the tutorial steps effectively.
- 😀 Start by opening a new blank document in Microsoft Word to begin creating your sales report.
- 😀 Use the 'Design' and 'Insert' tabs to add elements such as text boxes and images to customize the document.
- 😀 Insert a logo or image (e.g., from PicsArt) and adjust its size and placement to enhance your document's visual appeal.
- 😀 Add a title using a text box, and apply text formatting like bold, italics, or different fonts to make it stand out.
- 😀 Customize text size and style for the company’s contact details (address, phone number, etc.) for better presentation.
- 😀 Create a sales report table by selecting the desired number of rows and columns in the 'Insert > Table' option.
- 😀 Format the table’s design (border thickness, color, and cell size) to suit the document’s professional style.
- 😀 Use the 'Insert > Chart' option to add a visual representation of sales data, such as a bar or line chart.
- 😀 Save the completed document in either Word or PDF format, ensuring to keep a copy for future use or sharing.
Q & A
What version of Microsoft Word is being used in the tutorial?
-The tutorial is based on Microsoft Word 2016, but it is also applicable to versions 2013 and 2017, with only slight differences in the interface.
What is the first step in creating a document as shown in the tutorial?
-The first step is to open Microsoft Word and select 'Blank document' to start creating a new document.
How does the instructor suggest creating a logo for the document?
-The instructor uses PicsArt to create the logo and then inserts it into the document through the 'Insert' and 'Pictures' options in Microsoft Word.
What shape does the instructor start with when designing the document?
-The instructor starts by creating a rectangle shape using the 'Insert' tab and selecting 'Shapes.' This is used to structure the document.
What does the instructor do after inserting the rectangle shape?
-After inserting the rectangle shape, the instructor adjusts its size and thickness and then formats the shape to fit the desired layout.
How is the company name added to the document?
-The company name, for example, 'PT Samudera Benua,' is added by typing the text and applying bold formatting, followed by selecting a suitable font style.
What is the purpose of the table in the document?
-The table is used to structure data such as sales figures, and it helps organize information in a clear, readable format.
How does the instructor format the text and table for better visibility?
-The instructor adjusts the font size, applies bold formatting, and changes text colors to ensure the text and table are visually appealing and easy to read.
What additional elements are inserted after the company information and table?
-The instructor adds a sales report and a sales chart, which are created by copying and pasting from other sources and inserting them into the document.
How does the instructor conclude the document creation process?
-The instructor finishes by saving the document in the desired format, either as a Word file or a PDF, ensuring it is ready for sharing or printing.
Outlines

This section is available to paid users only. Please upgrade to access this part.
Upgrade NowMindmap

This section is available to paid users only. Please upgrade to access this part.
Upgrade NowKeywords

This section is available to paid users only. Please upgrade to access this part.
Upgrade NowHighlights

This section is available to paid users only. Please upgrade to access this part.
Upgrade NowTranscripts

This section is available to paid users only. Please upgrade to access this part.
Upgrade NowBrowse More Related Video

TIK APLIKASI PERKANTORAN (Ms. Word)

Format Penulisan Laporan PKL, Skripsi, Makalah Agar Lebih Mudah Menggunakan MS.Word
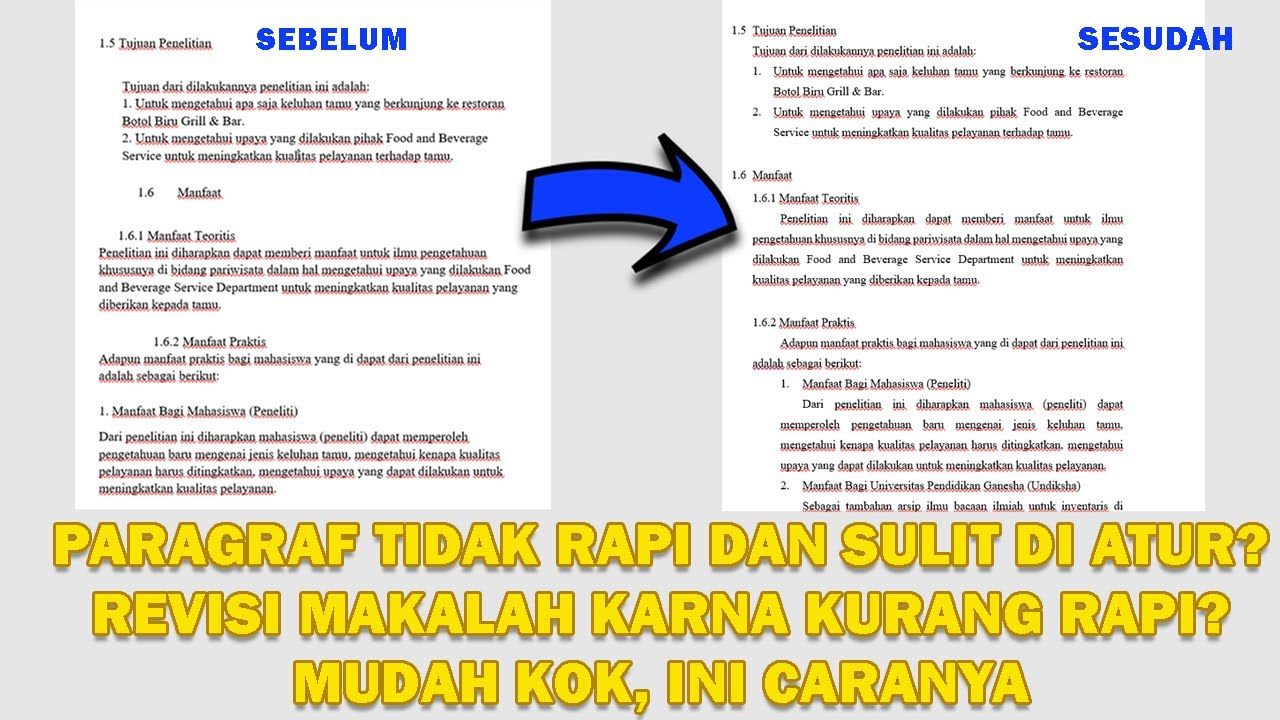
Cara Merapikan Paragraf Pada Makalah dan Skripsi di Microsoft Word
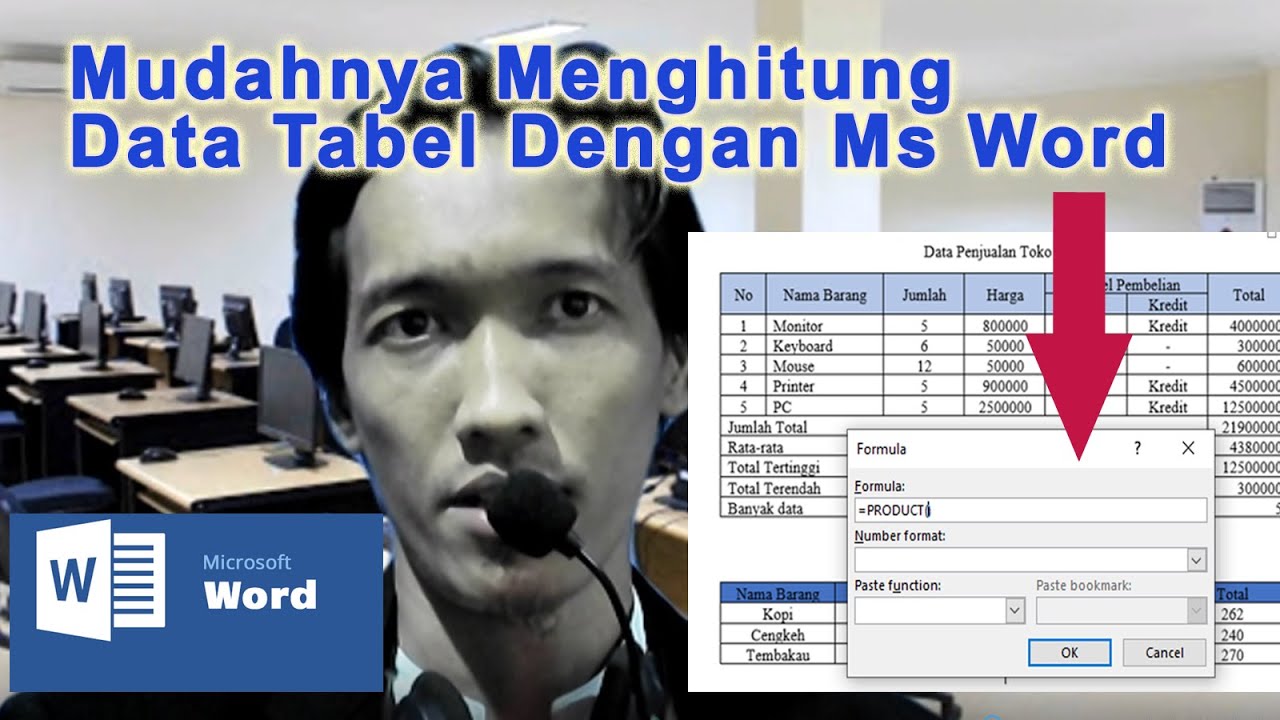
Menghitung data table dengan ms word || how to calculate table data with ms word
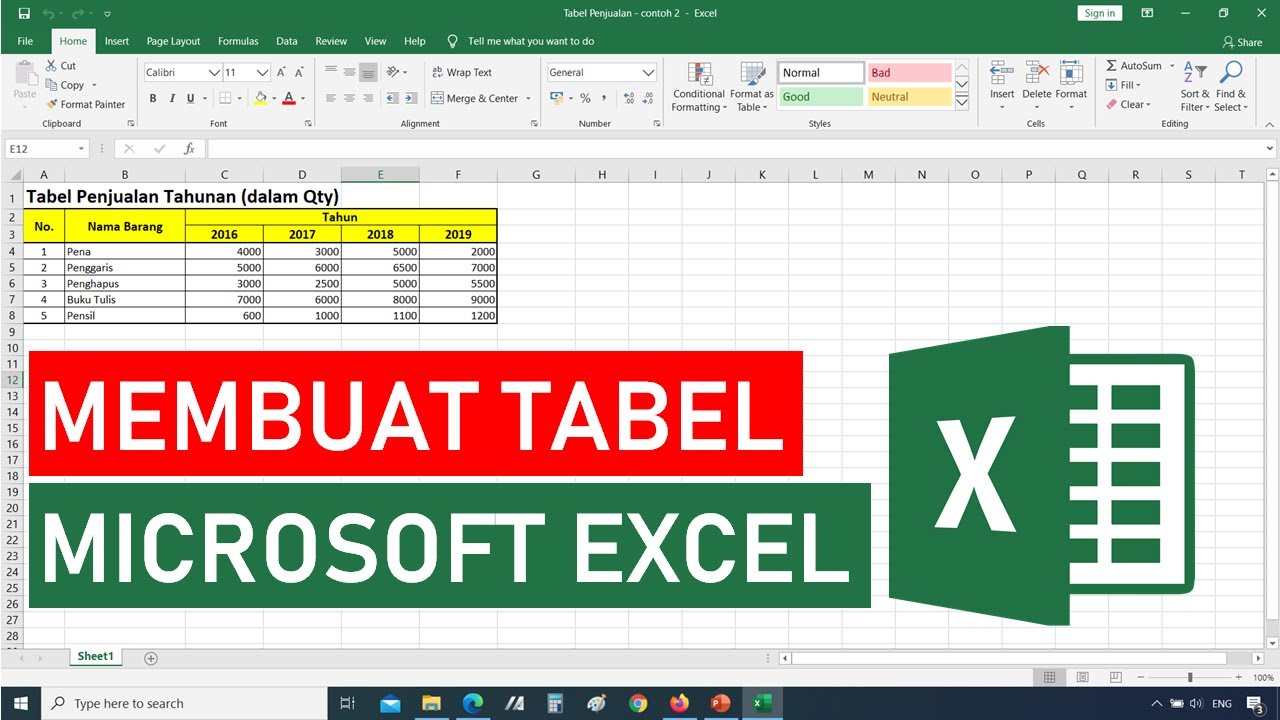
Tutorial Cara Membuat Tabel di Microsoft Excel || Tutorial Excel Bahasa Indonesia
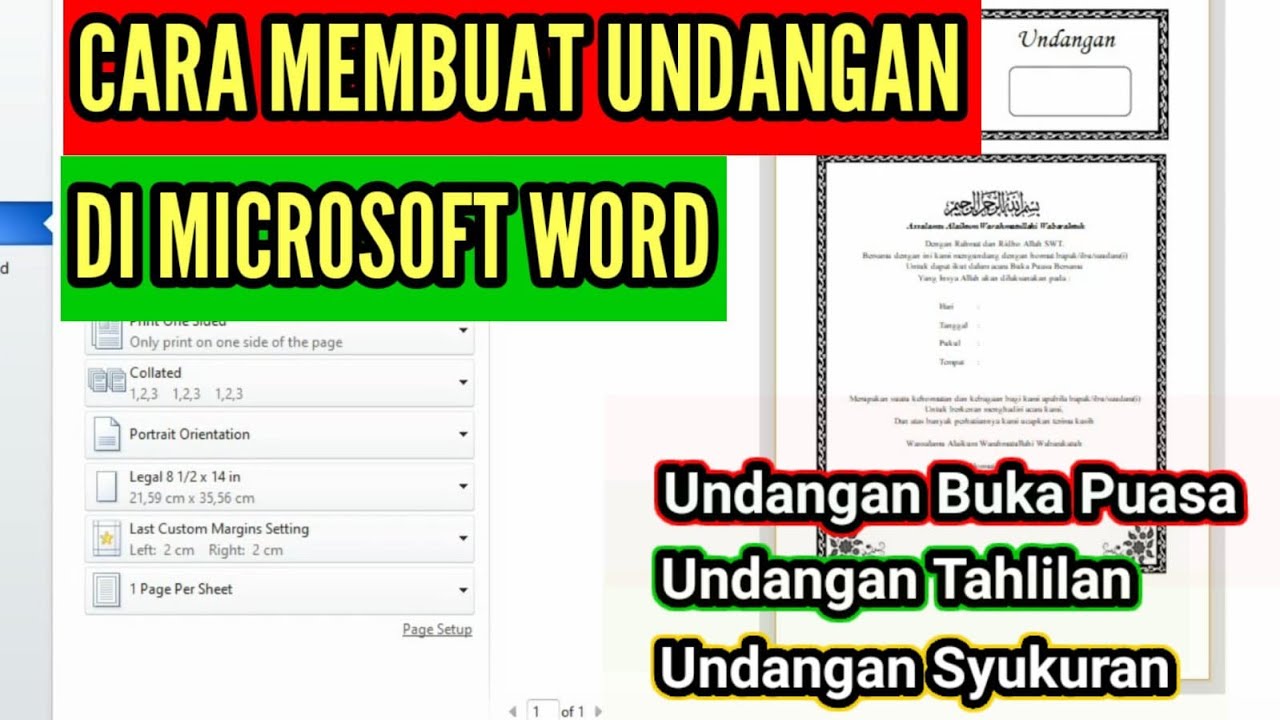
Cara Membuat dan Mencetak Undangan di Microsoft Word || Undangan Buka Puasa Bersama
5.0 / 5 (0 votes)