Troubleshooting Keamanan Jaringan Pada Jaringan WAN ( UJIKOM TKJ PKET 4 )
Summary
TLDRThis tutorial provides a step-by-step guide on configuring Turbo Shooting security networks using MikroTik routers and access points. It covers setting up IP addresses, wireless configurations, DHCP, time settings, DNS, and firewall rules. The video demonstrates how to reset configurations, create user profiles, manage IPs, and set up wireless security. Additionally, it includes instructions for blocking sites and files, managing VPN settings, and troubleshooting common issues. The guide is aimed at helping users securely configure and manage a network using MikroTik devices.
Takeaways
- 😀 Set up the routerboard and access point by connecting cables and resetting the access point.
- 😀 Access the routerboard through a browser by entering the IP address 192.168.0.1 and inputting your chosen password.
- 😀 Configure the network settings, including Static IP (e.g., 192.168.200.2) and gateway (e.g., 192.168.200.1).
- 😀 Enable wireless on the access point, set the SSID (e.g., @prxi UKK), and select the appropriate wireless mode (11 BN mix).
- 😀 Apply WPA or WPA2 encryption for wireless security, and set a password (e.g., 12345678).
- 😀 Configure DHCP settings to assign IP addresses to clients, and set the IP range (e.g., 192.168.200.2 to 192.168.200.100).
- 😀 Set up time synchronization by selecting the correct time zone (UTC+7) and using NTP servers (e.g., asia.pool.ntp.org).
- 😀 Enable DNS settings and configure DNS servers (e.g., 8.8.8.8 and 8.8.4.4).
- 😀 Apply firewall rules to block certain traffic, such as ping (ICMP) requests, and restrict access to specific sites or files.
- 😀 Test the network configurations by performing a ping test and checking if the access restrictions (e.g., site or file blocking) are effective.
Q & A
What equipment is needed for the network security setup described in the video?
-The equipment needed includes two routerboards, an access point, a power adapter, cables, and a computer or PC.
How do you reset the access point before starting the configuration?
-To reset the access point, press the black reset button on the back until the lights turn off, then release the button.
What is the process to configure the access point's network settings?
-After logging into the access point's web interface, set the mode to Access Point, input a static IP (e.g., 192.168.200.2), and configure the gateway if necessary (e.g., 192.168.200.1).
What wireless settings are required for the access point?
-Enable the wireless function, set the wireless name (SSID), choose 11BN mix for the wireless mode, and enable Auto Channel. Also, ensure to enable the SSID.
How do you secure the wireless network?
-Select WPA or WPA2 for encryption, set the password (e.g., 12345678), and save the settings.
What DHCP settings should be configured on the access point?
-Disable the DHCP server and set the starting IP range (e.g., 192.168.2.2) and the ending IP range (e.g., 192.168.200.100).
What time zone and NTP settings should be configured on the system?
-Set the time zone to +7 and use NTP servers such as asia.pool.ntp.org and ik.ntp.org for time synchronization.
How do you configure the routerboard for network access?
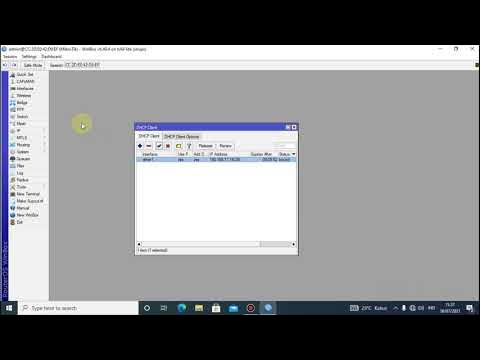
-Connect the routerboard to the internet port and assign cables to the appropriate ports (e.g., Port 1 for internet, Port 2 for PC). Use the Winbox utility to apply configurations for the network.
What is the purpose of configuring the IP and DNS settings on the routerboard?
-The IP settings (e.g., 192.168.100.1/24) and DNS (e.g., 8.8.8.8) are essential for the routerboard to communicate within the network and resolve domain names.
How do you block specific clients from pinging the router or other clients?
-You can block clients by setting up firewall rules in the IP section and configuring filters for ICMP requests. Specify the IP address range (e.g., 192.168.100.51 to 192.168.100.100) and drop the ICMP protocol.
Outlines

This section is available to paid users only. Please upgrade to access this part.
Upgrade NowMindmap

This section is available to paid users only. Please upgrade to access this part.
Upgrade NowKeywords

This section is available to paid users only. Please upgrade to access this part.
Upgrade NowHighlights

This section is available to paid users only. Please upgrade to access this part.
Upgrade NowTranscripts

This section is available to paid users only. Please upgrade to access this part.
Upgrade NowBrowse More Related Video
Tutorial konfigurasi mikrotik menggunakan winbox

Pembahasan Soal UKK TKJ Paket 2 Terbaru 2024/2025 Full - 2 Router Dynamic Routing ospf RB 951-2HnD

Cara Konfigurasi VLAN di Mikrotik dengan Mudah
Network Interconnection with IP Tunnel - MIKROTIK TUTORIAL [ENG SUB]
PENJELASAN VLAN + HOTSPOT (MIKROTIK) | 12-12-2022

Implementasi Static Routing pada Jaringan VPN
5.0 / 5 (0 votes)