Cara Membuat Koneksi PHP ke Database Mysql 2024 (How To Make PHP Connect To Mysql Database 2024)
Summary
TLDRIn this tutorial, the process of connecting PHP to a MySQL database using XAMPP is explained step by step. The video covers starting XAMPP, accessing PHPMyAdmin, creating a PHP file, and writing the connection code using variables for host, username, password, and database. The PHP `mysqli` extension is used to establish the connection, with checks to display whether the connection was successful or failed. Additionally, the tutorial offers troubleshooting tips for ensuring the connection details are correct, guiding viewers on how to manage database connections efficiently.
Takeaways
- 😀 Turn on XAMPP and start both Apache and MySQL before proceeding.
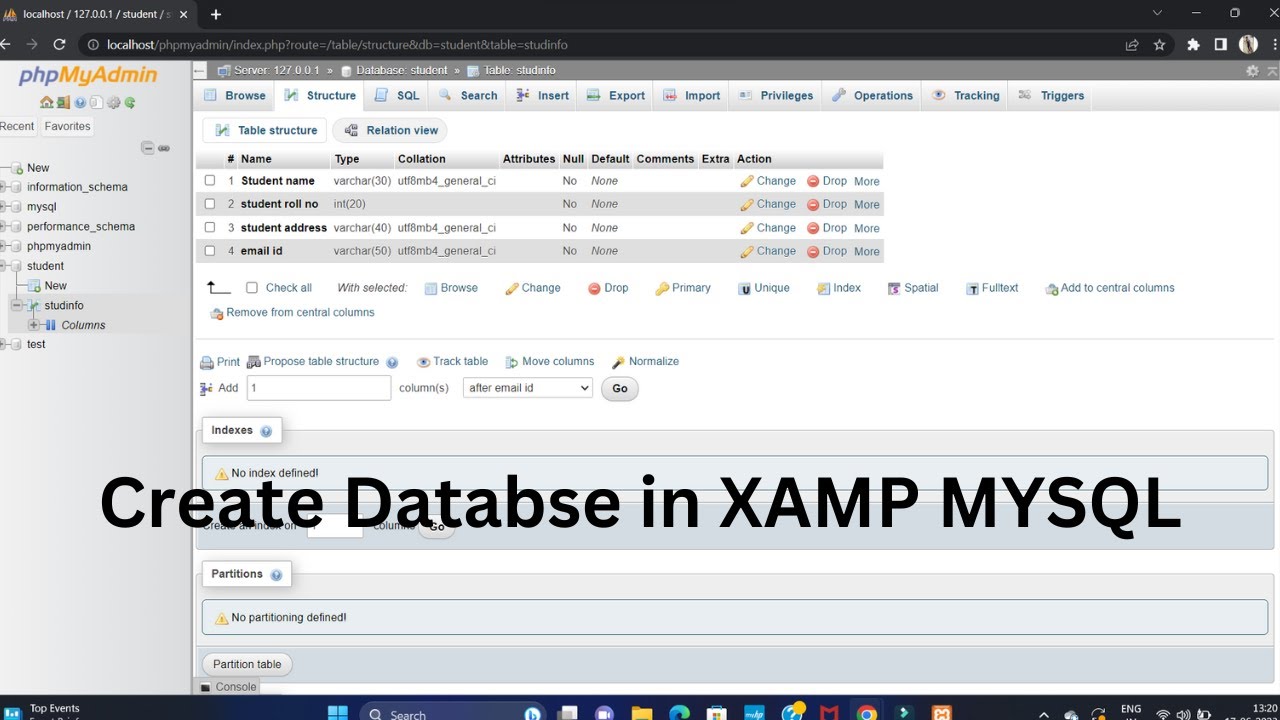
- 😀 Use PHPMyAdmin to create a new database, which will be used in the PHP script.
- 😀 Make sure the XAMPP control panel indicators turn green, indicating the services are running properly.
- 😀 Create a project folder under 'htdocs' in the XAMPP installation directory to organize your PHP files.
- 😀 Name the PHP connection file (e.g., 'koneksi.php') and save it in your project folder.
- 😀 Declare the necessary connection variables in PHP: host, username, password, and database.
- 😀 In the script, set 'localhost' as the host, 'root' as the username, and an empty string for the password (if default).
- 😀 Use the 'mysqli' object-oriented approach in PHP to establish a connection to MySQL.
- 😀 Implement a conditional check to verify if the connection is successful or if it fails, displaying appropriate messages.
- 😀 Test the connection by opening the PHP file in a web browser and checking for the success or failure message.
- 😀 If the connection fails, ensure the values for the host, username, password, and database are correctly configured in both the script and PHPMyAdmin.
Q & A
What is the first step to start the process of connecting PHP to MySQL?
-The first step is to start the SAM (Apache and MySQL) control panel and activate Apache and MySQL services.
How do you access the PHPMyAdmin interface?
-To access PHPMyAdmin, you open a web browser and type 'localhost/s', then click on the 'PHPMyAdmin' link at the top-right of the page.
Where should the PHP files be saved when using SAM?
-The PHP files should be saved in the 'htdocs' folder inside the SAM installation directory.
What should the file containing the PHP code be named?
-The file should be named 'koneksi.php' (or '.php'), as shown in the script.
Which PHP variables are used to store the database connection details?
-The PHP variables used are 'host', 'username', 'password', and 'database'.
How do you assign values to the PHP connection variables?
-You assign values such as 'localhost' for the host, 'root' for the username, an empty string for the password (if there is none), and the database name for the database.
What is the purpose of the 'new mysqli()' function in the script?
-The 'new mysqli()' function is used to create a connection between PHP and the MySQL database, utilizing the defined host, username, password, and database.
What feedback does the script provide if the database connection is successful?
-If the connection is successful, the script will display the message 'Database connected'.
What happens if the connection to the database fails?
-If the connection fails, the script will display the message 'Database not connected'.
How can you test the connection to the database in the web browser?
-To test the connection, you need to access 'localhost/phpMySQL', navigate to the 'koneksi.php' file, and check the displayed message to verify the connection status.
Outlines

This section is available to paid users only. Please upgrade to access this part.
Upgrade NowMindmap

This section is available to paid users only. Please upgrade to access this part.
Upgrade NowKeywords

This section is available to paid users only. Please upgrade to access this part.
Upgrade NowHighlights

This section is available to paid users only. Please upgrade to access this part.
Upgrade NowTranscripts

This section is available to paid users only. Please upgrade to access this part.
Upgrade NowBrowse More Related Video
Create Database Using XAMPP Server/MYSQL |Updated 2023|

Membuat Database MYSQL di XAMPP menggunakan CMD
SIMPLE WAY ON HOW TO CONNECT MYSQL TO PHP MyAdmin.
Tutorial Membuat Website Sekolah dengan PHP dan MySQL | Database #1
How to make a School Library Website

How to Connect React JS Frontend with PHP Backend
5.0 / 5 (0 votes)