KEGIATAN P5 PERAKTEK MENYABLON | pkbm bina warga
Summary
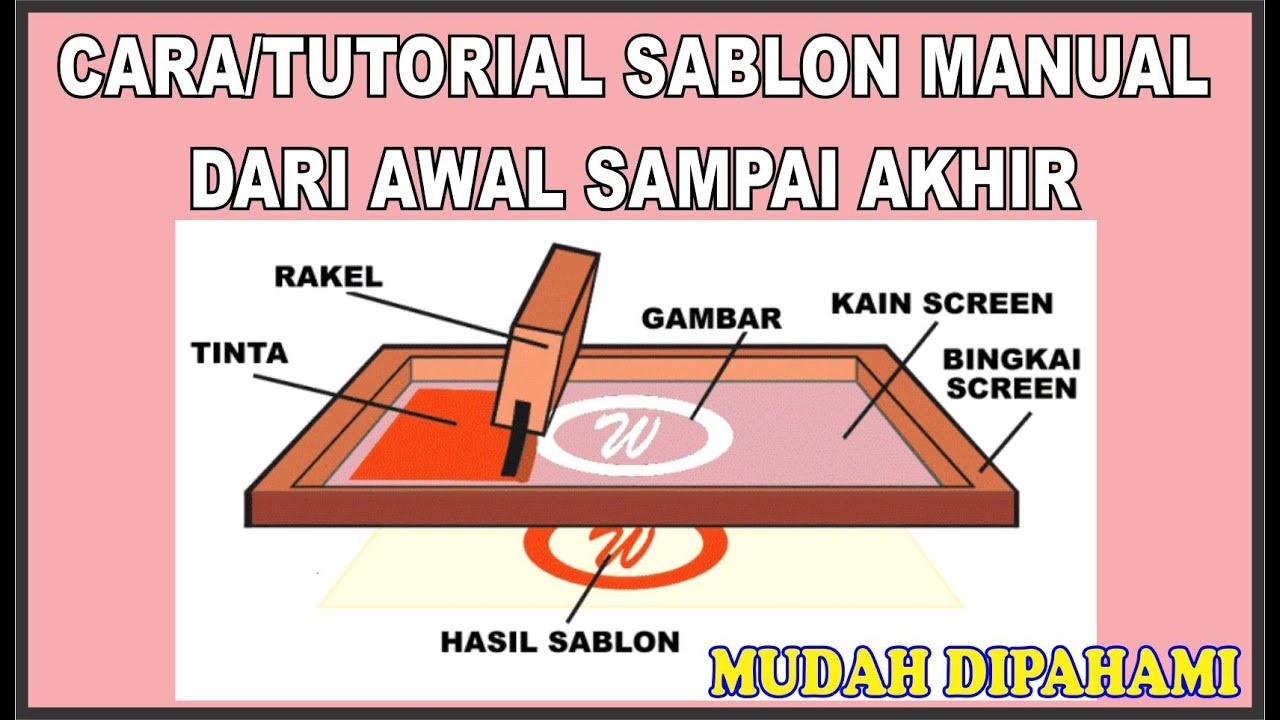
TLDRThis video tutorial walks through the steps of screen printing, from design creation to the final printing process. It covers essential equipment, including the screen, table, and various tools used for the task. Key stages of the process are explained in detail: preparing the design, transferring it onto the screen, applying the printing solution, and setting up the shirt on the printing table. The video emphasizes technique, precision, and the importance of drying and ensuring proper alignment to achieve professional-quality prints. It's a comprehensive guide for beginners eager to learn the art of screen printing.
Takeaways
- 😀 The session begins with a warm greeting and introduction to the self-assessment activity for skill development.
- 😀 The main activity of the session involves a screen printing process, which is divided into three key stages: design creation, transfer (afdruk), and final printing on t-shirts.
- 😀 The design for the t-shirt printing has already been created and is ready for transfer onto the screen.
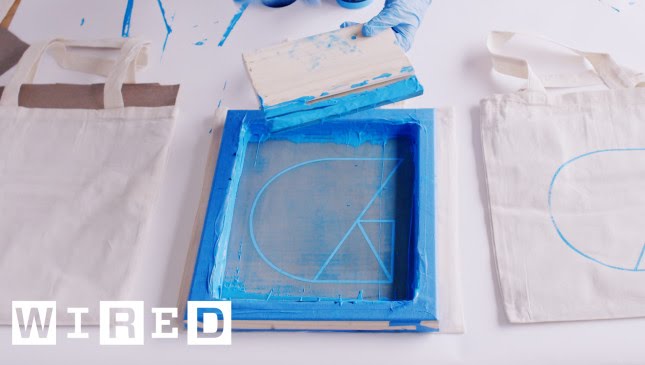
- 😀 The second stage involves the 'updrop' process, where the design is transferred to a screen using a special chemical (afdruk) that hardens when exposed to light.
- 😀 The screen is made of a mesh material and is prepared by applying a chemical substance that hardens in areas exposed to light, leaving the design visible on the screen.
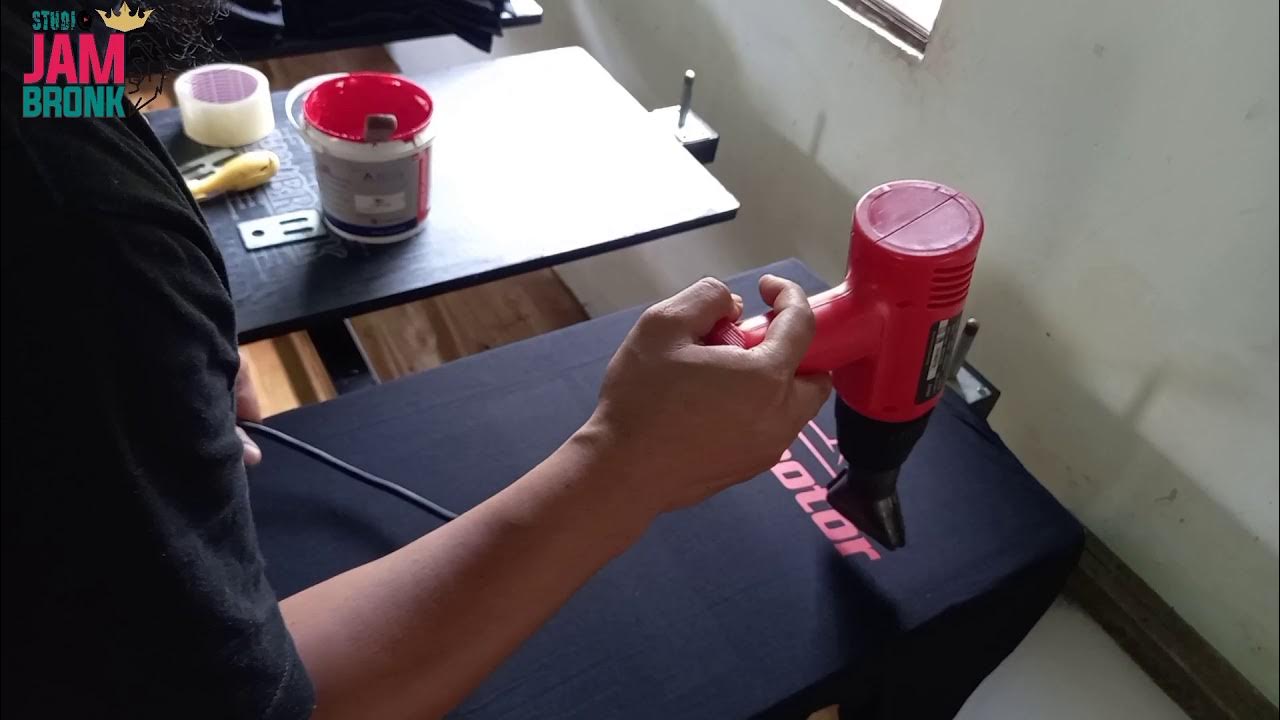
- 😀 Various tools and materials are introduced, including a Thailand table for screen stability and lem (glue) for fixing the t-shirt to the printing board.
- 😀 The process emphasizes precision in placing the t-shirt on the board and aligning it properly for consistent printing.
- 😀 The correct placement of the design on the t-shirt is marked using a guide, ensuring the printed image is centered and properly aligned.
- 😀 The screen printing procedure involves careful application of the afdruk chemical and ensuring it covers only the designated areas of the screen.
- 😀 A transparent paper (kalir paper) is used for printing, and extra steps are taken to ensure the paper allows light to pass through to the afdruk chemical underneath, helping in the proper exposure during printing.
Q & A
What is the first step in the screen printing process as described in the script?
-The first step is to create the design, which has already been done prior to the session. The design is ready to be printed onto the T-shirt.
What materials are used in the screen printing process?
-The materials include a screen, a frame, a special coating (called 'afdruk'), and a T-shirt. Additional items such as adhesive for the table and dryer are also used.
How does the 'updrop' process work in screen printing?
-The 'updrop' process involves transferring the design onto the screen. The screen is coated with a special material that hardens when exposed to light, leaving the design visible where the light is blocked by the black areas of the design.
What role does the black design play in the screen printing process?
-The black design blocks light from reaching the coating on the screen. The areas covered by the black design remain soft, while the exposed areas harden, allowing for the design to be transferred when water is applied.
What is the purpose of the 'meja Thailand' or Thai table in the process?
-The Thai table is used to hold the screen in place while printing. It ensures that the screen does not shift during the printing process, which is especially important for beginners or when precise printing is needed.
How is the T-shirt prepared for the printing process?
-The T-shirt is placed on the table and secured using adhesive. The adhesive ensures that the T-shirt stays in place while the screen printing is done.
Why is it important to apply a consistent amount of adhesive to the table?
-Applying a consistent amount of adhesive ensures that the T-shirt stays securely in place, preventing it from shifting during the printing process and ensuring precise alignment of the design.
What is the purpose of using a 'pengeras' (hardener) in the screen printing process?
-The hardener is mixed with the coating material to make it more durable when exposed to light. It helps the coating harden in the areas where the design is not blocking the light.
How is the design aligned on the T-shirt before printing?
-The design is aligned by first placing the T-shirt on the table, adjusting it so that the design fits properly. Markings are made to ensure the correct positioning of the design relative to the T-shirt.
What happens if the T-shirt is removed from the table before the printing process is complete?
-If the T-shirt is removed before the printing process is complete, the design might shift, causing misalignment, especially if multiple colors are involved. It is important to complete the process before removing the T-shirt.
Outlines

This section is available to paid users only. Please upgrade to access this part.
Upgrade NowMindmap

This section is available to paid users only. Please upgrade to access this part.
Upgrade NowKeywords

This section is available to paid users only. Please upgrade to access this part.
Upgrade NowHighlights

This section is available to paid users only. Please upgrade to access this part.
Upgrade NowTranscripts

This section is available to paid users only. Please upgrade to access this part.
Upgrade NowBrowse More Related Video
CARA SABLON PLASTISOL | CARA SABLON KAOS MANUAL | CARA SABLON KAOS MANUAL MEMAKAI TINTA PLASTISOL

Pembuatan Cetak Saring - Studio Grafis (Cetak Saring) - Dyah Yuni Kurniawati, S.Sn., M.Sn.
DIY: How To Burn a Silkscreen and Print at Home
Cara Pisah Warna di Photoshop Untuk Film Sablon Pemula ( 6 warna 4 warna 2 warna )
How to Burn Your Own Screens from Home: Screen Print Tutorial
SABLON KAOS MANUAL PRAKTIS DARI AWAL HINGGA AKHIR DIJAMIN BISA
5.0 / 5 (0 votes)