"Z2" - Upgraded Homemade Silicon Chips

Sam Zeloof
13 Aug 202105:46

Summary

TLDRThe video describes the creation of a homemade silicon chip with 100 transistors, made using a polysilicon gate process. The chip operates at lower voltages, improving performance and efficiency. The creator outlines their fabrication process, including steps like photolithography, doping, and etching. They also compare their new chip to Intel's first processor, which had only 2,000 transistors, highlighting the progress. The chip's applications include LED flashers and guitar pedals, and the creator details the precise tools and techniques used. The video invites viewers to support future semiconductor experiments.

Takeaways

  • 🔬 The speaker created a homemade silicon chip in their garage and recently developed version 2 with 100 transistors, improving on the older version.
  • 💡 The new chip uses a polysilicon gate process, enabling it to work at lower voltages (threshold voltage of about 1V), reducing power consumption.
  • 📉 The older chips required higher voltage, necessitating 9V batteries, but the new version can run on 3.3V and 5V logic levels.
  • 🧪 The fabrication process involves using photoresist and photolithography with homemade tools like a spin coater and maskless stepper.
  • 🎥 The speaker uses a DLP projector setup to project patterns onto the wafer, reducing the image to the appropriate size for exposure.
  • 🔍 A potassium hydroxide solution is used to etch away exposed photoresist in the photolithography process, allowing further development of the chip.
  • 🔥 The source and drain of the MOSFETs are created by doping with phosphorus, followed by high-temperature baking at over 1000°C.
  • 🔧 Layers such as the gate and contact are etched using reactive ion etching and hydrofluoric acid, with metal layers added via vacuum evaporation.
  • 📏 Detailed inspection follows to measure parameters like gate dimensions and layer thicknesses, ensuring quality control.
  • 📊 The final chip is tested using a probe station, comparing the ID vs VDS curve of the MOSFETs to industry standards, yielding promising results.

Q & A

  • What is significant about the silicon chip described in the transcript?

    -The silicon chip described is homemade and is the second version of the creator's design, featuring 100 transistors that are smaller, faster, and better than the previous version. This chip represents a significant improvement in complexity, approaching the level of early commercial chips like Intel’s first processor, which had only 2,000 transistors.

  • What advantage does the new version of the chip have over the previous one?

    -The new version operates at much lower voltages, with a threshold voltage of about 1 volt, allowing it to be powered by 3.3V and 5V logic levels. This results in lower power consumption, a higher density of transistors in a smaller area, and better overall performance.

  • How did the creator design the chip layout?

    -The creator used Photoshop to design the layout, as it’s simpler to use for a project with only four layers. More complex software wasn’t necessary for this simple chip design process.

  • What materials and tools are used to fabricate the silicon chip?

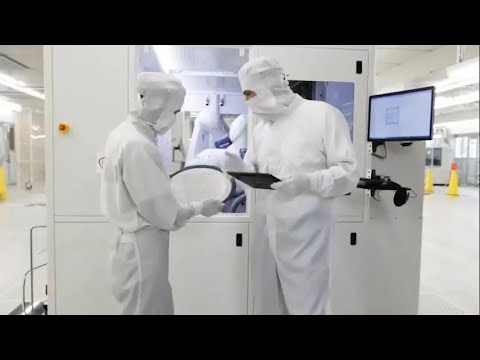
    -The creator starts with 200mm silicon wafers, dices them into smaller bits using a diamond scribe, and then uses a homemade spin coater for depositing photoresist. Other materials and tools include phosphorus solution for doping, polysilicon for the gate layer, and aluminum for the metal layer. The chip is processed in steps involving photolithography, spin coating, etching, and baking.

  • What is the purpose of using a spin coater in the process?

    -The spin coater is used to evenly apply a thin layer of photoresist onto the wafer. The wafer is spun at high speeds (4,000 rpm) for 30 seconds, which ensures a uniform and consistent layer across the entire surface.

  • How does the photolithography process work in this project?

    -Photolithography involves projecting an image of the design from a laptop onto the wafer using a DLP projector and optics. The wafer is then exposed to light, which hardens certain areas of the photoresist. The unexposed areas are later dissolved away during development, leaving the desired pattern on the wafer.

  • What is the purpose of doping, and how is it done?

    -Doping introduces impurities into specific regions of the silicon to create the source and drain areas of the MOSFETs. In this process, a phosphorus solution is spun onto the wafer and then baked at over 1,000°C for 45 minutes to drive the phosphorus atoms into the predefined areas.

  • What steps are involved in forming the metal contacts on the chip?

    -After defining the gate and contact layers, the chip undergoes a process to remove the insulating silicon dioxide layer. Metal contacts are then deposited by evaporating aluminum onto the wafer, followed by photolithography to define the metal layer. Finally, residual aluminum is etched off to form the contact points.

  • How are the transistors tested once the chip is complete?

    -The transistors are tested using a probe station, where small tungsten needles are used to make electrical connections with the chip’s transistors. The creator uses test equipment and programming to define the tests, such as measuring current versus voltage (ID vs VDS), and then analyzes the results.

  • What are the potential applications of the chip created in the transcript?

    -The creator has already made projects like an LED flasher and a guitar distortion pedal using the first version of the chip. With the improved version, the creator expects to build even more complex circuits and applications, thanks to the increased transistor count and lower power consumption.

Outlines

00:00

🔧 Homemade Silicon Chip Version 2: An Impressive Leap

The creator describes their second iteration of a homemade silicon chip, which now contains 100 transistors that are smaller, faster, and more efficient compared to their earlier version. They produced an array of 12 of these chips, totaling 1,200 transistors. With Intel’s first processor having just 2,000 transistors, they highlight that they are nearing a significant level of complexity. Previous projects, such as a guitar distortion pedal and LED flasher, were successful but required high voltages, an issue improved in this new design with low-voltage polysilicon gate technology.

05:01

💡 Chip Fabrication with Polysilicon Gates: The Detailed Process

This paragraph delves into the detailed steps of creating the new silicon chip. It starts with designing in Photoshop due to the simplicity of working with only four layers. The creator dices 200mm wafers into smaller sections and begins the process by applying photoresist to the wafer with a homemade spin coater. After drying the photoresist, they use a maskless photolithography stepper to project the design onto the wafer. The development process removes exposed areas of the photoresist, followed by an etching procedure to form the chip's structure.

🔬 MOSFET Creation: Doping and Etching Explained

This section continues with the MOSFET (transistor) fabrication process. After forming the chip's structure, the photoresist mask is stripped off, and phosphorus atoms are introduced into the wells through a doping process at high temperatures. The etching steps are repeated twice more for the gate and contact layers. These steps involve etching the gate and using reactive ion etching for the contact layer to ensure good electrical connections. The chip is then placed in a vacuum chamber to apply a metal layer, typically aluminum, which completes the foundational structure.

📊 Testing the Finished Silicon Chip: A Close Inspection

The creator inspects the finished chip closely, measuring parameters like gate length and layer thickness, using a microscope to check for accuracy. They place the chip on a probe station with tiny tungsten needles to make precise electrical connections for testing the transistors. The final part of the process involves using test equipment to analyze the chip’s performance, comparing its curves to ideal MOSFET models. Encouraged by the positive results, the creator reflects on their success and considers launching a Patreon to support more semiconductor experiments.

Mindmap

Keywords

💡Silicon Chip

A silicon chip is a small piece of silicon material on which circuits are created for various electronic functions. In the video, the creator talks about making homemade silicon chips in his garage, emphasizing the innovation and complexity of personal semiconductor fabrication. His second version has 100 transistors, showing the progress he’s made from his earlier work.

💡Transistors

Transistors are semiconductor devices used to amplify or switch electronic signals and power. The creator mentions that his new chip contains 100 transistors, which are essential in creating more complex circuits. He compares this to Intel’s first processor, which had only 2,000 transistors, demonstrating that even his home projects are approaching significant levels of complexity.

💡MOSFET

MOSFET stands for Metal-Oxide-Semiconductor Field-Effect Transistor, a type of transistor commonly used in electronic circuits. The creator refers to high threshold voltages of his earlier MOSFETs, which required higher power to operate. In the new chip, the threshold voltage is lower, allowing it to function at lower power levels like 3.3 or 5 volts, enhancing efficiency.

💡Polysilicon Gate Process

A polysilicon gate process is a method in semiconductor fabrication that involves using a layer of polycrystalline silicon for the gate electrode in MOSFETs. This process allows for better control of the transistor’s performance. The creator mentions this advancement in his second chip, which significantly improves power efficiency and allows for smaller, more densely packed transistors.

💡Photoresist

Photoresist is a light-sensitive material used in the lithography process to create patterns on a substrate, such as a silicon wafer. The creator uses photoresist to define layers of his chip. After applying it on the wafer, it is exposed to light, and the exposed portions are then developed and etched, allowing for precise construction of transistor components.

💡Photolithography

Photolithography is a process used in semiconductor fabrication to transfer patterns onto a substrate using light. In the video, the creator uses a homemade photolithography stepper to project images from his laptop onto the silicon wafer, which helps define various layers of the chip. This step is crucial in defining the transistors' source, drain, and gate regions.

💡Doping

Doping in semiconductor fabrication refers to the introduction of impurities into the silicon wafer to change its electrical properties. The creator describes spinning on a phosphorus dopant solution, which is baked at over 1000 degrees Celsius to diffuse the phosphorus atoms into the silicon, forming the source and drain regions of his MOSFETs.

💡Spin Coating

Spin coating is a technique used to apply a thin, uniform layer of material onto a flat surface, often used in semiconductor fabrication. The creator uses spin coating to apply both photoresist and dopants onto the wafer. By spinning the wafer at high speeds, he ensures a smooth, even distribution of materials essential for accurate photolithography and doping.

💡Reactive Ion Etching

Reactive Ion Etching (RIE) is a technique used to etch specific patterns into the wafer using chemically reactive plasma. The creator uses RIE to remove insulating layers of silicon dioxide in his chip, allowing him to make electrical contacts to the transistor components. This step is essential for finalizing the chip’s construction.

💡Probe Station

A probe station is a device used to physically connect to very small components on a semiconductor wafer for testing and characterization. In the video, the creator uses a probe station with tungsten needles to test his transistors by making contact with them. It’s a delicate process necessary for measuring the electrical characteristics of the MOSFETs, ensuring they work correctly.

Highlights

Created the world's first homemade silicon chip in a garage fabrication lab.

Version 2 of the chip contains 100 transistors, smaller, faster, and more efficient than the first version.

Made an array of 12 chips with a total of 1,200 transistors, nearing the complexity of Intel's first processor, which had 2,000 transistors.

Earlier projects with the first chip included an LED flasher and a guitar distortion pedal, both requiring 9-volt batteries due to high MOSFET threshold voltage.

The new chip uses a polysilicon gate process, lowering the threshold voltage to 1 volt and enabling operation at 3.3 and 5 volts.

For simple designs, uses Photoshop to create the four-layer structure instead of complicated software.

Begins with 200 mm silicon wafers, diced into smaller pieces using a diamond scribe for processing.

Uses a homemade spin coater to apply photoresist for the first layer, spun at 4,000 RPM for 30 seconds and dried on a hot plate at 95°C.

A homemade maskless photolithography stepper is used for exposure, projecting designs from a laptop using a DLP projector and optics.

Positive photoresist is etched away with potassium hydroxide after exposure, revealing the underlying structure for further processing.

Dopant layer applied with phosphorus solution, then baked at over 1000°C for 45 minutes to create the source and drain regions of the MOSFETs.

Polysilicon etching and multiple rounds of photolithography create the gate and contact layers of the MOSFETs.

Uses reactive ion etching or hydrofluoric acid to remove insulating silicon dioxide before applying metal contacts.

Final metal layer applied via aluminum sputtering or thermal evaporation, followed by photolithography to define the metal contacts.

Final testing includes using a probe station with tungsten needles to measure electrical characteristics, confirming successful MOSFET performance.

Transcripts

play00:00

a few years ago i made the world's first

play00:01

homemade silicon chip in my garage fab i

play00:04

just made version 2 which has 100

play00:06

transistors on it and they're smaller

play00:08

better and faster than the old one

play00:10

i made an array of 12 of these so that's

play00:12

1 200 transistors on the same piece of

play00:15

silicon intel's first processor had only

play00:17

2 000 transistors so we're already

play00:19

approaching a decent level of complexity

play00:21

and i should be able to make some really

play00:22

interesting circuits out of this soon i

play00:24

did some cool projects with my first

play00:25

chip like a led flasher and a guitar

play00:28

distortion pedal they worked really well

play00:30

but needed one or two nine volt

play00:31

batteries attached to them because the

play00:33

threshold voltage of the old mosfets

play00:35

were really high

play00:36

this new chip is made on a polysilicon

play00:38

gate process all these details are on

play00:40

the write up on my blog but the effect

play00:42

of that is that they work well at very

play00:44

low voltages they have a threshold

play00:45

voltage of only about 1 volt and that

play00:48

means that i can power them off of 3.3

play00:51

and 5 volt logic levels they draw less

play00:53

power and i should be able to pack more

play00:55

of them into a smaller die area for

play00:58

simple chips like this the process

play00:59

actually starts in photoshop there's

play01:01

only four layers to design and it's

play01:03

easier to use this than to use some more

play01:05

complicated software

play01:07

i start with a lot of 200 millimeter

play01:08

wafers that have some pretty specific

play01:10

starting parameters they're way too big

play01:12

so i dice them up using a diamond scribe

play01:14

into smaller bits i normally do about

play01:16

half inch squares like this but i can

play01:17

process larger things up to about two

play01:19

inch wafers

play01:21

the first layer to define is the doped

play01:23

layer that makes the source and drains

play01:25

the mosfets i put it on this homemade

play01:27

spin coater and then i deposit

play01:29

photoresist on top of it you only need

play01:31

about 100 microliters or so to cover a

play01:33

small wafer like this and we spin it at

play01:35

4000 rpm for 30 seconds

play01:39

after all the excess photoresist has

play01:40

been spun off it's dried on a hot plate

play01:42

at about 95 degrees c for one minute

play01:44

this drives off the rest of the solvents

play01:46

and leaves us with a solid film

play01:49

the result is a beautiful looking and

play01:51

uniform covering of the whole wafer

play01:55

then it's off to the homebuilt maskless

play01:57

photolithography stepper for exposure

play01:59

the basic idea is that we load up an

play02:01

image on this laptop that we want to

play02:03

project onto the chip then there's a

play02:05

standard dlp projector and some optics

play02:07

that shoot that down and reduce it onto

play02:09

the wafer i have a whole video on this

play02:10

tool so i recommend checking that out in

play02:13

the center you see a little blue dot

play02:14

that's the entire exposure field it

play02:16

lasts about nine seconds then the blue

play02:19

goes away at the end of the exposure we

play02:20

can step the wafer to another location

play02:22

and expose that part too

play02:25

just like processing filament a dark

play02:27

room the next step is development i put

play02:29

it in a couple percent potassium

play02:30

hydroxide solution for about a minute

play02:32

and this etches away the parts of the

play02:34

photoresist that were exposed because

play02:35

it's a positive photoresist

play02:40

i wash it with water to get rid of the

play02:42

residual developer and then we're ready

play02:44

to do the next step i can put under a

play02:46

microscope to inspect it and make sure

play02:47

everything worked out well if it didn't

play02:49

you can always just strip off the

play02:50

photoresist layer and try again with

play02:52

maybe a different exposure or

play02:53

development time

play02:56

now the image is formed in the

play02:57

photoresist i transfer that into the

play02:59

underlying polysilicon layer using an

play03:01

etchant once it's etched we don't need

play03:03

the photoresist mask layer anymore so

play03:05

that can be stripped off using acetone

play03:12

the wafer is then cleaned and dried and

play03:14

we spin on a dopant this is a

play03:16

phosphorous solution that's suspended in

play03:19

a liquid silicon dioxide this is spun on

play03:22

just like the photoresist and then we

play03:23

bake it at very high temperature over

play03:25

1000 degrees c for about 45 minutes this

play03:28

drives in the phosphorus atoms into the

play03:31

little wells that we just defined using

play03:32

lithography and that basically forms the

play03:35

source and drains of the mosfets i have

play03:37

to push it into the center of the

play03:38

furnace using this quartz rod and then

play03:41

at the end of the process we pulled out

play03:42

the other side the process of spin

play03:44

coating photoresist baking it exposing

play03:46

it and developing it is then repeated

play03:48

exactly twice once for the gate layer

play03:50

and then again for the contact the gate

play03:52

is etched just like we did before with

play03:54

the polysilicon etchant and the contact

play03:57

layer has to be etched as well because

play03:59

now after the high temperature step

play04:01

there's a layer of silicon dioxide

play04:02

insulating everything so after the

play04:04

contact mask is formed you have to use

play04:06

something like hydrofluoric acid or

play04:09

chf3

play04:10

reactive ion etching to get rid of that

play04:12

insulator so we can make good electrical

play04:14

contact

play04:15

then we stick the wafer into a vacuum

play04:17

chamber to either sputter or thermally

play04:19

evaporate metal i'm evaporating aluminum

play04:21

a thick layer of about a micron or so

play04:24

and then we do the whole

play04:25

photolithography process again of spin

play04:27

coating and exposing and developing to

play04:30

define that metal layer

play04:32

once that's done stick the wafer into a

play04:34

warm phosphoric acid bath that etches

play04:36

off the residual aluminum and finally

play04:39

the chip is done

play04:40

at this point i'll inspect the chip

play04:42

pretty thoroughly and take a lot of

play04:43

close-up pictures to measure parameters

play04:45

like gate length and width and layer

play04:47

thicknesses if i do a cross-section i

play04:49

can put it on the probe station which

play04:50

has a bunch of really small tungsten

play04:52

needles and allow me to make connections

play04:54

directly to the transistors it's very

play04:56

finicky and these transistors are so

play04:58

small that it's not actually that

play05:01

trivial to make contact to them but

play05:03

anyway i boot up all this test equipment

play05:06

that allows me to characterize them i do

play05:08

a little bit of programming to define

play05:10

the kind of tests i want to do and then

play05:12

hopefully we're greeted with this great

play05:15

curve so this is the

play05:17

id versus vds curve of an n channel

play05:20

mosfet here's an ideal one

play05:22

taken off of the internet and then

play05:24

here's the one that i'm getting from my

play05:26

fets and they look great

play05:28

i hope you found that interesting and

play05:29

enjoyed learning about my second

play05:31

integrated circuit i got a bunch of

play05:32

requests to set up a patreon or

play05:34

something like that i'm not sure if

play05:35

that's the best way to do it but i'll

play05:37

put a link in the description if you

play05:39

want to support more homebrew

play05:40

semiconductor fabrication experiments

play05:42

like this

play05:43

thanks for watching

Rate This

5.0 / 5 (0 votes)

Related Tags
Silicon ChipDIY ElectronicsMOSFETsLithographySemiconductorTransistorsHome LabIntegrated CircuitLow VoltageChip Fabrication