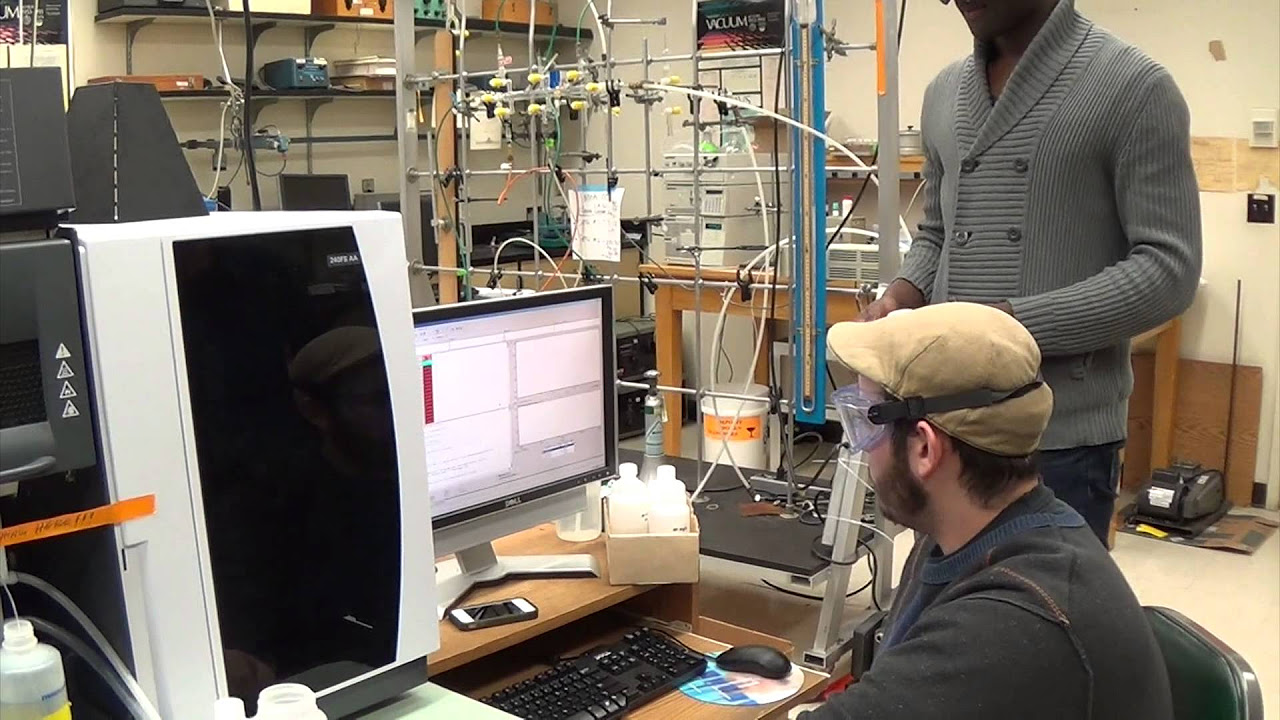
Atomic Absorption Spectroscopy Part 2
Summary
TLDRThe video walks through a detailed process of calibrating a scientific instrument. The presenter demonstrates how to light the instrument, ensure proper atomization, and optimize flame conditions for accurate readings. The calibration involves using different sample concentrations and adjusting the settings to achieve a correct signal. The video emphasizes the importance of proper sample preparation, storage, and measurement to prevent contamination and inaccurate readings. The final steps include running tests, analyzing calibration data, and properly shutting down the instrument to ensure it is safely turned off.
Takeaways
- 🔥 The flame is ignited and must be held down until lit, and warming up takes about 5 to 10 minutes.
- ⏳ The sample is tested for efficiency by measuring how much liquid flows in 30 seconds to ensure correct atomization.
- 🎧 Listening to the sound of the machine is important, as air suction sounds different from proper sample drawing.
- 💧 The instrument is calibrated by zeroing it with DI (deionized) water to ensure accurate readings.
- ⚗️ Sample aspiration is demonstrated, with an example showing a lead solution at 5 PPM (parts per million) giving a signal of 178.
- 🔬 Different elements atomize in different parts of the flame, and adjusting the flame's height optimizes the atomization.
- 📊 The calibration curve is checked for accuracy, showing that a 5 PPM solution should give about 0.2 absorbance.
- 🚰 Rinsing with DI water between each sample ensures cleanliness and prevents contamination.
- 📈 A calibration chart is created during the process to track the accuracy of sample readings.
- 🛑 Shutdown involves turning off the program, shutting off the instrument, and following specific instructions for the gas tanks.
Q & A
What is the first step mentioned in the process for using the instrument?
-The first step is to press and hold a button to light the instrument's flame, which needs to warm up for 5-10 minutes before reaching equilibrium.
What is the significance of the water sample in the procedure?
-The water sample is used to check if the instrument's efficiency is within a certain range (between 6-8 mL per minute), which is critical for generating small droplets and achieving atomization.
What should you listen for to ensure the sample is drawing correctly?
-You should listen for a soft sound when the sample is drawing correctly. If there's no difference in sound when putting the tube in or taking it out, it indicates the instrument may be plugged.
How is the flame optimized for the instrument?
-The flame is optimized by raising and lowering it, which allows different atoms, such as lead, to atomize in the solution. This step is typically done for calibration and has been pre-optimized in this case.
What does 'instrument zero' refer to, and how is it achieved?
-'Instrument zero' refers to setting the instrument to zero using deionized (DI) water. The instrument reads the DI water, and the signal is adjusted to zero accordingly.
What is the significance of the 5 PPM sample?
-The 5 PPM sample is used to obtain a signal from the instrument during calibration. The signal is measured and used as a reference for determining the accuracy and sensitivity of the instrument.
Why is it important to store metal solutions in plastic bottles instead of glass?
-Metal solutions are stored in plastic bottles because metals can absorb onto the glass over time, potentially leading to false readings during analysis.
What is the role of the nitric acid in the calibration process?
-The 2% nitric acid solution serves as a blank during the calibration process, which helps to establish a baseline measurement for the instrument.
What is the purpose of alternating between DI water and the sample during the calibration process?
-Alternating between DI water and the sample helps rinse the system and ensures accurate readings by preventing contamination from the previous sample.
How do you shut down the instrument after completing the process?
-To shut down the instrument, you need to turn off the program, shut off the instrument, close the main valve on the tank, and record the pressure before turning everything off.
Outlines

This section is available to paid users only. Please upgrade to access this part.
Upgrade NowMindmap

This section is available to paid users only. Please upgrade to access this part.
Upgrade NowKeywords

This section is available to paid users only. Please upgrade to access this part.
Upgrade NowHighlights

This section is available to paid users only. Please upgrade to access this part.
Upgrade NowTranscripts

This section is available to paid users only. Please upgrade to access this part.
Upgrade NowBrowse More Related Video

Pengoperasian Spektrofotometer Serapan Atom (SSA)
How to Get Survey-Grade Accuracy from LiDAR Laser Scans!
Medonic Hematology M32: Calibration Using The Control [TGIF19]
Lead Detection Using Flame AA Spectroscopy

How to Calibrate your Laptop Battery - Mac and Windows!

Video Animasi Pembelajaran Teknik Pengukuran Tanah
5.0 / 5 (0 votes)