Advanced Modeling - Sweep and Loft

Craig Hughes
30 Apr 202209:27

Summary

TLDRThis video covers two advanced modeling tools, Sweep and Loft, for the Autodesk Certified User (ACU) exam in Fusion 360. The instructor demonstrates how to use the Sweep command to create a paperclip by drawing a path and profile, and then guiding an extrusion along the path. Next, the Loft command is explored to merge different shapes, such as a circle and rectangle, into complex forms. The video also touches on useful tips, plane constructions, and parameter adjustments. It's a helpful guide for preparing for the ACU exam's advanced modeling section.

Takeaways

  • 🛠️ The video focuses on preparing for the Autodesk Certified User (ACU) exam for Fusion 360, specifically the advanced modeling section.
  • 📐 The key tools being discussed are the Sweep and Loft commands, essential for advanced 3D modeling in Fusion 360.
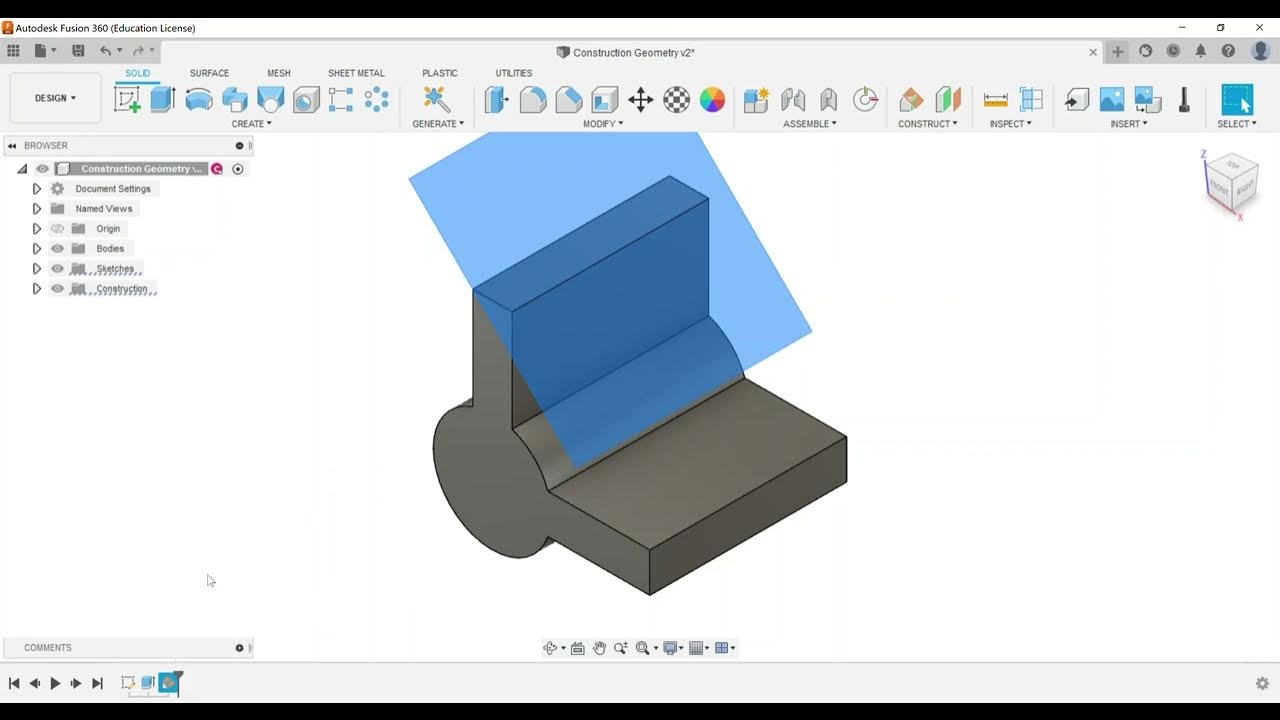
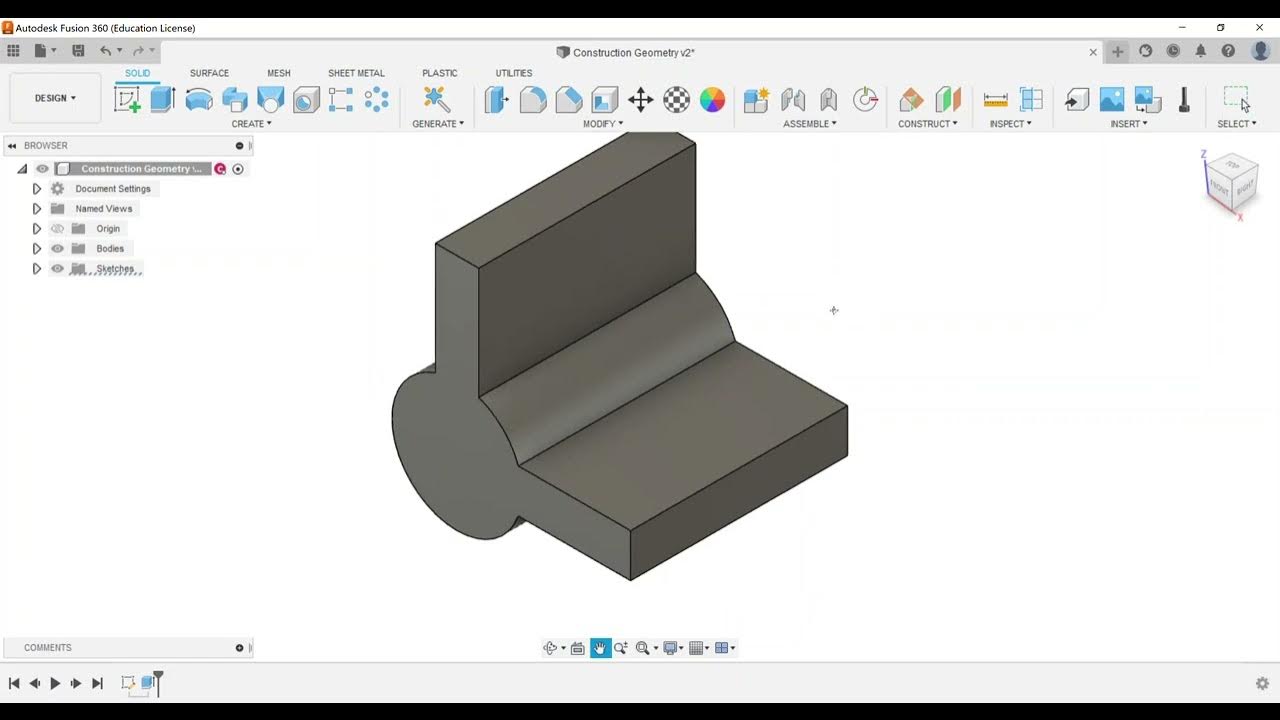
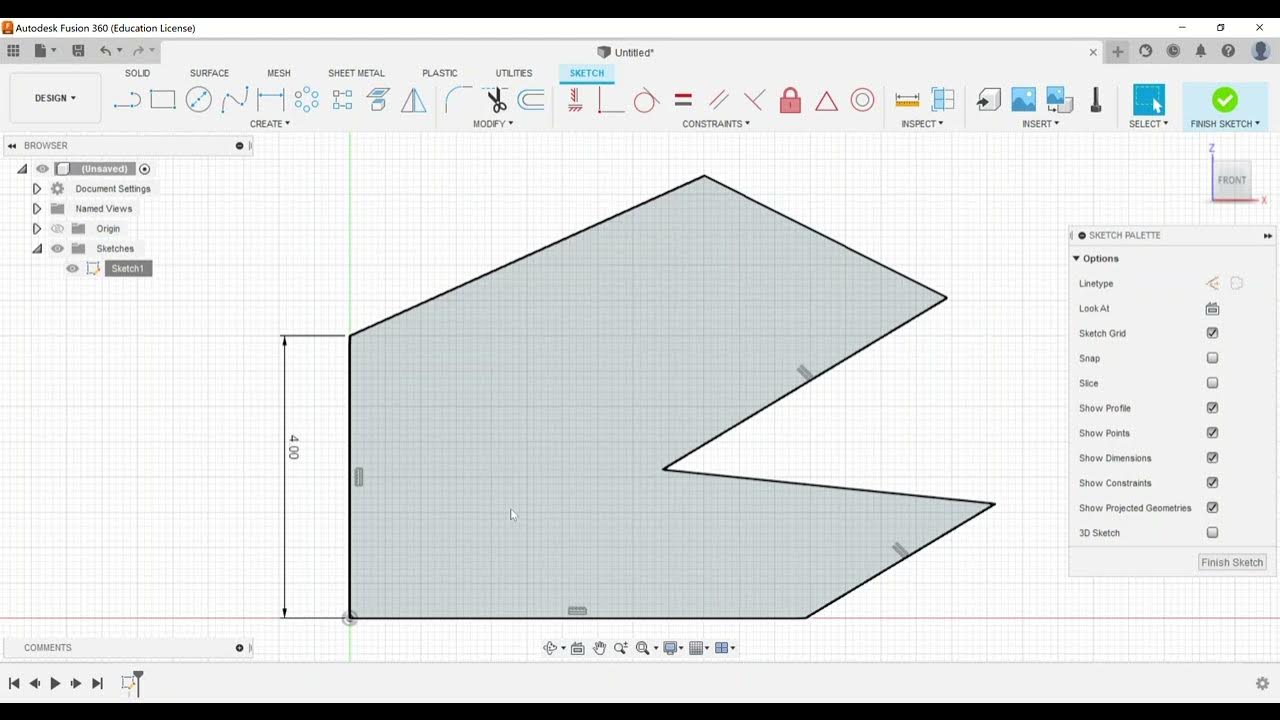
  • ✏️ The Sweep command requires two sketches: one for the profile and one for the path to follow.
  • 🔄 Using the Sweep command, you can take a profile and extrude it along a designated path to create complex shapes.
  • 🔧 The tutorial demonstrates creating a paperclip using the Sweep command with a simple line and arc profile.
  • 📏 For proper Sweep operations, the profile and path need to be correctly constrained, but the video simplifies this for demonstration purposes.
  • 📐 The Loft command is used to connect multiple profiles across different planes, allowing the creation of shapes like a transition from a circle to a rectangle.
  • 🚀 The Loft command allows for complex, irregular shapes by connecting sketches on different planes with additional options for curvature and direction.
  • 🛠️ The video highlights key exam-relevant options like taper angle and twist angle adjustments for both the Sweep and Loft commands.
  • 🎯 The tutorial aims to help viewers practice and prepare for their first attempt at the Autodesk Certified User (ACU) exam.

Q & A

  • What is the focus of the video regarding the Autodesk Certified User exam for Fusion 360?

    -The video focuses on the 'Advanced Modeling' section of the Autodesk Certified User exam for Fusion 360, specifically covering the sweep and loft commands.

  • What are the two commands discussed in the video?

    -The two commands discussed are the Sweep and Loft commands, both part of advanced modeling skills in Fusion 360.

  • How does the Sweep command work in Fusion 360?

    -The Sweep command in Fusion 360 requires a profile and a path. The profile is extruded along the defined path to create a 3D shape, much like an extrusion that follows a custom path.

  • Why is it necessary to create two sketches for the Sweep command?

    -The Sweep command requires two sketches: one for the profile (cross-section of the shape to be swept) and one for the path (the direction or route along which the profile will be extruded).

  • What is a tip mentioned in the video for drawing arcs in Fusion 360?

    -A tip mentioned is that you can draw arcs directly from the line tool by holding the left mouse button and moving the cursor, which automatically applies a tangent constraint.

  • What is the significance of fully constraining a sketch before using the Sweep command?

    -Fully constraining a sketch ensures that all the lines and arcs are locked into position, making the geometry more predictable and stable for operations like sweeping, though the video mentions it is not strictly necessary for demonstration purposes.

  • What is the Loft command used for in Fusion 360?

    -The Loft command is used to create a smooth transition between two or more different profiles, allowing you to create complex shapes by connecting different geometries like circles and rectangles.

  • How does the Loft command differ from the Sweep command?

    -The Loft command connects multiple profiles across different planes, creating a smooth transition between them. In contrast, the Sweep command extrudes a single profile along a defined path.

  • What are some of the additional options available in the Loft command?

    -The Loft command includes options like adjusting the takeoff angle, direction, and adding rails or centerlines to control the curvature of the lofted shape, allowing more complex forms.

  • What practical example is provided in the video for using the Loft command?

    -A practical example provided is creating the handle of a vacuum cleaner attachment, where the Loft command can be used to smoothly transition between different shapes like a circle and a rectangle.

Outlines

00:00

📋 Introduction to Fusion 360 ACU Exam: Focus on Advanced Modeling

The video begins with an overview of the Autodesk Certified User (ACU) certification exam for Fusion 360, specifically focusing on the advanced modeling section. The speaker introduces two key commands: sweep and loft, and explains that the video will walk through these advanced modeling techniques. The demonstration starts with creating a new component, named 'paperclip,' to practice using the sweep command.

05:03

🛠️ Creating a Sketch for the Sweep Command

The speaker creates a new sketch on the front plane, drawing a profile for the sweep command. They describe drawing lines and arcs, providing a helpful tip on how to create tangent arcs using the line tool. The profile is not fully constrained, and the speaker explains that for this demo, they are focusing on the process rather than precision. The sweep command is introduced as requiring both a profile and a path, leading to the next step of creating a second sketch to complete the sweep operation.

🔄 Executing the Sweep Command in Fusion 360

In this part, the sweep command is executed by creating a second sketch, which defines a small circle on the top plane to serve as the profile. The sweep command is applied by selecting the circle as the profile and the previously drawn line as the path, resulting in a path-following extrusion. The speaker highlights settings like taper angle and twist angle, explaining their impact on the sweep's final shape. They discuss how the sweep command can create a new body or join, cut, or intersect with existing bodies.

🌐 Introduction to the Loft Command

The video transitions to the loft command, another advanced modeling tool. The speaker explains that, like the sweep command, the loft requires multiple sketches and offset planes. They create offset work planes using the 'construct' tool and begin drawing sketches on these planes. The purpose of the loft command is to connect different profile shapes, in this case, a circle and a rectangle, to form a blended 3D shape.

🔷 Creating a Loft Between a Circle and a Rectangle

The speaker walks through the process of creating a circle on one plane and a rectangle on another, demonstrating how the loft command merges the two shapes. They explain how the four corners of the rectangle blend with the circular face, emphasizing the versatility of loft for creating complex, smooth transitions. This section also covers adjusting settings like the direction and takeoff angle, which modify the loft’s curvature and shape, useful for products like vacuum cleaner attachments.

🔧 Finalizing the Loft Command and Wrap-up

This section wraps up the loft command demonstration, discussing how tangent edges can either be merged or kept distinct depending on the design needs. The speaker finalizes the design, combining the circle and rectangle into a unified 3D object. They emphasize the importance of using multiple sketches to create more organic and irregular shapes, a common need in product design. The video concludes with a call to continue studying for the Autodesk Certified User exam and an invitation to ask questions.

Mindmap

Keywords

💡Autodesk Certified User (ACU) Exam

The Autodesk Certified User (ACU) Exam is a certification exam for individuals to demonstrate proficiency in Autodesk software, like Fusion 360. In the video, the speaker is preparing viewers for this exam by covering specific advanced modeling tools such as the sweep and loft commands, which are essential for passing the exam.

💡Fusion 360

Fusion 360 is a cloud-based 3D CAD, CAM, and CAE tool from Autodesk used for product design, engineering, and manufacturing. The speaker uses Fusion 360 to demonstrate advanced modeling skills such as the sweep and loft commands. Understanding how to navigate Fusion 360 and apply these tools is crucial for the ACU exam.

💡Sweep Command

The sweep command in Fusion 360 allows users to create 3D shapes by extending a 2D profile along a designated path. In the video, the speaker uses the sweep command to create a model resembling a paperclip, emphasizing that sweep requires two sketches: a profile and a path. This is an essential skill for advanced modeling in the ACU exam.

💡Loft Command

The loft command in Fusion 360 creates complex shapes by transitioning between multiple sketches, like a circle to a rectangle. The speaker demonstrates loft by connecting two shapes on different planes, explaining how loft can be used for creating smooth transitions between geometries. Mastery of loft is another key topic for the ACU exam.

💡Sketch

A sketch is a 2D drawing or shape created on a plane within Fusion 360, serving as the foundation for 3D modeling. In the video, the speaker creates sketches for both the sweep and loft commands, showing how accurate sketching is crucial for creating paths and profiles in advanced modeling operations.

💡Profile

In Fusion 360, a profile is a closed 2D shape used to create a 3D model through commands like sweep or loft. The speaker explains how the sweep command requires a profile and a path, using a circle as a profile to create a 3D shape. Profiles are essential for defining the geometry of a model.

💡Path

A path in Fusion 360 is a line or curve along which a 2D profile is swept to create a 3D shape. In the video, the speaker creates a path for the sweep command, explaining that the profile follows the path to form the desired geometry. Paths are crucial for understanding advanced modeling techniques in Fusion 360.

💡Tangent Constraint

A tangent constraint in Fusion 360 ensures that two curves or a curve and a line meet at a smooth angle without sharp intersections. The speaker highlights the use of tangent constraints while drawing arcs in the sketch for the sweep command. This constraint is important for maintaining smooth transitions in a model’s geometry.

💡Construction Plane

A construction plane is an additional reference plane used in 3D modeling for sketching or positioning geometry. In the video, the speaker creates offset construction planes to perform the loft command, allowing the placement of sketches at different heights. These planes enable precise control over where features are added in a 3D model.

💡Taper Angle

Taper angle refers to the degree of narrowing or widening applied to a sweep or lofted shape as it follows a path or connects two profiles. The speaker mentions adjusting the taper angle while discussing the sweep command, explaining how changing the taper can modify the shape’s geometry, a useful feature for advanced modeling.

Highlights

Introduction to the Autodesk Certified User exam for Fusion 360, focusing on advanced modeling skills such as sweep and loft commands.

Demonstration of the sweep command by creating a paperclip, showcasing how to create a new component and sketches in Fusion 360.

Key tip: Using the line tool to create tangent arcs, which automatically applies a tangent constraint to help maintain smooth transitions in the sketch.

Explanation of the sweep command's requirements: it needs both a profile and a path, which can be created in separate sketches.

Using the top plane to create a circular profile for the sweep, aligning it with the path's origin to ensure proper geometry.

How the sweep command works: Similar to an extrusion but follows a designated path, generating a smooth, flowing 3D shape.

Overview of advanced settings in the sweep command, such as taper angle and twist angle, and their effects on the resulting geometry.

Explanation of how to create new bodies or join geometries using the sweep command’s different options.

Introduction to the loft command, another advanced modeling tool, which requires multiple sketches on different work planes.

Demonstration of the loft command by offsetting work planes and creating different shapes (circle and rectangle) on each plane.

Explanation of how the loft command merges different shapes across sketches to create complex geometries, useful for products with irregular shapes.

Demonstration of how to adjust the loft direction to control curvature and smoothness, potentially creating shapes like vacuum cleaner handles.

Exploration of additional loft settings, such as takeoff angle, to refine the shape and ensure smooth transitions between profiles.

Overview of how the loft command allows merging tangent edges and adjusting settings to combine irregular shapes into cohesive models.

Conclusion: Encouragement to practice with sweep and loft commands for the Autodesk Certified User exam, with additional resources and videos available for further preparation.

Transcripts

play00:02

hey everyone this is another video

play00:04

covering an autodesk certified user

play00:06

certification exam for fusion 360. and

play00:09

we're going to be taking a look at the

play00:10

exam objectives and specifically in this

play00:14

video we're going to be targeting the

play00:16

advanced modeling section and we're

play00:18

going to be looking at

play00:20

sweep and loft so two

play00:23

commands

play00:24

that we're going to consider as part of

play00:26

advanced modeling skills so i'm going to

play00:28

move into fusion and we're going to take

play00:30

a look at the sweep command so first off

play00:34

i'm going to create a new component

play00:36

and we'll call this paperclip

play00:38

and we're going to practice with using

play00:40

the

play00:41

the sweep command so here i'm going to

play00:44

create a new sketch

play00:45

and

play00:46

on the front plane here i'm going to go

play00:48

ahead and draw a line

play00:51

and another thing here so i'm just going

play00:53

to kind of draw not really worry about

play00:55

too much on the dimensions but i'm going

play00:57

to draw a profile so i'm going to click

play00:59

and i'm going to draw an arc in now one

play01:01

little tool tip to kind of help you out

play01:03

with this is we can create

play01:05

arcs which just like on the icon with

play01:07

our line tool so i'm going to kind of

play01:08

move out away and i'm going to come back

play01:10

to the point hold down my left mouse

play01:12

button and then i'm going to draw an arc

play01:15

that's going to be kind of tangent

play01:18

and it's automatically going to apply a

play01:19

tangent constraint so i'm going to go

play01:21

down

play01:24

in the same kind of scenario i can go

play01:26

ahead and draw another

play01:28

arc in here

play01:30

and i'm just going to pick up the point

play01:32

here just to kind of kind of track it

play01:35

and then i'm going to go ahead and bring

play01:36

it in just a little bit

play01:38

and just something like this

play01:42

okay so again just kind of on a fly just

play01:44

to show you the profile that we have i'm

play01:47

going to finish the sketch

play01:48

ideally we would want to add more

play01:50

constraints and things like that so that

play01:51

way all the lines would turn black and

play01:54

be fully constrained but with a sweep

play01:57

if i try to use the sweep command if i

play01:59

go into the create panel and go to sweep

play02:01

or for me i have it already marked here

play02:04

in the i've got my toolbar customized to

play02:06

have it

play02:07

sweep requires a profile

play02:10

and it requires a path so this actually

play02:13

requires two sketches so here i end up

play02:16

having one this is the path but i need a

play02:19

profile in order to make this work so

play02:21

i'm going to go ahead and create another

play02:23

sketch and since i based it off the the

play02:25

first one being constrained to the

play02:27

origin i can always go through and do

play02:29

that there's some other construction

play02:31

plane methods that you can use to make

play02:33

sure that you're going to be connected

play02:35

to your path that you have so i'm going

play02:38

to click the

play02:40

click on the um

play02:42

top plane here and i'm going to create a

play02:44

circle

play02:45

and just

play02:46

i'm going to create kind of a small

play02:48

diameter here circle and i'm just going

play02:50

to go ahead and finish the sketch so now

play02:52

what you see is you've got a small

play02:54

circle that is intersecting the center

play02:56

of the circle is coincident with the

play02:58

center

play02:59

of the origin and the other thing is as

play03:02

well is our path

play03:03

also is coincident with the origin as

play03:06

well so now when i run my sweep command

play03:08

the first thing i'm looking for is a

play03:10

profile so i'm gonna go ahead and select

play03:12

my circle that's the profile

play03:14

and then i want to go through and then

play03:16

i'm gonna hit select and i'm gonna

play03:18

choose the path

play03:20

so and then what that's gonna do is it's

play03:21

gonna take that circle and it kind of is

play03:24

almost like an extrusion it's gonna take

play03:26

the extrusion but it's gonna follow this

play03:28

path

play03:29

that it goes until it hits the very end

play03:31

so i can go and say okay

play03:34

and that is utilizing the sweep command

play03:37

the main kinds of things so as far as

play03:39

for the acu exam i'll go and show you in

play03:42

this editing feature a lot of this is

play03:44

just dealing with a single path

play03:46

extrusion or sweep i should say

play03:49

and as you go along profile path knowing

play03:52

that if you need to go through and mess

play03:54

with some of these other settings it'll

play03:56

tell you whether or not you need to go

play03:57

ahead and set this taper angle at maybe

play03:59

a 10 degrees you're going to see that's

play04:01

going to go through and kind of

play04:03

sometimes

play04:04

you know that may be a little too much

play04:06

body is going to intersect itself so i'm

play04:08

going to do zero and then maybe like a

play04:10

twist angle

play04:14

and we can go through and kind of see

play04:16

that that's probably going to lock this

play04:18

up too so 10 degrees but again i've got

play04:21

a very small profile here

play04:23

but that's kind of the basics you can go

play04:25

through and make a twist or you can and

play04:27

you can also have the orientation be if

play04:30

it's parallel it doesn't really work we

play04:32

need it to be perpendicular and a lot of

play04:34

times we're going to be creating a new

play04:35

body out of this

play04:36

or

play04:37

depending upon if you have multiple

play04:39

geometries you could be joining it to an

play04:41

existing body you could be cutting it or

play04:43

intersecting so in this case we would be

play04:45

creating a new body but that's where you

play04:47

can go through and change those

play04:48

different operations so

play04:51

that is kind of covering what our sweep

play04:53

command looks like

play04:55

the basics so i'm going to open up a new

play04:57

design file the other one we're going to

play04:59

look for is a loft and much like sweep

play05:02

loft requires

play05:04

that we go through and we have multiple

play05:08

kind of uh work planes

play05:11

uh as well as could be work planes but

play05:13

also multiple sketches so i'm actually

play05:15

going to go ahead and i'm going to go

play05:16

here to construct

play05:18

and i'm going to use some offset planes

play05:20

so i'm going to offset a work

play05:22

plane probably about i don't know about

play05:25

four inches or so

play05:27

i'm gonna go ahead and turn on the

play05:28

origin planes just because i'm gonna use

play05:30

those and i'm gonna also go ahead and

play05:32

offset a plane

play05:35

here as well

play05:38

and then that way i can go ahead and

play05:40

use it

play05:41

so

play05:42

and actually this plane that i had i can

play05:45

always come down here to the model

play05:46

history tree let me edit that feature

play05:49

and i'm actually going to have it come

play05:50

out to the front

play05:52

so what i'm going to do with this

play05:54

particular case i'm going to hide the

play05:55

origin planes

play05:57

is i'm going to create a couple a few

play05:59

sketches here so

play06:01

i'm going to go ahead and create one on

play06:02

this top plane that i created and i'm

play06:05

just going to go ahead and i'm going to

play06:06

create a circle

play06:08

again i'm not going to worry about

play06:09

dimensions too much i'm just going to go

play06:11

ahead and just create the shapes i'm

play06:13

going to create another sketch

play06:15

and i'm going to utilize

play06:17

this work plane here to go through and

play06:19

make that happen so and in this case i'm

play06:22

going to go ahead and grab just a center

play06:24

rectangle

play06:27

and we'll make this a little bit bigger

play06:30

so the benefit of utilizing loft is that

play06:34

i can go ahead and choose the loft

play06:36

command and it's going to ask me for

play06:39

what are the profiles that i want to

play06:41

select so if i select the circle and if

play06:43

i select the rectangle it is going to go

play06:47

through and provide

play06:49

that it's going to connect those two

play06:51

shapes and you can kind of see where the

play06:53

four corners

play06:54

of our of our rectangle are going to

play06:56

meet and become merged with our circular

play07:00

face of the circle that we drew on the

play07:02

first sketch

play07:04

so that is kind of some of the things

play07:06

here you can either do certain

play07:07

directions so like here you can see my

play07:09

direction that as as i changed profile

play07:13

one i want it to go through and curve up

play07:16

if i change the direction here you can

play07:18

see it kind of goes through and adds a

play07:19

little bit of curvature so that is

play07:22

something that like for example if we

play07:23

were making the

play07:25

handle on a

play07:27

part for maybe a vacuum cleaner an

play07:28

attachment this would be something that

play07:30

would be very beneficial so you can also

play07:32

add some things like rails or you can

play07:34

add a center line if you have a line

play07:36

that's being drawn in that you want to

play07:37

maintain a certain curvature that would

play07:39

be fine we'll just use the outside rails

play07:41

of the shapes and then you know there

play07:45

are some other options like take off

play07:46

angle take off weight that can be played

play07:49

with

play07:50

again if we go through and look at the

play07:52

takeoff angle we do 10 degrees that's

play07:54

kind of like an offset you see how that

play07:55

kind of shaped how that kind of changed

play07:57

so if i go bump this up to 20

play08:01

you'll be able to see how that gets kind

play08:03

of edits and modifies the shape a little

play08:05

bit more so you can kind of see the cut

play08:07

the kind of angle that we're getting and

play08:08

this starts to look a little bit closer

play08:10

to what kind of like maybe the again

play08:12

like a vacuum cleaner attachment or

play08:15

something along the lines

play08:16

of of that particular shape so in terms

play08:19

of that tangent edges can be

play08:21

merged or they can or you can keep

play08:24

keep those for this shape doesn't look

play08:25

like it necessarily matches but we'll go

play08:28

ahead and and merge those together what

play08:30

that is is when we hit okay

play08:32

we'll be able to see

play08:33

that you know we're going to kind of

play08:35

merge those together but that is the

play08:37

loft command and so some some of those

play08:40

things to create some more irregular

play08:42

kind of shapes that we see

play08:44

out

play08:45

with a lot of products in the world

play08:47

this allows us to do so but again we did

play08:49

this utilizing two sketches

play08:52

and then loft allows you to combine

play08:54

those and be able to create multiple

play08:57

shapes and combine them together

play09:01

all right so this completes the video

play09:03

for

play09:04

utilizing sweep and loft for the

play09:07

autodesk certified user exam if you have

play09:09

questions feel free to email me

play09:11

otherwise continue to prepare for the

play09:14

exam and look for more videos on

play09:17

spotlighted exam

play09:18

objectives

play09:19

and

play09:21

hopefully you'll be successful in your

play09:23

first attempt at the acu exam

Rate This

5.0 / 5 (0 votes)

Related Tags
AutodeskFusion 360ModelingSweep commandLoft commandCertification examACU exam prepAdvanced skills3D designCAD training