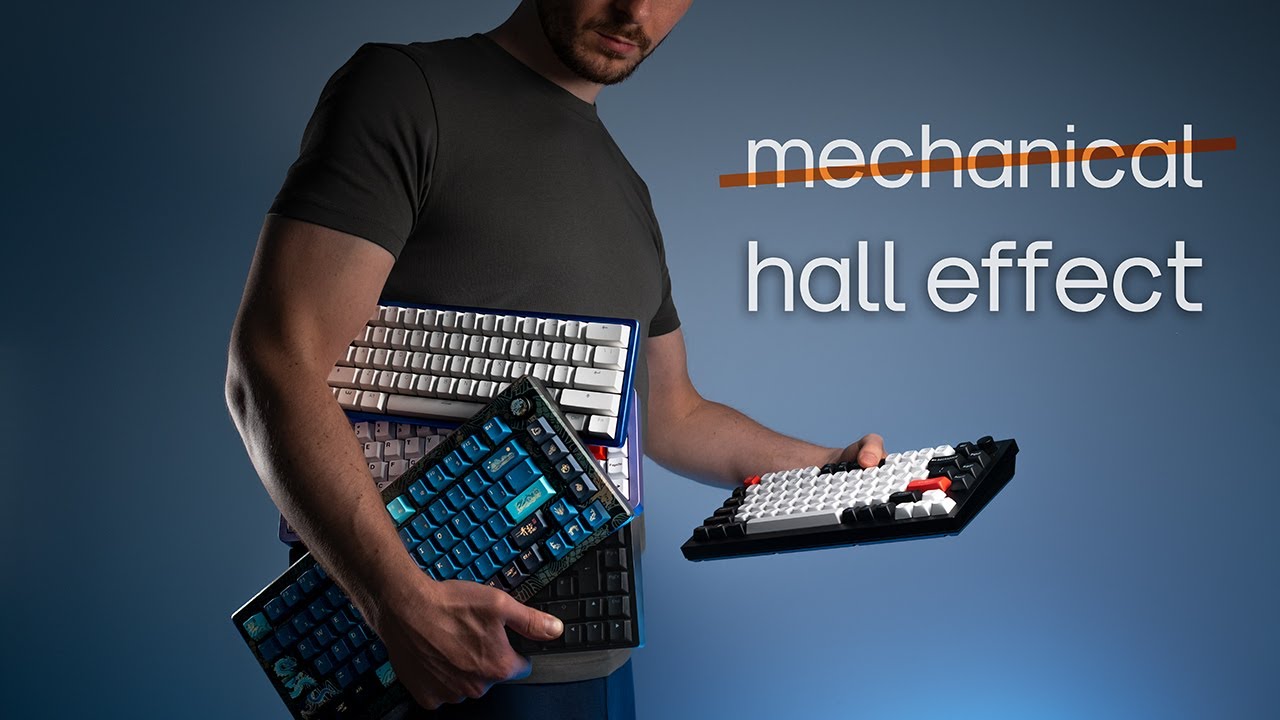
How do Computer Keyboards Work? š¤āØāØš
Summary
TLDRThis video script explores the engineering marvels behind basic computer keyboards, focusing on cost reduction. It dissects an inexpensive keyboard with only 8 critical parts, costing as low as $1.57 each, and explains how it functions using a simple matrix system. The script contrasts this with a high-end mechanical keyboard, costing over 50 times more, revealing the intricate mechanisms behind its tactile feedback and clicking sound. The video also touches on laptop keyboards and emphasizes the importance of engineering education.
Takeaways
- š² Basic computer keyboards have surprisingly impressive engineering, particularly in cost reduction.
- š° The inexpensive keyboard is made up of only 8 critical parts, allowing for bulk purchases as low as $1.57 each.
- š Inside the cheap keyboard: a rubber sheet with domes, three plastic sheets with conductive wires, and a simple circuit board with components.
- āļø The keyboard's functionality relies on a matrix system where keys press domes to bridge conductive traces on plastic sheets.
- š The keyboard matrix uses a method of scanning columns with 3 volts and detecting row inputs to identify key presses.
- š The microprocessor sends key data to a 2.4 GHz transceiver, utilizing printed planar antennas for wireless communication.
- š” Mechanical keyboards, costing over 50 times more, have a different internal mechanism, including a spring and metal contacts for each key.
- š The clicking sound in mechanical keys comes from the metal contacts hitting each other when the key is pressed.
- š ļø Mechanical keyboards offer a more tactile feel due to their intricate internal components, which also contribute to their higher cost.
- š± Laptop keyboards use a scissor switch mechanism with rubber domes for a lower profile, differentiating them from desktop keyboards.
Q & A
How many critical parts are inside the inexpensive keyboard mentioned in the script?
-The inexpensive keyboard has only 8 critical parts inside.
What are the main components of the inexpensive keyboard's key mechanism?
-The main components of the key mechanism in the inexpensive keyboard are a rubber sheet with domes under each key and three plastic sheets, with conductive wires printed on the top and bottom sheets.
How does the inexpensive keyboard detect which key has been pressed?
-The inexpensive keyboard detects which key has been pressed by bridging the connection between the top and bottom plastic sheets when a key is pressed, allowing a 3-volt signal to travel from the bottom sheet, through the pressed key, to the top sheet, and back to the microprocessor.
What is a keyboard matrix and how does it relate to the inexpensive keyboard?
-A keyboard matrix is a grid-like organization of the keyboard's traces, with the bottom traces forming columns and the top traces forming rows. The inexpensive keyboard uses this matrix to determine which key is pressed by correlating the active column with the input row.
How does the inexpensive keyboard solve the problem of identifying which key is pressed when multiple keys are pressed simultaneously?
-The inexpensive keyboard solves this problem by sending a cycle of pulses that turn off one column at a time to determine which key in a row is pressed, with these pulses sent for 65 microseconds to each column, once every 4 milliseconds.
What is the purpose of the 2.4 gigahertz transceiver in the inexpensive keyboard?
-The 2.4 gigahertz transceiver in the inexpensive keyboard is used to send the data about which keys are pressed to the connected device using the printed planar antennas.
What is the main difference between the inexpensive keyboard and the mechanical keyboard discussed in the script?
-The main difference is that the mechanical keyboard has a more complex and durable key mechanism with a tactile feel and a clicking sound, whereas the inexpensive keyboard uses a simpler and less expensive mechanism with rubber domes.
What is the function of the stem and slider in the mechanical keyboard's key mechanism?
-In the mechanical keyboard's key mechanism, the stem and slider work together to move one of the metal contacts away from the other when a key is pressed, creating a connection and causing a click sound. When the key is released, the spring pushes everything back up, separating the metal contacts.
Why are mechanical keyboards more expensive than the inexpensive keyboards?
-Mechanical keyboards are more expensive due to the larger printed circuit board and the intricate mechanism inside each key, which provides a more tactile feel and a clicking sound when pressed.
What is the purpose of the scissor switch mechanism in laptop keyboards?
-The scissor switch mechanism in laptop keyboards allows for a lower profile while still providing a key mechanism with rubber domes, making it suitable for the thinner design of laptops.
How does the inexpensive keyboard's design highlight the importance of engineering in cost reduction?
-The inexpensive keyboard's design highlights the importance of engineering in cost reduction by using only 8 critical parts and a simple key mechanism, allowing the keyboard to be produced and sold at a very low cost while still being functional and durable.
Outlines
š Inside the Inexpensive Keyboard: Engineering for Cost Reduction
This paragraph delves into the engineering marvels of a basic computer keyboard, focusing on cost reduction rather than high-tech features. The keyboard is composed of only 8 critical parts, which allows for mass production at an incredibly low cost of $1.57 each. The components include a rubber sheet with domes, three plastic sheets with conductive wires, and a few additional parts like batteries and a printed circuit board (PCB) with a microprocessor. The operation is based on a simple mechanism where key presses create a connection between the conductive layers, allowing the microprocessor to detect which key was pressed. The paragraph also introduces the concept of a keyboard matrix, explaining how the microprocessor uses a grid system to determine the exact key pressed, and discusses the energy-efficient method of scanning columns to identify key presses.
š„ Exploring the High-End Mechanical Keyboard: A World of Difference
The second paragraph contrasts the inexpensive keyboard with a high-end mechanical keyboard, which costs over 50 times more. It describes the internal components of the mechanical keyboard, which include a large PCB with mechanical keys, LEDs for lighting, and a unique tactile and auditory feedback mechanism. Each key in a mechanical keyboard contains a stem, slider, switch housing, spring, and metal contacts that create a clicking sound when pressed. The paragraph explains how the key press engages the slider, causing the metal contacts to connect and create a click, and how the spring mechanism resets the key. It also touches on the practicality and preferences that justify the higher cost of mechanical keyboards and briefly mentions laptop keyboards with scissor switch mechanisms.
š Engineering Education: The Backbone of Technological Advancement
The final paragraph serves as a conclusion and a call to action for engineering education. It emphasizes the importance of understanding the cost differences and engineering behind everyday technologies like keyboards. The paragraph also acknowledges the support from Patreon and YouTube Membership Sponsors, which enables the creation of educational content. It encourages viewers to subscribe, like, and share the video, and provides a prompt to watch more videos by Branch Education, which produces 3D animations to explore the technology behind modern innovations.
Mindmap
Keywords
š”Engineering
š”Cost Reduction
š”Critical Parts
š”Mechanical Keyboard
š”Rubber Dome
š”Conductive Wires
š”Microprocessor
š”Keyboard Matrix
š”2.4 Gigahertz Transceiver
š”Scissor Switch Mechanism
Highlights
Basic computer keyboards have surprisingly impressive engineering for cost reduction.
A cost-effective keyboard has only 8 critical parts inside.
These keyboards can be bought in bulk for as little as $1.57 each.
The engineering feat is creating durable, functional keyboards at nearly zero cost.
The keyboard consists of 148 parts, with 8 being critical.
Components include a rubber sheet with domes, three plastic sheets, and a few electronic parts.
The top and bottom plastic sheets have conductive wires printed on them.
The middle sheet acts as a spacer with holes cut out.
The remaining components are batteries, a clamping bracket, and a small printed circuit board.
The microprocessor applies 3 volts to the traces on the bottom sheet.
When a key is pressed, it bridges the connection between the top and bottom sheets.
The keyboard matrix is visualized as a grid with columns and rows.
The microprocessor uses a scanning method to determine which key is pressed.
The mechanical keyboard is opened to compare with the inexpensive keyboard.
Mechanical keyboards have a different tactile feel and make a clicking sound.
Inside mechanical keys, there's a stem, slider, switch housing, spring, and metal contacts.
The slider's unique shape pushes one contact away from the other when a key is pressed.
The stem and slider allow for a small distance of travel before engagement.
Laptop keyboards use a scissor switch mechanism with rubber domes.
The video highlights the cost difference and engineering in two similar items.
Transcripts
You might not think it, but basic computerĀ keyboards have a surprisingly impressiveĀ Ā
amount of engineering inside. Weāre notĀ talking about incredible engineeringĀ Ā
like a rocket that can land itself or aĀ stealth aircraft that can evade radar;Ā Ā
rather, weāre talking about the engineering ofĀ cost reduction. Specifically, this keyboard hasĀ Ā
only 8 critical parts inside, essentially removingĀ all the componentsā costs so that you can buy themĀ Ā
in bulk for as little as 1 dollar and 57 centsĀ each! Engineering something that is durable,Ā Ā
functional, and costing next to nothing isĀ indeed a feat on its own. So, letās look insideĀ Ā
this dirt-cheap keyboard and see how only a fewĀ critical components enables it to work. After thatĀ Ā
weāll open a mechanical keyboard that costs overĀ 50 times as much and see the difference as well asĀ Ā
find out what causes that clicking sound insideĀ the mechanical keys. So, letās jump right in.Ā
This inexpensive keyboard is assembled from 148Ā parts, and almost all the parts are the keys,Ā Ā
screws, and the top and bottom plastic casing,Ā leaving us only 8 critical parts inside. TheseĀ Ā
components are a rubber sheet with domes underĀ each key and three plastic sheets. The top andĀ Ā
bottom sheets have conductive wires printedĀ onto them, with dots under each key, and theĀ Ā
middle sheet acts as a spacer with holes cut outĀ of it. The remaining 4 components are 2 batteries,Ā Ā
a bracket to clamp down the plastic sheets,Ā and a small printed circuit board which has aĀ Ā
simple microprocessor, a crystal oscillator,Ā a switch, a 2.4 gigahertz planar antenna,Ā Ā
a pair of wires to connect to the batteries, andĀ a set of conductive lines to connect to the wiresĀ Ā
printed on the top and bottom plastic sheets. So now that weāve seen the few components inside,Ā Ā
how do they work? Well, the main idea is thatĀ the batteries and microprocessor apply 3 voltsĀ Ā
to all the traces on the bottom sheet, whileĀ all the traces on the top sheet are activelyĀ Ā
being monitored by the processor on the PCB. WhenĀ a key is pressed, it presses on the rubber dome,Ā Ā
which pushes the conductive circle from the topĀ sheet down through the air gap created by theĀ Ā
middle sheet and into the circle on the bottomĀ sheet, thereby bridging the connection betweenĀ Ā
top and bottom plastic sheets. The 3 volts thenĀ travels along the conductive trace of the bottomĀ Ā
sheet through the hole of the key that has beenĀ pressed, and into the top sheetās trace, and thenĀ Ā
returns back to the PCB and microprocessor whereĀ itās sensed. When you let your finger off the key,Ā Ā
the rubber dome returns the key to the un-pressedĀ position thereby opening the connection.Ā
On the top sheet of plastic are 12 tracesĀ and on the bottom sheet are 11 traces,Ā Ā
with each trace traveling to a different set ofĀ keys. Itās visually hard to see here, so letāsĀ Ā
reorganize these traces into a grid, also calledĀ a keyboard matrix, with the bottom traces formingĀ Ā
the columns and the top traces forming the rows.Ā Just as before the microprocessor outputs 3 voltsĀ Ā
along each column while actively monitoring theĀ in-puts along each row. With this reorganization,Ā Ā
you can more easily see that, as you press theĀ Y key, 3 volts is sent out along the 4th column,Ā Ā
and returned along the 2nd row, and thus theĀ processor can tell that the Y key was pressed.Ā Ā
Or with the B key, 3 volts is output alongĀ the 8th column, and input through the 1stĀ Ā
row. With 11 columns and 12 rows, we can haveĀ a maximum of 132 keys, which works out well,Ā Ā
because the keyboard has only 111 keys. However, if you havenāt noticed, thereāsĀ Ā
actually a major problem with this keyboardĀ matrix. That is: if we have 3 volts runningĀ Ā
along all these columns and we press a key, 3Ā volts will return along a row. However, becauseĀ Ā
each of these columns output the same 3 volts, howĀ do we know which key in the row was pressed? Well,Ā Ā
there are a few solutions to this problem. OneĀ solution is to quickly scan 3 volts along eachĀ Ā
of the 11 columns, so that at any given timeĀ only one column is active. By correlating theĀ Ā
active column with when voltage is received on theĀ input row, we can determine the exact intersectionĀ Ā
of column and row and thus which key is pressed.Ā However, with this solution, weāre continuouslyĀ Ā
scanning 3 volts across the columns, which takesĀ power thereby draining the batteries. So instead,Ā Ā
we found that itās more practical to have 3 voltsĀ on each column, and when a key is pressed, a cycleĀ Ā
of pulses of turning off one column at a time isĀ sent to determine which key in a row is pressed.Ā Ā
These pulses are sent for 65 microseconds to eachĀ column, once every 4 milliseconds. Therefore, ifĀ Ā
the G key were pressed, then the 3rd row would seeĀ an input that looks like this. Whereas if the T,Ā Ā
L, and A key were pressed, then the 2nd and 6thĀ row inputs would see a voltage that looks likeĀ Ā
this, and all the other rows would see nothing. Now that the microprocessor knows which keys areĀ Ā
pressed, it sends the data to the 2.4 gigahertzĀ transceiver using these printed planar antennas.Ā
Weāll cover these antennas as well as theĀ oscillator in another video, but for now letāsĀ Ā
close this inexpensive keyboard and look inside aĀ mechanical keyboard that costs over 50 times more.Ā
But before exploring mechanical keyboards,Ā the next portion of this video is sponsoredĀ Ā
by Keysightās virtual event, Keysight World:Ā Live from the Lab. In this livestream, KeysightĀ Ā
will be exploring batteries, DC to DC converters,Ā and a wide range of IoT devices through hands-onĀ Ā
design analysis and Q and A sessions with industryĀ experts. Sign up quickly because the next KeysightĀ Ā
Live event is May 16th, and by attending this liveĀ stream youāll be entered to win an oscilloscopeĀ Ā
in their test gear giveaway. In fact, the only wayĀ we were able to reverse engineer this keyboard wasĀ Ā
with an oscilloscope just like this one, whereĀ we could easily see the cycling of OFF pulsesĀ Ā
whenever a key is pressed. At Keysightās upcomingĀ Live from the Lab event, youāll learn many usefulĀ Ā
tools such as how temperature can affect batteryĀ and device life as well as techniques and tricksĀ Ā
for using DC to DC converters in your designs. Whether youāre an expert engineer or electronicsĀ Ā
newbie, thereāll be plenty of opportunities toĀ learn new things. Hurry up and register for theĀ Ā
May 16th Keysight World livestream usingĀ the Branch Education link, and youāll getĀ Ā
an extra entry into Keysightās huge test gearĀ giveaway. Go check it out! But now letās getĀ Ā
back to the inside of this mechanical keyboard. Instead of seeing plastic sheets, we find a ratherĀ Ā
large, printed circuit board, with mechanical keysĀ soldered to it. This PCB functions similarly toĀ Ā
the keyboard matrix, but now we have an LED underĀ each key to create attractive designs. However,Ā Ā
quite noticeable with the mechanical keyboardĀ is that these keys have a different tactile feelĀ Ā
and make a clicking sound when pressed. So, letās look inside one of these keys whereĀ Ā
we find a keycap on top, the stem and sliderĀ below that, a top and bottom switch housing,Ā Ā
and inside are a spring and two metalĀ contacts which are also called metalĀ Ā
contact leaves or gold crosspoint contacts. The main mechanism is that when you press aĀ Ā
key down, it moves the stem and slider. TheĀ slider is uniquely shaped such that it pushesĀ Ā
one of the contacts away from the other, and, whenĀ pressed down, the slider moves out of the way,Ā Ā
allowing for one of the metal contacts to springĀ outwards and hit the other, thus creating aĀ Ā
connection between the two pieces of metal andĀ causing a click sound when they hit. When youĀ Ā
release the key, the spring pushes the slider,Ā the stem, and key back up and the slider reengagesĀ Ā
the metal contact, thus separating the two metalĀ contacts and opening the connection between them.Ā
The stem and slider are separate components, soĀ that if you accidentally brush a key, the keycapĀ Ā
and stem can travel a small distance down beforeĀ the slider is engaged. However, once the slider isĀ Ā
pushed a frac-tion of a millimeter down, the metalĀ contact quickly forces the slider to jump out ofĀ Ā
the way allowing the metal contacts to engage. By having such a mechanism, each key has a moreĀ Ā
tactile feel when pressed, different fromĀ the key hitting the rubber dome. That said,Ā Ā
having a large PCB such as this, as well as anĀ intricate mechanism inside each key, causes thisĀ Ā
keyboard to be significantly more expensive, butĀ depending on your preferences, it can be worth it.Ā
Finally, there are laptop keyboards whichĀ have a scissor switch mechanism along withĀ Ā
rubber domes to allow it to have a lowerĀ profile, but letās wrap it up for now.Ā
This topic is moderately simple, but we thinkĀ it properly highlights the cost difference andĀ Ā
engineering in two similar items. Weāre working onĀ more videos that dive deeper into the engineeringĀ Ā
inside computer architecture and other complexĀ technologies, so be sure to subscribe, hit thatĀ Ā
like button, and share this video with others. We believe the future will require a strongĀ Ā
emphasis on engineering education and weāreĀ thankful to all our Patreon and YouTube MembershipĀ Ā
Sponsors for supporting this dream. If you wantĀ to support us on YouTube Memberships, or Patreon,Ā Ā
you can find the links in the description. This is Branch Education, and we create 3DĀ Ā
animations that dive deeply into the technologyĀ that drives our modern world. Watch another BranchĀ Ā
video by clicking one of these cards or clickĀ here to subscribe. Thanks for watching to the end!
Browse More Related Video
ŠŠ»Š°Š²ŠøŠ°ŃŃŃŠ° Š² Š¢ŠµŠ»ŠµŠ³ŃŠ°Š¼ ŠŠ¾ŃŠ°Ń - Inline Reply Šø Builder Š½Š° AIOGRAM 3.4 | 4 Š£Š ŠŠ
The Best Keyboard, According to Science
El teclado de moda... Puro marketing? NuPhy Air
TOP 10 Meilleurs CLAVIERS GAMER en 2024
Top 5 Budget Keyboards in 2024!
Parts of a Motherboard and Their Function - Part 2 Back Panel Connectors & Ports
5.0 / 5 (0 votes)