Take Your Images to the Next Level with Stable Diffusion!

Arch Viz Artist
13 Mar 202407:37

Summary

TLDRThis tutorial demonstrates how to enhance renders using Stable Diffusion, a technique that significantly improves the photorealism of 3D elements, water effects, and natural landscapes. By utilizing the img2img section and Inpaint option in Stable Diffusion, users can refine specific areas of their render, such as 3D people and water ripples, to achieve a higher quality outcome. The video also covers the use of masks and various settings to control the denoising process, ultimately resulting in a more realistic and visually appealing final model.

Takeaways

  • 🎨 **Stable Diffusion for Render Improvement**: The video introduces how to use Stable Diffusion to enhance renders, particularly for 3D elements and natural scenes.
  • 🤖 **Magical Effect on 3D People**: Stable Diffusion can significantly improve the quality of 3D people, which are often challenging to render photorealistically.
  • 💧 **Enhancing Water Effects**: The method is effective for creating realistic water ripple effects, saving time that would otherwise be spent in 3D or Photoshop.
  • 🏞️ **Improving Landscape Elements**: The tutorial demonstrates how to refine cliffs and other background elements using Stable Diffusion for a more natural look.
  • 🌳 **树木渲染**: Stable Diffusion is particularly adept at enhancing trees in a scene, offering a near-3D model quality without the fake sharpness.
  • 📝 **Customization and Control**: The render outcome is customizable, with the right settings ensuring a non-random, desired result, focusing on improving photorealism of natural elements.
  • 🎓 **Previous Tutorial Reference**: A detailed tutorial on Stable Diffusion was created six months prior, covering installation, models, settings, and practical use cases.
  • 🖼️ **Post-Rendering Enhancement**: The video focuses on improving an existing render using the img2img section of Stable Diffusion and the Inpaint option.
  • 🔍 **Resolution and Inpaint Settings**: The importance of setting the 'Resize to' to the maximum resolution (768x768 pixels) and adjusting the Inpaint area to 'Only masked' for quality control is emphasized.
  • 🎭 **Denoising Strength**: Controlling the denoising strength allows for more or less similarity to the original render, with lower values providing more accurate results and higher values introducing more randomness.
  • 🖌️ **Masking and Layering**: The process of creating masks with wirecolor passes and layering for specific enhancements, such as with 3D人物 or water effects, is detailed.
  • 🔄 **Iterative Generation Process**: The method involves iteratively generating small pieces of the image, tweaking the denoising strength and prompt until the desired outcome is achieved.

Q & A

  • What is the main focus of the video?

    -The video focuses on demonstrating how to quickly improve renders using Stable Diffusion, particularly with 3D elements and natural textures.

  • Why are 3D people often avoided in renders?

    -3D people are often avoided because of the difficulty in achieving high-quality, photorealistic results, which can be time-consuming to produce.

  • How does Stable Diffusion enhance the appearance of water in renders?

    -Stable Diffusion improves the appearance of water by creating a realistic ripple effect, which would otherwise require significant time and effort to achieve in 3D or Photoshop.

  • What changes were made to the cliffs in the background of the render?

    -The cliffs in the background were enhanced using Stable Diffusion to achieve a more natural and visually appealing look.

  • How does the final model differ from the original 3D model?

    -The final model looks almost the same as the 3D model, but it has less fake sharpness and appears more natural due to the use of Stable Diffusion.

  • What is the importance of the 'Inpaint area' setting in Stable Diffusion?

    -The 'Inpaint area' setting is crucial because it determines the dimensions of the generated result. Setting it to 'Only masked' ensures that only the masked area is filled with the generated content.

  • How does the Denoising strength setting affect the output of Stable Diffusion?

    -The Denoising strength setting controls the level of similarity between the generated result and the original image. Lower values yield more similar results, while higher values produce more random and potentially less accurate results.

  • What is the purpose of using a prompt in Stable Diffusion?

    -Using a prompt in Stable Diffusion helps guide the generation process towards more accurate and desired results. It can include specific details or negative prompts to exclude certain elements.

  • How can masks be utilized in the Stable Diffusion inpainting process?

    -Masks can be loaded in the Inpaint upload tab to define the area that needs to be generated or modified. The mask should be black and white, with the area to be inpainted filled with white and the rest with black.

  • What is the recommended approach for generating multiple images at once in Stable Diffusion?

    -The recommended approach for generating multiple images is to use the option that allows for the creation of several outputs, which can then be reviewed and selected based on their quality and accuracy.

  • What is the main advantage of using Stable Diffusion for architectural visualizations?

    -The main advantage of using Stable Diffusion for architectural visualizations is the significant time-saving and enhanced photorealism it offers, especially for complex natural elements and textures that would otherwise be challenging and time-consuming to create in 3D or 2D.

Outlines

00:00

🎨 Enhancing Renders with Stable Diffusion

This paragraph introduces the video's focus on using Stable Diffusion to improve render quality, particularly for 3D elements. The speaker explains how this method can enhance various aspects of a scene, such as 3D people, water ripples, and cliffs, resulting in a more photorealistic outcome. It also mentions a previous tutorial on Stable Diffusion, and how this video will demonstrate further improvements on a finished render. The importance of using the right settings for consistent photorealism is emphasized, and the process of working with 3D elements is simplified through the use of Stable Diffusion.

05:05

🖌️ Inpainting and Masking Techniques in Stable Diffusion

The second paragraph delves into the technical process of using Stable Diffusion's img2img section with the Inpaint option. It explains the importance of adjusting settings like 'Resize to' and 'Inpaint area' for optimal results. The speaker discusses the impact of denoising strength on the similarity and randomness of the generated images and provides a step-by-step guide on painting and generating targeted areas of the image. The paragraph also touches on the use of prompts for more accurate results and the ability to modify and refine the process until the desired outcome is achieved. Additionally, it mentions the use of masks and the wirecolor pass for better control over the rendering process.

Mindmap

Keywords

💡Stable Diffusion

Stable Diffusion is an AI-based image generation and manipulation technique that allows users to improve the quality and photorealism of digital renders. In the context of the video, it is used to enhance various elements of a 3D scene, such as people, water, cliffs, and trees, to achieve a more realistic outcome. The script mentions using Stable Diffusion to populate a scene with 3D people and to create a photorealistic effect on water ripples.

💡3D people

3D people refer to the virtual human characters created and used in 3D modeling and rendering. They are often challenging to achieve high-quality results with due to the complexity of human anatomy and details. In the video, the author discusses how Stable Diffusion can be used to easily populate a scene with 3D people without compromising on quality, which is typically a difficult task in 3D modeling.

💡Photorealism

Photorealism is a visual art style that aims to create images or scenes that are indistinguishable from photographs or real-life visuals. In the context of the video, photorealism is the goal when improving renders, as the author seeks to make the digital elements appear as realistic as possible. The use of Stable Diffusion helps in achieving photorealistic outcomes by enhancing the natural elements and textures within the 3D scene.

💡Ripple effect

A ripple effect refers to the visual representation of small waves or disturbances on the surface of a liquid, such as water. In the video, the author highlights the ability of Stable Diffusion to create a realistic ripple effect, which would otherwise be time-consuming to achieve using traditional 3D or Photoshop techniques. This effect contributes to the overall photorealism of the render.

💡Cliffs

Cliffs are steep rock faces that are a prominent feature in landscapes and can be a challenging element to render realistically in 3D. The video demonstrates how Stable Diffusion can be used to enhance the appearance of cliffs in the background of a scene, improving the overall visual quality and realism of the render.

💡Denoising strength

Denoising strength is a parameter in image processing and AI-based generation models like Stable Diffusion that controls the level of noise or random variations in the generated image. Lower values result in a more conservative approach, maintaining similarity to the original image, while higher values introduce more randomness and potential deviations from the source material. In the video, the author adjusts the denoising strength to achieve the desired level of realism and detail in the render.

💡Inpaint option

The Inpaint option is a feature within the Stable Diffusion tool that allows users to generate new image content based on an existing image, filling in specific areas or 'masks' that are designated for modification. This tool is essential for targeted improvements in a render without affecting the entire image. The video script describes using the Inpaint option to selectively enhance parts of the 3D scene.

💡Prompts

Prompts in the context of AI image generation are textual descriptions or instructions that guide the AI in creating a specific output. They are used to provide direction to the Stable Diffusion model, helping it understand the desired characteristics of the generated content. In the video, the author uses prompts to achieve more accurate and realistic results when generating elements like hair and water ripples.

💡Masks

Masks in image editing and AI generation are selection tools that define which parts of an image will be affected by certain operations. In the context of the video, masks are used in conjunction with the Stable Diffusion Inpaint feature to isolate specific areas of the render for enhancement. The masks are typically black and white images that determine where the AI should generate or modify content.

💡Resolution

Resolution refers to the dimensions of an image, typically measured in pixels. Higher resolutions allow for more detail and clarity in an image. In the video, the author discusses the importance of resolution when using Stable Diffusion, noting that the model's maximum resolution for generation is 768 by 768 pixels, and how this affects the quality and scaling of the generated content.

💡Architectural visualizations

Architectural visualizations are the digital representations of architectural designs, often used to showcase and communicate the visual aspects of buildings, landscapes, and urban planning projects. The video is centered around improving these visualizations using Stable Diffusion, particularly in enhancing the realism and quality of 3D renders.

Highlights

The video demonstrates a method to quickly improve renders using Stable Diffusion, a technique that can make a significant difference in photorealistic outcomes.

Stable Diffusion works effectively on 3D people, which are often challenging to render and typically avoided due to quality issues.

The method allows for the easy population of scenes with 3D people, resulting in high-quality, photorealistic images similar to using cutouts.

The water rendering in the video showcases an impressive ripple effect that would be time-consuming to achieve in 3D or Photoshop.

Background cliffs have been enhanced using Stable Diffusion, with a preference expressed for the natural look achieved.

The final model, while almost identical to the 3D model, lacks the fake sharpness and appears more natural.

The beauty of this method is the control over the render's appearance, ensuring it matches the creator's vision through the right settings.

A detailed tutorial on Stable Diffusion was created six months ago, covering installation, models, checkpoints, interface, settings, and practical use cases.

The video provides a step-by-step guide on improving a finished render using the example provided, emphasizing efficiency in 3D work.

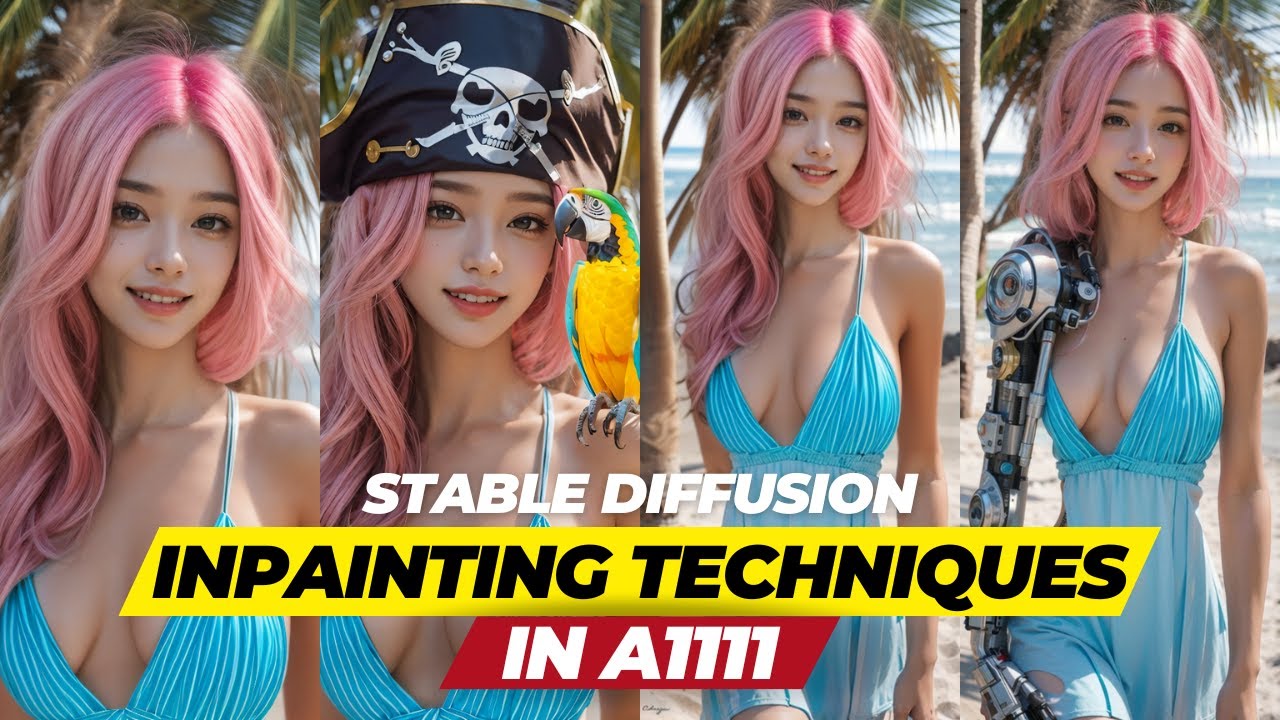
The process begins with saving the image in .jpg format and using the img2img section in Stable Diffusion with the Inpaint option.

Key settings to adjust include 'Resize to' for the maximum resolution and 'Inpaint area' set to 'Only masked' for precise generation.

Denoising strength is crucial in controlling the output, with lower values yielding more similar results to the original and higher values introducing more randomness.

The area to be generated should ideally be equal to or smaller than the maximum resolution for optimal quality.

The video illustrates the iterative process of generating, evaluating, and refining the render piece by piece, adjusting prompts and denoising strength as needed.

Masks can be loaded for more precise control over the generation process, using a wirecolor pass to create a black & white mask.

The video concludes with a before and after comparison, showcasing the effectiveness of the Stable Diffusion method in enhancing visualizations.

For those interested in architectural visualizations, the creator offers a course and additional YouTube videos for further learning.

Transcripts

play00:00

Hi guys, in this video I will show  

play00:02

you how to quickly improve your  renders using Stable Diffusion.

play00:05

At first glance, the difference is  not huge, but if you zoom in… come on!

play00:10

It works like magic on 3D people which are  often avoided because of their quality.

play00:16

Using this method you can easily  populate your scene with 3D people  

play00:20

and in the end have a photorealistic  outcome like with using cutouts.

play00:25

The water looks amazing too, we have  a really nice-looking ripple effect.

play00:29

You would need to spend a lot of time to  get this effect done in 3D or in Photoshop.

play00:34

I’ve also improved the cliffs in the background.

play00:36

I really like this change.

play00:38

And lastly, the trees, stable  diffusion is perfect for that.

play00:43

The final model looks almost the same as the 3D  model, but we get rid of this fake sharpness.

play00:49

It just looks more natural.

play00:51

And the beauty of this method is, that your  render looks exactly how you wanted it.

play00:55

With the right settings, you  don’t get a random outcome.

play00:58

You just improve the  photorealism of natural elements.

play01:02

6 months ago I created a detailed  tutorial about Stable Diffusion,  

play01:06

I showed the whole process from installation,  through learning about models & checkpoints,  

play01:11

presenting the interface, explaining all the  settings, and finally showing practical use cases.

play01:18

If you haven’t watched it yet, the link will be in  the corner and in the description below the video.

play01:23

In this tutorial, I will show you how I  improve the finished render using this example.

play01:28

With this method in mind, you don’t  have to spend a lot of time in 3D.

play01:32

For example, here I didn’t pay too  much attention to the 3D people,  

play01:36

the water in the swimming pool,  or the cliffs in the background.

play01:39

After the image is ready,  save it as a .jpg format.

play01:44

In Stable Diffusion, we go to the img2img section,  because we will be generating based on our image.

play01:51

Here we will use the Inpaint option.

play01:52

We have to add our image here.

play01:54

There are a few settings we have to adjust.

play01:57

First, the “Resize to” setting.

play01:59

I will set it to the max resolution the model  can generate which is 768 by 768 pixels.

play02:07

If you want to know why a  higher value will not work,  

play02:10

check out the Stable Diffusion  video I’ve mentioned before.

play02:14

Then, the really important  setting - the Inpaint area.

play02:17

We have to change it to “Only masked”.

play02:19

If we don’t do it the whole output will have  these dimensions which is not what we want.

play02:24

When we change the setting only the  generated result will have these dimensions.

play02:30

If the painted area is smaller than  set resolution, the result will be  

play02:34

still generated in the resolution  we’ve set, in this case 768 pixels,  

play02:40

and scaled down to the painted  area resulting in better quality.

play02:45

If the area is larger than these dimensions,  

play02:48

the result will be scaled up  resulting in lower quality.

play02:53

So ideally, you want to generate the pieces  that are equal or smaller to the max resolution.

play02:59

Once this is set, we control the whole  output with the Denoising strength.

play03:03

With lower values, the result will  be more similar to the original.

play03:08

Higher values will give you more random results.

play03:10

Once we get this done, we can start generating.

play03:13

First, we have to paint the  area we want to generate.

play03:16

Remember that it should be  smaller than 768 pixels square.

play03:21

I will start with the lady in the water.

play03:23

I will break it down and  start working on the hair.

play03:26

We can add a prompt to help  generate more accurate results.

play03:29

We can also add a negative prompt  to remove some unwanted results,  

play03:34

here I like to simply copy  it from the model’s website.

play03:39

Once all it’s done, let’s generate.

play03:43

Here is the result.

play03:44

I am happy with it,  

play03:45

remember that we have generated just  the small area that covers the hands.

play03:50

Now, we can just drop the generated image  to the left viewport and work on it.

play03:54

I will paint over the hair and arms.

play03:58

Let’s edit the prompt a bit.

play04:03

Then, let’s generate.

play04:06

And here it is, this time I am  not so happy with the result.

play04:10

It’s not realistic and we have some errors.

play04:13

In this case, let’s lower the denoising strength,  

play04:15

so the generated image will be  more similar to the original.

play04:21

Great, now it looks better.

play04:23

I will generate only the hair  again, to get a better result.

play04:27

Also, with the smaller area,  I will get a higher quality.

play04:30

As I don’t care if the generated  hair looks similar to my model,  

play04:34

I will increase the denoising strength.

play04:36

Let’s generate.

play04:41

Great, looks way better.

play04:44

Let’s move to the next area.

play04:47

We can also increase the size of the brush.

play04:50

I will paint over the water as well.

play04:57

Adjust the settings and generate.

play05:04

Here, the result is not satisfying either.

play05:07

Let’s modify the prompt.

play05:09

I will delete this part and add  the word “ripples” to the prompt.

play05:13

Also, let’s increase the area a bit.

play05:18

Now, it looks way better.

play05:20

Let’s continue.

play05:21

That’s the process, you just tweak the denoising  

play05:24

strength and prompt until you get  the result you are looking for.

play05:28

Because of the limitation in resolution, we  have to generate one, small piece at a time.

play05:33

The larger the resolution of the visualization  the smaller the region you can generate.

play05:38

It is still way faster than creating  these kinds of effects in 3D or 2D.

play05:45

We can also, load the masks.

play05:48

We have to switch to the Inpaint upload tab.

play05:50

We load the visualization to the top  window and at the bottom, we load the mask.

play05:55

We can use the wirecolor pass to create our mask.

play05:58

It has to be black & white.

play06:00

I will select this 3D person, create a  new layer, and fill it with white color.

play06:06

Then let’s create a black layer and move it below.

play06:09

It is also a good idea to expand a  selection a bit to have a better blend.

play06:14

Save the mask as .jpg file.

play06:18

Other than that, the process is the same.

play06:20

You can modify the prompt  and the denoising strength.

play06:28

Here, again, I am not happy with the result,  so I will go back to the denoising strength.

play06:35

With this option, we can generate multiple  images at once and then choose the one we like.

play06:42

Here are all 8 images, you can zoom in and choose.

play06:47

I found the one I like but  there is an issue with the feet.

play06:51

We can go back to Inpaint tab, and  work on the new image with the brush.

play07:01

With trees and cliffs in the background,  the process is exactly the same.

play07:06

Just divide the image into these smaller  pieces and work through the render.

play07:15

Again, here is the before and after.

play07:17

I hope this tutorial will help  you improve your visualizations.

play07:20

If you want to learn all about  architectural visualizations,  

play07:24

check out my course, or watch  more videos here on YouTube.

play07:27

Bye-bye.

Rate This

5.0 / 5 (0 votes)

Related Tags
3DRenderingStableDiffusionPhotorealism3DPeopleRippleEffectsCliffEnhancementDenoisingInpaintingVisualTutorialsArchViz