Phlebotomy Lesson With My MA Students | Straight Needle

Medical Assisting with Ms. K
28 Sept 202307:01

Summary

TLDRIn this educational video, the presenter demonstrates a live venipuncture lesson on a patient with an ideal vein. The process includes selecting the appropriate needle, applying a tourniquet, and finding the vein through palpation. The video emphasizes proper technique, such as not pumping the patient's arm to avoid altering test results, and maintaining a steady hand during the procedure. It also covers the importance of inverting blood collection tubes with additives and securing the needle after use to prevent accidents.

Takeaways

  • πŸ’‰ The lesson is about performing a venipuncture on a real patient using a straight needle or vacutainer system.
  • πŸ” Before starting, the patient's arm is checked to determine the appropriate needle size, with smaller veins requiring a butterfly needle.
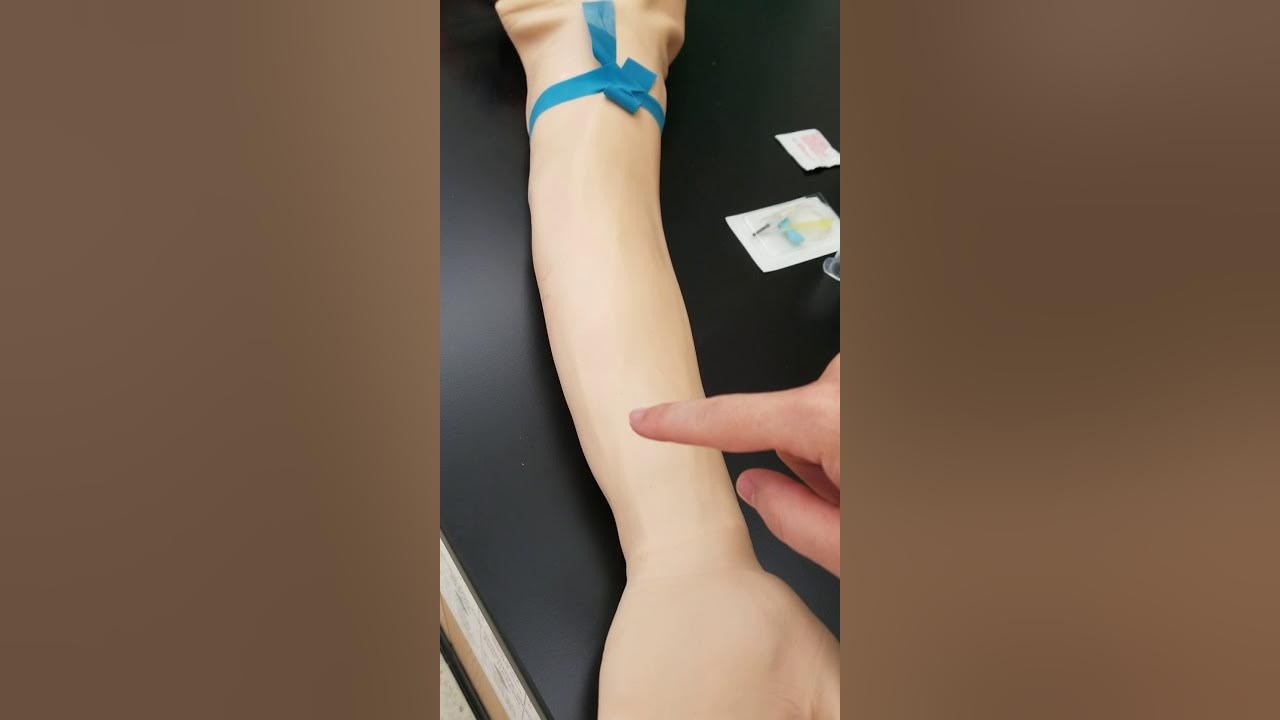
  • πŸ‘€ The patient has a visible and accessible vein, which is ideal for a successful venipuncture.
  • 🀝 The tourniquet is applied 3 to 4 inches above the elbow, and is not left on for more than a minute to prevent discomfort.
  • ✊ The patient is asked to make a fist to make the vein more prominent, but not to pump the fist as it can alter blood results.
  • πŸ‘ The vein is palpated gently to confirm its location and feel; it should be spongy and bounce back when touched.
  • 🧼 The site is cleaned using a circular motion, starting from the point of insertion and moving outward.
  • πŸ“¦ All supplies are prepared and organized before starting the procedure to ensure a smooth and efficient process.
  • βœ‚οΈ The tourniquet is the last step before inserting the needle, and the patient's arm is positioned to stabilize the vein.
  • 🩸 The needle is inserted with the bevel up, and the tube is filled with blood, which is then removed carefully to avoid needlestick injury.
  • πŸ”„ After drawing blood, the tube is inverted a specific number of times depending on the additive it contains to ensure proper mixing.

Q & A

  • What is the purpose of the video?

    -The purpose of the video is to demonstrate a live lesson on phlebotomy, which involves drawing blood from a patient.

  • Why is it important to check the patient's arm before starting the procedure?

    -Checking the patient's arm is important to determine the appropriate needle size, especially for pediatric or geriatric patients with small or fragile veins.

  • What is the significance of the vein's appearance in the video?

    -The vein's appearance is significant because a prominent and spongy vein is easier to access, making the phlebotomy procedure more straightforward and less painful for the patient.

  • Why should the tourniquet be tied 3 to 4 inches above the elbow?

    -The tourniquet should be tied 3 to 4 inches above the elbow to provide sufficient pressure without cutting off circulation, and to ensure the veins are accessible for needle insertion.

  • What is the reason for having the patient make a fist during the procedure?

    -Having the patient make a fist helps to make the veins more prominent, which can facilitate easier needle insertion and blood draw.

  • Why is it advised not to have the patient pump their fist?

    -Pumping the fist can alter the blood results, so it's advised to only have the patient make a fist without pumping to maintain the accuracy of the blood sample.

  • How long should the tourniquet be left on before it's considered too long?

    -The tourniquet should not be left on for more than a minute to avoid unnecessary discomfort and potential complications.

  • What is the proper technique for cleaning the skin before needle insertion?

    -The proper technique involves cleaning from the inside out in circular motions, focusing on the area where the needle will be inserted and then working outwards.

  • Why is it important to have all supplies ready before sticking the patient?

    -Having all supplies ready prevents the needle from being moved unnecessarily, reducing the risk of contamination and ensuring a smooth procedure.

  • What is the significance of the order in which the blood collection tubes are set up?

    -Setting up the blood collection tubes in the order of draw helps streamline the process, making it easier to pick up each tube in sequence and maintain an organized workflow.

  • Why is it crucial to apply pressure after the needle is removed?

    -Applying pressure after the needle is removed helps to stop bleeding and prevent bruising at the puncture site.

  • How should the blood collection tubes be handled after drawing blood?

    -After drawing blood, the tubes should be inverted a specific number of times as indicated by the tube's requirements to ensure proper mixing of the blood with the additive.

Outlines

00:00

πŸ’‰ Phlebotomy Lesson on Vein Selection and Preparation

The video script describes a phlebotomy lesson on drawing blood from a live patient. The instructor begins by discussing the importance of assessing the patient's veins to determine the appropriate needle type, such as a butterfly needle for pediatric or geriatric patients. The focus is on using a straight needle or vacutainer system for this lesson. The patient has a prominent vein, which is ideal for the procedure. The instructor demonstrates how to apply a tourniquet 3 to 4 inches above the elbow and emphasizes the importance of not pumping the patient's arm to avoid altering blood results. The patient is asked to make a fist to make the vein more prominent. The instructor then palpates the vein, describing it as spongy and responsive to touch. The tourniquet is released promptly to avoid prolonged constriction. The process of cleaning the venipuncture site with circular motions from the inside out is explained. The instructor assembles the needle and other supplies, ensuring everything is ready before sticking the patient. The importance of keeping the needle steady and not moving it around during the procedure is highlighted. The instructor also discusses the order of draw and how to prepare the tubes for multiple draws.

05:00

🩹 Post-Phlebotomy Safety and Blood Tube Handling

In the second paragraph, the instructor continues the phlebotomy lesson by demonstrating the actual blood draw. The patient is asked to make a fist again, and the tourniquet is applied just before the needle stick. The skin is taunted to anchor the vein, ensuring it doesn't move during the procedure. The instructor inserts the needle bevel up and collects the blood into the tube. After the blood is drawn, the patient is instructed to open their hand, and the tourniquet is released. The needle is safely locked and placed into a sharps container to prevent needlestick injuries. The patient is advised to apply pressure to the puncture site to stop bleeding. The instructor labels the blood tube with the patient's information and the time of draw. The importance of inverting the blood tubes with additives to mix them properly is also discussed. The instructor demonstrates how to hold the flange during the blood draw to keep the needle and tube secure. The video concludes with a recap of the key points, including the importance of a steady hand and proper tube inversion.

Mindmap

Keywords

πŸ’‘Photomy

Photomy, also known as phlebotomy, is the practice of drawing blood from a patient for medical testing, transfusions, donations, or research. In the video, the narrator is conducting a photomy lesson on a real patient, demonstrating the proper techniques and procedures involved in drawing blood. The term is central to the video's theme as it is the main activity being taught.

πŸ’‘Supplies

Supplies refer to the necessary equipment and materials required for performing phlebotomy. In the script, the narrator mentions having their supplies ready, which includes items like a tourniquet, needle, and Band-Aid. These supplies are essential for safely and effectively drawing blood from the patient, as they ensure both the patient's and the phlebotomist's safety.

πŸ’‘Tourniquet

A tourniquet is a device used to apply pressure to a blood vessel, typically above the site where blood is to be drawn, to restrict blood flow and make the veins more prominent. In the video, the narrator ties a tourniquet 3 to 4 inches above the patient's elbow to facilitate the identification and access to the vein. The tourniquet is a key tool in the phlebotomy process, as it helps to make the veins more visible and accessible.

πŸ’‘Vein

A vein is a blood vessel that carries blood towards the heart. In phlebotomy, veins are the target for needle insertion to draw blood. The script describes the patient having a 'beautiful vein,' which is ideal for blood collection because it is easily accessible and reduces the risk of complications. Vein visibility and condition are crucial for a successful blood draw.

πŸ’‘Palpate

Palpation is the act of feeling or examining a vein by touch to determine its location and condition. The narrator mentions palpating the vein to find a spongy texture, indicating a good vein for blood draw. This technique is important in phlebotomy to ensure the needle is inserted into the vein correctly and to minimize patient discomfort.

πŸ’‘Butterfly

A butterfly is a type of needle used in phlebotomy, particularly for pediatric or geriatric patients with small or fragile veins. The narrator mentions that for this lesson, they are using a straight needle, but in other cases, a butterfly might be more appropriate. The butterfly needle has a short, hollow needle attached to a plastic 'wings' that can be taped to the patient's arm, making it easier to manage and less likely to dislodge.

πŸ’‘Vacutainer

A Vacutainer is a device used to collect blood samples in vacuum tubes. The narrator refers to using a straight needle or a Vacutainer system, which implies the use of a needle attached to a tube that is pre-evacuated to create a vacuum, drawing blood into the tube once the needle is inserted into the vein. This system is commonly used in phlebotomy for its efficiency and reduced risk of contamination.

πŸ’‘Order of draw

The order of draw refers to the sequence in which different types of blood collection tubes are filled during phlebotomy. The narrator organizes the tubes in the order they will be used, starting with the light blue tube. This is important to prevent contamination of the sample and to ensure that additives in the tubes are properly mixed with the blood, as some tubes contain anticoagulants or other substances that need to be in contact with the blood in a specific order.

πŸ’‘Invert

Inverting refers to the action of turning the blood collection tube upside down to mix the blood with the additive within the tube. The narrator mentions inverting the tube several times after drawing blood to ensure proper mixing. This step is crucial for tubes that contain additives, as it activates the additive and prevents clotting or other issues that could affect the blood sample's integrity.

πŸ’‘Band-Aid

A Band-Aid is an adhesive bandage used to cover and protect a small wound, such as the one created by a needle puncture during phlebotomy. The narrator prepares a Band-Aid as part of the phlebotomy supplies and applies it after the blood draw to prevent bleeding and contamination. The use of a Band-Aid is a standard part of post-venipuncture care, ensuring the patient's comfort and safety.

πŸ’‘Labeling

Labeling in phlebotomy refers to the process of marking the blood collection tubes with patient information, such as name, date of birth, and other relevant details. The narrator labels the tubes with the patient's information, initials, date, and time after drawing the blood. Accurate labeling is critical to ensure that the blood samples are correctly identified and matched to the patient, preventing errors in laboratory testing and patient care.

Highlights

Introduction to a photomy lesson using a real patient

Explanation of checking the arm for vein and needle type

Preference for straight needle or vacutainer system

Importance of selecting the best arm for vein access

Identification of a good vein for blood draw

Tying the tourniquet 3 to 4 inches above the elbow

Verification of patient's identity before proceeding

Instructions for the patient to make a fist to enhance vein visibility

Palpation technique to feel for the vein's spongy texture

Releasing the tourniquet to prevent vein movement

Cleaning the puncture site from the inside out in circular motions

Assembling supplies and preparing the needle

Placing dirty supplies aside to maintain hygiene

Organizing tubes in the order of draw

Applying the tourniquet just before the needle insertion

Technique for taunting the skin to anchor the vein

Insertion of the needle with the bevel up

Instructions for the patient to open their hand and release the tourniquet

Applying pressure and locking the needle for safety

Labeling the blood collection tube with patient and procedural details

Inversion of the blood collection tube to mix additives

Emphasis on using flanges to prevent needle dislodgement

Transcripts

play00:00

all right hey guys so today we're going

play00:02

to be doing a photomy lesson on a real

play00:05

live patient so first of all I already

play00:08

have my supplies here in real life I

play00:11

would check her arm first to see which

play00:13

needle I need because of course if they

play00:15

have a small fragile vein if we're doing

play00:17

a pediatric geriatric patient we would

play00:19

use a butterfly but in this case I'm

play00:21

doing a lesson on um straight needle um

play00:24

or vacutainer system okay so we're going

play00:26

to go ahead and get started now I'm

play00:28

going to put my turn on in real life you

play00:31

want to check both arms and you want to

play00:33

go for whichever arm is the best but I

play00:36

already know I'm going to go here now if

play00:38

you look at her arm she has a beautiful

play00:41

vein like this is the type of person

play00:42

that when they come in the lab you are

play00:44

very happy because it's a very good vein

play00:47

right everybody is not going to be like

play00:49

that but in this case she has a very

play00:51

good vein so I'm going to tie the

play00:53

tourniquet on and as you guys know you

play00:55

want to tie the tourniquet 3 to 4 in

play00:57

above the elbow depending on how big big

play01:00

your hand is or how big your fingers is

play01:02

that's maybe about two to three fingers

play01:04

so we're going to tie that

play01:06

there I do have a video on how to tie

play01:09

the tourniquet so here I'm not going to

play01:11

get into that I'm just going to go ahead

play01:13

and tie it on there so I've already

play01:15

verified her name and date of birth and

play01:17

made sure it was okay for me to do this

play01:19

right so I have the tourniquet on I'm

play01:22

just going to have her make a fist now

play01:23

I'm not going to have her pump because

play01:25

if you pump that can alter the results

play01:28

so we're going to actually just have her

play01:29

make a fist there and as you can see

play01:32

once she made that fist her vein became

play01:35

even more prominent okay so I'm going to

play01:38

feel that there and the way we feel for

play01:40

a vein we want to palpate right we're

play01:42

not going to be feeling like this we're

play01:44

going to palpate just like that and the

play01:47

vein is actually spongy it kind of

play01:49

bounces right back at you all right so

play01:51

once I find her vein because it cannot

play01:54

be because this tourniquet should not be

play01:55

on for more than a minute we're going to

play01:57

go ahead and release it or as we say pop

play02:00

the tourniquet all right going to go

play02:03

ahead and clean

play02:06

it and when we clean we want to clean

play02:08

From the Inside Out circular motion

play02:11

wherever you want to stick you want to

play02:12

just wipe there and then keep working

play02:14

your way out okay all right so while

play02:16

that's drying I'm going to go ahead and

play02:17

get my supplies together so I'm going to

play02:20

assemble my needle

play02:22

there put that there I'm going to open

play02:25

up my Band-Aid cuz we want everything

play02:28

already together we don't want to stick

play02:30

our patient and then have to do all of

play02:32

this we want to have everything already

play02:40

ready all right so I'm going to put that

play02:43

there now my dirty stuff I'm just going

play02:45

to kind of put that to the side cuz I

play02:46

don't want it all to get mixed in right

play02:48

just going to put that over

play02:50

there okay all right I got my Gau here

play02:53

now this is very important when you are

play02:56

doing photomy you're going to have a

play02:58

needle inside your pap patient's arm you

play03:00

don't want to be moving that needle and

play03:02

all over the place so whatever hand you

play03:03

going to be sticking with just remember

play03:05

your supplies are going to be next to

play03:07

the opposite hand okay cuz once you

play03:09

stick that patient your hand can never

play03:11

move the only hand that should be moving

play03:13

is the is your opposite hand okay so in

play03:16

my case I'm right-handed I'm going to

play03:18

stick with my right hand so I'm going to

play03:20

make sure all of my supplies is on the

play03:22

left side scoot up for me a little bit

play03:25

all right so now I got everything ready

play03:28

also another thing too I I usually sit

play03:30

my tubes in the order of drawer in the

play03:33

order that I'm going to pick them up

play03:34

right so if you know the order of draw

play03:36

you know that this light blue is going

play03:37

to go first now I'm just going to draw

play03:39

the the light blue but I just wanted to

play03:41

put two tubes right here to show an

play03:42

example if you're doing multiple tubes

play03:45

just go ahead and set them in the order

play03:46

you're going to draw them that way it's

play03:48

easier to just pick them up and keep

play03:50

going okay all right so I'm going to go

play03:52

ahead and put her tourit

play03:54

[Music]

play03:55

on we don't want to put the tourniquet

play03:58

on until we are ready to stick okay so

play04:00

this is the last thing I'm going to do

play04:01

right before I

play04:07

stick all righty make a fist for me and

play04:10

then can you take this Fist and put it

play04:12

right up under your elbow right there y

play04:15

all righty so I already cleaned

play04:18

it now I'm going to take my cap off and

play04:21

I'm going to hold her arm right here and

play04:24

I'm going to taunt the skin taunting the

play04:26

skin also allows us to Anchor the vein

play04:28

so the vein does not move

play04:30

okay so I'm just going to go here my

play04:32

bevel is up so I'm going to go in there

play04:36

I'm only going to draw this one tube now

play04:38

the blood is Flowing so go ahead and

play04:40

open up your hand we're going to pop

play04:42

that tourniquet remember tourniquet tube

play04:45

needle okay so we're going to remove

play04:47

that

play04:49

tube all righty notice I use my

play04:55

flange all right and then I'm going

play04:58

to

play05:00

have her apply pressure lock your needle

play05:03

or activate the safety device as soon as

play05:05

you come out okay you don't want to

play05:06

stick yourself so we going to lock right

play05:09

away and then we're going to put it in

play05:11

the Shar container okay now can you

play05:13

apply pressure for a moment sure going

play05:15

to have you kind of lift your arm up and

play05:17

apply pressure now while your patient is

play05:19

applying pressure cuz you want to keep

play05:21

you want to uh continue to apply

play05:23

pressure and allow it to stop bleeding

play05:25

before you uh apply the Band-Aid right

play05:27

so I'm going to have while she's

play05:28

applying pressure

play05:30

that's when I'm going to go ahead and

play05:31

label my tube with her name date of

play05:33

birth my initials the date as well as

play05:35

the time okay and depending on where you

play05:37

work you may have a label for your tubes

play05:40

okay so once I do that I'm going to

play05:42

label my tubes and then I am going to

play05:45

give her a Band-Aid one thing that I

play05:49

want to point out when I was drawing her

play05:50

blood as I was drawing her blood I was

play05:54

my my hand was steady right so as I was

play05:56

drawing her blood I was using my Fang in

play05:59

myotomy video that I did before I talked

play06:02

about the importance of using your

play06:03

flanges right so when you're going in

play06:06

you want to hold your flange like this

play06:09

coming out you want to press against it

play06:12

because what happens is if you don't do

play06:14

that as you're pulling the tube out is

play06:16

going to pull the needle out as well so

play06:18

in order to keep that tube that needle

play06:20

from coming out you want to press on

play06:23

your flange so again we want to go in

play06:26

and hold our flange coming out we want

play06:29

to press against it either with our

play06:31

index finger or your thumb either way

play06:35

okay um one thing too I want to mention

play06:37

remember the tubes have additives in it

play06:40

so we have to invert it so normally when

play06:42

I'm drawing blood as I am sitting my

play06:45

tube now I normally just invert it a few

play06:47

times as I sit it down and then I'll go

play06:49

back and invert it 8 to 10 times or five

play06:52

times depending on the tube because each

play06:54

tube has a certain amount of times it

play06:55

needs to be um it needs to be umed

play06:58

inverted

play06:59

all righty guys so that's that

Rate This
β˜…
β˜…
β˜…
β˜…
β˜…

5.0 / 5 (0 votes)

Related Tags
VenipunctureMedical TrainingPatient CareBlood DrawHealthcareNursing SkillsPhlebotomyHealth EducationClinical PracticeMedical Procedures