CANGGIH!!! Cara buat Kunci pintu Pakai PASSWORD

Youbeagger
24 Jun 202112:49

Summary

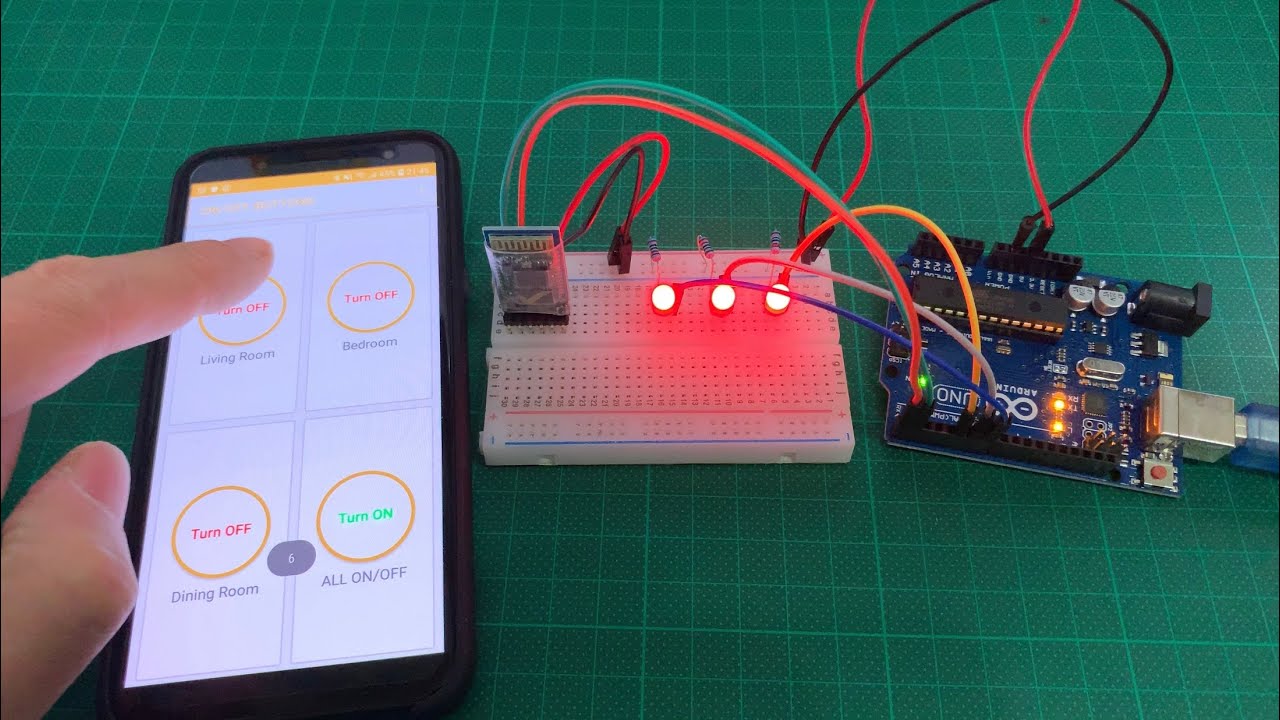
TLDRThis video tutorial guides viewers through creating a DIY smart door lock using an Arduino Nano. The presenter demonstrates how to assemble the components, including a keypad for password entry and a servo motor to operate the lock. The video covers the setup process, wiring, and coding with Arduinodroid, emphasizing the use of a password for security. It concludes with a test of the lock's functionality, showcasing a successful project that can be powered by a power bank or phone charger for convenience and backup.

Takeaways

  • 😀 The video is a tutorial on creating a DIY smart door lock with a keypad and password.
  • 🛠️ Viewers are guided through the process of unlocking the door using a pre-set password.
  • 💡 The project utilizes an Arduino Nano for programming the smart lock mechanism.
  • 🔑 A keypad is used for entering the password, and the tutorial suggests purchasing one for the project.
  • 🤖 A servo motor is employed to physically turn the lock mechanism within the door.
  • 🔋 The tutorial mentions using a power bank or phone charger as a power source for the lock.
  • 🔌 Eight male-to-female cables are required for connecting the components to the Arduino Nano.
  • 💻 The coding for the project is done using the 'arduinodroid' app, which can be installed from the Play Store.
  • 📱 The tutorial provides a link to download the code for the project, which is essential for setting up the lock.
  • 🔧 The final setup includes a hidden cable installation for a cleaner look and a secure locking mechanism.

Q & A

  • What is the main project being discussed in the script?

    -The main project being discussed in the script is a DIY smart door lock system that uses a keypad for entering a password to unlock the door.

  • What is the first step mentioned in the script for setting up the project?

    -The first step mentioned in the script is to prepare the materials, starting with the door latch.

  • What is the estimated cost for the door latch mentioned in the script?

    -The estimated cost for the door latch is around 8000, which is considered affordable in the context of the script.

  • Which microcontroller is suggested for the project?

    -The Arduino Nano is suggested as the microcontroller for this project.

  • What is the purpose of the servo mentioned in the script?

    -The servo is used to physically turn the lock mechanism to open the door.

  • What type of cable is needed for connecting the keypad to the Arduino Nano?

    -Male to female cables are needed, and the script mentions preparing eight of them.

  • How many colors of cables are used for connecting the keypad to the Arduino Nano?

    -Five different colors of cables are used: black, yellow, orange, green, and brown.

  • What is the purpose of the 'indicator light' mentioned in the script?

    -The indicator light is used to show whether the door can be opened or not, based on the correct password being entered.

  • What is the name of the application recommended for coding the Arduino in the script?

    -The application recommended for coding the Arduino is called 'arduinodroid'.

  • How does one change the password for the door lock in the script?

    -One can change the password by modifying the 'cat password' line in the code to a desired sequence of numbers.

  • What is the final step before testing the door lock system in the script?

    -The final step before testing the door lock system is to upload the coding to the Arduino using a USB cable.

Outlines

00:00

🔐 Introduction to DIY Smart Lock Project

The speaker introduces a DIY smart lock project, explaining how to use a password to open a door. They demonstrate the process of unlocking the door with a pre-set password and mention the need for materials such as an Arduino Nano, a keypad, and a servo motor. The video aims to guide viewers through creating a cool project by the end of the video. The speaker also discusses the cost-effectiveness of the materials and provides a brief overview of the components required, including the door latch, Arduino Nano, and the keypad for the password.

05:01

🛠️ Setting Up the Smart Lock Components

The tutorial continues with the assembly of the smart lock components. The speaker details the process of connecting the keypad and the servo motor to the Arduino Nano, including the wiring of the male-to-female cables and the specific connections for each color-coded wire. They also explain the setup of the servo motor, including the use of a gear to turn the lock mechanism. The video provides a step-by-step guide on how to wire the components together, ensuring that the connections are correct and the setup is secure.

10:05

💻 Coding and Testing the Smart Lock System

The final part of the video script focuses on the coding aspect of the smart lock project. The speaker instructs viewers to download the necessary code from a provided link and to use the 'arduinodroid' app for uploading the code to the Arduino Nano. They guide through the process of installing libraries for the keypad and servo motor, setting up the password, and configuring the servo motor's angle. The video concludes with a demonstration of the smart lock in action, showing how entering the correct password will unlock the door and how the system can be powered by a power bank or phone charger for convenience and emergency use.

Mindmap

Keywords

💡Password

A password is a secret word or phrase that is used for user authentication to prove identity or access approval to systems. In the context of the video, the password is used to secure a door mechanism, and the correct password is required to unlock it. The script mentions entering a password to open the door, indicating its role in the security system of the project.

💡Arduino Nano

The Arduino Nano is a small, affordable, and flexible microcontroller board that is used in electronics projects. It is mentioned in the script as the main controller for the door lock project. The video likely demonstrates how to program the Arduino Nano to manage the door's locking and unlocking based on the password input.

💡Keypad

A keypad is a type of input device that allows users to enter data, usually numbers or characters, through buttons. In the video, a keypad is used for entering the password to unlock the door. It is an essential component of the security system, as it interfaces between the user and the microcontroller to input the password.

💡Servo

A servo is a rotary actuator or linear actuator that allows for precise control of angular or linear position respectively. In the script, a servo is used to physically manipulate the door's lock mechanism. The video probably shows how the servo is connected and programmed to move in response to the correct password being entered.

💡Coding

Coding refers to the process of writing instructions in a computer programming language. The video script mentions coding as a crucial step in setting up the door lock project. It involves writing and uploading a program to the Arduino Nano that defines how the system should respond to password inputs and control the servo.

💡Prototype

A prototype is an early sample or model of a project built to test a concept or process. The script refers to the door lock project as a prototype, suggesting that it is a working model used to demonstrate the feasibility of the idea before potentially developing a final product.

💡Power Bank

A power bank is a portable charger used to charge electronic devices via USB. In the context of the video, a power bank is suggested as a power source for the door lock system, providing a convenient and portable way to supply power to the Arduino Nano and other components.

💡Circuit

A circuit refers to the path of electrical flow from a power source through an electrical device and back to the source. The script mentions assembling the circuit, which involves connecting the various components like the Arduino, keypad, and servo in a way that allows them to function together as part of the door lock system.

💡Indicator Light

An indicator light is a visual signal used to show the status of a device or system. In the video, an indicator light is used to show whether the door is locked or unlocked. The script mentions the light turning on when the door is unlocked, serving as a visual feedback mechanism for the user.

💡OTG Cable

An OTG (On-The-Go) cable is a USB accessory that allows USB devices to directly communicate with each other. The script mentions using an OTG cable to connect the Arduino Nano to a smartphone for programming, demonstrating a practical use of OTG technology in the setup process of the door lock project.

💡Library

In programming, a library is a collection of pre-written code that can be used in a program. The script refers to installing libraries for the keypad and servo, which are essential for providing the necessary functions to interface with these hardware components within the Arduino program.

Highlights

Introduction to creating a home security project with a password-protected door lock.

Demonstration of unlocking the door using a pre-set password.

Explanation of the initial failure to unlock the door and subsequent successful attempt.

Tutorial on preparing the necessary materials for the project, including a door latch.

Recommendation of an affordable door latch and its cost.

Introduction to using an Arduino Nano for the project's programming.

Provision of a pre-prepared code for the project to simplify the process.

Discussion on acquiring a keypad for inputting the password.

Instruction on using a servo to operate the door lock mechanism.

Description of the wiring process for the Arduino Nano and the keypad.

Guidance on assembling the servo and its wiring to the Arduino.

Explanation of the setup for the door latch and how to attach it to the servo.

Tutorial on installing the necessary libraries for the project using the Arduinodroid app.

Instructions on how to change the password in the code to customize the project.

Compilation and uploading of the code to the Arduino Nano.

Demonstration of the completed project in action, including the use of a power bank for added functionality.

Final testing of the door lock system with the correct password, showcasing its functionality.

Conclusion of the tutorial with a thank you note and a sign-off.

Transcripts

play00:00

Hi Hi guys buat kalian Sering nonton

play00:01

film Mungkin sering lihat pintu rumah

play00:04

yang pakai kata sandi nah ini saya buat

play00:06

teman-teman Oke ini kita buka kita buka

play00:09

dia akan ngebuka karena terkunci untuk

play00:11

membuka kuncinya kita pakai sandinya

play00:14

teman-teman Oke kita akan coba kasih

play00:15

Candi asal-asalan dulu apakah bisa nggak

play00:20

hai oke asal-asalan ya Nah ternyata

play00:22

enggak ngebuka sekarang saya akan

play00:24

masukkin kata sandi yang sudah buat

play00:25

teman-teman oke nah seperti ini dan

play00:28

lampu indikator hidup artinya pintu ini

play00:30

bisa dibuka teman-teman oke buat kalian

play00:32

yang ingin membuat Project keren ini

play00:34

simak videonya Sampai Akhir

play00:37

Hai Hai guys untuk membuat project ini

play00:40

kalau siapin bahan-bahannya yang pertama

play00:42

ini dia ini adalah engsel pintu

play00:44

teman-teman Nah jadi kalau kalian beli

play00:46

harganya cuma murah kok cuma 8000an yang

play00:48

bagus nih oke setelah itu kali siapin

play00:50

untuk program ya kita pakai Arduino Nano

play00:52

Inget ya Arduino Nano ini harganya di

play00:54

samping nih Jadi kalian gak usah ribet

play00:56

modif Oding saya udah nyiapin kodenya

play00:58

teman punya gampang banget kalian pasti

play01:00

bisa buat di rumah kali ya oke setelah

play01:03

itu kalian siapin Nah ini dia keypad

play01:05

untuk passwordnya kita pakai ini cuman

play01:07

ya oke Kalian beli di samping remora

play01:09

banget ya Oke sekarang kita akan coba

play01:13

siapin bahan selanjutnya Nah jadi untuk

play01:15

memutar kuncinya kita menggunakan servo

play01:18

aja ya Oke ini servo emg80 es nih kalau

play01:23

kalian beli harganya di samping ya Oke

play01:25

halocline siapin ini dia ini adalah

play01:28

kawat kalian bentuk seperti ini nah

play01:30

kalian masukin

play01:32

Ayo kita Oke Jadinya enggak pakai

play01:34

gearnya ya Kirim depannya saya pakai ini

play01:36

aja slm aja ya seperti ini aduh bisa

play01:43

pakai girang di luar ya bisa juga

play01:45

sekalian kalo saya lebih suka pakai

play01:47

kayak gini teman-teman Oke nih jadi

play01:49

ternyata teman-teman nah udah kita modif

play01:52

seperti ini sekarang kita akan coba

play01:54

rangkai kabel kabelnya Hai guys untuk

play01:59

pemasangan kabelnya nah kali siapin

play02:02

kabel male to female sebanyak delapan

play02:04

buah nih jadi di iPad ini ada lapangan

play02:07

buah jalur kabel yang harus dipersiapkan

play02:09

ke Arduino Nano nya ya Oke sekarang kita

play02:12

pasang jika tgs kabelnya harus beda-beda

play02:15

warna biar kita bisa membedakan nanti di

play02:19

Kodim ini diambil namanya ya jadi ga

play02:21

ribet OK seperti ini kita sudah pasang

play02:25

nah ini cuman Ada kesamaan warna satu

play02:28

doang karena kabel habis semuanya oke

play02:30

selalu terasa

play02:32

ini saya perhatikan nah di Arduino Nano

play02:35

kita akan pasang di kabel bikin benar

play02:37

Nah dari D2 sampai d9a ya oke seperti

play02:41

ini nah ini kita pasang secara berurutan

play02:43

sesuai kabel tadi Nah ini ada kabel di

play02:46

samping * sesuaikan nih oke nah warna

play02:49

abu-abu D2 warna kuning gede tiga warna

play02:54

orange di d41 ini Nah warna hijau di

play03:02

Hai warna biru di dengan

play03:07

Hai coklatan ya digunain Deswita pd9

play03:10

ikuti dd9 ya oke selalu dah terpasang

play03:13

seperti ini sekarang kita coba pasang

play03:15

servernya share menyuruh kita mau di

play03:17

kabel sudah panjangin nanya 23 kabel

play03:20

orange ini adalah untuk sinyal merah vcc

play03:24

dan coklat itu untuk ke ground ya oke di

play03:28

sini cecak pasang di Brown Dandi 5volt

play03:31

dan di d11 Oke kita coba memang di sini

play03:38

ada I dulu kita pasang dulu Gue warna

play03:41

coklatnya itu seperti ini untuk warna

play03:45

merahnya kita pasang di 5 volt Nah untuk

play03:48

orange atau sinyalnya kita pasang Dedes

play03:50

11 ya oke seperti di benua nah ini sudah

play03:54

jadi teman-teman sekarang kita coba

play03:56

pasang batre kan disini teman ya Nah

play04:00

kabel ini dia ini adalah waktu indikator

play04:02

nanti ya kalau biru ini ground merah dan

play04:05

teh putih dan orang ini adalah sini

play04:07

ini terpasang ke amino namanya hepatica

play04:11

disini akhirnya Kawasan blurnya dulu

play04:13

sebelumnya warna biru tadi kabelnya

play04:16

pasang biground VCD Ya udah dewasa ini

play04:24

berwarna biru besok ini ada dua ya teman

play04:30

bisa kalian pilih mana aja terserah

play04:32

kalian Oke kalau ini untuk Win buktinya

play04:35

kabel fotonya sudah bosan DJ 10 ya oke

play04:43

Mungkin orangnya ke terpasang di dc-12

play04:49

Oke seperti ini sudah jadi

play04:51

teman-temannya Oke terputus kabelnya

play04:54

ternyata pencuri teman-teman Oke sudah

play04:56

terpasang Nah sekarang kita akan coba

play04:59

codingnya teman-teman untuk codingnya

play05:01

caranya gampang banget disini kalian

play05:03

masuk ke Playstore terlebih

play05:05

hai lalu Kalian cari aplikasi namanya

play05:07

arduinodroid teman-teman seperti ini tuh

play05:11

ya okelah itu kalian klik aja install

play05:14

kalau udah diinstall kita buka aja ya

play05:17

oke buat kalian yang belum mendownload

play05:19

kodenya silahkan download di codingnya

play05:21

ada di deskripsi teman-teman ya kalau

play05:23

kalian men-download Nanti kalian bisa

play05:24

membuat project ini kalau belum link

play05:26

downloadnya gak bisa Oke kita klik

play05:28

filenya di sini kita buka disket

play05:31

googledownload Nah di sini ada apel

play05:33

namanya pintu password Dotin Oke kita

play05:36

klik ceklis ah muncul codingnya

play05:39

teman-teman seperti ini Oke kita akan

play05:41

coba kaca hari library servo dan

play05:43

sifat-nya kalau kalian belum punya ya

play05:45

hai oke clickminded libraries disini

play05:48

libraries ngene diberi selalu * pilih FW

play05:52

ya Nah di sini kalau cari tapi kan

play05:55

keypad nih terjadi ke vet kita enter

play06:00

secari sesuai dengan coding librarynya

play06:04

Oke keypad Sudah terinstal lalu servos

play06:07

erfurt cari kita mencari servo library

play06:13

servo takutnya belum terinstall dan

play06:14

Maret servo Oke kita cari di sini servo

play06:24

Oke ternyata sudah terinstall ya kalau

play06:26

belum kalian install silahkan diinstall

play06:28

aja teman-teman oke selalu udah seperti

play06:31

ini saya perhatikan di sini ada kata

play06:33

sandi cat password 212 nah ini kalian

play06:36

bisa ganti atau mana di sini kalian bisa

play06:37

ganti cat passwordnya sesuai dengan

play06:39

coding kalian ya atau kawasan di rumah

play06:42

kalian ini sekalian ganti nih Apaan

play06:44

misalnya 50

play06:45

Tong ngerti ini bisa eh Terserah kalian

play06:49

noknya sesuai dengan selera kalian aja

play06:51

oke nah kali perhatikan disini untuk

play06:55

rettpin love dan blue pinlock ini blue

play07:00

kita pakai warna hijau tadi ya oke di

play07:02

sini Nah untuk servernya nih kalian bisa

play07:04

ganti di teman ini tergantung derajatnya

play07:08

berapa derajat c 90° saya pakai ya dan

play07:11

bisa rubah 60° Terserah kalian Oke kita

play07:14

langsung ajak kita compiling oke nah

play07:23

Ternyata kau beli finish gini berarti

play07:24

codingnya berhasil ya pasti bisa nih

play07:27

kalau udah kayak gini Ok sekarang Coba

play07:29

kita akan coba ini ya kita upload

play07:32

codingnya di HP yang satunya biar kalian

play07:35

lebih ngerti ini teman-teman Oke untuk

play07:38

mengupload kita gunain kabel yang

play07:39

dikasih Kalau belinya dikasih

play07:41

teman-teman ya kabel USB untuk Arduino

play07:43

nya Nah lalu kali siapin

play07:45

PG sudah termasuk di hpnya temannya Oke

play07:50

kita masukin seperti ini ini kalau harus

play07:55

aktif dulu aktivasi Oke OTG ya biar bisa

play07:57

ngakses Arduino ininya ya oke sudah kita

play08:02

langsung install aja teman kita install

play08:06

hai oke dan berhasil karena compiling

play08:08

udah selesai tadinya ada iklannya nih

play08:10

oke sekarang kalau berhentikan saya akan

play08:12

coba codingnya ini saya kita minum es

play08:16

dulu iklan ini mengganggu banget nih Oke

play08:18

kita masukkan kata sandi yang mereka

play08:20

buat hadiah 500 kan

play08:23

2500 Nah langsung saya punya berjalan

play08:26

dan lampunya berubah jadi merah ya

play08:28

seperti kalau ingin membuka kuncinya

play08:30

tiga tanda kres aja teman Oke setelah

play08:34

kode udah berhasil Nah sekarang kalian

play08:36

siapin inputnya kita bisa pakai power

play08:38

bank atau charger HP juga bisa

play08:40

teman-teman nah jadi lebih keren lagi

play08:42

guys nah kalian charger HP ini dan

play08:45

powerbank ini kalian pararel jadi

play08:46

korbannya untuk darurat dan chargernya

play08:48

untuk stand by kalau lagi link lampu

play08:51

hidup jadi powerbank ini hanya untuk

play08:53

mati lampu aja seperti itu biar lebih

play08:55

kalian lebih aman Nah sekarang kita siap

play08:58

ini dia kita buka dulu ya OTG nya kita

play09:02

coba pasang di pintu kita nih ini kalian

play09:04

simak nih cara pemasangannya biar gagal

play09:06

paham ya oke dipintu rumah yang kita

play09:08

coba pasang kartu ininya ya

play09:12

Hai sandinya Kita masukin double-tap

play09:14

seperti ini ya guys kalian kalian tahu

play09:16

agar lebih aman ini pintu kalau kalian

play09:19

ingin pakai password selamanya kalian

play09:21

lubang ini aja dibentuk seperti lubang

play09:24

seperti itu Nah jadi nanti dia kabelnya

play09:27

enggak terlihat seperti ini teman-teman

play09:28

jadi kalau masukin lebih dari dalam ya

play09:31

jadi cuma contoh aja biar kalian tahu

play09:34

kalau fungsinya ini benar-benar

play09:35

berfungsi ya codingnya oke seperti ini

play09:39

lalu kita masukkin beri terapi dulu

play09:45

kabelnya double tebing dulu ya Oke

play09:49

kabelnya kita Meski lagi seperti ini nah

play09:53

tapi lain untuk servernya kita kasih

play09:56

lemfo Lem bakar aja ya biar gampang jadi

play09:59

Oke kita masukin ya sudah kalian

play10:05

sesuaikan dengan tinggi dari ini ya

play10:09

lengsernya oke no

play10:12

zaman kawat-kawat ini tujuannya agar

play10:15

kita bisa ngontrol Kita sesuaikan ya

play10:18

antara servo dan onci engselnya seperti

play10:21

ini contohnya masih ada bentuk seperti

play10:24

itu oke Disini di engselnya kita kasih

play10:28

Lem dulu biar menempel nah seperti Indah

play10:33

nempel panas duel minuman Oke kita

play10:36

masukin seperti ini nah

play10:42

hai oke sudah terpasang kalau kita

play10:45

masukin yang udah kita buat lubang tadi

play10:47

Nah jadi sepertinya kejadian lurus ya

play10:48

Yang sampai dia belok ke bawah guys

play10:50

Nanti kalian juga belakang bisa

play10:52

menyebabkan berguna nanti karena akan

play10:54

terhalang yang lubang kan tadi itu ya

play10:56

nggak bisa dia oleh tidak terasa seperti

play10:59

ini kita rapiin dulu kabelnya Oke Jadi

play11:02

kalian bisa Kalau ini pakai permanen

play11:04

kalian bikin lubang ya Nah sesuaikan di

play11:07

pintunya tuh jadi nanti kabelnya enggak

play11:08

bakal terlihat dia jadi keren banget deh

play11:10

untuk powerbanknya kita pasang di sini

play11:15

Jika kita bisa mempararelkan pakai power

play11:18

bank atau pakai charger HP jadi kalau

play11:20

charger HP ketika mati lampu nya masih

play11:23

hidup atau listrik hidup kita pakai jadi

play11:25

rabe kalau magic power bank untuk

play11:27

darurat aja ok seperti ini kita pasang

play11:31

ya ini untuk rapihin biar kita nutupin

play11:33

nih itu atau aja teman-teman Prototype

play11:36

aja ya Jadi untuk aplikasi lebih

play11:38

lanjutnya kalian eksekusi rumah kalian

play11:40

ya Jadi kalian bisa

play11:42

mungkin tuh untuk jalur kabelnya ini

play11:45

cuman wajah Prototype namirun Indah Oke

play11:51

selesai Kita tes dulu nih perhatikan di

play11:53

sini ada gambar servernya di samping

play11:54

kita Masuki kata sandi dulu nah ketika

play11:58

benar saya punya akan bergerak ke kiri

play12:00

oke di sini kalian bisa menggunakan

play12:02

dress untuk mengunci ya Nah kalau sudah

play12:05

terpasang seperti ini kita akan coba tes

play12:07

dulu apakah berbugil tonggak Oke simak

play12:09

videonya guys Oke kalimat ini sini

play12:15

pintunya nah ini dong dalam keadaan

play12:18

terkunci atau Man oke kalau perhatikan

play12:21

di sini ya Sara Kita masukin kata

play12:23

sandinya kita akan coba asal-asalan dulu

play12:26

ya salah-salah dulu Kita masukin Nah Oke

play12:29

kita masukkin kerasan di yang 233 dulu

play12:32

ya nah dia enggak terbuka karena tadi

play12:35

salah oke sekitar sandi yang benar yaitu

play12:37

500 dan pintunya pun terbuka teman

play12:42

Hai Oke terima kasih telah nonton video

play12:44

ini wassalamu'alaikum warahmatullahi

play12:46

wabarakatuh

play12:47

[Musik]

Rate This

5.0 / 5 (0 votes)

Related Tags
DIY ProjectSmart Door LockArduino NanoHome AutomationElectronicsSecurity SystemCoding TutorialServo MechanismInnovationTechnology