Monitoring Suhu Dan Kelembaban Menggunakan ESP32 + DHT22 Dengan Protokol MQTT
Summary
TLDRThis video tutorial guides viewers through creating an IoT project using an ESP32 microcontroller and a DHT22 sensor to monitor temperature and humidity. It covers the setup of hardware connections, installation of necessary libraries in Arduino IDE, programming steps, and configuration of MQTT for data publishing. The video also demonstrates how to use the MQTT Dash app on Android for real-time monitoring of the environmental data, concluding with a live test of the system.
Takeaways
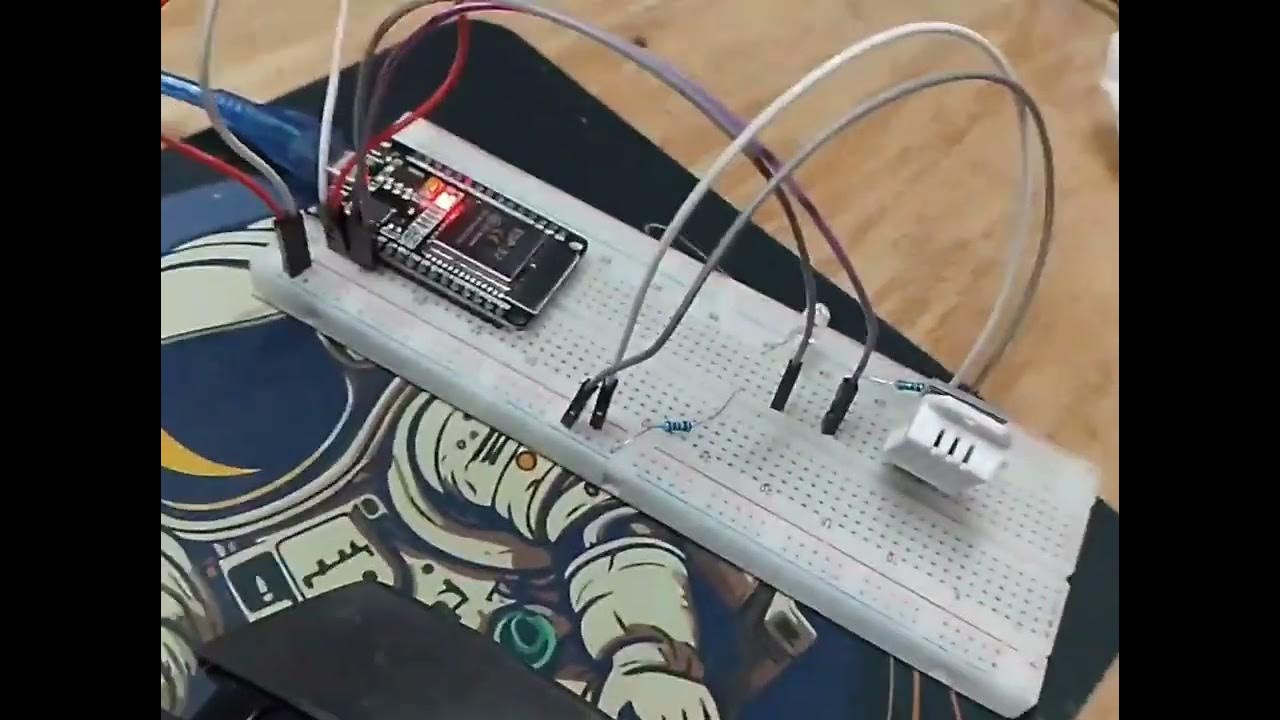
- 📷 The video demonstrates setting up an IoT project using an ESP32 and a DHT22 sensor to monitor temperature and humidity, displaying the data on an MQTT dashboard.
- 🔍 The ESP32 microcontroller is chosen for its built-in Wi-Fi module, facilitating easy internet connectivity for the project.
- 🌡️ The DHT22 sensor is selected over the DHT11 for its higher accuracy in measuring temperature and humidity.
- 🔧 Two breadboards are used in the setup to accommodate the ESP32, which would otherwise occupy all available pins on a single breadboard.
- 🔌 The DHT22 is connected to the ESP32 using jumper cables, with the VCC pin to VIN, the OUT pin to a digital pin (D32), and the GND pin to the ESP32's ground.
- 📚 The Arduino IDE is used for programming the ESP32, requiring the installation of the PubSubClient and DHT.h libraries for MQTT communication and sensor data reading.
- 📝 The script includes setting up Wi-Fi credentials and MQTT broker details within the Arduino code, using a free MQTT broker like broker.hivemq.com.
- 🔑 The MQTT topic for publishing data is defined in the code, with a unique identifier to prevent data collision, especially when using a free broker.
- 🔄 The 'void Loop' function in the Arduino code is responsible for obtaining data from the DHT22 and publishing it to the MQTT broker.
- 📲 The video mentions using an Android app, such as MQTT Dash, to monitor and display the temperature and humidity data published by the ESP32.
- 🛠️ The video is sponsored by PCBY, a PCB manufacturing service offering low-cost prototyping, and also provides services like CNC, 3D printing, and laser cutting.
Q & A
What is the main purpose of the project described in the video?
-The main purpose of the project is to create an Internet of Things (IoT) device that monitors temperature and humidity using an ESP32 microcontroller and a DHT22 sensor, and publishes the data to an MQTT broker.
Why is the ESP32 microcontroller a suitable choice for this project?
-The ESP32 microcontroller is suitable because it includes built-in Wi-Fi connectivity, making it easier to connect the device to the internet for data transmission.
What are the alternatives to the DHT22 sensor mentioned in the script?
-The script mentions the DHT11 as an alternative to the DHT22, but the DHT22 is chosen for its higher accuracy in measuring temperature and humidity.
Why are two breadboards used in the project setup?
-Two breadboards are used because a single ESP32 module occupies all available pins on one breadboard, preventing the use of additional pins on the same side.
What is the function of the USB cable in the project setup?
-The USB cable is used for programming the ESP32 microcontroller, connecting it to a computer or laptop for code upload and debugging.
Which libraries are required to be installed for the project's Arduino programming?
-The required libraries for the project are 'PubSubClient' for MQTT communication and 'DHT.h' for reading data from the DHT22 sensor.
What is the significance of the MQTT broker in the project?
-The MQTT broker is essential for the project as it acts as an intermediary for the ESP32 to publish temperature and humidity data to a topic, which can then be subscribed to and monitored.
How can one subscribe to the data published by the ESP32 in the script?
-One can subscribe to the data by using an MQTT client, such as the MQTT Dash app on Android, and setting up a subscription to the specific topic that the ESP32 publishes to.
What is the recommended MQTT broker for a free service as mentioned in the script?
-The script recommends using 'broker.hivemq.com' as a free MQTT broker service for the project.
How does the video guide the user to test the project setup on the hardware?
-The video instructs the user to upload the program to the ESP32, set up the MQTT Dash app on an Android device to monitor the data, and then test the hardware by observing the temperature and humidity readings on the app.
What is the importance of having a unique topic for the MQTT messages?
-Having a unique topic is important to avoid data conflicts, especially when using a free MQTT broker, as a common topic might be used by multiple users, leading to mixed data streams.
Outlines

Этот раздел доступен только подписчикам платных тарифов. Пожалуйста, перейдите на платный тариф для доступа.
Перейти на платный тарифMindmap

Этот раздел доступен только подписчикам платных тарифов. Пожалуйста, перейдите на платный тариф для доступа.
Перейти на платный тарифKeywords

Этот раздел доступен только подписчикам платных тарифов. Пожалуйста, перейдите на платный тариф для доступа.
Перейти на платный тарифHighlights

Этот раздел доступен только подписчикам платных тарифов. Пожалуйста, перейдите на платный тариф для доступа.
Перейти на платный тарифTranscripts

Этот раздел доступен только подписчикам платных тарифов. Пожалуйста, перейдите на платный тариф для доступа.
Перейти на платный тарифПосмотреть больше похожих видео

penjelasan keterhubungan antara ESP32 dengan Blnyk web

Sending Temperature and Humidity Sensor Data (DHT11) to Firebase using ESP32

Monitoring Data Suhu dan Kelembapan Sensor DHT11 Menggunakan ESP32 dan BLYNK IOT 2.0

Monitor Temperature using Augmented Reality & IoT

ESP32 tutorial A-04: The DHT temperature and humidity sensor

KONTROL BEBAN DAN MONITORING SUHU BERBASIS IOT MENGGUNAKAN SERVER COREX ID DAN ESP32
5.0 / 5 (0 votes)
