Create Select Item Place Order Page - Part 18(B)
Summary
TLDRIn this Tech mining video, viewers are guided through the final touches of a 'Select Items' and 'Place Order' page, focusing on adding or removing products from an order. The tutorial covers creating processes for order handling, PL/SQL code for database interactions, and configuring page properties for proper functionality. The video also demonstrates navigating through the order process, including adding products, updating order details, and canceling orders, with a preview of the upcoming 'Summary of Orders' page.
Takeaways
- 📚 The video is a tutorial on completing the properties of a 'Select Items' page in a tech mining process.
- 🛠️ The tutorial covers two main processes: adding a product to the current order and removing one from it.
- 🔗 The source code for the tutorial is provided in the video description for reference.
- 📝 The 'Add' function populates the collection with a new product, while the 'Delete' function removes a product based on a condition.
- 🔄 A new process is created under the 'Processing' tab, which is triggered by the 'Next' button after product selection.
- 💾 The PL SQL code in this process adds customer and order information to the database using SQL insert statements.
- 🔄 After committing the DML statement, the process truncates the order collection.
- 🌐 Three branches are created under the 'After Processing' node for navigation after placing an order.
- 🚫 The second branch allows users to cancel an order and return to a previous page without saving.
- 🛑 The last branch enables users to move to the previous page from the current order placement.
- 🔄 The video demonstrates how to resolve an issue with the 'Select Item' subregion by configuring its type property and inputting PL SQL dynamic content.
- 🔑 The tutorial concludes with instructions on how to save modifications and navigate through the application using the main menu.
Q & A
What is the main focus of the video?
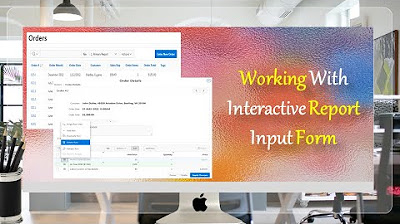
-The video focuses on completing the remaining properties of the select items and place order page, specifically handling the routines to add or remove a product from the current order.
Where can the source code for the video be found?
-The source code link is provided in the video description.
What does the add member function do in the context of the video?
-The add member function references the collection and populates it with a new product.
How is the delete member function different from the add member function?
-The delete member function is the opposite of the add member function; it is called by a link with a remove request and deletes the selected product from the order collection if the request matches.
What happens when the next button is clicked after selecting products for an order?
-The process associated with the next button adds new customer and order information to the relevant database tables using SQL insert statements and then truncates the order collection.
How many branches are created under the after processing node on the processing tab?
-Three branches are created under the after processing node on the processing tab.
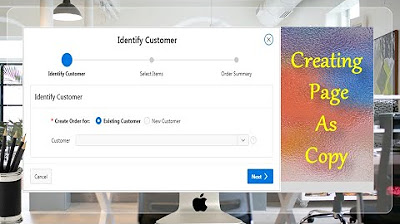
What is the purpose of the first branch after clicking the place order button?
-The first branch takes the user to the next wizard page, which is page 14, created in the next video.
What does the second branch allow the user to do if they want to cancel an order?
-The second branch takes the user to page four, allowing them to cancel the order.
How does the last branch help the user navigate through the application?
-The last branch allows the user to move to the previous page.
Why did the message appear when the add button was clicked for the Air Jordan 6 shoes?
-The message appeared because the wrong type property of the select item subregion was selected in a previous video, which needed to be configured to show Legacy at the bottom of the list.
What is the final step shown in the video for the user to confirm their order changes?
-The final step is to click the save page button to save the modifications and refresh the browser window to see the updated order.
Outlines
🛒 Completing Select Items on Place Order Page
This paragraph introduces the final steps in configuring the 'Select Items' properties on the 'Place Order' page within a tech mining video tutorial. It explains the creation of two processes for adding or removing products from the current order. The source code is available in the video description, and the video guides the user through the process of opening the relevant files and folders. The tutorial covers the 'Add Member' function, which populates the collection with a new product, and the 'Delete Member' function, which handles the removal of products based on a remove request. It also details the PL SQL code used to add customer and order information to the database and the subsequent steps to create branches under the 'After Processing' node for navigating the wizard pages.
🔄 Demonstrating Order Modification and Navigation
In this paragraph, the video script continues with a demonstration of how to modify an order by adding and removing products. It shows the user how to observe changes in quantity and total price as products are added to the current order. The tutorial then guides the user on how to remove a product from the order and cancel the order without saving. It also previews the next steps, which include creating the final wizard page for a segment summary of orders. The video concludes with a thank you message and an invitation to watch the next video for further instructions.
Mindmap
Keywords
💡Tech mining
💡Select items
💡Place order page
💡Add member function
💡Delete member function
💡PL SQL
💡SQL insert statements
💡DML statement
💡Processing tab
💡Branches
💡Wizard page
💡Legacy
Highlights
Introduction to completing the remaining properties of select items on the place order page.
Explanation of two processes for adding or removing a product from the current order.
Source code link provided in the video description for reference.
Demonstration of the add member function to populate the collection with a new product.
Description of the delete member function and its operation based on a remove request.
Process creation for handling customer and order information in the database using SQL insert statements.
Truncation of the order collection after committing DML statements.
Creation of three branches under the after processing node for navigation within the wizard.
Guidance on how to proceed to the next wizard page after selecting items.
Instructions for canceling an order and navigating to page four.
Method to move to the previous page using the last branch.
Importance of saving work using the save page button.
Running the application and accessing the orders page through the main menu.
Process of entering a new order using the existing customer option.
Configuration issue with the Select item subregion type property and its resolution.
Validation successful message upon correct configuration.
Demonstration of adding products to the current order and observing the changes in quantity and total.
How to remove a product from the current order section.
Canceling the order without saving and returning to page four.
Preview of the next video focusing on creating the last wizard page for segment summary of orders.
Closing remarks and thanks for watching the tutorial.
Transcripts
a very warm welcome to Tech mining in
this video we're going to complete the
remaining properties of select items
place order page
two processes created in this step
handle the routine to either add a
product to the current order step or
remove one from it
[Music]
source code link is in video description
open part 7 folder to get file used in
video
foreign
the add member function references The
Collection to populate it with a new
product
[Music]
foreign
[Music]
the delete member function is just
opposite to the add member function
it is called by a link which carries a
remove request
the request is evaluated by a condition
set if the request matches the selected
product is deleted from the order
collection
foreign
click the processing tab
under the processing node create a new
process
after selecting products for an order
you click the next button
this process is associated with the next
button
PL SQL code specified in this process
adds new customer and Order information
in relevant database tables using a few
SQL insert statements
after committing the DML statement the
process truncates the order collection
[Music]
create the following three branches on
this processing tab under the after
processing node
[Music]
after selecting items when you'll click
the place order button this first Branch
will take you to the next wizard page
page 14 created in next video
the buttons referenced in these branches
were created in previous video
[Music]
if you want to cancel an order this
second Branch will take you to page four
[Music]
with the help of this last Branch you
can move to previous page
foreign
[Music]
click the save page button to save your
work
click the run application button
[Music]
using the main menu root open orders
page
[Music]
click the enter New Order button
using the existing customer option
select a customer
click next
on this order items page
next to this Air Jordan 6 shoes click
this add button
this message appeared because we've
selected the wrong type property of
Select item subregion in previous video
let's configure this issue
open page 12 in page designer interface
[Music]
click select item sub-region
set its type property to show Legacy at
the bottom of list
then select PL SQL Dynamic content
Legacy
[Music]
input the same code as we did in
previous video
[Music]
this time validation successful message
must pops up
click ok
click the save page button to save this
modification
[Music]
refresh your browsers window
[Music]
repeat these same steps as we did
previously
[Music]
now click this add button
this is our current order
here is its price quantity subtotal and
total at the end
click the add button again for this
product
[Music]
see increase in quantity and total
[Music]
add some more products
[Music]
observe the change in the current order
section
click this cross sign to remove a
product from the current order section
[Music]
click this cancel to return to page 4
without saving the order
in the next video we will going to
create the last wizard page of this
segment summary of orders page thanks
for watching
Посмотреть больше похожих видео
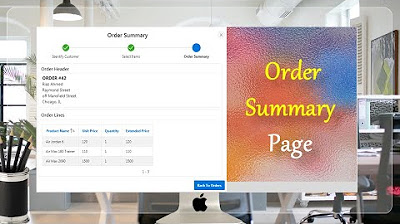
Final Step of Order Creation Wizard (Order Summary) - Part 19
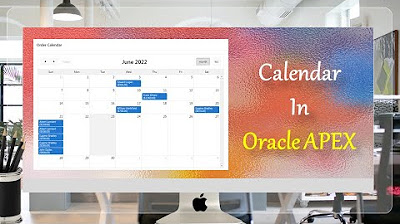
Create Setup to Display Records In an Order Calendar - Part 28
Give a New Look to Interactive Report & Input Form - Part 15(B)
Data Entry Form Oracle APEX - Part 20
Page Copy Utility Oracle APEX - Part 16
Customize Interactive Report With Actions Menu - Part 11
5.0 / 5 (0 votes)