Module 3.1 - Essential Drawing (Autodesk Inventor 2024)
Summary
TLDRThis video tutorial guides students through the process of creating precise engineering drawings using Autodesk Inventor 2024. It covers the essentials, from setting up drawing tools and adjusting settings (such as changing projection types and scale) to applying dimensions, creating title blocks, and inserting borders. The tutorial emphasizes proper drafting techniques, including the use of rectangle, dimension, and center line tools, as well as projecting views and adding sectional details. By the end, students will know how to complete an engineering drawing, ready for export as a PDF, adhering to standard engineering practices.
Takeaways
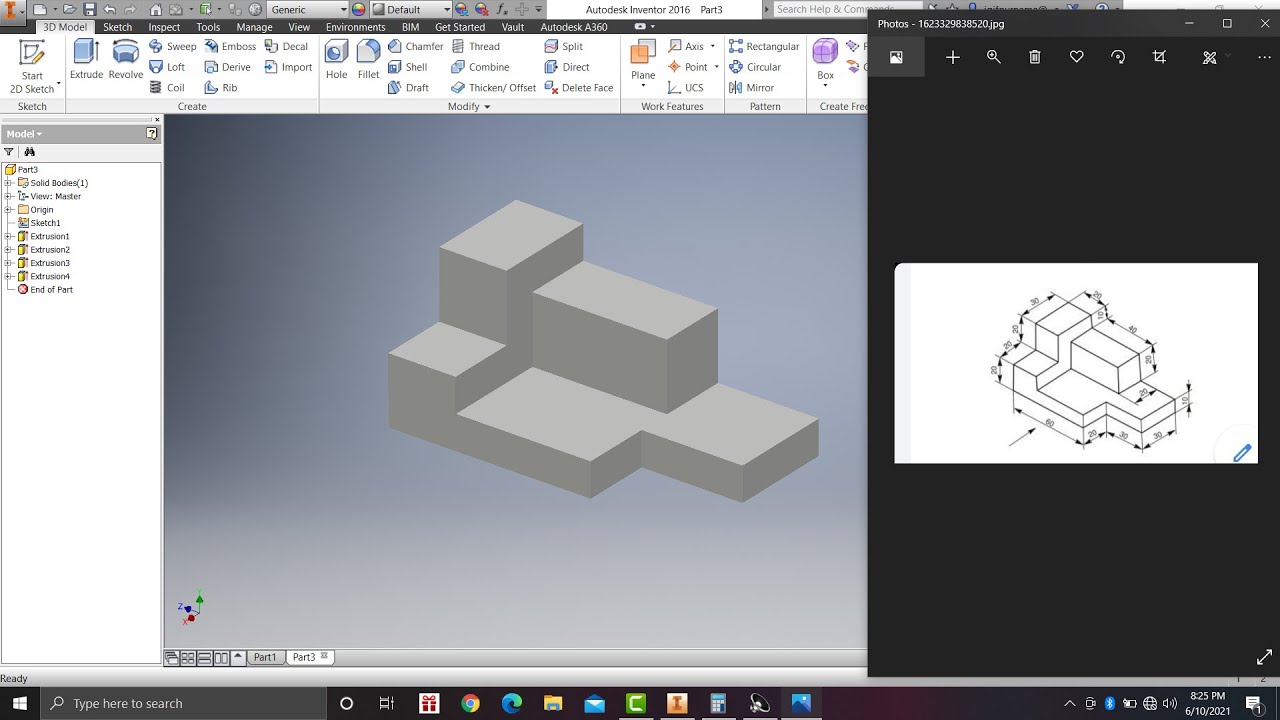
- 😀 Learn how to use essential drawing tools in Autodesk Inventor 2024 for engineering drawings.
- 😀 Understand the process of setting up a new drawing by opening and configuring the project files in Autodesk Inventor 2024.
- 😀 Change the projection type to third angle projection and set the unit preferences to millimeters for engineering accuracy.
- 😀 Use the rectangle and dimensioning tools to create a basic shape and ensure all lines are properly measured.
- 😀 Edit title blocks to include necessary details such as scale, date, name, assistant code, and ID number.
- 😀 Modify paper size and insert title blocks for different sheets within the drawing, including A3 and A4 sizes.
- 😀 Use the 'base' and 'projected' tools to display parts from existing files and adjust view styles to match hidden line representations.
- 😀 Create breakout views and add center lines and center marks for proper alignment in engineering drawings.
- 😀 Use the section view and detail tools to create detailed parts views and projections based on specific sections of the object.
- 😀 Export the final drawing as a PDF file, ensuring the correct resolution and settings for professional printing or sharing.
Q & A
What is the main objective of Module 3.1 in the Engineering Drawing and Design Studio laboratory?
-The main objective of Module 3.1 is for students to learn about essential drawing tools in Autodesk Inventor 2024, and to be able to create engineering drawings properly according to engineering drawing rules using the software.
Which version of Autodesk Inventor is used in this module?
-This module uses Autodesk Inventor 2024.
What is the first step to begin the lab work session in Autodesk Inventor 2024?
-The first step is to open Autodesk Inventor 2024, then go to 'Open' and select the lab folder to open the drawing file.
How do you change the projection type in Autodesk Inventor 2024?
-To change the projection type, go to the 'Manage' tab, click on 'Styles Editor', expand 'Standard', find 'Default Standard ISO', and change the projection type from 'First Angle' to 'Third Angle'.
How do you change the unit of measurement from inches to millimeters in Autodesk Inventor 2024?
-In the 'Styles Editor', under 'General Type', find 'Linear' and left-click on 'Inch'. From the dropdown, select 'Millimeter'.
What tool is used to create a rectangle in Autodesk Inventor 2024?
-The 'Rectangle' tool, found in the 'Sketch' tab, is used to create a rectangle. You need to choose 'Rectangle 2-Point' and draw the shape by left-clicking and dragging the mouse.
How do you set the scale for the drawing in the title block?
-In the title block, use the text tool to input the scale value, such as '3:1', and ensure the text is formatted correctly by adjusting the font size and style.
What is the process for inserting the border and title block in a drawing?
-Right-click on 'Border' in the drawing resources, then click 'Insert'. After that, right-click on 'Title Block' and insert the title block. Fill in the necessary details, such as the drawing name, scale, date, and other metadata.
How do you display parts in the drawing sheet in Autodesk Inventor 2024?
-To display parts, use the 'Plus Views' tool, click on 'Base', and choose the part file you want to display. Make sure to adjust the scale and projection settings according to your drawing requirements.
How do you add a center mark to a drawing in Autodesk Inventor 2024?
-To add a center mark, use the 'Center Mark' tool from the 'Annotate' tab, select the circle or arc you want to mark, and click on it to place the center mark.
Outlines

Этот раздел доступен только подписчикам платных тарифов. Пожалуйста, перейдите на платный тариф для доступа.
Перейти на платный тарифMindmap

Этот раздел доступен только подписчикам платных тарифов. Пожалуйста, перейдите на платный тариф для доступа.
Перейти на платный тарифKeywords

Этот раздел доступен только подписчикам платных тарифов. Пожалуйста, перейдите на платный тариф для доступа.
Перейти на платный тарифHighlights

Этот раздел доступен только подписчикам платных тарифов. Пожалуйста, перейдите на платный тариф для доступа.
Перейти на платный тарифTranscripts

Этот раздел доступен только подписчикам платных тарифов. Пожалуйста, перейдите на платный тариф для доступа.
Перейти на платный тарифПосмотреть больше похожих видео

Pre-Module 1: 2D Essential Drawing (Autodesk Inventor 2024)
Learn autodesk inventor 3dimensional # 13 mechanical engineering

PEN in | Autodesk Inventor CAD
TUTORIAL AUTODESK INVENTOR UNTUK PEMULA PART 1

Toolbar and "File" Tab - Home Screen (Part 1) | Autodesk Inventor 2021 IN DEPTH

Home Screen Main Window - Home Screen (Part 4) | Autodesk Inventor 2021 IN DEPTH
5.0 / 5 (0 votes)
