Pertemuan 6
Summary
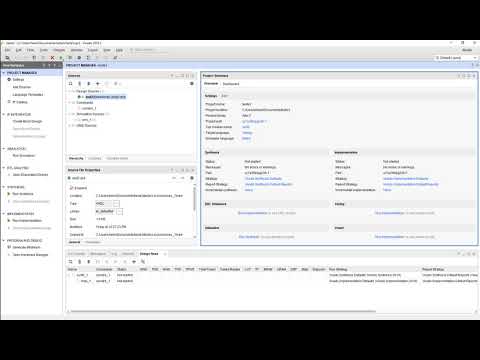
TLDRIn this tutorial, the presenter demonstrates how to simulate an 8-input, 3-output encoder using Proteus software. Starting with project setup and logic gate configuration, the video walks through defining input-output mappings and building the encoder circuit with OR gates and LEDs for visual feedback. Through the simulation, different input combinations are tested to verify the correct output behavior. The tutorial provides a hands-on approach to understanding encoder circuits, making it a valuable resource for students in digital electronics and multimedia broadcasting. The video concludes with a summary and an invitation to engage with the content.
Takeaways
- 😀 The video tutorial is about creating a digital encoder with 8 inputs and 3 outputs using Proteus simulation software.
- 😀 The tutorial is aimed at students in the Multimedia Broadcasting program at the Electronic Polytechnic of Surabaya.
- 😀 The first step involves creating a new project in Proteus and naming it according to the user's preference.
- 😀 The encoder logic includes 8 input signals (D0 to D7) and 3 output signals (Y0, Y1, Y2).
- 😀 OR gates are used in the encoder circuit to combine the inputs for determining the output states.
- 😀 Various input combinations produce specific outputs according to a predefined table in the tutorial.
- 😀 The tutorial demonstrates how to simulate the encoder's behavior in Proteus, with output signals indicated by LEDs.
- 😀 The values of the outputs are dependent on the active input signals (D1, D2, etc.), with each combination resulting in a different output value.
- 😀 The video also covers the use of ICs and logic gates in the simulation, including 4-input OR gates.
- 😀 The end goal is to compare the simulated output results with the expected values from the encoder's table.
- 😀 The video concludes with a reminder for viewers to like, comment, and subscribe to future tutorials.
Q & A
What is the main focus of the video tutorial?
-The main focus of the video tutorial is to explain how to create and simulate an encoder with eight inputs and three outputs using Proteus simulation software in a digital electronics lab exercise.
What is the first step in setting up the project in Proteus?
-The first step is creating a new project in Proteus, where the user can choose a name for the project and the directory for saving it.
Why does the instructor choose not to create a PCB layout?
-The instructor decides not to create a PCB layout because the focus of the project is on simulation rather than physical implementation on a PCB board.
What are the inputs and outputs involved in the encoder?
-The encoder has eight inputs (D1, D2, D3, D4, D5, D6, D7, D8) and three outputs (Y0, Y1, Y2), which correspond to different combinations of input values.
What kind of logic gates are used in the design?
-The design uses OR gates to combine input values. The instructor uses both 2-input and 4-input OR gates to implement the encoder logic.
How does the encoder output respond to the active input conditions?
-The encoder output changes according to a predefined table that defines how the outputs Y0, Y1, and Y2 respond to various combinations of active inputs. Each combination of active inputs generates a specific output value.
What role do the LEDs play in the simulation?
-The LEDs are used to visually display the output values. When the encoder outputs a '1', the corresponding LED lights up, providing a clear indication of the output state.
How is the encoder's output behavior verified in the simulation?
-The encoder's output behavior is verified by activating various input combinations and observing the corresponding changes in the output LEDs. The output values are compared to the expected results based on the encoder table.
What is the significance of the table mentioned in the video?
-The table in the video is used to define the relationship between the eight input values and the three output values. It specifies which output should be active for each possible combination of inputs.
What should the user expect when all inputs are inactive?
-When all inputs are inactive, the output values will be '0', and none of the LEDs will light up, confirming that the encoder logic works as expected when no inputs are active.
Outlines

Этот раздел доступен только подписчикам платных тарифов. Пожалуйста, перейдите на платный тариф для доступа.
Перейти на платный тарифMindmap

Этот раздел доступен только подписчикам платных тарифов. Пожалуйста, перейдите на платный тариф для доступа.
Перейти на платный тарифKeywords

Этот раздел доступен только подписчикам платных тарифов. Пожалуйста, перейдите на платный тариф для доступа.
Перейти на платный тарифHighlights

Этот раздел доступен только подписчикам платных тарифов. Пожалуйста, перейдите на платный тариф для доступа.
Перейти на платный тарифTranscripts

Этот раздел доступен только подписчикам платных тарифов. Пожалуйста, перейдите на платный тариф для доступа.
Перейти на платный тарифПосмотреть больше похожих видео

Tutorial Proteus 8 Professional para principiantes

Introduction to Arduino Mega 2560 | Pinout | Features | Proteus Simulation

Find a function’s output value when given an input value
Vivado01 1 Familiarizacao com o Vivado e Simulacao de uma AND2

Simulasi Penyearah Setengah Gelombang & Gelombang Penuh PROTEUS 8 || Merangkai Penyearah Dioda

Band Stop Filter Using HFSS Software
5.0 / 5 (0 votes)
