3D bracket with Solid and Surface tools of AutoCAD
Summary
TLDRIn this AutoCAD tutorial, the process of creating a simple 90-degree angle bracket is demonstrated using a combination of 3D modeling and surfacing tools. The tutorial walks through the steps of drawing basic shapes, trimming, joining, extruding, and applying tools like press pull and patch to create a 3D solid. The final design includes grooves and precise detailing, with a smooth transition from 2D to 3D. The video also highlights the benefits of Skillshare for learning software like Photoshop and Illustrator, offering a free trial to the first 1000 viewers.
Takeaways
- 😀 Switch to the 3D modeling workspace in AutoCAD using the gear icon for easy access to 3D tools.
- 😀 Start your 3D design by drawing a rectangle with specific dimensions using the 'Rectangle' tool.
- 😀 Use the 'Circle' tool to create circles at specific points, adjusting the radius as needed for your design.
- 😀 Clean up the drawing using the 'Trim' and 'Join' tools to ensure all segments form a continuous polyline.
- 😀 Convert your 2D drawing into 3D by using the 'Press Pull' tool to extrude the shapes to the desired height.
- 😀 Switch to the front view to draw additional shapes and adjust the positioning for accuracy.
- 😀 Use 'Break at Two Points' for trimming and refining your geometry when the regular trim tool doesn't work.
- 😀 Use the 'Extrude' tool to create 3D shapes from 2D profiles, and avoid using the 'Press Pull' tool in certain scenarios where it doesn't work as expected.
- 😀 Make use of the 'Patch' tool to create 3D surfaces from multiple splines, filling the gaps in your design.
- 😀 Use the 'Blend' tool to smoothly connect edges and create a continuous 2D profile before converting it into 3D.
- 😀 Finalize your model by using the 'Sculpt' tool to convert your surfaces into a 3D solid, allowing you to perform further operations like creating grooves.
Q & A
What is the purpose of this video tutorial?
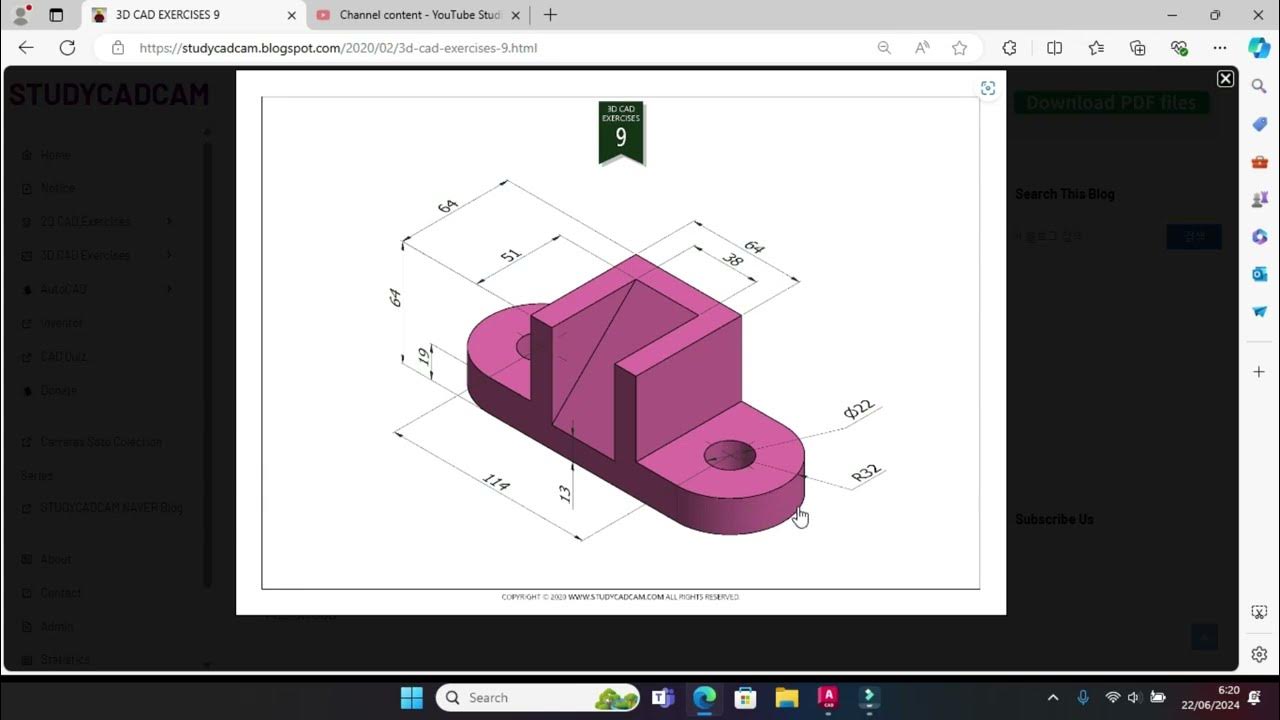
-The tutorial demonstrates how to create a simple 90-degree angle bracket in AutoCAD using a combination of 3D modeling and surfacing tools.
What workspace does the instructor switch to in AutoCAD for 3D modeling?
-The instructor switches to the '3D Modeling' workspace, which can be accessed by clicking the gear icon and selecting the 3D modeling option.
What basic shapes are used in the tutorial to create the bracket?
-The instructor uses a rectangle and two circles to form the basic shapes required for the bracket.
What is the purpose of the 'Press Pull' tool in this tutorial?
-The 'Press Pull' tool is used to add height to the 2D shapes and convert them into 3D objects by extruding them.
Why did the instructor use the 'Extrude' tool instead of 'Press Pull' in some instances?
-The 'Press Pull' tool was not highlighting the required area, so the instructor switched to the 'Extrude' tool to properly add height to the 3D object.
What technique does the instructor use to clean up the drawing before converting it into 3D?
-The instructor uses the 'Trim' and 'Break at Two Points' tools to clean up unnecessary lines and prepare the drawing for 3D conversion.
How does the instructor handle the rotation of the drawing to make further adjustments?
-The instructor rotates the drawing using the 'Orbit' feature and adjusts the view to better align the parts for the next steps in the modeling process.
What is the role of the 'Blend' tool in this tutorial?
-The 'Blend' tool is used to smooth out connections between lines and curves, creating a continuous spline between edges for a clean 3D surface.
How does the instructor make the 3D model airtight before converting it into a solid?
-The instructor uses the 'Extrude' tool to close any gaps and ensure that the surface is airtight, then converts it into a solid using the 'Sculpt' tool.
What is the purpose of the 'Boolean' tool in the tutorial?
-The 'Boolean' tool is used to subtract the shapes from the solid, creating the final holes in the bracket.
Outlines

Этот раздел доступен только подписчикам платных тарифов. Пожалуйста, перейдите на платный тариф для доступа.
Перейти на платный тарифMindmap

Этот раздел доступен только подписчикам платных тарифов. Пожалуйста, перейдите на платный тариф для доступа.
Перейти на платный тарифKeywords

Этот раздел доступен только подписчикам платных тарифов. Пожалуйста, перейдите на платный тариф для доступа.
Перейти на платный тарифHighlights

Этот раздел доступен только подписчикам платных тарифов. Пожалуйста, перейдите на платный тариф для доступа.
Перейти на платный тарифTranscripts

Этот раздел доступен только подписчикам платных тарифов. Пожалуйста, перейдите на платный тариф для доступа.
Перейти на платный тариф5.0 / 5 (0 votes)


