Basic Chemistry Lab Equipment
Summary
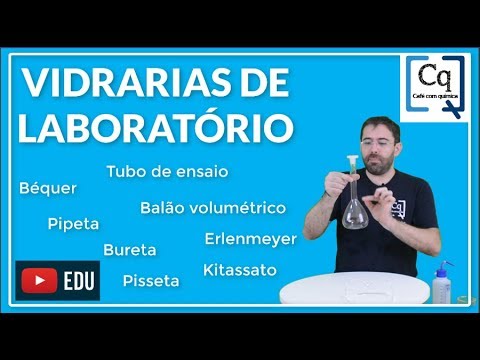
TLDRThis video script offers a detailed introduction to essential lab equipment, focusing on glassware such as beakers, flasks, and graduated cylinders, each with specific uses and features. It also covers the proper handling of these items with tools like test tube holders, crucible tongs, and beaker tongs. The script further explains heating methods using a Bunsen burner, ring stands, and wire gauze, and introduces various other lab tools, including scoopulas, watch glasses, evaporating dishes, filter funnels, glass stirring rods, pipettes, and thermometers. The goal is to familiarize viewers with lab terminology and equipment functions, preparing them for practical lab sessions.
Takeaways
- 🧪 Beakers are containers with straight parallel sides used for holding liquids, not for precise measurements.
- 🥂 Erlenmeyer flasks have a conical shape with a narrower mouth, useful for containing splashes during chemical reactions.
- 📏 Graduated cylinders are essential for accurately measuring the volume of liquids with marked lines and numbers.
- 🔬 Test tubes and racks are used for conducting small-scale chemical reactions and keeping the tubes upright.
- 🤏 Test tube holders are used to securely hold test tubes, especially when heating or moving them.
- 🔥 Crucible tongs are designed for handling very hot items like crucibles and are not meant for picking up test tubes.
- 🍽 Beaker tongs with rubber tips are used for safely lifting and moving hot beakers.
- 🔥 Bunsen burners are used for heating substances in a lab setting and require proper lighting techniques.
- ⏸ Ring stands with iron rings and wire gauze provide a stable and even heating platform for lab equipment.
- 🥄 Scoopulas are small tools for transferring solid powders or crystals from one place to another.
- 👀 Watch glasses are used for observing substances but should not be heated due to their fragility.
- 🍲 Evaporating dishes are made of strong porcelain for heating and evaporating liquids safely.
- ☕️ Filter funnels are used to separate solids from liquids through filtration, similar to a coffee maker.
- 🥄 Glass stirring rods are made of Pyrex to avoid reactions with certain chemicals, especially acids.
- 💧 Pipettes are used for transferring small, precise amounts of liquid from one place to another.
- 🌡 Thermometers are essential for measuring temperatures in various lab processes.
Q & A
What is the primary purpose of a beaker in a laboratory setting?
-A beaker is primarily used to hold substances, such as liquids. It has straight parallel sides and is not typically used for precise measurements due to its lack of accuracy.
How does the shape of an Erlenmeyer flask differ from that of a beaker?
-An Erlenmeyer flask has sides that are not parallel; they slope inwards, making the mouth of the flask narrower than the base. This design helps prevent splashing during chemical reactions.
Why are graduated cylinders important in a laboratory?
-Graduated cylinders are essential for measuring the volume of liquids accurately. They have numbers and lines on the side to provide precise volume readings.
What is the purpose of a test tube and how is it typically stored?
-A test tube is used for conducting small-scale chemical reactions. It is typically stored in a test tube rack to prevent it from falling over due to its rounded bottom.
What is a test tube holder used for?
-A test tube holder is used to securely hold a test tube, especially when it needs to be heated or handled without direct contact with the glass, to avoid breakage or burns.
What is the difference between crucible tongs and beaker tongs?
-Crucible tongs have a unique bent design to hold crucibles, which are small porcelain cups used for heating substances. Beaker tongs, with rubber tips, are padded and designed to grip and carry hot beakers.
How is a Bunsen burner used in a laboratory?
-A Bunsen burner is used to provide a hot flame for heating substances in a laboratory. It is connected to a gas source and lit at the tip to produce the flame.
What is the purpose of a ring stand and wire gauze in a laboratory setup?
-A ring stand provides a stable platform for laboratory equipment. A wire gauze, placed on top of an iron ring on the stand, creates an even heating surface for beakers or other containers.
What is a scoopula used for in a laboratory?
-A scoopula is a laboratory tool that is half scoop, half spatula, used for transferring solid powders or crystals from a container to another location in the lab.
What is the difference between a watch glass and an evaporating dish?
-A watch glass is a shallow, glass cover used for observing substances without heating. An evaporating dish, on the other hand, is a larger, more robust container made of porcelain, used for heating and evaporating liquids.
What is the function of a filter funnel in a laboratory?
-A filter funnel is used to separate solids from liquids through filtration. A filter paper is placed in the funnel, and the mixture is poured through it, allowing the liquid to pass through while the solid remains on the paper.
Why is it important to use a glass stirring rod instead of a metal one in certain laboratory procedures?
-A glass stirring rod, typically made of Pyrex, is used to prevent reactions with the substances being stirred, especially when dealing with acids or other reactive chemicals. Metal rods could react with these substances, leading to contamination or inaccurate results.
What is the purpose of a pipette in a laboratory?
-A pipette is a tool used for transferring small, precise volumes of liquid from one place to another. It is especially useful for adding measured amounts of reagents in chemical reactions.
Why might a mercury thermometer not be the preferred choice in a modern laboratory?
-Although mercury thermometers are coated to prevent breakage, they are generally not preferred due to the potential environmental and health hazards associated with mercury exposure.
Outlines
🧪 Introduction to Lab Equipment
The script introduces viewers to common laboratory equipment, focusing on glassware and instruments. It aims to familiarize viewers with the names and uses of various lab tools before they engage in practical lab work. The narrator explains the differences between beakers, flasks, and graduated cylinders, describing their shapes, typical uses, and the inaccuracies of the scales found on some glassware. Beakers are for holding substances, flasks are ideal for chemical reactions due to their shape, and graduated cylinders are essential for measuring liquid volumes accurately.
🔬 Additional Lab Glassware and Heating Equipment
This paragraph delves into other types of glassware such as test tubes and crucibles, along with their respective holders and tongs. Test tubes are used for small-scale chemical reactions and are kept upright in racks due to their rounded bottoms. Crucible tongs are designed for handling hot items, including crucibles, which are small porcelain cups used for heating substances. The paragraph also introduces Bunsen burners and various heating structures like ring stands and wire gauze, which are essential for conducting experiments that require heat.
🔍 Lab Tools for Handling and Measuring Substances
The final paragraph covers a range of laboratory tools used for handling and measuring substances. It discusses the use of a scoopula for transferring solid powders or crystals, a watch glass for observing substances, and an evaporating dish for heating without evaporating liquids. The paragraph also explains the use of a filter funnel for separating solids from liquids, similar to a coffee maker. Additionally, it mentions a glass stirring rod, a pipette for transferring small volumes of liquid, and the importance of using thermometers for measuring temperatures in experiments. The narrator emphasizes the importance of learning the names and functions of lab equipment for successful lab work.
Mindmap
Keywords
💡Lab Equipment
💡Beaker
💡Erlenmeyer Flask
💡Graduated Cylinder
💡Test Tube
💡Test Tube Holder
💡Crucible Tongs
💡Bunsen Burner
💡Ring Stand
💡Scoopula
💡Evaporating Dish
💡Filter Funnel
💡Glass Stirring Rod
💡Pipet
💡Thermometer
Highlights
Introduction to lab equipment and glassware for beginners.
Explanation of the three general types of glassware: beakers, flasks, and cylinders.
Beakers are used for holding liquids but not for accurate measurements.
Beakers come in various sizes, with a 250 ml beaker being a common size.
Flasks, specifically Erlenmeyer flasks, have non-parallel sides to prevent splashing.
Graduated cylinders are used for accurate volume measurements of liquids.
Different sizes of graduated cylinders are available for varying volume measurements.
Test tubes and racks are used for conducting small chemical reactions.
Test tube holders are used to securely hold test tubes during heating or reactions.
Crucible tongs are designed for handling hot items like crucibles, not test tubes.
Beaker tongs with rubber tips are used for safely lifting hot beakers.
Bunsen burners are used for heating substances in a lab setting.
Ring stands and wire gauze are used to create a stable heating platform.
Clay triangles are used to secure crucibles for heating.
Scoopulas are used for transferring solid powders or crystals.
Watch glasses are used for observing substances but should not be heated.
Evaporating dishes are used for heating and evaporating liquids.
Filter funnels are used for separating solids from liquids through filtration.
Glass stirring rods are used for stirring without reacting with the substance.
Pipettes are used for transferring small amounts of liquid.
Thermometers are essential for measuring temperatures in various lab processes.
Advice to review the video and use a handout for better understanding of lab equipment.
Transcripts
well hi welcome to the lab I thought
we'd take a little bit of time today to
take a look at some of the lab equipment
that we use some glasswar and some
instruments so that when you take your
first lab
you'll be able to understand what the
equipment is called and so I'm going to
show you a few of these things and tell
you how they're used so that you become
familiar with them I will tell you some
of the glasswar is a little confusing at
first until you're used to the
terminology so hopefully we'll get you
used to the terminology pretty
quick we're going to start with some
basic glassware now there are three
General types of glassware that you're
going to be coming in Conta with beers
flasks and cylinders it's pretty simple
actually the way you tell the difference
between them will also help you
understand how they're used so we'll
start with beakers a beaker is anything
with straight parallel sides it looks
kind of like a drinking cup although you
never want to drink anything out of
here but it has straight parallel sides
sometimes a beaker has numbers on the
side of it uh but we don't really use
this scale we don't use these numbers to
do really anything
important um it's just to give you an
idea of about how much is in here
they're not very
accurate you don't really measure with
beers beers aren't used to make
measurements beers are used just to hold
stuff so you might put a liquid in here
if you wanted to boil some water for
example quite a bit of water you would
put it in here beakers come in various
sizes this is probably one of the most
common sizes this is a 250 ml Beaker and
again you'll see it's got numbers on the
side but we don't use those numbers for
anything um and then they go very large
and they even get down to very very
small this is a tiny little uh 10ml
Beaker and uh it's isn't it cute it's
cute so a beaker has straight parallel
sides it may or may not have numbering
on it it's just used to hold stuff a
flask on the other
hand the sides are not parallel this
side almost looks like a cone and as a
matter Fact one of the names of it is a
conical flask but its more common name
is named after the scientist that
created it it's called an Erin Meer
flask an Erin Meer flask has sides that
are not parallel they slope in in other
way in other words the mouth of the
flask is much narrower than the base of
the flask in the case of a beaker the
mouth and base are essentially the same
diameter more or less but uh flask is
much an hour at the top and this
prevents splashing so we often do
chemical reactions in flasks because if
there's any kind of splashing it'll
usually be contained by the sides this
is probably the most common size this is
a
250ml earin Meer flask you'll be using
these every now and then and again they
get very large or they get very small
this is a 25ml Earl Meer flask but you
see it's the same shape the same general
side some of these may have numbers on
them but we don't we don't really
measure anything other than approximate
amounts in a Myer flask if you want to
measure volume you need to use something
called a graduated cylinder many of you
have seen a graduated cylinder before
it's called a graduated cylinder because
it has not only numbers but many numbers
and lines if you can see those right
along there numbers and lines on the
side this is what we use to measure
volume volume of liquids specifically
it's fairly accurate in other words we
can get a pretty good idea of how much
volume we have in here if we read it
correctly there are different sizes this
is a 50ml graduated cylinder we have 25
milliliters it's a little bit smaller
and we have 10 milliliters they're very
skinny they don't hold quite as much and
the lines are a lot smaller on a 10ml
flask if you can see how small those
lines are on a 10m graduated cylinder
they're very small and that means that
we're actually able to get a very
accurate volume uh small volume but very
accurate with something like this so we
have beers flasks and graduated
cylinders graduated cylinders are really
the only ones that we're going to use to
measure volume beers and flasks hold
stuff but don't generally we don't
generally measure with them even if they
have lines on them some other glassware
that you're going to become familiar
with you've probably seen something like
this in most movies about ABS or you may
have actually used these before these
are of course the ubiquitous test tube
and the rack the test tube rack that we
keep them in uh we need to keep them in
a rack because if you look very
carefully their bottoms are rounded
which means they won't stand up if I put
it down on the bench it'll fall right
over so we often don't want them to fall
over because whatever's in might spill
so we put them in a rack to keep them
upright the test tubes are where we do
small reactions we do chemical reactions
in test tubes all the time tests test is
just another word for reaction often in
chemistry and if we want to hold a test
tube we're going to use a very specific
piece of equipment called test tube
holder this is a test tube holder you
squeeze it together like this the Jaws
open you can put your test tube inside
like that and now we can hold the test
tube securely but without having to
actually touch the glass in case there's
something very hot in here or if we want
to put it into a flame and heat it test
tube
holder test tube holder test tube
rack test
tube something that people get confused
with the test tube holder and the test
tube
rack are these things now these are
called Crucible tongues and they have a
very unusual end to them see they're
kind of bent like that and they have
this weird sort of bent piece in the
middle Crucible tongs are not going to
be used to pick up test
tubes um they are used to pick up things
that are very hot you can hold something
directly in a bun and burner flame with
test with uh Crucible tongs or you can
use it to pick up something a hot piece
of glass wear for example if this Beaker
were a little too hot to touch it's
small enough I can grip it by the sides
uh but a a crucible Tong was originally
invented to hold well it's namesake a
crucible and a crucible is a small
porcelain cup a little
hat and inside this cup we can do some
heating we can heat things very strongly
cuz porcelain conducts heat pretty well
and originally this little weird bent
piece in the middle of the of the uh
Crucible tongs was designed to allow The
Crucible to sit right in there
unfortunately if you don't have a steady
grip or you relax your hand just a
little bit it'll slip right through and
you'll break your Crucible so when we
use crucibles we don't carry the hat
around with it the lid we just grip it
by the sides and that thing's not going
anywhere it's very very secure that way
so we can carry it around the lab put it
up we don't want to be touching it with
our hands because it's usually going to
be very hot so we can carry it around
with The Crucible tongs pretty
easy so these Crucible tongues these
with the rubber tips are called Beaker
tongs and these are used to pick up hot
beakers usually it's a lot easier than
this especially if a beaker is a little
bit larger and full of boiling water
it's going to be very heavy and it's
going to be hard to lift with Crucible
tongs so we use the beaker tongs they're
padded they've got a little nonstick or
non-slip uh rubber sleeve on each of the
the arms and uh we can carry around our
Beaker like
that so we can heat liquids in beakers
we can heat solids in crucibles we can
do chemical reactions in test tubes or
in earin Meer flasks what if we want to
heat something we keep talking about
heating things how do we heat things
well we're going to use something called
a bunson burner here's a bunson
burner very famous uh structure here in
in chemistry we use these buns and
burners to heat things all the time in a
later video I'll show you how to light
it properly there's a right way to light
this thing and a way that's not quite as
efficient and more difficult so I'll
show you the easy and correct way of
lighting buns and burner later on but we
heat things with buns and burner this
end of the hose gets hooked up to the
gas and uh we light the tip right here I
turn on the gas and light it and we get
a nice flame that can get fairly hot
about 700° or so well uh we can hold
something directly over the flame using
one of our tongs but sometimes we just
want to let it sit especially if we're
going to do uh let water boil and so if
we want to do that we're going to set up
a little structure called a ring stand
with a ring and some other items that we
might put
on so here is a ring
stand and and it has this little
platform base we can often put our
bunson burner directly on there and then
we can set something clamp something to
the stand
itself in this case I have an iron ring
it clamps right on here I can put the
bunson burner right underneath it and
then if I want a platform or something I
can use for example this this is called
a wire gauze it's made out of wire it
has this asbest circle in the center
that allows us to uh heat evenly and I
can put the wire gauze on top of the
iron ring and I get a very nice little
cook top and then I can put my Beaker on
top of that and I can heat it nicely so
that's one way that I can heat things if
I want to heat a crucible up on
my little oven top I can do this but
there's probably a little bit easier way
and uh better way to heat a crucible we
can use something called a clay triangle
this is a clay triangle and that
actually holds the Cru Crucible rather
nicely right in place if we wanted to
heat The Crucible when it's time to
light the bunson burner I use a sparker
this is a sparker it creates a little
spark and I can light the buns and burer
again you'll see this later on when we
go ahead and uh show you how to light
the bunson bur just a couple more to do
couple of other pieces of equipment that
you're going to be using that you want
to become familiar with uh this anytime
you need to take take some powders or
crystals out of a uh a beaker for
example or out of a bottle you're going
to use this thing this is called a
scoopula it's like half scoop half
spatula and so you can reach in and you
can grab some and it sort of sits right
in there it's like a little spoon it
sits in there and you can transfer it
from one place to another so the
scoopula is used to get solid powders or
crystals out of bottles or beakers and
put them someplace where you want to use
them this looks like a giant contact
lens it is in fact called a watch glass
and we can use this we can put something
on there to observe it uh we don't ever
heat a watch glass be very careful
sometimes you might want to heat this
don't Heat this this uh Pyrex that it's
made out of is pretty fragile and it'll
crack if you try to heat it if you do
want to heat something in an open
container that's not like a crucible you
can use The Crucible Big Brother this is
an evaporating dish and you can put
something in here and you can heat it
very strongly it's also made out of very
strong porcelain it will heat very well
you can put it in here and it will well
it'll evaporate whatever liquid might be
in there so evaporating dishes are
better to evaporate liquids
overheat most of you probably know what
this is this is called a filter funnel
this is used when we need to filter a
solid out of a liquid we put a piece of
filter paper in here we pour our mixture
through the solid gets stuck in the
filter paper and the liquid goes right
on through same general idea as a basic
coffee maker that's kind of how coffee
makers work the coffee filter is the
filter paper the structure that you put
that filter in is like the funnel and
the mixture is the coffee grounds and
the water going through it and what
comes through is what is dissolved
what's mostly liquid so we use the
coffee filter uh filter
funnel just a couple
more this is a glass stirring Rod it is
used you guessed it to stir it's glass
it's Pyrex actually so it doesn't react
you generally don't want to stir with
metal especially if you have acids or
things that react with metal uh use
Pyrex because it's not going to
react
this looks like an ey dropper it is
actually called A pipet and A pipet is
used well that's what an eye dropper is
it's a pipet so if you want to suck up a
little liquid on one place and put it
someplace else you use a pip hat these
things are disposable we throw them out
all the time if you use them generally
they get a little dirty you can't clean
them real well because the opening at
the at the tip there is very very small
so we just throw them out
and
finally a thermometer you're going to
need to take some temperatures
occasionally this is a thermometer now
this one is a mercury thermometer we
probably will not be using mercury
thermometers even though it is coated
with something so that it won't break uh
we generally don't like to use mercury
so the ones that you use will probably
be alcohol means they'll have a blue or
red liquid in there uh still used to
take temperature so that's a lot of
equipment um if you've just watched this
video through without pausing you're
going to miss a lot you should probably
go back and use the handout that has all
the pictures and write in their names
and write down maybe their structures or
their functions so that you know what
they do you're going to start to need to
know what these things are because when
we do labs in the lab description it'll
say take a 50ml graduated cylinder well
you need to know what to look for if
you're doing a 50ml graduated cylinder
so learn your lab equipment learn their
names learn their basic functions and
don't forget to do the Whisk at the end
of the video and we'll see you later
関連動画をさらに表示
ALAT ALAT LABORATORIUM KIMIA DAN KEGUNAANNYA - MATERI KIMIA SMA KELAS X
Common Scientific Glassware and the Undergraduate Chemistry Laboratory
Lab Tools and Equipment - Know your glassware and become an expert Chemist! | Chemistry
KIM 2 7 FIN
20 most important apparatus used in chemistry lab | chemistry lab apparatus name with picture
The Chemical Laboratory
5.0 / 5 (0 votes)