Raspberry Pi Anemometer: Measuring Wind Speed!

ExplainingComputers
14 Mar 202120:50

Summary

TLDRIn this video, the creator builds a homemade anemometer to measure wind speed as part of a Raspberry Pi weather station project. Using low-cost components like ping-pong balls, an infrared sensor, and a Raspberry Pi, the video walks through the assembly, wiring, and coding process. The goal is to track wind speed alongside temperature, pressure, and humidity data. The project introduces key concepts in electronics, Python programming, and sensor integration. The creator hints at future plans to expand the weather station and explore plant cultivation monitoring using Raspberry Pi sensors.

Takeaways

  • 😀 The video is a tutorial on building a homemade anemometer to measure wind speed and integrate it with a Raspberry Pi weather station.
  • 🛠 The project uses a Raspberry Pi 3 B+, but any model can be used. An infrared reflectance sensor is employed to detect rotation.
  • 💡 The anemometer is constructed with simple materials like ping-pong balls, a biro, M3 nuts and bolts, and a high-impact polystyrene sheet.
  • 🔍 The infrared sensor works by emitting infrared light that reflects off a surface and is detected by a phototransistor.
  • 📏 The anemometer's design includes a black disc with a white mark to enable the sensor to track rotation.
  • 💻 The video demonstrates writing Python code to process the sensor's input and calculate the wind speed.
  • 🔢 The code accounts for the anemometer's efficiency by using a factor to adjust the final wind speed calculation.
  • 📈 Data including temperature, pressure, humidity, and wind speed is recorded and can be exported to a spreadsheet.
  • 🌤️ The anemometer was tested both indoors with artificial wind and outdoors in a garden, showing variable results with real weather conditions.
  • 🌱 The creator plans to expand the project by adding more sensors and exploring Raspberry Pi applications in plant cultivation and monitoring.

Q & A

  • What is the purpose of the video?

    -The purpose of the video is to demonstrate how to build a low-cost homemade anemometer using a Raspberry Pi to measure wind speed and integrate it into an existing Raspberry Pi weather station project.

  • What is an anemometer, and how does it work in this project?

    -An anemometer is a device used to measure wind speed. In this project, the anemometer is constructed using ping-pong balls, a biro, and a sensor. The wind spins the device, and the Raspberry Pi records the number of rotations using an infrared reflectance sensor to calculate wind speed.

  • Which Raspberry Pi model is used in the project?

    -The project uses a Raspberry Pi 3 B+, but the creator mentions that any model of Raspberry Pi can be used.

  • What is the role of the infrared reflectance sensor in this project?

    -The infrared reflectance sensor is used to measure the rotation of the anemometer. It detects the reflection of a white mark on a rotating disc attached to the anemometer, allowing the Raspberry Pi to count the number of rotations.

  • What materials are used to construct the anemometer?

    -The materials used include ping-pong balls (cut in half to create cups), a biro (for the axle), m3 nuts and bolts, a high-impact polystyrene sheet, liquid polystyrene adhesive, and a black disc with a white mark for rotation detection.

  • How is wind speed calculated using the anemometer?

    -Wind speed is calculated by measuring the number of rotations of the anemometer in a set period, determining the distance traveled by the wind based on the circumference of the rotating cups, and applying an anemometer factor to account for inefficiencies in the measurement process.

  • What coding languages and libraries are used in the project?

    -The project uses Python for coding. Libraries such as the GPIO library are used to interact with the Raspberry Pi's pins, and additional libraries handle timing and sensor inputs.

  • What is the purpose of the 'anemometer factor' in the wind speed calculation?

    -The anemometer factor is a multiplier used to account for inefficiencies in the anemometer's operation, such as friction and energy loss. The factor is estimated based on the design and efficiency of the specific anemometer.

  • How does the Raspberry Pi record the weather data?

    -The Raspberry Pi runs Python code that collects data from the anemometer (wind speed) and a BME280 sensor (temperature, pressure, humidity). This data is recorded in a spreadsheet every 10 minutes.

  • What future plans does the creator have for this Raspberry Pi weather station project?

    -The creator plans to add more sensors to the weather station and explore using the Raspberry Pi to control and monitor plant cultivation in a greenhouse.

Outlines

00:00

🌦️ Introduction to 
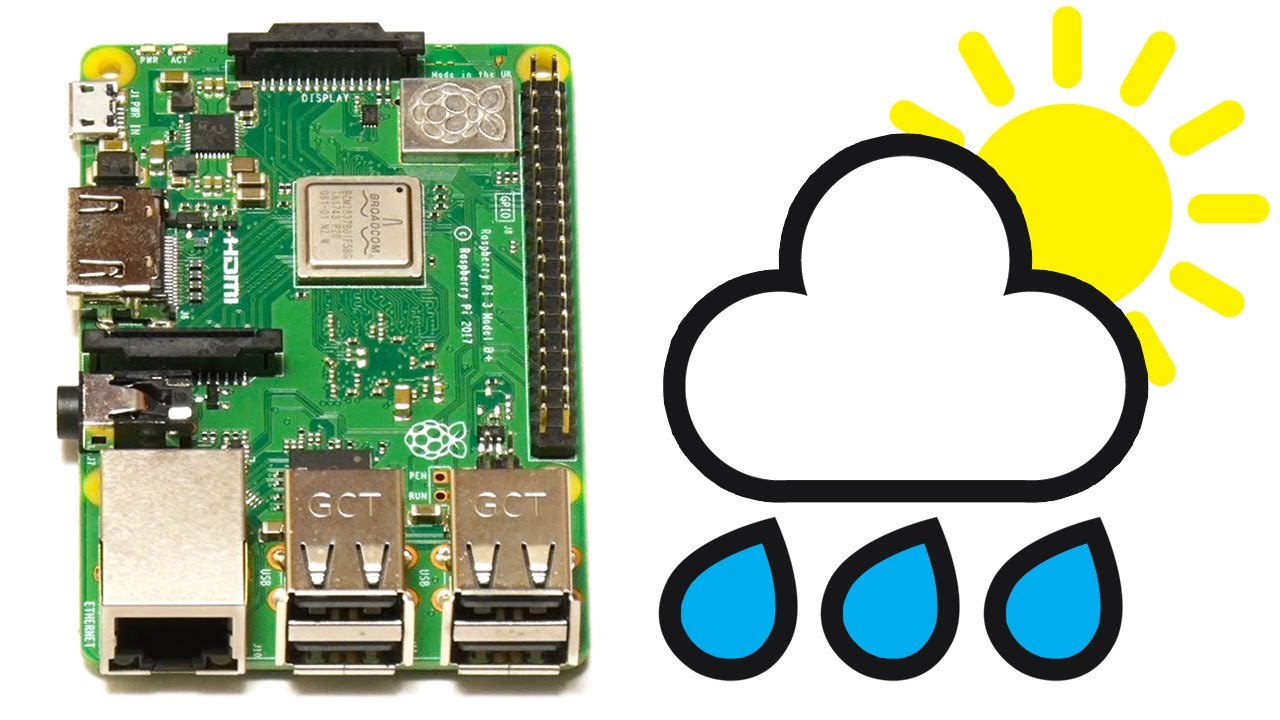
Raspberry Pi Weather Station Project

The video begins with an introduction to a Raspberry Pi weather station project. The presenter explains that they previously built a sensor-based station for temperature, pressure, and humidity recording, which was popular. Now, the project is expanded by adding a homemade anemometer to measure wind speed. This low-cost project focuses on learning, using an infrared sensor and Python code for wind measurement. A Raspberry Pi 3 B+ is used, although any model can work. The presenter also mentions that the BME 280 sensor from the previous project will be reused later.

05:00

🔧 Introduction to the Infrared Reflectance Sensor

The presenter introduces the main sensor, an infrared reflectance sensor bought from Adafruit, explaining its components: an infrared LED and an infrared phototransistor. The sensor detects reflective surfaces and will be used to measure wind rotation. The plan is to mount the sensor on a Raspberry Pi, with reflective surfaces being tracked to monitor rotation. The presenter also mentions using components like ping-pong balls, a biro, and polystyrene sheet to build the anemometer cups and arms, which will help measure wind speed.

10:00

⚙️ Assembling the Anemometer and Initial Tests

In this segment, the presenter constructs the anemometer by cutting ping-pong balls in half to create wind-catching cups and attaching them to arms connected to a biro axle. The parts are assembled using liquid polystyrene cement. Despite uncertainty about its success, the anemometer rotates when blown on. The next step involves adding a black disc with a white mark to the axle, allowing the sensor to track rotation and eventually calculate wind speed.

15:02

🔩 Mounting the Anemometer and Sensor Setup

The presenter showcases the completed anemometer assembly, with the white mark for the sensor attached to the axle. The setup includes a plastic housing to protect the sensor, which will be mounted on a pole to measure wind speeds at a height. Inside the housing, the sensor is temporarily secured, connected to the Raspberry Pi via a cable. The resistors and jumper leads are properly wired, and the circuit is explained in detail with a diagram of how the components interact with the GPIO pins. The presenter moves on to write and test basic Python code for detecting wind rotation.

20:03

💻 Writing and Testing Wind Speed Calculation Code

A detailed explanation of the code for measuring wind speed is provided. The code uses GPIO inputs to track sensor rotations, calculates the wind speed based on rotations per second, and adjusts for real-world inefficiencies using an anemometer factor. The presenter tests the code, first with no wind to confirm zero rotations, and then by manually spinning the anemometer. The test shows accurate wind speed readings, with further improvements made by removing test outputs. The use of a high-pressure air device for stronger wind tests yields more accurate and faster rotations.

🌬️ Refining the Project with a BME 280 Sensor

The presenter reintroduces the BME 280 sensor from the previous weather station project and integrates it with the anemometer. Combined code is written to measure temperature, pressure, humidity, and wind speed, logging the results into a spreadsheet every 10 minutes. The code structure is explained, showing how it collects sensor data and saves it in real time. A test run is performed indoors to ensure the system records accurate weather data, with plans to test the setup outdoors.

📊 Outdoor Testing and Final Data Analysis

The video concludes with the anemometer mounted outside on an eight-foot pole, connected to the Raspberry Pi indoors. Using SSH, the presenter monitors the real-time data from the setup, including temperature, pressure, humidity, and wind speed. Over the course of a day, the weather conditions vary, and the anemometer continues functioning, logging wind speeds into the spreadsheet. The gathered data reflects changing weather patterns, confirming the success of the project. The presenter expresses satisfaction with the results and hints at future Raspberry Pi projects, including plant monitoring in a greenhouse.

Mindmap

Keywords

💡Raspberry Pi

Raspberry Pi is a small, affordable computer used for a variety of projects, including weather stations and automation systems. In the video, the Raspberry Pi 3 B+ model is used as the central device to collect and process weather data, like wind speed, temperature, and humidity.

💡Anemometer

An anemometer is a device used to measure wind speed. The video demonstrates a DIY anemometer built using ping-pong balls, a biro, and a sensor. The purpose of this project is to add wind speed measurements to a Raspberry Pi weather station.

💡Infrared Reflectance Sensor

An infrared reflectance sensor detects the reflection of infrared light from a surface. In the project, the sensor is used to track the rotation of the anemometer, which helps calculate the wind speed by detecting changes in reflectivity as the device spins.

💡Python Code

Python is the programming language used to write the software for controlling the Raspberry Pi and processing data from the sensors. The video explains how Python code is written to calculate wind speed based on rotations detected by the sensor.

💡BME 280 Sensor

The BME 280 sensor is a component that measures temperature, pressure, and humidity. It was used in a previous Raspberry Pi weather station project, and in this video, the sensor is integrated back into the system to collect additional weather data.

💡Ping-Pong Balls

Ping-pong balls are used as the rotating cups of the anemometer. These balls are cut in half and attached to arms extending from a biro, which allows them to catch the wind and rotate the device, enabling wind speed measurement.

💡High-Impact Polystyrene Sheet

This material, often called HIP sheet or plastic card, is used to create structural components for the DIY anemometer, such as the arms that hold the ping-pong ball cups. The plastic is lightweight and easy to work with, making it suitable for this kind of project.

💡Wind Speed Calculation

The process of calculating wind speed involves determining the circumference of the anemometer’s rotation and multiplying it by the number of rotations per second, as detected by the sensor. The Python code in the video performs this calculation using values like the diameter of the anemometer and a correction factor for inefficiency.

💡GPIO Pins

GPIO (General-Purpose Input/Output) pins are used to connect sensors and other components to the Raspberry Pi. In this project, the GPIO pins are used to power the infrared sensor and to read its output, which helps detect the rotations of the anemometer.

💡Weather Station

The Raspberry Pi weather station is the overarching project in which multiple sensors, including the anemometer and the BME 280 sensor, are used to collect weather data such as temperature, pressure, humidity, and wind speed. The station records this data for analysis and visualization.

Highlights

Introduces the Raspberry Pi weather station project using temperature, pressure, and humidity sensors.

The video focuses on building a homemade, low-cost anemometer to measure wind speed.

The key components for the anemometer include an infrared reflectance sensor, ping-pong balls, an old biro pen, and a high-impact polystyrene sheet.

An infrared LED and photo transistor are used to detect rotation by measuring reflections from a marked disc.

Explains the construction process of the anemometer, cutting ping-pong balls to create cups for capturing wind.

A black disc with a white mark is attached to the biro axle to help monitor rotation using the reflectance sensor.

The sensor is connected to a Raspberry Pi via GPIO pins, and code is written to measure wind speed based on the anemometer's rotation.

The Python code uses GPIO libraries to calculate rotations per second and wind speed in meters per second and miles per hour.

The diameter of the anemometer's cups and the inefficiency factor of the device are used to calculate wind speed accurately.

An initial test shows the code registering accurate readings based on manual rotation of the anemometer.

The video includes a demonstration of using high-pressure air to test the anemometer's response to wind speed.

The project also integrates a BME 280 sensor to measure temperature, pressure, and humidity alongside wind speed.

A combined code is written to log data every 10 minutes into a spreadsheet, capturing both wind speed and weather conditions.

The anemometer is mounted outdoors for real-time weather monitoring, and the project successfully logs hours of data.

Future plans are hinted at, including using the Raspberry Pi for controlling and monitoring plant cultivation in a greenhouse.

Transcripts

play00:01

[Music]

play00:12

welcome to another video from explaining

play00:14

computers

play00:17

earlier this year i took a temperature

play00:19

pressure and humidity sensor

play00:21

and used it to build a raspberry pi

play00:23

weather station that recorded data

play00:25

in a spreadsheet to my surprise

play00:28

this turns out to be a very popular

play00:31

project and so this time i'm going to

play00:33

take it

play00:33

further by building a homemade

play00:36

anemometer

play00:37

so that our raspberry pi weather station

play00:38

can also record the speed of

play00:40

the wind now i want to stress from the

play00:44

start

play00:44

that this is not a video about building

play00:46

a perfect anemometer

play00:48

rather what i'm doing here is a low-cost

play00:50

raspberry pi project

play00:52

which we're going to use to learn about

play00:53

all kinds of things including

play00:55

measuring rotation using an optical

play00:57

sensor and

play00:58

writing associated python code

play01:06

so in this project we're going to be

play01:09

using this

play01:10

raspberry pi 3 b plus but you can use

play01:13

any model of raspberry pi

play01:15

computer right now the bme 280 sensor we

play01:19

used in the first raspberry pi weather

play01:21

station video

play01:21

is connected to the pi but for now we'll

play01:23

disconnect this but we'll be wiring

play01:25

things up

play01:26

in this project so we could add this

play01:27

sensor back in again if we want to

play01:30

and the sensor we're going to be using

play01:32

in this video is

play01:34

this one which is an infrared

play01:36

reflectance sensor

play01:37

which adafruit sell for 1.95

play01:40

and which i purchased from primeroni for

play01:43

two pounds

play01:44

10. so let's open up this little bag

play01:50

there we are and in here we have two

play01:52

resistors whose purpose will become

play01:54

obvious and we've also got the sensor

play01:56

itself

play01:57

and if we take a closer look at this

play01:59

what we have here

play02:00

is two components in one package we have

play02:03

got

play02:04

an infrared led and an infrared photo

play02:07

transistor

play02:08

and the idea is that the led will emit

play02:11

infrared radiation infrared light and if

play02:14

there's a reflective surface

play02:16

above the sensor it will be reflected

play02:18

off the reflective surface

play02:20

back to the infrared photo transistor

play02:22

which will trigger its gate

play02:23

and we'll be able to register that on

play02:25

the pi

play02:27

and back in my raspberry pi gpio input

play02:30

video

play02:31

i wired up one of these sensors and

play02:33

showed how it can be used

play02:34

to turn on an led when it detected a

play02:37

black mark

play02:37

on a piece of white cardboard but

play02:41

you may ask how are we going to use a

play02:42

reflective sensor

play02:44

like this to measure the speed of the

play02:46

wind

play02:47

well the answer is over on this cutting

play02:50

mat we've got various other things we'll

play02:51

be using

play02:52

in this project if we start with a

play02:53

couple of ping-pong balls that's always

play02:55

rather exciting isn't it and we've also

play02:57

got an old biro gonna have an old biro

play03:00

we've got some m3 nuts and bolts we've

play03:03

got a

play03:04

stanley of a knife to help us out and

play03:06

we've got also here some

play03:07

liquid polystyrene adhesive and we're

play03:09

going to be using that

play03:10

with this stuff this is a two millimeter

play03:13

high impact polystyrene sheet hip

play03:15

sheet sometimes branded as plastic card

play03:18

and i'll give you more information in

play03:19

the video description on how you get

play03:20

hold of

play03:21

this product anyway what we're going to

play03:24

do is to take the two ping-pong balls

play03:26

and to cut them in half to make four

play03:28

cups which will then mount on

play03:30

arms sticking out from the biro

play03:33

we'll then mount this contraption in

play03:35

some sort of box and in theory when the

play03:37

wind blows

play03:38

it will spin around we'll also add a

play03:41

black disc with a white mark on it

play03:43

to our biro axle which should allow us

play03:45

to monitor rotation

play03:46

using the reflectance sensor and then

play03:50

finally by taking the distance between

play03:52

the cups and multiplying by

play03:54

pi we should be able to work out how far

play03:56

the wind has traveled

play03:57

in one anameter revolution which will

play03:59

allow us to write some code on the pi

play04:01

to calculate the speed of the wind

play04:05

so that's the theory let's now see if we

play04:07

can put it

play04:08

into practice

play04:15

right as you can see things have now

play04:17

progressed standing the knife has been

play04:20

hard at work helping you make these four

play04:22

little arms for

play04:23

the anemometer and i've got a hole

play04:25

drilled in them as well and i've got the

play04:27

ping pong balls which you can see either

play04:29

cut in two and these have got holes in

play04:30

the top too and the principle is we're

play04:33

going to use the nuts and bolts to

play04:34

attach these arms

play04:35

to the cups and to attach them to our

play04:37

axle which is the biro

play04:39

i've no idea if this is going to work so

play04:41

all we can do is to put it together

play04:42

and see what happens and so by the magic

play04:46

of filmmaking

play04:46

here we are i've now put the veins

play04:49

together and it seems to have worked

play04:52

pretty well i thought when i started

play04:54

this that the

play04:55

most difficult part of the whole project

play04:56

would be holding ping-pong balls onto

play04:58

the end of little arms

play05:00

onto some sort of axle and that seems to

play05:02

have worked

play05:03

it's held together just with the liquid

play05:05

cement

play05:06

onto the biro as well which i think is

play05:08

abs plastic so that's also been

play05:10

solvent welded quite successfully using

play05:13

the

play05:13

the solvent i've been using to do that

play05:16

and um

play05:17

hopefully this will work if i just stand

play05:18

it so you can see it like that

play05:20

this obviously will be in a proper mount

play05:22

it's it's standing on the ballpoint pen

play05:24

obviously ball point which i'm hoping is

play05:26

me a good axle but i'll just hold it

play05:28

like that which is not ideal but if i

play05:29

blow

play05:36

yes we have something that rotates when

play05:41

it's windy or artificially windy inside

play05:44

so we can now move on i think to

play05:46

building some sort of enclosure for this

play05:48

where we can put the sensor under here

play05:51

and we can record the rotation

play05:53

of our anemometer vein

play06:01

greetings here i am back again and as

play06:04

you can see i've now fitted a disk

play06:06

to our axle which was a easier said than

play06:08

done

play06:09

and on the disk there is this piece of

play06:12

white plastic which came from a piece of

play06:13

a

play06:14

buttery spread container and this is

play06:16

stuck on so that in theory

play06:18

our sensor will be able to detect that

play06:20

as this thing spins

play06:21

around and over here i built a little

play06:24

plastic card housing

play06:26

and this will eventually be bolted to

play06:27

the top of a long wooden

play06:29

post so we can get the anomer nice and

play06:32

high up

play06:32

you want to measure wind speed some

play06:33

distance from the ground and

play06:36

inside this box as you can hopefully see

play06:38

we've got our sensor which is currently

play06:40

just temporarily mounted with a piece of

play06:42

blu-tack putty so i can get the position

play06:44

absolutely right and it's been soldered

play06:46

to this six meter length of a

play06:49

telephone flex which is very handy for

play06:51

core cable to solder to

play06:52

the sensor with its four connections so

play06:55

let's take our axle and put it inside it

play06:58

just goes into a little notch down there

play07:00

and that down there and there was a top

play07:02

piece

play07:03

which drops in if i can get it in

play07:06

something

play07:06

like this this does bolt on but i'll

play07:08

just put it on like that for now

play07:10

and this thing will therefore stand up

play07:12

and hopefully

play07:14

yes it will rotate without any problems

play07:16

at all it's a bit

play07:17

uh jittery as you can see it's not the

play07:20

best uh

play07:21

spinning thing in the world but we can

play07:22

partially compensate for this in

play07:24

software as we will do a bit later in

play07:26

the video

play07:27

anyway for now you're probably wondering

play07:28

what goes on at the end of this cable

play07:31

and it's terminated in this which is a

play07:34

small piece of strip board which

play07:36

contains the resistors which came with

play07:37

the sensor

play07:38

plus an extra one i've thrown in for

play07:40

good measure and it's got jumper leads

play07:42

here

play07:42

going out to the raspberry pi and if you

play07:45

want to know exactly what's going on

play07:46

here you can see the soldering there

play07:48

on the back we look at this circuit

play07:50

diagram we can see the sensors led is

play07:52

connected to 5 volts

play07:53

and ground pins on the pi via 470 ohm

play07:56

current limiting

play07:57

resistor and the photo transistor is

play08:00

then fed

play08:00

3.3 volts from the pi with its emitter

play08:03

connected to

play08:03

gpio pin 12 via a 1k current limiting

play08:06

resistor which will protect the pin

play08:08

in case of a coding error and finally

play08:12

there's also a 10k pull down resistor

play08:14

also wired to the gpio

play08:16

pin this is all a very standard kind of

play08:18

setup

play08:19

and if you want to know more about pull

play08:20

down resistors and current limiting

play08:22

resistors and things like that

play08:23

look in my raspberry pi using gpio

play08:26

inputs

play08:26

video anyway let's get this all

play08:30

connected up

play08:31

and running and here we are the

play08:33

andrometer is now

play08:34

connected up to a functional raspberry

play08:36

pi and if we go across the pi's desktop

play08:39

i'm running here the genie editor in

play08:41

which initially i've written a very

play08:42

simple piece

play08:43

of a test code and all this does is to

play08:46

import the gpio

play08:47

libraries it sets pin 12 as a gpio input

play08:51

using board numbering there and it runs

play08:53

an infinite loop here

play08:54

because while true is always true which

play08:56

says if gpro input 12

play08:58

is equal to one in other words you can

play09:00

see white it's going to print white

play09:01

else it's going to print black and this

play09:04

runs inside a try finally combination so

play09:06

we always clean up the gpio pins at the

play09:08

end

play09:08

even though we're going to crash out of

play09:10

this code so

play09:12

if we bring up a shot of the anemometer

play09:14

and we run

play09:15

this code there it is it says black

play09:19

but if i rotate the thing eventually

play09:22

somewhere

play09:23

there we go there's there's white black

play09:25

again and if i

play09:26

spill it around like that it goes back

play09:28

and forth between white and black

play09:29

you can see the creative principle this

play09:31

thing is working

play09:34

so let's close that code down and over

play09:36

here i've written some code which will

play09:38

actually calculate

play09:39

wind speed and it starts off exactly the

play09:42

same way

play09:42

importing the libraries also importing

play09:44

the time library here

play09:45

and setting up gpio pin and then there's

play09:48

various variables which are defined

play09:50

the first one is the anameter vane

play09:53

diameter this is the distance between

play09:54

the cups

play09:55

in millimeters on the anemometer which

play09:57

for me is 106 millimeters

play10:00

obviously here enter the value here for

play10:01

anything you built yourself

play10:03

and then we work out the vein

play10:05

circumference using a vein circumference

play10:07

equals obviously vein diameter

play10:08

over a thousand to move it into meters

play10:11

and multiplying by pi

play10:13

3.1415 is perfectly adequate in terms of

play10:15

accuracy

play10:16

what we're doing here we also set what's

play10:19

called an anemometer factor which here

play10:21

are set to

play10:22

2.5 and this basically accounts for the

play10:25

fact that no anenometer

play10:26

is perfectly efficient there will be a

play10:28

loss of energy

play10:29

as wind hits the vein and turns it round

play10:32

and there'll be friction

play10:33

in terms of the operation of a system we

play10:35

know out is a bit jittery

play10:36

so all adenometers have to have a number

play10:38

multiplied by that final result

play10:40

to account for the practicalities of the

play10:42

real world inefficiencies

play10:44

this value seems to be anywhere between

play10:45

about one point two five and three

play10:47

depending on

play10:48

different anenometers i've guessed at

play10:50

2.5 here that might be a bit high but i

play10:52

think it's not that unreasonable as

play10:53

you'll see

play10:54

for various reasons a bit later on we

play10:57

then measure wind speed we start up by

play10:59

printing

play11:00

measuring wind speed that seemed a good

play11:01

idea then we defined some variables

play11:04

rotations is going to be a floating

play11:05

variable there and we set it initially

play11:07

to zero

play11:08

and we set trigger to zero which is

play11:10

going to be whether we triggered or not

play11:11

our sensor then going to define a

play11:14

variable called

play11:15

end time which with the current time

play11:17

plus 10 seconds

play11:18

which basically uses time plus time

play11:20

which returns the current time in

play11:22

seconds

play11:22

we add 10 to that and we're also going

play11:24

to gather the initial state of the

play11:26

sensor so sensor start is going to be

play11:28

the current state of the gpio input

play11:30

which could of course be seeing black or

play11:32

white we don't know when this thing

play11:33

starts

play11:35

we've then got a loop which is actually

play11:36

going to count rotations

play11:38

so it's going to say whilst the current

play11:40

time is less than end time it'll keep

play11:42

going through and then if g player input

play11:44

12 is one

play11:45

and trigger is zero it'll add one to

play11:47

rotations and set trigger to one so it

play11:50

won't do it again

play11:51

if the thing hasn't moved when we come

play11:52

back next time and here it's also going

play11:54

to print recorded a trigger just so we

play11:56

can see

play11:57

what is going on and then if gpio input

play12:00

12

play12:00

is zero we're going to set trigger to

play12:03

zero and this thing will keep going

play12:04

around adding to rotations as we go

play12:06

through

play12:07

and after various experimentation i

play12:09

found you did a tiny little delay in

play12:11

this loop to keep things stable so we've

play12:12

got a time sleep

play12:13

.001 of a second very small time sleep

play12:18

then once the loop is finished we can

play12:19

work out what's going on

play12:21

but first of all we want to account for

play12:23

the fact we'll have got a rotations of

play12:25

one

play12:25

even if the thing didn't move and it was

play12:27

seen right at the start

play12:28

so here we basically say if rotations is

play12:30

one and sensor start was one it was

play12:32

seeing white at the start

play12:34

we'll put rotations back to zero to try

play12:36

and get things most

play12:37

accurate we then work out the actual

play12:39

wind speed itself

play12:41

rotations per second is going to be

play12:43

floating point variable

play12:44

rotations divided by 10 and wind speed

play12:47

in meters a second

play12:48

will be rotations per second times the

play12:50

vein circumference

play12:51

times the angerometer factor finally

play12:54

we're going to print the results

play12:56

we're going to print out rotations

play12:57

rotations over 10

play12:59

wind speed in meters a second and wind

play13:01

speed in miles per hour

play13:02

by which you simply multiply by 2.237

play13:05

get it right and there's that's all

play13:07

nicely formatted with this code here

play13:09

and then finally as usual as you should

play13:11

with gpio stuff you clean up your gpu

play13:13

pins so let's bring up a shot of the

play13:17

anemometer

play13:18

there it is and we'll uh run the code

play13:21

like this

play13:22

and it's measuring wind speed and what

play13:23

i'm going to do is actually nothing

play13:25

to start out so i'm not going to rotate

play13:27

the thing at all i'm just going to

play13:28

blabber on for 10 seconds

play13:30

and we will get a result at the end

play13:31

there we are zero rotations

play13:33

zero rotations a second obviously wind

play13:35

speed is zero i just wanted to check it

play13:36

gave you zero when nothing had happened

play13:38

so we'll press a key on that and we'll

play13:40

now run it again

play13:42

and this time

play13:48

i'm going to do some blowing on it it'll

play13:50

record triggers and at the end of that

play13:52

period of time

play13:53

there we are it did 23 rotations 2.3 a

play13:56

second

play13:56

wind speed is 1.19 meters a second or

play13:59

4.28

play14:00

miles an hour which which is all very

play14:02

good things seem to be

play14:03

working so let's go back to the code

play14:06

and i think i'm going to get rid of the

play14:08

bit of prince recorded

play14:10

a trigger because that's clearly just

play14:12

there for testing so we'll get rid of

play14:13

that

play14:14

like that and we save our code file

play14:17

and save and if we just go back to the

play14:20

anendometer

play14:21

i'm going to bring in this this is a

play14:24

rather

play14:24

wacky piece of equipment this is a

play14:26

computing cleaning device which has a

play14:28

very high pressure air output if i just

play14:30

turn it on

play14:32

that's a very if you can still hear me

play14:34

that's a very high pressure air output

play14:35

so let's go back to the code and run

play14:39

the code and i'm going to use this thing

play14:42

to

play14:52

there we are uh we've got that was very

play14:55

exciting we've got some results here 116

play14:58

rotations

play14:59

and it wasn't even forced at it for the

play15:01

whole period of 10 seconds of course

play15:03

um and we've got a wind speed of 9.66

play15:06

meters a second

play15:07

21.6 miles an hour if you get this

play15:10

just right and run it for the whole

play15:11

period of time you get about 30 on that

play15:13

test and that's why i think my

play15:14

anemometer factor

play15:15

is about right but anyway it seems

play15:18

things are working

play15:19

we've successfully put together a

play15:21

raspberry pi

play15:22

and a monitor

play15:29

right just before we do an outside test

play15:32

i've added a bme 280 sensor back onto

play15:35

the raspberry pi

play15:36

and i've also written some combined code

play15:38

which puts together what i've just shown

play15:40

you for measuring wind speed

play15:41

with what i showed you for measuring

play15:42

temperature pressure and humidity in the

play15:44

last

play15:45

raspberry pi weather station video so

play15:47

what this piece of code will do

play15:49

is to record temperature pressure

play15:51

humidity and wind speed

play15:52

every 10 minutes into a spreadsheet and

play15:55

i won't go through this in detail

play15:56

because it does combine two things i've

play15:57

already shown you

play15:58

it basically imports all the libraries

play16:00

we need sets up gpio

play16:02

deals with the variables for measuring

play16:04

wind speed deals with initializing

play16:06

the bmw 280 sensor and then loads in a

play16:09

workbook where we're going to be saving

play16:10

our results and that has a massive loop

play16:13

which both reads the temperature

play16:15

pressure and humidity sensor

play16:16

and takes the wind speed measurements

play16:18

and then down here

play16:19

prints out the results and adds things

play16:21

to the spreadsheet

play16:23

so let's just test this out show you

play16:25

it's working so we'll just bring up a

play16:27

shot of the

play16:27

anemometer and run the code and

play16:31

i'll give it some

play16:34

artificial wind this will be running for

play16:36

10 seconds doing its stuff

play16:38

no output on the screen whilst it's

play16:40

doing that but hopefully in a second

play16:42

something will happen there we are it's

play16:44

adding this data to the spreadsheet

play16:46

temperature pressure and humidity and

play16:48

also a wind speed

play16:50

and this will continue on every 10

play16:52

minutes so we'll actually go into that

play16:53

for now and stop it because we'd be here

play16:55

forever but if i just bring up the

play16:57

spreadsheet

play16:59

there we are and you can see the first

play17:01

row of data has been recorded

play17:03

with a date and a time and the values

play17:06

we've just been talking about

play17:07

so what i'm going to do is to get rid of

play17:09

this row of data because

play17:11

we don't want it there when we've just

play17:13

been doing a test or delete

play17:14

that row save the spreadsheet again and

play17:17

everything is now

play17:18

ready to do an outside test

play17:26

right here i am again it's now the next

play17:29

day

play17:30

there are some little white fluffy

play17:31

clouds chasing across the sky

play17:33

and the allenometer has been mounted at

play17:35

the top of an eight-foot pole

play17:37

in my garden and it's going around at

play17:39

least at the moment and it's connected

play17:41

to the raspberry pi

play17:42

which is in my garage so it's also

play17:44

outside but i

play17:46

am inside here on my laptop where i've

play17:48

connected to the raspberry pi via

play17:50

ssh and i'm going to run the combined

play17:52

code now

play17:53

over ssh like this it should be taking

play17:56

the first measurement and hopefully show

play17:58

us a measurement

play17:59

in a second oh it's very exciting are we

play18:02

going to see some measurements

play18:03

coming across has 10 seconds past we

play18:06

don't know it always seems a long time

play18:08

when you're counting out 10 seconds

play18:10

there we are look 10.4 degrees out there

play18:13

various pressure humidity readings and

play18:15

the wind speed of 1.17 liters

play18:17

a second so what i'm going to do now is

play18:20

to leave the pi putting data into the

play18:21

spreadsheet

play18:22

and we'll come back in a few hours

play18:28

well here we are back again after an

play18:31

afternoon

play18:32

of weather it's been pretty varied it

play18:35

was sunny initially when it got

play18:36

rather dull we've had a rain shower but

play18:40

the anedometer is still spinning around

play18:42

it survived the weather which is

play18:44

rather good for something that measures

play18:46

the weather and if we look

play18:47

here on the pi's desktop here is the

play18:50

spreadsheet of the data it has produced

play18:53

it has worked i'm always pleased to see

play18:54

when things work and produce data

play18:56

as they should so as you can see we've

play18:58

had a variety of well temperatures have

play19:00

been going down i guess they do in the

play19:01

afternoon particularly in the

play19:02

february as it is now pressure's gone a

play19:04

little bit humidity's gone up

play19:06

quite a lot it rained in the middle of

play19:08

that i think it rained around here but

play19:10

not absolutely certain and the wind

play19:12

speed has been variable as you can see

play19:14

it's not been

play19:15

massively windy except on a few

play19:16

occasions the thing went round

play19:18

very very fast but of course it wouldn't

play19:20

necessarily coincide with when the

play19:21

measurement

play19:22

was being taken anyway i'm very pleased

play19:25

with this

play19:26

i was pleased when i put the anemometer

play19:28

on the pole this afternoon

play19:29

and it started spinning it's great when

play19:32

you can take some ping pong balls and

play19:34

albiro

play19:34

and a sensor and things like that and

play19:36

actually generate some meaningful

play19:38

results

play19:47

so there we are we've managed to add a

play19:50

functional

play19:50

if not perfect anemometer to a raspy pie

play19:54

weather station and we're not finished

play19:57

yet

play19:57

not by far not only do i have plans to

play20:01

continue to add sensors to the raspberry

play20:03

pi weather station

play20:04

but are now musing on the idea of taking

play20:06

a raspberry pi

play20:07

and using it to control the cultivation

play20:09

of plants and to monitor the cultivation

play20:11

of plants

play20:12

in this somewhat dilapidated greenhouse

play20:15

there must be

play20:16

lots of raspberry pi sensor and

play20:18

associated projects we can do

play20:20

here but now that's

play20:23

it for another video if you've enjoyed

play20:25

it you've seen here please press that

play20:26

like button

play20:27

if you haven't subscribed please

play20:29

subscribe and i hope to talk to you

play20:31

again

play20:33

very recent

play20:50

you

Rate This

5.0 / 5 (0 votes)

関連タグ
Raspberry PiWeather StationAnemometerDIY ProjectWind SpeedPython CodeSensor SetupTech TutorialElectronicsSTEM Education
英語で要約が必要ですか?