Breeder Bin Bait Trap Result and How Breeder Traps are Different from Grow Out Bin Traps.
Summary
TLDRIn this educational video, Jayne from RockinWorms demonstrates a method for efficiently resetting a breeder bin for worm farming. Using a bait trap, she gathers worms into a condensed area before transferring them to a new bin with a moist, nutrient-rich bedding. Jayne explains the importance of moisture for breeding success and contrasts this process with baiting out in growout bins. The video highlights the benefits of the bait trap method, including time-saving and ease of cocoon collection, ultimately aiming to streamline worm breeding operations.
Takeaways
- 🐛 The video is about resetting a breeder bin for worms, specifically using a bait trap to gather breeders into a condensed area for moving to a new bin.
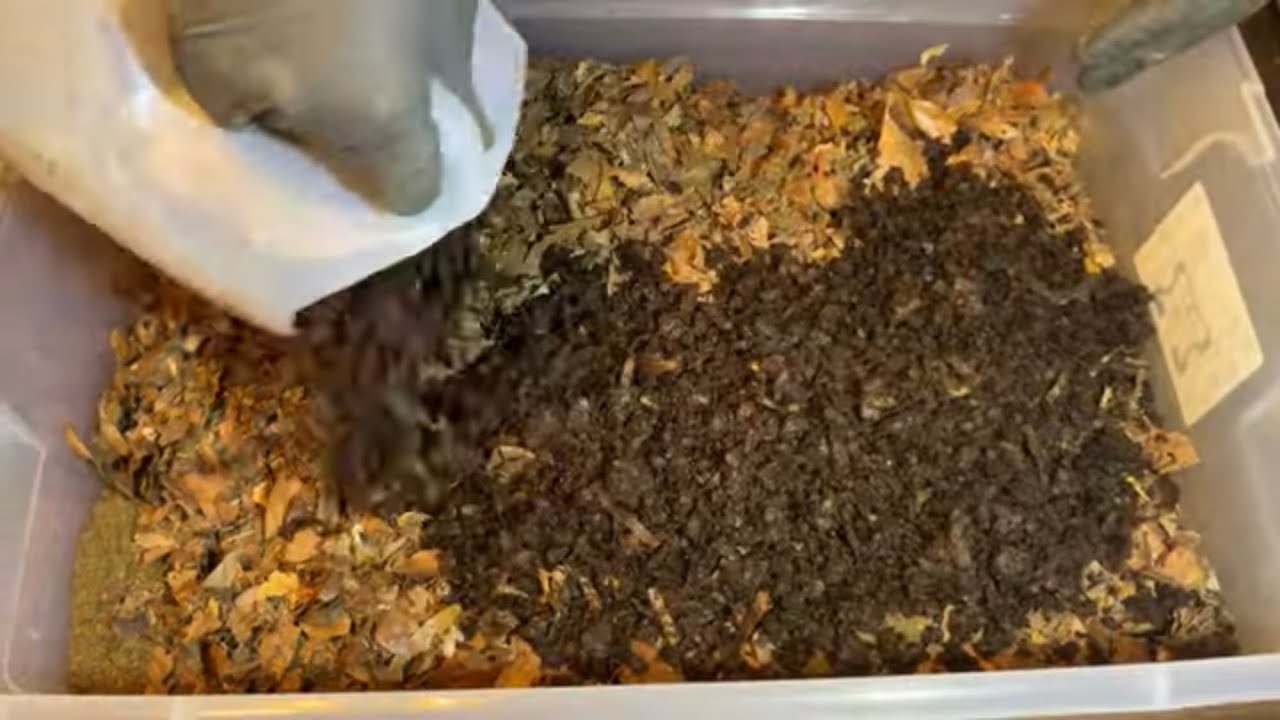
- 📦 Jayne demonstrates preparing a new breeder bin with damp newspaper and a mixture of pre-post sifted cow manure, worm chow, veggie powder, grit, and moisture to encourage cocoon production.
- 🌱 The importance of a moist environment for breeder bins is emphasized, as it is conducive to maximizing cocoon production.
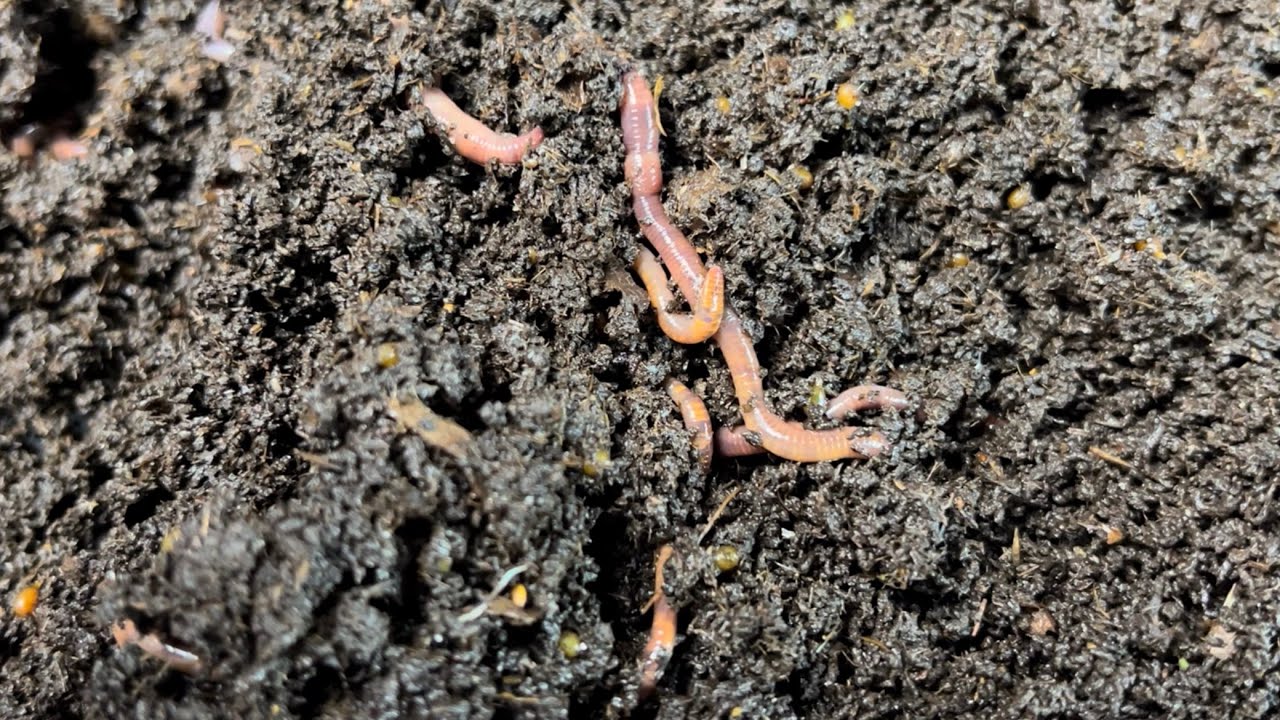
- 🍄 The presence of additional biota, such as fungi, in the breeder bin is highlighted as a positive aspect, providing food for the worms.
- 陷 The bait trap method is used to efficiently move breeders from an old bin to a new one, with the intention of speeding up the process compared to manual picking.
- 🔄 Jayne discusses the difference between baiting out in a breeder bin versus a grow-out bin, noting that breeders are not allowed to forage due to the need to maintain their health for breeding.
- 💧 The contrast in moisture levels between breeder bins, which are kept damp, and grow-out bins, which are kept drier for ease of castings harvesting, is explained.
- 🕊️ The bait trap in the breeder bin works by providing a concentrated area of food and moisture, which attracts the worms, despite the bins already being quite moist.
- 📝 Jayne shares her experience timing a full breeder bin reset, which took approximately 25 minutes and 46 seconds, and how the bait trap method saved time.
- 🧹 After moving the worms, the remaining material in the old bin is used to clean off any attached cocoons, which are then collected separately.
- 🔄 The process of resetting the breeder bin not only involves moving the worms but also collecting cocoons and integrating a bit of the old bedding into the new bin for the worms' comfort.
Q & A
What is the main purpose of using a bait trap in the breeder bin reset process?
-The bait trap is used to gather the breeders into a condensed area so they can be easily moved and mass-transferred to a new breeder bin for the next breeding cycle.
Why is the breeder bin kept very moist according to Jayne?
-The breeder bin is kept very moist to maximize cocoon production, as a damp environment is conducive to the breeding worms' health and reproduction.
What are the contents of the breeder bin that Jayne has prepared for the worms?
-The breeder bin contains pre-post sifted cow manure, worm chow, veggie powder, grit in the form of oyster shell flour or powdered eggshells, possibly azomite, and a significant amount of moisture.
What is the significance of additional biota growing in the breeder bin?
-The additional biota, such as fungi and mushrooms, serve as a source of food for the worms, contributing to their health and the overall success of the breeding process.
How does Jayne ensure the breeder bin is ready to receive the breeders from the bait trap?
-Jayne aerates the bin to ensure it is not too compacted and is ready for the worms, providing a good environment for them to thrive after being transferred from the bait trap.
What is the difference between a bait out trap in a breeder bin and a growout bin according to the script?
-For a growout bin, worms are allowed to go into a forage mode before baiting out, making them hungrier and more attracted to the bait trap. In contrast, breeders are not foraged and are always provided with enough food, so they are less driven by hunger when attracted to the bait trap.
Why does Jayne not let the breeders forage before setting up a bait trap?
-Jayne does not let the breeders forage because she wants them to be focused on breeding rather than finding food, ensuring they remain healthy and ready to reproduce.
How does Jayne collect the worms from the bait trap and move them to the new breeder bin?
-Jayne uncovers the bait trap and quickly moves the worms, one by one, into the new breeder bin to minimize their exposure to light, which would cause them to retreat back into the bedding.
What is the benefit of having a moist bait trap when doing a bait out in a growout bin?
-A moist bait trap is attractive to worms in a growout bin because it provides a sudden area of high moisture, which the worms need to breathe and are naturally drawn to.
How does Jayne ensure that the breeder bin remains obstacle-free for the worms?
-Jayne carefully removes any foreign objects, such as sticks, that may have accidentally entered the bin with the pre-compost or sifted manure to maintain a clean environment for the worms.
What is Jayne's strategy for collecting cocoons after moving the worms to the new breeder bin?
-Jayne scrapes off the top layer of the pre-compost and bedding, allowing any attached cocoons to be left behind and then collected. She also spreads out the material gently to reveal any hidden cocoons for collection.
Why is it important for Jayne to leave some of the original bedding in the new breeder bin?
-Leaving some of the original bedding helps the worms feel more at home in the new environment, as it provides a mix of familiar and new bedding, reducing stress and promoting a smoother transition.
How does Jayne address the concern of time consumption in resetting breeder bins?
-Jayne uses the bait trap method to expedite the process of picking out the breeders and resetting them into a new bin, which she found to be significantly faster than her previous method.
What does Jayne suggest for those who might have missed some cocoons during the collection process?
-Jayne acknowledges that it's okay if a few cocoons are left behind or if some hatchlings appear in the new breeder bin, as long as there aren't too many, as they won't interfere with the breeding process.
Outlines
🐛 Breeder Bin Reset with Bait Trap
In this paragraph, Jayne from RockinWorms introduces the process of resetting a breeder bin for worms using a bait trap to gather breeders into a condensed area. The goal is to move them to a new, prepped bin to initiate the next breeding cycle. Jayne explains the ideal conditions for a breeder bin, emphasizing the importance of high moisture levels for cocoon production. She also shows additional biota growth, such as fungi, which is beneficial for the worms. The bin's contents include pre-post sifted cow manure, worm chow, veggie powder, grit, and moisture, which have been set for several days to allow for the biota bloom and compaction.
🔄 Differences in Bait Trap Methods for Breeders and Growout Bins
Jayne discusses the differences between using a bait trap in a breeder bin versus a growout bin. For growout bins, she allows worms to enter a forage mode, where they consume all available food and biota, leading to hungrier worms that are more attracted to the bait trap's fresh food. In contrast, breeders are not foraged and are always provided with ample food to remain healthy and focused on breeding. Jayne also shares her experience with the bait trap for breeders, noting that it worked effectively this time, unlike previous attempts.
📦 Efficient Worm Transfer Using Bait Trap
This paragraph details Jayne's method of transferring worms from the bait trap to the new breeder bin. She emphasizes the importance of moving quickly to prevent the worms from retreating into the bedding upon exposure to light. Jayne also describes her strategy for sifting the worms using a half-inch sifter and how this method has given her a new use for a previously underutilized tool. The paragraph concludes with Jayne's satisfaction with the bait trap's success and her plans to apply this method to future breeder bin resets.
💧 Moisture Levels in Breeding and Growout Bins
Jayne explains the significance of moisture levels in breeder and growout bins. Breeder bins are kept damp to encourage breeding, while growout bins are slightly drier to facilitate easier harvesting of castings. She contrasts the moisture attraction in growout bins, where worms are drawn to the bait trap's moisture, with breeder bins, where the existing moisture may make the bait trap's moisture less of a draw. Jayne reflects on her initial doubts about the bait trap's effectiveness in breeder bins due to their already high moisture levels but acknowledges that the method proved successful.
⏱ Time-Saving Bait Trap Method for Breeder Bin Reset
In this paragraph, Jayne shares her time-saving experience using the bait trap method for resetting a breeder bin. She mentions a previous full breeder bin reset took 25 minutes and 46 seconds but was able to complete the task much faster using the bait trap. Jayne also discusses the process of removing the bait trap materials to force the worms into the new bedding and collect any remaining cocoons, which are important for her buyer.
🕊 Efficient Cocoon Collection and Bedding Preparation
Jayne describes the final steps in the breeder bin reset process, focusing on the efficient collection of cocoons and the preparation of the new bedding. She explains how the worms' movement into the new bedding helps to scrape off and reveal hidden cocoons, which can then be easily collected. Jayne also emphasizes the importance of leaving some of the original bedding with the worms in the new bin to make them feel more at home and to maintain a balance in the environment for optimal breeding conditions.
Mindmap
Keywords
💡Breeder Bin
💡Bait Trap
💡Cocoon Production
💡Biota
💡Moisture
💡Worm Castings
💡Forage Mode
💡Bulgy Clitellum
💡Azomite
💡Sifter
💡Whisps
Highlights
Introduction to the breeder bin reset process using a bait trap to gather breeders into a condensed area for efficient moving.
Preparation of a new breeder bin with damp newspaper and additional biota growth for enhanced worm nutrition.
The importance of maintaining a very moist environment in breeder bins to maximize cocoon production.
Use of pre-post sifted cow manure, worm chow, and oyster shell flour to create an optimal breeding substrate.
Observation of beneficial biota such as fungi in the breeder bin, which serves as a food source for the worms.
Explanation of the bait trap method for moving breeders to a new bin quickly to avoid light exposure and worm retreat.
Demonstration of the bait trap's effectiveness in gathering breeders and the process of transferring them to a new bin.
Differences between baiting out in breeder bins versus growout bins, including the foraging behavior of worms.
The preference for not allowing breeders to forage to keep them focused on mating and maintaining a consistent food supply.
Comparison of moisture levels in breeder and growout bins and their impact on bait trap effectiveness.
The experimental nature of the bait trap method in breeder bins and its successful outcome in this instance.
Utilization of a half-inch sifter for efficiently removing worms from the bait trap.
Collection of cocoons during the bait trap removal process to ensure a clean transfer to the new breeder bin.
The time-saving benefits of using a bait trap for breeder bin reset compared to traditional methods.
The strategic approach to not mix pre-compost with the entire bedding to preserve cocoons for harvesting.
Final steps of the breeder bin reset process, including the collection of remaining worms and cocoons.
Reflection on the efficiency of the bait trap method and its potential for scaling up worm farming operations.
Encouragement for viewers to share their thoughts on the bait trap method and its potential benefits for their operations.
Transcripts
hi everyone I'm Jayne at RockinWorms welcome we're going to do the next step
in the breeder bin reset where I am using a bait trap to hopefully gather at
least some of the Breeders into a condensed area so I can move them and
Mass to their new breeder bin for the next breeding cycle okay so this is the
with the breeders in it but we're actually going to look at the bin where
they're going first so this will be all prepped and ready to receive the
Breeders very quickly out of the Trap and I'll explain a little bit more on
that in a minute so this is my standard breeder bin setup this is a a very damp
newspaper so that shows that there's a lot of moisture in this breeder bin
which is what I want you want your breeder bins to be very moist if you're
looking to maximize your cocoon production so one of the things I want
to show you is that I have some additional biota growing in the bin
because this breeder bin has been set up and ready to go for several days now and
here is some more and over here here I don't know
maybe I'll swing this around so cameraman can get a better angle at it
look at I got a little fungi going a little tiny
mushroom so that's this is all good food for any worm and certainly for your
breeders okay so what's in this bin is pre-post sifted cow manure worm Chow
veggie powder grit in the form of oyster shell flour and or powdered
eggshells um I think I put some azomite in here as well and a whole bunch of
moisture and I've let it set for several days which is my preferred thing to do
but honestly I don't always get the chance in timing to do it but when it
does sit for several days before I put the breeders in I do normally get that
additional biota Bloom which I just finished showing you and also it kind of
compacts a little bit um just from its own weight and the moisture so I just
want to air rate it really quickly before I put the Breeders into this bin
okay so this is ready to go all right cool beans all right now we go over to
the breeder in so I'm going to uncover this and I'm going to move them probably
quicker than I'm going to talk because one of the things I want to do is move
whatever worms are in the bit trap to the new bin as quickly as possible
because once they're exposed to the light the worms are going to dive back
down into the bedding below the Trap and then that kind of negates the whole
point of having them in the Trap all right so here is one of the Breeders on
top he's a nice size little guy has a bit of a bulgy clitellum so uh he
probably isn't too far along in that cocoon making stage but he's looking
good so I'm just going to pick him up there he is and put him right in the
new breeder bin cuz that's where he's going and anyway all right so let's move
this quickly taking off again The Damp cover and more damp newspaper and you
can quickly see that there are breeders in here you can see them already
scooting down out of the light so I'm going to pick them up and put them right
over here in their new bin so anybody who wants to go down is
at least going down into the place I want them now I'm going to swing back to
the breeder bin and I have breeders right here and I'm going to start
quickly picking them up and also moving them to their new home for the next
period of time now while I do some of this quick pick
out um let me talk to you about the difference between doing a bait out trap
in a breeder bin and doing it in a growout bin there's basically uh two
main differences that I think are between the two
setups hold on I can't always do this and talk to you at the same time all
right and I'm going to take this handful and I'm actually going to slide just for
ease the bait trap down and uh put that Handful in there I
want to do one more quick handful um and then I'm going to go back
to the Trap so one of the differences between a growout bin bait trap and a
breeder bait trap is when I do the baiting out of a growout bin I prefer
and often very doe allow the worms in the growout bin to go into a forage mode
for a couple of weeks before I do the bait out now first of all what's the
forage mode that's when I stop feeding the worms in the bin and they need to
forage through the bin and kind of eat up all the little micro bits of food and
biota that have you know been scattered through the bin over the previous
feeding cycles and what that does is one give me
more concentrated pure pure castings cuz they're eating
more of the you know bits of food I'm almost done in this little concentrated
area that's good they're eating more of the food therefore making more castings
and leaving more percentage of pure castings behind
okay and they get hungrier here's some uh cocoons right here by the way that
I'm turning up as I pull these breeders that's really great to see um so the
worms as they forage and they start eating up all those scraps of food they
start getting a little bit hungry so when I set up a bait
trap and put in new fresh food and everything that bait trap they're like
Yay here's the food finally she's feeding us let's zoom into that bait
trap with with all that fresh food and therefore they get concentrated into the
bait bait trap very quickly alter alternatively or
contrastingly with breeders I don't let them forage I'm always putting in enough
food to get them through their breeding cycle because I don't want them going
hungry I want them to be chunky in size I want them not to be concentrated on
finding food I want them to be concentrated on finding a mate okay so
the Breeders aren't as hungry to get into new worm food when I set up a bait
trap for that that said let's see if I do have worms in here I mean I know we
saw that but there are a good amount of worms in here so yay the B the bait trap
for the Breeders is working so what I'm going to do I'm trying to figure out how
I want to do this because this is the first time I'm really doing this so it
is an experiment I think I'm going to try to just tip it look at all these
worms so the bait trap in this breeder been worked this time and again as a
reminder I have tried this previously and it did not work how I wanted it to
work and I explained that a little bit in the uh setup video for this trap and
I'll link that in the description so you can go back and see that video and see
how um my previous bait trap setup was and why I think it didn't work so well
but this one is working great okay so I'm just cleaning off a little bit of
the worms just real gently this by the way is the half inch sifter MH size that
came with my five sifter set that I bought a while ago I almost never use
this size sifter for anything CU with the worms it's just kind of huge for the
holes but it has worked well for the uh bait out so I'm happy because now I have
a good use for this larger sifter screen that basically just sits on my shelf
useless okay so now I have a use so that's awesome
right um I'm almost actually done getting these worms out of here they
fall through the holes really easy so that's another benefit for the larger
screen size can you see in here pretty good cameraman okay good okay he's
giving me the thumbs up here I got one little worm over here that's kind of
weaved itself through let's see if I can gently get him out well give him a
second let me get a couple of the other ones that are kind of just hanging
easily I'm just gently poking them through so they fall down okay and that
one went through on its own see I just left it alone for that minute and
instead of fighting with it it did it on its own and that's always better because
then they're not getting hurt by me forcing them through you're pointing at
something he's hanging is that what you're saying okay there he is okay so
this was at this point I think arousing success and I'm very happy with it all
right now what I'm doing really quickly is I'm just looking
around the edges here and in the bedding that's left behind to see if
I have any cocoons because I want to be able to O there's one more worm here you
know collect all the cocoons and I want them all in one place
there we go I think that that's it let me turn it over see oh one more hanger
on her and there we go okay success yay I
will not only will I be doing this again but I was fairly confident was going to
work so I already set up my next breeder bin that I have to harvest like right
after this one with the same kind of bait Out screening and food and again
the food in here is my standard breeder feed
which is the pre compost with the worm chow and veggie powder and a little grit
in it okay um so yeah so I set that up on in
the next breeder bin as well so hopefully that'll be as successful all
right what I'm going to do is I'm going to let these worms which have now been
agitated have several minutes to go down into their new bedding and then after
they do that I'm going to start scraping off the top of this pre compost and I
what I need to decide and I haven't decided it yet is whether I'm just going
to mix this pre compost into the entire bedding which was my original
thought but I think I can't do that because I should have cocoons in here
and I don't want to mix cocoons in here I want to harvest the cocoons out so I
think what I have to do is actually scrape the bedding off let the worms go
down put the bedding back into uh perhaps one side of this
bin and then be able to go through the Trap bedding in a concentrated section
and pick out cocoons so while I'm giving those worms a chance to go down into the
bedding I'm going to continue to pick pick out worms out of the breeder bin
and tell you about the next difference between doing this bait out mechanism in
a growout bin versus a breeder bin okay so let me start picking them out and
talk to you about the second factor that is differ different between these two um
situations okay and that is moisture I tend to run my breeder bins
quite damp as I already talked about worms seem to breed much better breeders
when they're in very damp conditions now alternatively for my growout bins which
I'm running um to do a couple of things as
their goal one is to Simply house a whole bunch of worms while they're in
the maturation maturation process and also to generate lots of
castings I'm not looking for my growout bins to
generate cocoons okay and in my personal experience I'm going to dump this in in
in a pile on top of that first pile you saw me do right when I started the
video is uh my personal experience is that I don't get a ton of cocoons in my
growout bins and that's because they are more crowded and the worms have pretty
much self regulated their production to match any
you know small you know die offs that happen in a bin you know worms don't
live forever nothing does so I will get some cocoons I will get some whisps in
grow up bins but proportionally speaking it is way less than a grow up bin okay
so anyway um because one of my main goals of a growout bin is generating
castings I need to be able to reasonably Harvest those castings which means I
generally want to sift those castings and it's easier to sift castings when
they're on the dry side that translates back to me choosing
to run my growout bins a bit on the dry side okay and to
recall couple minutes ago I run my breeder bins on the Wet
Side so when I do a bait out in my growout bins and I put in a bait in in a
trap that is very moist as well as being full of lots of food the worms are not
only attracted to the new food source or the Abundant food source but they're
also attracted to that sudden area of high moisture and worms will follow the
moisture Always Forever they need that moisture to breathe and you know they're
like us right in that the easier we can breathe the happier we are if we're
struggling to breathe you know we're not going to be doing much
else so when I put that moisture Laden trap in a growout bin again the worms
are very quickly attracted to that and that helps with the bait out
alternatively because the breeder bins are already very moist to begin with
when I put in very moist attractant into that bait trap for the Breeders they're
like yeah I already have a lot of moisture I'm already breathing fine this
change this difference isn't as big as it is in the growout bins okay so
between it was really because of the moisture level difference that I
wasn't 100% confident that the bait out in the breeder bin was going to work I
thought the Breeders might be a little indifferent to the increased moisture
level and also the increased food availability in a
concentrated area because again recapping the Breeders don't forage I
don't forage them all right so you can see there's still you know a fair few
breeders in here but it's not you know breeder breeder breeder breeder which it
normally is when I reset a breeder bin that trap took out a very
nice proportion or percentage I'm sorry percentage of breeders that were in this
bin oh there's a stick I'm going to take that out I must have come in with the
pre- compost somehow I don't know or maybe the sifted C manure it happens
I'll just take it out so that obstacle is out of my breeder bin I want
obstacle free breeder bins now also I want to um note and this is for my uh
learning too is the time it's taking me to empty out the Breeders out of this
completed breeder bin is way less than it takes me if I hadn't done the trap
somebody had posted on on my comments saying you know I've got a a lot of bins
I want to scale up but to reset breeder bins takes
forever and I just see that as a limit in my ability to increase my breeder
bins because I only have so much time and if it takes a lot of time to reset a
breeder bin that by natural levels will decrease the number of breeder bins I
can run so what I did and I didn't get a chance to post back to this person yet
because I just did it the other day I did reset a breeder bin and I timed it
for the first time ever and it took me 25 minutes and about 46 seconds I think
to do a full breeder bin reset and that means not only picking out the worms
like I'm doing now but also what I'm going to show you next CU it is part of
the breeder bin reset process hold on I'm almost done bear
with me for just a minute I never get out all the Breeders the first or second
time through which is fine because as I go through and start looking at the
cocoons and everything I'll come across the random look at this whole little
bunch of cocoons right here just flip that over can you see that camera man
whole little clump of uh cocoons they look Beau beautiful nice yellow one
that's a a more recent lay and this one here I just covered it up of course with
my fat finger it's a little bit more darker so this one was laid earlier in
the breeding cycle it's getting closer to hatch okay so anyway I never get all
the worms out the first or second time through so
I just don't even worry about it I pick out what I can and then I pick out the
other breeders uh or the left behind breeders
as I you know move along in my cocoon collecting process all
right that's pretty much all the Breeders that was way less than 25
minutes way less so that trap really did save me a lot of time and the and the
worms did the work I didn't so that's a huge win all right so here's the next
step I am going to skim off I'm just putting this down on one end
here's a couple more worms like I said they'll they'll keep popping
up for a couple goth throughs okay so here I have this sort of clean end it
doesn't have to be clean clean because it doesn't matter so what I'm going to
start doing is taking off the bait
trap materials which will force the worms
down here's the worm in it I'm just going to put it on the pile with the
other guys hold on here's another one in here
okay that's good enough because again I'll go through that um all right so I'm
taking off the material because what I want to do is
force the worms into the new bedding and also collect this material so I can go
through it and pick out any cocoons and those cocoons will go I
think there's one over here here's one right over here okay so can you get that
angle pretty good or do you want me to spin around okay so here is a cocoon let
me um just show that a little bit more okay so here's a cocoon that the
Breeders laid while they were in the Trap and I want to be able to pick out
that cocoon put it with the more finished casings and cocoons cuz that's
what's going to go to my buyer okay my buyer is buying cocoons and the
bedding and the benefit to the buyer with purchasing the cocoons in the live
material is that when he receives them he can just dump them into their new bin
and those cocoons and the new hatchings the new whisp will be F in
that bedding for several weeks and so he doesn't have to do anything with the new
worms and the new cocoon HS for several weeks so that's less you know time
Demand on him as he's setting up you know you know his expanded operations
all right so the the uh worms you know they
need time to go down and I'm kind of pushing it so I can show you on uh
camera so what I'm going to now switch over to is a little bit of the pile here
which again isn't the best example because I'm pushing it on time so you
can see what's going on but as the worms dive
down they are leaving behind the cocoons that were previously stuck to their body
so the material is acting as a cleaner to scrape off any cocoons and
leave them behind so now I can come in and just either pick them out
individually or what I normally do is just scrape off the bedding the castings
and put them back into the original bin which will then again be harvested for
castings and also you know for the cocoons all right so I think you get the
concept and again this is just a way that I found that speeds things up
here's another
cocoon can you see it yep there's another cocoon that was
attached to a Breeder's body because you saw me pulling them out right I'm not
pulling out tons of bedding and castings with the worms but they are coated with
it and there's going to be cocoons in there so this is just a faster way to
one have the worms dive down into their new bedding and for me to scrape off any
cocoons that are left behind okay and if a worm comes up in my hand I
just you know take it off now when I get down to this kind of level what I do is
I just spread it out gently with my finger and see I have a cocoon there and
I'll just pick it out and put it into the Cocoon Pile in the original bin and
then I just spread it out and see if there's more cocoons
here's another one and here's another one
and what I'm doing is not only picking out the cocoons but I will also at the
end have a little bit of their original Bedding left behind and I'm going to
gently mix that in to their new bedding and that kind of makes them feel a
little bit more at home because then it's not 100% new bedding here's a
little bit and here's a couple more cocoons so you can see how the worms
going going down and the Cocoon scraping off really does help bring these
cocoons to the surface and make them easy to collect all
right um let me see I also want to note that you know if there's a couple
cocoons left behind and some whisps hatch in the new breeder bin it's okay
um you know a whisper two isn't going to be a problem I just don't want lots of
wisps because then again they just get in the way of the Breeders meing and
mating all right does that look pretty good yep all right one more all right so
we're good to go I'm going to just scretch this in and call it good enough
I'm going to continue to work on pulling this material off you've got the concept
that's what I'm going to be working working
on and I'm going to be using that bait out
a whole lot more because that saved me a huge amount of time in picking out the
Breeders and resetting them into a new V so new method works great I'm all for it
let me know in the comments what you think about this method whether you
think that it could help you reset breeder bins more quickly and
efficiently because that's what we want to do right when we want to be taking
care of our worms in a fun efficient you know manner that works for us and works
for the worms okay oh and don't forget like And subscribe I'm back so you know
help me get my uh algorithm kicked up again all right I will see you next time
I remain yours in the dirt Jayne
関連動画をさらに表示
ReSetting Breeder Bin - New Method of Separating the Adults from the Cocoons
Breeder Bin Managing to Success - Module 4: Breeder Cycle Length 21 Days or ??!
3 Ways Using Newspaper on Top of A Worm Bin Helps You Manage Your Bins - Plus Bonus BREEDER BIN TIP
First Time Breeder Bin Cycle Results Plus Using a Fan for the First Time
WORST UNBOXING Ever - Azomite Additive for My Worm Chow
Overcoming Worm Farm Pest Issues with Natural Bacteria - African Night Crawlers- Vermi Bag
5.0 / 5 (0 votes)