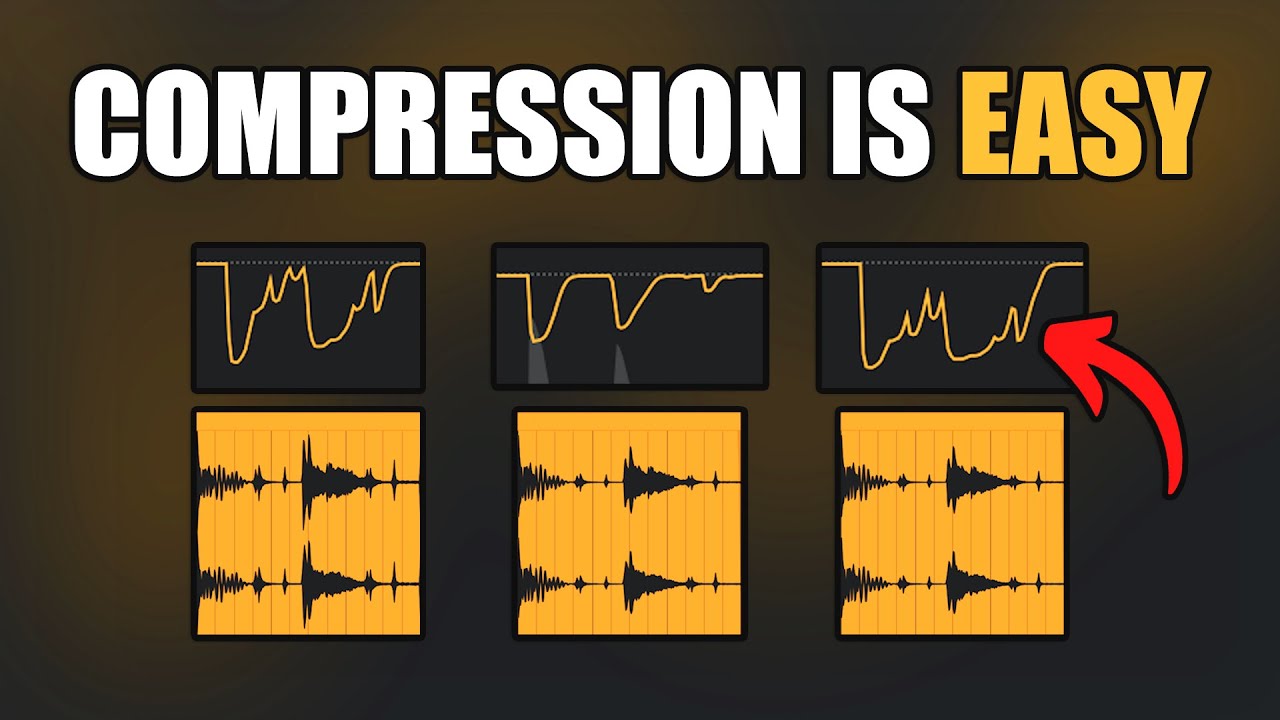
GAIN AUTOMATION (the secret sauce of compression)
Summary
TLDRDieses Video gibt einen Einblick in das Geheimnis der professionellen Kompression durch Gain Automation. Dylan Pines erklärt, wie man die Lautstärke von Audiodateien anpasst, um eine konsistente Kompressionsklangfarbe im gesamten Lied zu erreichen. Er unterscheidet zwischen Gain- und Volume-Automation und zeigt praktische Schritte zur Anwendung in Logic Pro. Zusätzlich gibt es ein kostenloses Bonusangebot: eine Sammlung von Mixing-Cheat-Sheets mit wertvollen Informationen über EQ, Kompression, Reverb und mehr.
Takeaways
- 🎙️ Gain Automation ist eine Methode, um eine konsistente Kompressionsstimmung über ein gesamtes Lied hinweg für alle Instrumente zu erreichen.
- 🔊 Es unterscheidet sich von Volume Automation, da Gain die Eingangsstärke eines Signals und Volume die Ausgangsstärke eines Kanals beeinflusst.
- 📈 Die Verwendung von Gain Automation hilft dabei, professionelle Kompression für besonders dynamische Aufnahmen wie Gesang zu erreichen.
- 👂 Eine unregelmäßige Leistung, bei der bestimmte Passagen sehr leise und andere sehr laut sind, führt zu inkonsistenten Dynamiken und Ton.
- 🔧 Gain Automation beinhaltet das Automatisieren der Stärke eines Audio-Files, um eine gleichmäßige Leistung zu gewährleisten.
- 👁️ Es ist wichtig, mithilfe des Auges und des Ohres, die Stufen der Gain-Regulierung auf eine allgemeine Lautstärke zu bringen, um eine natürliche Klangentwicklung zu erzielen.
- ⚙️ Crossfades sind nützlich, um saubere Übergänge zwischen Regionen zu erzielen und unerwünschte Lautstärke-Änderungen zu vermeiden.
- 🎹 Auch bei dynamischen Instrumenten wie Orgeln kann Gain Automation helfen, eine konsistente Kompression zu erreichen.
- 🎤 Bei Gesangsaufnahmen kann eine detaillierte Betrachtung von einzelnen Sätzen helfen, um eine gleichmäßige Lautstärke zu erreichen und einen modernen Klang zu erzielen.
- 📊 Gain Automation kann die Dynamik beeinträchtigen, aber Volume Automation kann verwendet werden, um die gewünschten dynamischen Veränderungen zwischen verschiedenen Teilen des Liedes beizubehalten.
- 🎁 Der Video-Autor bietet eine Sammlung von Mixing-Cheat-Sheets an, die Informationen über EQ, Kompression, Reverb, Delay, Saturation und Lautstärkebalancing enthalten.
Q & A
Was ist Gain Automation und wie hilft es bei der Kompression?
-Gain Automation ist die Automatisierung der Verstärkung eines Audio-Files, um eine gleichbleibende Lautstärke über das gesamte Lied zu erreichen. Es hilft dabei, einen konsistenten Kompressionston über alle Instrumente hinweg zu erzielen.
Was ist der Unterschied zwischen Gain Automation und Volume Automation?
-Gain Automation betrifft die Veränderung der Lautstärke des Audio-Files selbst, während Volume Automation die Lautstärke des Kanals am Ende der Signalkette verändert. Gain entspricht also der Eingangsstufe, Volume die Ausgangsstufe.
Warum ist Gain Automation für professionelle Vokale wichtig?
-Gain Automation ist für professionelle Vokale wichtig, da sie sehr dynamisch sein können. Ohne Gain Automation kann die Kompression nicht gleichmäßig über das gesamte Lied hinweg angewendet werden, was zu inkonsistenten Dynamiken und Klangfarben führen kann.
Wie wird Gain Automation in Logic Pro durchgeführt?
-In Logic Pro erfolgt Gain Automation, indem man die Regionen des Audio-Files selektiert und die Gain-Funktion im Region-Dropdown-Box anpasst. Dies ermöglicht es, die Lautstärke einzelner Abschnitte manuell anzupassen.
Was sind die Vorteile von Crossfades bei der Automatisierung?
-Crossfades automatisieren die Lautstärke einer Region, um eine nahtlose Überblendung zu anderen Regionen zu erzielen. Dies verhindert sogenannte Speaker-Pops und sorgt für saubere Edits.
Welche Rolle spielen die Augen und das Ohr bei der Durchführung von Gain Automation?
-Beim Gain Automation werden zuerst die Augen genutzt, um die Lautstärke der Regionen anhand des Wellenform-Diagramms einzuschätzen. Danach wird mit dem Ohr überprüft, ob die Lautstärke der einzelnen Abschnitte konsistent ist.
Wie wirkt sich Gain Automation auf die Dynamik eines Instruments aus?
-Gain Automation kann die natürliche Dynamik eines Instruments beeinträchtigen, da es die Lautstärke über den gesamten Song anpasst. Um dies auszugleichen, kann Volume Automation verwendet werden, um die gewünschten Dynamiken wiederherzustellen.
Was sind die Mixing Cheat Sheets und wofür sind sie nützlich?
-Die Mixing Cheat Sheets sind eine Sammlung von Hilfsmitteln für die Audio-Mischung, die Informationen über EQ, Kompression, Reverb, Delay, Saturation und Lautstärke-Ausgleich enthält. Sie sind nützlich, um schnell und effektiv Mixing-Entscheidungen zu treffen.
Welche Empfehlung gibt Dylan Pine für die Verwendung von Gain Automation in der Mischung?
-Dylan Pine empfiehlt Gain Automation für fast alle seiner Mischungen, es sei denn, es handelt sich um eine sehr reduzierte Mischung, bei der die ursprüngliche Performance beibehalten werden soll.
Welche zusätzlichen Ressourcen bietet der Kanal 'Musician on a Mission'?
-Der Kanal 'Musician on a Mission' bietet zusätzlich zu den Tutorials auch eine Sammlung von Mixing Cheat Sheets an, die von Dylan Pine als sehr nützlich für die Mischprozesse bezeichnet werden.
Was ist der letzte Ratschlag von Dylan Pine in dem Video?
-Der letzte Ratschlag von Dylan Pine ist, unabhängig von der Mischungstechnik, die eigene Kreativität und das Schaffen von Musik nicht zu unterbrechen.
Outlines
🎙️ Gain-Automation für professionelle Kompression
Dieses Absatz beschäftigt sich mit der Gain-Automation, einer Technik zur Steigerung der Kompressionsqualität in Musikproduktion. Es wird erklärt, dass Gain-Automation das Gain-Level eines Audio-Files automatisiert, um eine gleichmäßige Lautstärke über das gesamte Lied zu erreichen. Der Absatz betont die Wichtigkeit dieser Methode für die Erzielung einer konsistenten Kompressionstonart für alle Instrumente. Es wird auch ein kostenloser Mix-Cheat-Sheets-Download angekündigt, der Informationen über EQ, Kompression, Reverb, Delay, Saturation und Lautstärkenbalancing enthält.
🔧 Anwendung der Gain-Automation in Logic Pro
Dieser Absatz veranschaulicht die praktische Durchführung der Gain-Automation mit Logic Pro. Es wird erläutert, wie man die Regionen eines Audio-Tracks auswählt, um deren Gain individuell anzupassen. Der Prozess beinhaltet das Verwenden des Marquee-Tools, um Regionen zu teilen, und das Anpassen des Gain-Levels, um eine konsistente Lautstärke zu erreichen. Zudem wird die Verwendung von Crossfades zur Vermeidung von Lautstärke-Übergangen bei den Regionen erläutert.
🎶 Detaillierte Gain-Automation für Vokale
In diesem Absatz wird die Anwendung der Gain-Automation auf Vokale genauer erörtert. Es wird betont, dass Vokale sorgfältig auf Phrasenebene analysiert und angepasst werden sollten, um eine gleichmäßige Lautstärke zu erreichen. Dies ist besonders wichtig, da Vokale in der Mischung sorgfältig beobachtet und vorne gehalten werden müssen. Der Absatz erklärt, wie man die Lautstärke einzelner Phrasen anpasst und später mit den Ohren überprüft, um sicherzustellen, dass sie richtig klingen.
📉 Gain-Automation und Dynamik
Der vierte Absatz befasst sich mit der Frage, ob Gain-Automation die Dynamik einer Aufnahme beeinträchtigt. Es wird erklärt, dass Gain-Automation dazu beiträgt, einen konsistenten Ton zu erreichen, während Volume-Automation verwendet wird, um die Dynamik zu steuern. Der Absatz zeigt, wie man die Lautstärke in bestimmten Abschnitten des Liedes mit Volume-Automation anpasst, um die gewünschten Dynamikverhältnisse beizubehalten, und betont die Wichtigkeit dieser Technik für die Erzielung einer besser klingenden Instrumentierung.
Mindmap
Keywords
💡Gain Automation
💡Kompression
💡Verstärkung
💡Dynamik
💡Mischer-Tipps
💡EQ
💡Reverb
💡Volume Automation
💡Crossfade
💡Signalkette
Highlights
Gain automation is a technique used to achieve a consistent compression tone across an entire song for all instruments.
Gain automation involves automating the gain level of an audio file to average around the same level throughout the song.
Gain and volume automation are not the same; gain refers to the amplitude or loudness of individual audio tracks, while volume refers to the level of the channel.
Professional vocals and dynamic instruments benefit from gain automation to achieve a consistent tone and compression.
Inconsistency in audio levels can lead to varying compression effects and an inconsistent tone across different parts of a song.
Gain automation can be achieved by manually adjusting the gain levels of individual audio regions to maintain a consistent performance.
Logic Pro's marquee tool can be used to select and adjust the gain of specific audio regions.
Gain adjustments should be made based on visual cues from the waveform and confirmed by listening to ensure a natural sound.
Crossfades can be used to smoothly transition between regions with adjusted gain levels, preventing abrupt changes in volume.
Vocals can benefit from detailed gain automation, focusing on individual phrases to maintain a consistent average loudness.
Gain automation should be done before mixing, but it's not necessary to spend excessive time perfecting it.
Gain automation can affect the dynamics of a song, but volume automation can be used to restore intended dynamics.
Volume automation is used to maintain the intended dynamics of a song, such as quieter verses and louder choruses.
Gain automation is a secret trick for achieving better sounding instruments in a mix.
The presenter offers a free bonus of mixing cheat sheets, including information on EQ, compression, reverb, delay, saturation, and volume balancing.
The EQ balance chart from the mixing cheat sheets is highlighted as a particularly useful tool for every mix.
Transcripts
hello hello dylan pines here with
musician on a mission
and today we're going to be talking
about one of the biggest
industry secrets for getting pro level
compression we are going to be talking
about gain automation
it's an amazing way to get a consistent
compression tone across an entire song
for all of your instruments but before
we get into it i want to let you know we
are giving away
a free bonus for today's video we're
giving away
our entire treasure trove of mixing
cheat sheets we've been designing these
over the past few years
and there is some fantastic info in here
stuff on eq
and compression and reverb delay
saturation
volume balancing anything in between
we've probably got it in this pack and
we're giving it away free so if you'd
like your own personal access
just click the link on screen or down in
the description below
and we'll make sure to get one sent
straight to you so with that said let's
dive
straight in and talk about gain
automation
so gain automation is basically where
you automate
the gain level of an audio file so that
it averages around the same level
throughout the song let me break that
down into
plain english now we're talking about
the gain level you know that's the
amplitude the level the loudness
of our individual audio tracks or
individual
audio files or regions not the level
of our channels that's our volume
volume automation and gain automation
are not the same thing
so if we're automating the gain level of
our audio file
that means that we're going to be
changing the audio file
itself so that we have a more consistent
performance across the entire
song the obvious question that comes up
after this is why should i care
well this is a huge secret for getting
pro
level compression especially for
professional
vocals stuff that is really really
dynamic
basically if a track is really
inconsistent and level
it's not going to be compressed the same
way throughout the song
for example let's look at this vocal so
you can see that in this part of the
chorus it's extremely loud i'm gonna
actually solo it out so you can hear it
and when the song hits hard with the
drums and guitars the
world explodes but then at a different
part of the song earlier on in the verse
it's much much quieter time slows when
you get
close to the horizon so if we were to
put a compressor on this
where would we set our threshold so
let's look at what this looks like on a
compressor i've got a compressor here
that i've got preset up and we're gonna
see it's getting you know three or four
dbs
of gain reduction at the loud moments
check this out and when the song hits
hard with the drums and guitars the
world explodes to the great divine
but if we take this to our quieter
moment we're not going to get hardly
anything time slows when you get close
to the horizon
compression is going to change the tone
of the instrument and if it's set up
well it's going to change it for the
better
but if you have an inconsistent
performance
where a certain part is very quiet and a
certain part is very loud
then you're going to have not only
inconsistent dynamics but also an
inconsistent tone because your
compressor is going to be working
wildly differently depending on the part
of the song that you're on
this happens not only in vocals but also
in just
any dynamic instrument so for example
let's look at this organ
so up here you can see that during the
verse it's a little bit quieter but
during the choruses it gets quite a bit
louder
so if i was wanting to compress this i
would really
struggle because i would have to
compress it so that it was
getting the right amount of compression
for the loud moments but then i would
get
almost no compression for the quiet
moments so what can i do
to fix this gain automation i can
automate the level of my gain
so that i'm getting consistent
compression throughout the song now
before i show you what this looks like i
do want to point out something
gain automation is not the same thing as
volume automation
gain does not equal volume there are two
different words that
describe the same thing amplitude level
the loudness of a sound
but gain is the level at the beginning
of a signal chain
and volume is the level at the end of
that signal chain
so the loudness of our individual region
that's our gain but the loudness of our
channel that's our volume and since
we're going to be affecting what our
plug-ins here
we want to change our gain because if we
change our volume that's not going to
change
anything that is going into the plugins
that's just changing what is getting
sent out of the channel if you remember
nothing else from this video remember
that
gain equals input level and volume
equals output level so let's talk about
how to actually
do gain automation now we're actually
going to start off
looking at our organ instead of at our
vocals just because it's a little bit
more of a simpler example
and really quickly i do want to point
out i'm going to be
doing this using logic pro and logic
pro's way
of affecting gain now every daw has a
different way of doing this
so i would do a little bit of google
research on your own just researching
your daw's name
gain automation and you'll find how your
daw allows you to do this but here's
what i'm going to do
i am going to look at my region and i'm
going to find the
the different sections that are
obviously smaller
than other sections like for example
this intro this verse
going into this louder chorus and i'm
going to hold down my command
key and you can see when i do that this
little plus pops up
now what this is is basically my marquee
tool is what that's known as
and it allows me to select different
parts of a region or multiple regions
and whenever i click on this selection
it splits it into its own region
this is an extremely helpful tool for
many
many different mixing techniques but for
this moment
it's great because it allows us to
change the individual gain
of just this individual spot so what i'm
going to do
i'm going to go over to my region drop
down box which is right here
and you can see there's a little
function labeled gain
now i want you to look at the waveform
whenever i move
gain up and down
so you can see as i increase the level
of the gain the waveform increases and
as i decrease the level of the gain
the waveform decreases what's great
about this system
is that i can basically just use my eyes
to do my gait automation
you know this is a soft science it's not
a hard science
i'm not trying to get this exactly
perfectly right
i'm just kind of trying to get
everything in the same ballpark
you know the same general loudness and
so i'm able to use my
eyes and just say like okay cool that's
that's
probably pretty close and then go
in and solo it and listen and see if
your eyes and your ears agree
so for me that was actually just a
little bit too loud so i'm just going to
take it down by one dbs
and call it a day i would want to do
this pretty much across the board
on all of these individual sections and
it's important to say whenever you're
doing something so broad like this
you're wanting to pick sections not
necessarily moments
so i would want to go in here for
example and cut out this whole section
and increase that rather than going in
here
cutting out this moment and then cutting
out this other moment
separately because the more i subdivide
it
into just different parts of a
performance the more difficult it's
going to be
to keep it sounding natural so let me
really quickly go
and actually do my gain automation for
all of these sections
i'm not going to actively try too hard
to get it right
obviously you would want to go back and
listen to
it and make sure that it sounds correct
but i'm going to say that that's pretty
good so i'm going to grab
these four regions because i already got
this first one i'm going to turn the
gain up a little bit
until everything's kind of in the right
area we're gonna say that's good and
then what i'm gonna do is i'm going to
select
all of my regions and i'm going to add
some cross fades so what crossfades
are is they basically will automate the
level
of one region you know the region on the
left they'll automate it down
while at the exact same time automating
the level of the region on the right
up it basically keeps you from having
any kind of weird speaker pops
when one region cuts into another region
it's a really great way to have clean
edits so in order to do this i'm going
to go to wherever
i had messed with my gain i'm going to
click down
to more and then i am going to go to
fade out
i'm going to change that from out to
crossfade
and then i'm just going to add in 10
milliseconds it really doesn't need to
be much
at all and i'm going to listen we're
going to make sure that that's sounding
okay
you see how i could hardly hear that
transition at all
that's what a good crossfade will do so
now that we've looked at this organ
let's take a look
at these vocals now most instruments if
you're wanting to do any gate automation
on them
you know you're really only going to
have to affect specific
sections you know turn the verse up turn
the bridge down
something like that with vocals if
you're okay with putting in a little
extra work
they can sometimes really benefit from
you looking at individual
phrases so making sure that each phrase
is on average around the same loudness
and this is because the vocals are so
heavily scrutinized
in the mix and they need to stay so far
forward
so having really good compression is
an essential to getting a modern vocal
sound
so how exactly would i go about doing
this luckily
this is another thing where you can just
use your eyes
and then go back and double check with
your ears
now this is a rare moment where i'm
going to tell people to use their eyes
actively usually i'm pretty big at
saying hey use your ears don't just
trust your eyes but splitting these
individual phrases up and then
increasing their level like so
so that they all kind of look like
they're generally in the same area
and then later on going and listening
and making sure that's true
is a completely fine way of making this
work now you're probably going to be
going back
and changing up where the individual
edits are because you might be cutting
breaths in half
and you definitely don't want to do that
you might be having some strange
popping noises going on you or you might
be cutting off an
s or the end of a word so uh again
you're definitely gonna want to go
and double check stuff but for now
what i'm going to do let's just focus on
this i'm going to grab this
i'm going to definitely want to turn
this up a little bit grab this
turn it up a little bit um this may be
down just a hair
and yeah on the whole this is all
looking
quite a bit closer again we're just
trying to make it
closer to being in the same spot not
necessarily
exactly in the same spot i might
actually take this down a little bit
there we go and so now i would just grab
all of these
and i would add a crossfade so go over
here
i'd select crossfade and i'd add
you know 10 milliseconds totally fine
and then i would go and listen and i'd
make sure that everything was still
sounding
pretty good see if i missed anything or
if i was maybe a bit too
aggressive i thought we'd take a stroll
around the block
but that wasn't fast enough and you said
i can't get close to real emotion
so this is a great moment where i'm
really glad i went and checked it
because even though this looked like it
was the same size
this is a much punchier vocal
performance
and so the individual words in between
sort of these words that the singer is
like spitting out
are actually a lot quieter whereas these
words are a lot more consistent
so what i'm going to do is i'm actually
just going to take this down
a little bit so it's not quite so
aggressive
honestly a good rule of thumb you're
kind of wanting
everything to have around the same
average level
the peak level doesn't really matter so
basically if you have a section
like this one where you have occasional
really loud peaks
you can kind of ignore those and look
more for
the rest of the sound you know where's
the rest of the sound living
because a good compressor can handle
those peaks
but if everything else is super quiet
well that's
not really going to be very helpful to
you so i might want to take this
up quite a bit so that the average level
is sitting where everything else is
even though these peaks are a little bit
too dramatic
so now let's check this out around the
block but that wasn't
fast enough and you said i can't
get close to real emotion and then at
this point
i might just take it down a bit and say
we're good and call it a day this is
supposed to be a pretty quick process
it's something that you should
definitely do before you start mixing
but not necessarily something you need
to spend hours
doing if you can just get it in
generally the right area you should be
good to go now here's the big
question that everyone asks me about
gain automation
won't this screw up my dynamics and
you know it's true you might want a
particular instrument to be quiet in the
verse
and loud in the chorus and gain
automation gets rid of that kind of like
our organ
the verses for the organ maybe sounded
better before i did this gain automation
and now they're too loud
but the great thing is that's what
volume automation is for
gain automation helps us to get a more
consistent tone
but volume automation helps us to get
more consistent
dynamics it helps our performance
our overall sound to be better
so if i maybe turned up my organ let's
say by two dbs
and now it's two dbs too loud in my
verses well i can just
open up my automation lanes and i can
just grab
this exact same area with my marquee
tool
and then turn it down by two dbs and now
it's
right back where it was before but with
a much more consistent
tone so honestly this is something that
i will do
on pretty much all of my mixes unless
it's a mix
where it's very stripped down and i'm
wanting to keep it
as close to the original performance as
possible
this is definitely a great secret trick
that's going to help to get you much
better sounding instruments
so with that said that is how you do
gain automation
before you head out don't forget we are
giving away a
huge free bonus on this video our entire
collection
of designed mixing cheat sheets make
sure to click the link on screen or down
in the description to get your own free
access
this is stuff that honestly i will even
use
each time i mix in fact keep your eye
out for the eq balance chart the thing
that goes over the frequency spectrum
it is maybe my favorite thing that
musician on a mission has ever
created it's something that i use every
single time i mix
also if you're new here don't forget to
like and subscribe
we make tutorials just like this one
every single week on this channel and we
would honestly love to help you grow
in any way we can so that's going to
about wrap it up for me
this has been dylan pines with musician
on a mission and remember
create regardless
[Music]
you
Voir Plus de Vidéos Connexes
5.0 / 5 (0 votes)