NRM 3300, F24, Lab 4 Create TX Contours
Summary
TLDRIn this instructional video, the presenter guides viewers through creating and editing templates in a GIS software, focusing on the title area and inserting images. They demonstrate how to adjust and align elements using smart guides and coordinates, and introduce the process of creating hollow boxes and locking map frames. The tutorial also covers copying layouts, working with terrain layers, and generating vector-based contours from a DEM. The presenter emphasizes the importance of understanding fundamental GIS concepts for becoming a proficient user.
Takeaways
- 🖥️ The video is a tutorial focusing on a GIS software, guiding users through creating and editing map layouts and templates.
- 🔄 The instructor demonstrates how to delete and rearrange elements in a map layout, emphasizing the importance of the title area.
- 🖼️ A new logo (TTU word Mark) is introduced and inserted into the map layout, replacing the old Tech logo.
- 📏 The video covers how to use the polygon tool to draw a hollow box and adjust its size and position.
- 🔗 The concept of 'smart guides' is introduced as a tool for aligning and positioning elements within the layout.
- 🔒 The tutorial shows how to lock and group elements in the layout to keep them organized and prevent accidental changes.
- 🔄 The process of copying and pasting layouts is explained, highlighting the importance of naming layouts appropriately for organization.
- 🌄 The video discusses the use of terrain layers, including streaming terrain layers and the creation of hillshade layers for better visualization.
- ⛰️ The instructor explains the difference between raster-based and vector-based contours, emphasizing the need for the latter for more detailed and smooth maps.
- 🛠️ The tutorial guides users through the process of blurring a DEM (Digital Elevation Model) to simplify the terrain for contour creation.
- 📊 The use of statistical functions to refine the appearance of the terrain layer is demonstrated, with a focus on using standard deviations to improve visualization.
Q & A
What is the main focus of the video script?
-The main focus of the video script is to guide users through creating and editing templates in a GIS software, specifically for an elevation lab.
Why is the title area considered important in the script?
-The title area is considered important because it sets the first impression of the map and contains crucial information such as the name of the person who created the map and the logo of the institution.
What is the purpose of deleting the Tech logo and moving the name in the title area?
-The purpose is to simplify the title area and ensure that the name of the person is more prominently displayed, which is a common practice for clarity and professional presentation in map layouts.
Why is the TTU word Mark image being added to the template?
-The TTU word Mark image is being added to the template to replace the previous logo, as the instructor believes it will work better for the title area of the map.
What is the significance of drawing a hollow box around the image in the script?
-Drawing a hollow box around the image serves as a visual frame, which can help to highlight the image and make it stand out within the map layout.
Why is the class name text size being reduced in the template?
-The class name text size is being reduced to make it less prominent and to ensure that it fits well within the design of the title block without overwhelming the other elements.
What is the reason for locking and grouping elements in the layout?
-Locking and grouping elements in the layout helps to keep the design organized and prevents accidental movement or changes, which is essential when creating a template that will be reused.
Why is the instructor emphasizing the importance of naming layouts appropriately?
-The instructor emphasizes the importance of naming layouts appropriately to ensure that each layout is easily identifiable and to maintain order when working with multiple layouts and maps.
What is the benefit of using a local DEM file instead of streaming one for creating contours?
-Using a local DEM file allows for more detailed and accurate contour creation because it is not limited by the streaming data's resolution or potential connectivity issues.
Why is the instructor blurring the DEM before creating contours?
-The instructor is blurring the DEM to simplify the terrain details, which helps to create smoother and more manageable contour lines, especially when working with a large dataset that might be too detailed for contouring.
What is the purpose of setting a contour interval of 40 meters?
-A contour interval of 40 meters is set to provide a balance between detail and simplicity in the contour lines, ensuring that the contours are neither too dense nor too sparse for the map's scale.
Outlines
🖼️ Designing a Title Block in a GIS Project
The speaker begins by continuing a GIS lab session, focusing on improving the title area of a map layout. They remove an existing Tech logo and reposition their name, then insert a new picture from a specified folder on Blackboard named 'TTU word Mark'. The image is adjusted for size and position using smart guides and X and Y coordinates. A hollow box is drawn around the image using the polygon tool, with dimensions specified. The box is then moved and resized to fit the title area. The speaker emphasizes the importance of aligning elements properly within the layout. They group and lock the title box, and the session concludes with a focus on making copies of the template for future use.
🔄 Refining Templates and Managing Layouts
The video script details the process of refining a GIS project template by adjusting the class name font size and centering it. The speaker demonstrates how to use smart guides to align text and elements within the layout. They also show how to group and lock elements to maintain consistency across multiple layouts. The focus then shifts to managing multiple layouts and maps within a project, including copying and pasting layouts, renaming them for clarity, and saving the project. The speaker also discusses the use of streaming terrain layers for analysis, demonstrating how to enhance visualization through dynamic range adjustments and the creation of hillshade layers.
🏞️ Enhancing Terrain Visualization with GIS Tools
The speaker continues the lab by showing how to enhance terrain visualization using GIS tools. They discuss the importance of using the correct base layer for analysis and demonstrate how to create contour lines from raster data. The speaker emphasizes the difference between raster-based and vector-based contours, explaining that raster files are pixel-based, while vector files are point-based. They guide the audience through the process of adding a high-detail boundary layer for Texas and using it as a clipping reference. The video concludes with the addition of a detailed terrain layer and a discussion on simplifying the contour creation process for better visualization and analysis.
🗺️ Adding and Customizing Terrain Layers
The focus of this segment is on adding and customizing terrain layers in a GIS project. The speaker instructs on how to add a high-detail Texas boundary layer from the USDA and remove the previous one. They guide the audience on how to clip the terrain layer to the new boundary and add a detailed terrain layer that is more suitable for contour creation. The speaker then demonstrates how to simplify the contour process by blurring the DEM and adjusting the dynamic range for better visualization. They also discuss the importance of choosing the right scale for contour lines and the process of creating vector-based contours using the Contour tool from the Spatial Analyst toolbox.
📝 Emphasizing the Importance of Fundamentals in GIS
In the final paragraph, the speaker stresses the importance of understanding the fundamentals of GIS software. They encourage students to take comprehensive notes during the lab sessions, as these notes account for 50% of their grade. The speaker compares the importance of fundamentals in learning software to learning sports or life skills, emphasizing that a strong foundation is key to becoming a power user. They conclude the session by reminding students to save their work and express anticipation for the next video, where they will continue exploring advanced GIS techniques.
Mindmap
Keywords
💡Elevation
💡Templates
💡Smart Guides
💡Raster Functions
💡Contour Lines
💡Vector Data
💡Symbology
💡Clipping
💡Dynamic Range
💡Geodatabase
Highlights
Introduction to the elevation lab and setting up the base layout.
Editing the title area by removing the Tech logo and repositioning the name.
Inserting a new picture for the title area and using smart guides for alignment.
Adjusting the picture's X and Y coordinates for precise positioning.
Creating a hollow box around the picture using the polygon tool.
Sizing the hollow box to 3 inches wide and adjusting its position.
Locking the map frame and selecting everything but the map frame for alignment.
Ensuring equal vertical and horizontal space around the title box.
Grouping elements and naming the group 'title box'.
Adjusting the class name size and centering it within the title box.
Locking the title box and preparing to make copies for other projects.
Copying and pasting the Texas base layout for the elevation map.
Importing a high-detail Texas boundary layer for the map.
Removing unnecessary layers and setting the new boundary layer as a clipping reference.
Adding a detailed terrain layer and adjusting its dynamic range for better visualization.
Creating vector-based contours instead of raster-based for better accuracy.
Blurring the DEM to simplify the contouring process and reduce file size.
Using the statistics tool to refine the DEM's appearance and prepare for contouring.
Creating contours with specific intervals and settings for the Texas map.
Emphasizing the importance of understanding the fundamentals for becoming a power user of the software.
Transcripts
okay let's jump into mini section 2 for
our elevation
lab and I have Pro open
already so this is where we left off at
the end uh of course we were in the base
layout now I want to finish up our two
templates because we're going to start
making copies of them
okay so I am not super crazy
about this little uh but it's very
important this title area so I'm going
to delete this Tech
logo okay and I'm going to delete
that and I'm just going to move my name
above that
guy all right and now I'm going to come
up
to insert the insert Tab and here I'm
going to click on the
picture Okay so navigate to your 09
folder and then add this new one that I
just put on blackboard uh for you and
it's called TTU word Mark okay I think
this one's going to work better and then
let's just use our smart guides
and just draw it out like that and see
how that works okay
so let me click
on
okay I don't know why these guys are
hard to
move so let me click
on okay so let me click on the double
click on the picture over here and that
usually selects it so what I'm going to
do is just use
these positional
arrows uh the X and Y coordinates and I
want to move it on the x axis which is
the horizontal axis and then that looks
pretty good I'll just move it up a here
nope that's too
much okay that looks good so we've got
that simplified and now what I would
like to
do is let's draw
a
hollow box around it so choose your
polygon tool and then what we can do
let's just draw it out like this for now
and then we can adjust the shape over
here so why don't we all make
ours 3 in wide
and 1.75 or 1 and 3/4
in
wide okay and then we can move that over
I'd like to use
my get that over like Okay so
and let's just make this
a05 there we go that looks pretty good
all right now come up to your layout
and full
extent okay and now let's use hold down
on yours uh left Mouse
button and let's select everything but
let's lock our
map frame
okay and the reason I wasn't using those
align tools is because see how there's
extra space in there and um that's kind
of a shame that we couldn't do that but
now you could just kind of pick it up
all together and move it
over and what you're looking for is that
this space uh this vertical space and
this horizontal space are just about
equal okay now over here here now we're
done with that so let's select all of
these guys rightclick and we we're going
to choose
group and we're just going
to call this um
title
box okay and then we can close that up
and we can lock
that okay nice so I'm going to come back
up here and and look at everything okay
so now we can make copies of this and we
don't have to
constantly
um we don't have to constantly redo any
of that the only thing I want to do
is and you want to get this right on the
template is I want to make that class
name a little bit smaller so I'm going
to select that and go to text symbol and
I'm just going to take that down to
20 okay and then that should have been
in the
center all right let's see paragraph
position there it is okay so there's
where you can put it in the
center and now let's just grab
that class name again and hold down
shift and use your or just it's not
working for some reason I don't why
those are grayed out okay so let me move
this over there and using your Smart
Guys you can get it right in the middle
okay so that looks better now we have
more space around all of that now I'm
going to
select everything but the rectangle and
I'm just going to move that up I know
this is kind of tedious work but like I
said once you get it right
once you have this title block and you
can use it for other projects okay so
now we're going to lock that up and
close that
up and zoom out okay so we were working
with the
streaming terrain layer okay and we are
now going to make from our Texas base
okay cuz this template is done and now
this template is done okay so now what
we can do is right here under
catalog let's go to project and let's
open up our
layouts and we can simply rightclick on
this and we're just going to choose copy
and come up here to layouts and
rightclick and we are going to paste it
Okay now what's very important when you
start making multiple layouts and Maps
is that you name them
accordingly okay so we are simply going
to call this elevation
okay all right now what we're going to
do is the same thing with our map okay
so let me get rid of these guys you
shouldn't wish just something I must
have been doing to get ready for this
okay so now same thing right click on
your Texas
Bas you are going to choose
copy and here just choose
paste okay now once again click on this
and just name it
elevation okay now close out of both of
these these are your
templates okay and let's do a control s
to save our
project all right now double click on
your elevation
map okay and we'll get to the layout
later okay so you remember how I was
telling you how powerful this
terrain uh layer is that you can stream
in and I'm going to wait for mine to
load yours is probably might be taking a
little bit of time too okay and then I
want to show you you just how quickly
for example um say you were doing an
analysis
of pla lakes on the Yano esato okay and
you zoom way in here well once again you
can't see anything okay but that dynamic
range
adjustment is still working and you'll
see how this pops into um you know just
a really incredible definition so I'm
going to push pause and wait for that to
kick
in okay so see that's that's just
incredible to me I mean that's beautiful
the there are your pla Lakes okay
because remember the darker the color
the farther it is uh the farther away it
is from you so this is going to be your
high point in this area now it's just
taking into account
the area that is on your screen okay and
so this data source is is really really
incredible and again you can come up
here to
analysis and you could go to raster
functions okay and go down to
surface and very quickly you can say you
want to accentuate
you want to make it easier for people to
visualize this well you can just make a
quick hillshade layer okay and you would
just put in
terrain okay and then you would just say
create a new
layer okay so I'm going to apply the
dynamic range to this area give me a
second
okay so that can help people visualize
uh the terrain because it has some
slight shadows and and there's other
things we can do with that uh to make it
look better remember we may uh we can
also make contour lines very quickly
okay now here's what the reason I'm
doing all of this and we want to always
choose your your base layer as the
raster to work from but the reason I'm
doing all of this and let's make our
contour
interval you know like maybe five
because they don't know how flat this
area is
okay but these
Contours okay these are these are
actually raster based Contours okay and
that's uh remember we went over that
term
before raster files are made up of
pixels okay and Vector files are made up
of vertices okay which is um a
mathematical term for points in space
okay so if I was going to zoom into one
of these do you see these are made up of
pixels okay and what you really can't do
a whole lot with the these kind of tools
except
visualize which is very powerful and if
you need to make quick maps for your
client or for your
class get your terrain loaded in uh zoom
into your aoi and you can even mask it
as we did before okay up
here and then you can just
apply uh these different raster
functions to it and uh you know you can
end end up with some very striking
visual
results okay the but what we want to do
in in
this lesson is we want to create Vector
based Contours so once again I just want
to show you the difference see how
that's real pixelated now that'll clean
up a bit but again
these these are just uh these are just
pixs okay so now I want you to hold down
your shift key and we're going to we're
going to get rid of all three of these
layers okay so rightclick after you
select them all with shift and choose
remove okay now head over to your
catalog and you should have
downloaded this uh zipped file file from
Blackboard and unzipped it and just all
you have to do is just place that file
in your project file don't put it in
another folder and if you do it that way
you're going to see it right here okay
so I want us to
use
um a better outline uh of the State of
Texas okay I want us to add
this uh better layer uh boundary layer
for Texas okay that I put in our Geo
database okay and if you're having
trouble seeing the Geo database okay you
can rightclick up here and choose
refresh now you may have left it in the
the zipped folder uh after you unzipped
it and if that's the case you can right
click here and hit refresh and then you
you might see it like this down here
okay so you should be able to find it
and then I want you to open that up and
just drag and drop this High detail
Texas boundary layer from the
USDA okay and uh remove the other Texas
boundary layer that you had okay so now
you should really just have
three uh boundary layers you have have
the outer boundary that we just got okay
let's turn these
on okay
and zoom to that
layer okay there we go and then you you
should have your
counties okay and your cities okay and
we don't need any of these to be turned
on for this current lab all right
but what I want you to do is come up
here even though it's not turned on we
can still use this as a clipping
reference okay so you're going to choose
clip to an outline and you will pick
your new uh detailed boundary from the
USDA and then just click
okay okay so now let's add a Terrain
layer like we had except it's one that
I've created for us and we can actually
do a lot more with it uh because it's
not streaming in from the internet okay
so let's rightclick here on big text and
go add to current
map okay boom that looks uh really good
all right so what we're going to do for
this uh map normally at this scale you
don't don't add Contours to a map okay
Contours are really for maps that are
maybe at 1 to 500,000 maximum maybe 1 to
100,000 maximum but we are you know well
over a million so what we're going to do
is we're going to simplify the Contour
process the contour lines and then we're
going to add a style that's going to
make them look really nice okay and it
will really accentuate the elevational
aspect of of
Texas okay so with uh your Dem selected
come up to your raster layer and let's
do our Dr dynamic range okay and then
for the stretch type let's go to minimum
maximum okay and that looks a little
better you don't want all that super
high bright white okay and again Texas
there's there's good data in there okay
there's plenty of data in there okay so
even though you can't see it sometimes
it's in there all right now let's get
ready to start making our Contours now
when I zoomed in did you see just how
detailed that that
is this this data is if we used that we
would run into a lot of problems because
it's overd detailed for Contours and you
know we like to have Contours to be
smooth flowing lines okay and if we used
it like this it would it would really
just be jaggedy the file size would be
too big so what we're going to do is
we're going to blur this demem
okay and again these
raster um function tools are great for
doing uh quick things like that okay now
there's no tool in here called blur for
some reason you got to go to
statistical okay and what we're going to
use is
statistics okay and we need to tell it
which
raster and then
let's turn these up to
nine okay and under general of output
pixel type you're going to choose
16bit
unsigned and then you're going to choose
create new layer so you're not creating
a whole another data set you're really
just
symbolizing this existing data set in a
different manner it's kind of like when
we just change the color of a feature
okay so create a new
layer okay now it might take a little
bit of time turn off your your big text
okay nice now you can see that we've got
a much
blurrier um land formations and while
that doesn't sound good it it is in in
this case Okay so let's come up to
raster light we're going to choose our
dynamic range again and let's
choose standard deviation but let's come
over here and refine that a bit so
rightclick on your statistics go to
symbology and let's try three standard
deviations because what I'm trying to do
is wipe out that big white mess there
and maybe with
four there we go okay so that is going
to work now I want you to hit contrl
s okay and then the last thing we are
going to do for this mini section is we
are actually going to create our
Contours okay so let's do that with this
analysis
tool and right regular uh click on your
toolbox and I want to explain that if we
were streaming in that terrain layer and
we tried to use um we tried to make real
Contours so to speak and not just raster
Contours it wouldn't work okay but since
we have our own
Dem it will work okay so let's go to the
tool boxes and I just want you to type
in
Contour okay so let's choose Contour
spatial
analyst and then they make you click on
that all right now it's important that
you choose the
statistics okay that's the whole reason
we did uh that
operation okay let's call
this TX
uncore
Contours okay now these numbers are
important all right you we're going to
have a contour every 40 m okay and that
sounds like it's too much it's not okay
because it's going to be plenty to work
with trust me now our base
Contour okay we're going to leave that
at zero the Z Factor will be one and
then here's where we are going to do
something really really cool in the next
video okay we are going to work with
polygon Contours so they're actually
going to close in on themselves okay and
we wouldn't be able to do this
technique uh this symbolization
technique if they were just contour
lines okay open-ended lines now maximum
vertices per feature let's do
50,000 and that's sounds like a lot but
if you don't put anything in there you
could have a million or more vertices
per contour line and then it it just
becomes a mess okay in
environments for the coordinate system
just choose this map and for your
parallel processing Factor type in
100% okay and then
click oh and if you're using a school
computer okay I'm glad I thought of this
if you're using a school computer just
don't put anything in there okay because
I don't know if that's going to cause an
error but if you're using your own
computer use fire it up on all eight
cylinders okay then just hit
Run Okay so mine uh popped out nice and
quick all right
and that is where we are going to leave
this mini section okay I hope you took
some good notes there is a lot in there
and by the way some of you are taking
extraordinary notes and please remember
that is 50% of your grade okay because I
don't want us to just follow recipes
throughout the semester that are quickly
forgotten if you take those notes like a
lot of you are and really understand
understand the fundamental concepts of
this program you will quickly become a
power user I've learned a lot of
software programs and what I've un what
I've learned is the most important thing
is the
fundamentals and there's a whole lot of
stuff this program can do but if you
really don't know the
fundamentals
then this stuff is is really going to be
unobtainable
and you know the fundamentals like 80%
90% of football basketball pretty much
life is working with the
fundamentals okay so let's hit a contrl
s and I will see you in the next video
Voir Plus de Vidéos Connexes
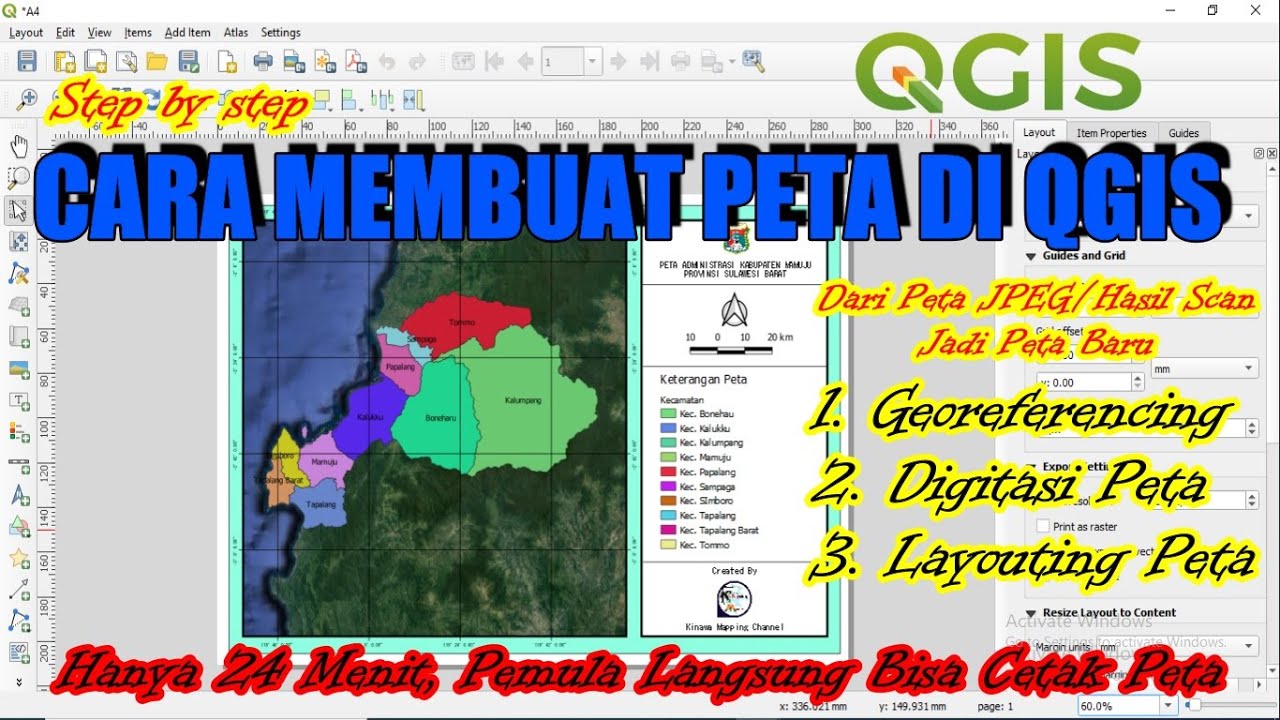
Cara Membuat Peta di QGis (Georeferencing, Digitasi, Layout)
QGIS Terrain Analysis: hillshade, slope, aspect (Version 3.x)
NRM 3300 Clean up Contours, Symbolize & Export Layout
Download Free Land Cover data from Earth Explorer / USGS
VHDL code for 4 bit ALU and Realization on FPGA development Board
Angular Login and Signup Page | Local-Storage | angular tutorial | angular tutorial for beginners
5.0 / 5 (0 votes)