Learn Facial Gua Sha from a Chinese Medical skincare professional
Summary
TLDRSandra Lanchine introduces a home facial guasa treatment rooted in Chinese medicine, designed to enhance skin health and appearance. Utilizing a jade guasa tool and two hydrating products, she demonstrates a routine that involves specific angles, pressures, and slow, mindful strokes. The technique targets various facial areas, from the neck to the forehead, aiming to lift, sculpt, and relax. Sandra emphasizes the importance of technique and concludes by highlighting the treatment's benefits for both skin and relaxation.
Takeaways
- 🌱 Sandra Lanchine is an acupuncturist and herbalist who specializes in using Chinese medicine to treat skin.
- 🌐 The video demonstrates a home version of a professional Gwasha treatment, a Chinese medical technique for healthier and more radiant skin.
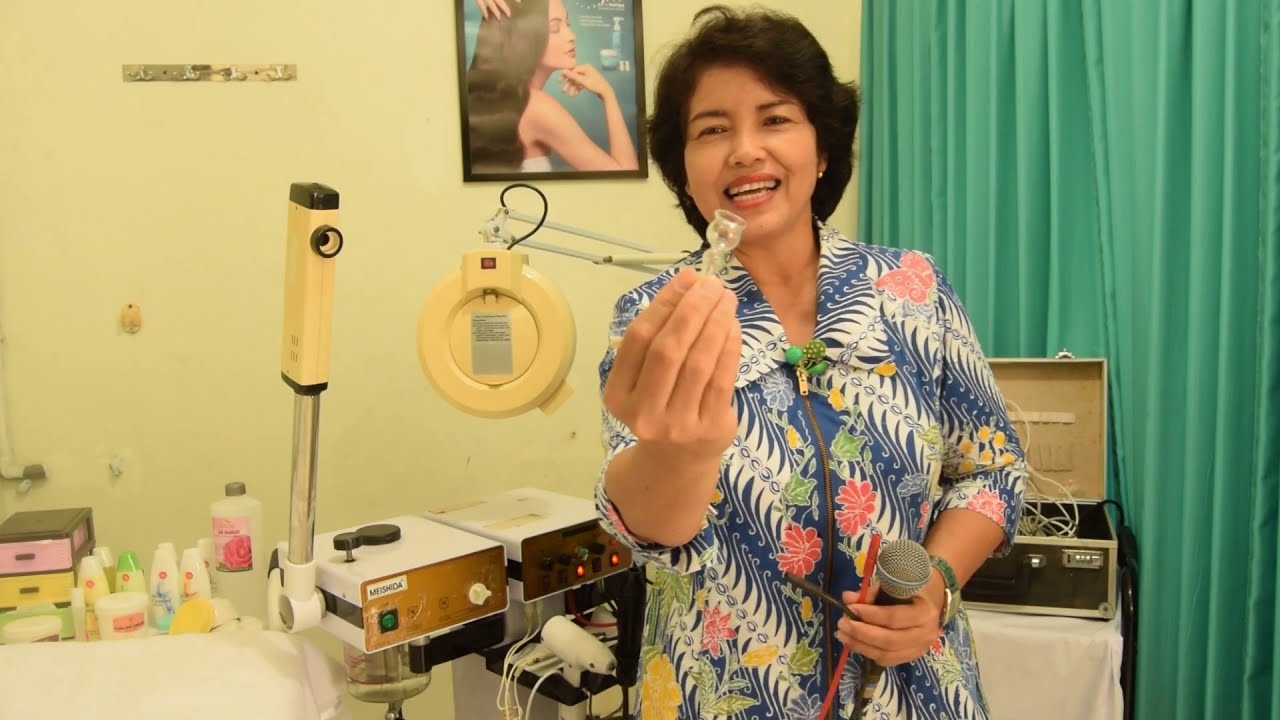
- 🛠️ To perform facial Gwasha, you'll need a jade Gwasha tool, a hydrating mist, and a facial oil.
- 💧 The hydrating mist and facial oil are used to prep the skin, providing hydration, suppleness, and creating a 'slip' for the Gwasha tool.
- 🔧 The correct technique involves holding the tool flat against the skin, using light to medium pressure, and slow, mindful strokes.
- 💆♀️ The treatment starts with the neck to release tension, which can affect the face, using specific strokes and angles with the Gwasha tool.
- 👩⚕️ The facial Gwasha includes steps for the jaw, cheek, under-eye area, brow, and forehead, each with unique techniques and pressures.
- 🌀 The under-eye area requires extremely light pressure to avoid damaging the delicate skin in this region.
- 🔄 After completing one side of the face, there should be noticeable differences in lift, openness of the eye, and overall sculpting of the face.
- 🧹 It's important to clean and store the Gwasha tool properly after each use to maintain its effectiveness and hygiene.
- 🌐 For more information and to purchase the recommended products and tools, visit the website lansheen.com.
Q & A
What is Sandra Lanchine's profession?
-Sandra Lanchine is an acupuncturist and herbalist.
What does Sandra specialize in treating?
-Sandra specializes in treating skin using the tools of Chinese medicine.
What is facial guasa and what does it do?
-Facial guasa is a Chinese medical technique that improves the health of the skin and tissues, resulting in more radiant and beautiful skin, and more lifted and sculpted features.
How often can facial guasa be performed?
-Facial guasa can be performed as often as daily or even two to three times a week.
What are the three things needed to start facial guasa at home?
-To start facial guasa at home, you need a jade guasa tool, a hydrating mist, and a facial oil.
What is the importance of using the correct angle when holding the guasa tool?
-The correct angle of holding the guasa tool is flat against the skin to avoid using the sharp pointy edge, ensuring a safe and effective treatment.
What is the recommended pressure and speed for performing facial guasa?
-For facial guasa, a light to medium pressure and a slow, mindful speed are recommended to relax the nervous system.
Why is it important to prep the skin with products before facial guasa?
-Prepping the skin with products like a hydrating mist and facial oil builds hydration, suppleness, and plumpness into the skin, and creates a slip for the guasa tool, enhancing the treatment's effectiveness.
What is the significance of starting facial guasa on the neck?
-Starting facial guasa on the neck is significant because tension in the face often originates from a tense neck, making it an important area to work on to ensure freedom from tension.
How does the facial guasa routine affect the appearance and feel of the skin?
-Regular facial guasa can make the skin look smoother and more even, with more lifted and sculpted features, and it also helps in feeling more relaxed and less tense.
What is the recommended maintenance for the guasa tool after use?
-After each use, the guasa tool should be washed and stored properly to maintain its cleanliness and effectiveness.
Outlines
🌿 Introduction to Facial Gua Sha with Sandra Lanchine
Sandra Lanchine, an acupuncturist and herbalist, introduces a video tutorial on facial Gua Sha, a Chinese medical technique for skin health. She explains that Gua Sha can enhance skin radiance and facial contours. Sandra outlines the necessary tools: a jade Gua Sha tool and two skin-prepping products—a hydrating mist and a facial oil. She emphasizes the importance of technique, including the correct angle of the tool, light to medium pressure, and slow, mindful movements. The video begins with prepping the skin for the Gua Sha treatment.
💆♀️ Neck Preparation and Gua Sha Techniques
The video script describes the process of Gua Sha on the neck, which is crucial for releasing tension that may affect the face. Sandra demonstrates how to use the notched edge of the jade tool to stroke from the base of the neck to the hairline, using light to medium pressure. She advises massaging with a wiggling motion upon reaching the bone and repeating the process multiple times. The neck routine includes the back, sides, and front of the neck, with a focus on the often-neglected front area.
🔍 Facial Gua Sha: Jaw, Cheek, and Eye Area
Sandra continues with facial Gua Sha, starting with the jawline. She instructs viewers to use the notched edge of the tool, applying light to medium pressure while following the jaw's angle towards the ear. For the cheek area, she advises using the long edge of the tool, angling upwards towards the temple. Under-eye Gua Sha requires extremely light pressure, with strokes from the inner corner of the eye outwards. The brow area is also addressed, with the tool following the brow bone and turning upwards towards the hairline.
🧖♀️ Completing the Gua Sha Routine and Observing Results
The final part of the facial Gua Sha routine involves the forehead, with strokes from the brow bone to the hairline, using light pressure. Sandra suggests observing the differences between the treated and untreated sides of the face, noting improvements in lift, contour, and relaxation. She encourages viewers to repeat the process on the other side of the face, emphasizing the importance of consistent practice for better results. The video concludes with a reminder to clean and store the Gua Sha tool properly and provides information on where to purchase the tools and products used.
Mindmap
Keywords
💡Acupuncturist
💡Herbalist
💡Gwasa
💡Chinese Medicine
💡Hydration
💡Facial Oil
💡Jade Gua Sha Tool
💡Pressure
💡Lifted and Sculpted Features
💡Relaxation
💡Massage
Highlights
Sandra Lanchine introduces herself as an acupuncturist and herbalist specializing in skin treatment using Chinese medicine tools.
Demonstrates a short version of a professional Gwasha treatment that can be done at home for skin health and beauty.
Facial Gwasha is a Chinese medical technique that enhances skin health and gives a more radiant and sculpted appearance.
The treatment can be performed daily or up to three times a week for optimal results.
Three essential items are needed: a jade Gwasha tool, a hydrating mist, and a facial oil.
Hydration is initiated with a mist, followed by a facial oil to build suppleness and create a slip for the Gwasha tool.
Proper technique involves holding the tool flat against the skin with light to medium pressure and slow, mindful strokes.
The treatment begins with a clean, freshly washed face to prep the skin for Gwasha.
The neck is the first area addressed, as tension in the face often originates from the neck.
The notched edge of the Gwasha tool is used to open the neck from front to back, starting with the back.
The side of the neck is treated with the long edge of the tool, pulling upwards towards the bone.
The front of the neck is treated with a rolling motion over the collarbone, pulling up towards the jawbone.
The front center of the neck is treated with the notched edge, stroking upwards and massaging at the bone.
After completing the neck, the face is treated starting with the jaw, using the notched edge of the tool.
The cheek area is treated with upward strokes, focusing on releasing tension and knots under the cheekbone.
Extremely light pressure is used under the eye, with a feather-light stroke moving outward towards the temple.
The brow is lifted and the eye opened with the notched edge, following the brow bone and massaging at the hairline.
The forehead is treated with light pressure, rolling over the brow bone and moving up towards the hairline.
The center of the forehead is treated with upward strokes, passing through the third eye area for relaxation.
After one side of the face is treated, users are encouraged to observe the differences in lift and relaxation.
The treatment concludes with the other side of the face, repeating the same steps for a balanced effect.
Facial Gwasha is said to result in smoother, more even skin, a more lifted and sculpted appearance, and a relaxed feeling.
Regular practice of facial Gwasha is recommended for the best results.
Proper cleaning and storage of the Gwasha tool after each use is emphasized for hygiene and longevity.
More information and where to purchase the tools and products used can be found at Lansheen.com.
Transcripts
hi everyone my name is sandra lanchine
chew i'm an acupuncturist and herbalist
and i specialize in treating skin using
the tools of chinese medicine
in this video i'm going to show you a
short version of a professional gwasa
treatment that you can do at home
facial gwasa is a chinese medical
technique that improves the health of
your skin and tissues which gives you
more radiant and beautiful skin and more
lifted and sculpted features
this can be done as often as daily or
even two to three times a week and can
truly transform the way you look and
feel
to get started you're going to need
three things
the first is a jade wasak tool
and
two products
to prep your skin
the first product is a hydrating mist
and this will begin the hydration
process by literally feeding your skin
with water
i'm using josh rosebrook's hydrating
accelerator which is one of my absolute
favorite products
the second product is called the
vitality elixir by mahalo this is a
facial oil and it's also one of my
personal favorites
before we begin i want to give you a few
notes on technique that you'll need to
remember through the whole routine
the first is the correct angle of
holding the tool which is flat
so as you're going through each step
make sure the tulle is turned flat
against your skin
don't use that sharp pointy edge against
your skin always make sure the tool is
turned flat
the next is pressure so we want to use a
light to medium pressure
and finally the speed is slow
and mindful
because we're trying to relax the
nervous system
first we're going to start with a clean
freshly washed face
next we're going to prep the skin with
the products that we just introduced
in order to build hydration
suppleness and plumpness into the skin
and also we want to create a little bit
of slip for our guasa tool
so start with your mist and generously
spray your entire face and neck
so just like you get thirsty for water
so does your skin
so you want to really press that water
into your skin
now while your skin is still damp you
want to use your facial oil
i'm going to use one pump of my vitality
elixir if at home you're using a dropper
you probably only need about four to
five drops any more than that could be
too much
now rub the oil together in your palms
because this will help it apply more
evenly
and press into your skin
like this
don't forget your neck
and you can also start applying upward
massage strokes to work it in even
further
and you know your face is very open to
suggestion so when you create this
upward massage stroke you're actually
creating lift
so now you're prepped and we can begin
the facial guaza technique
and we're actually gonna start on our
neck
because whatever is happening in our
face is happening in our neck so if your
face is tight then it's coming from a
tense neck so it's a really important
area to work open and to be free of
tension
so let's start by opening our neck from
front to back starting with the back
so you're gonna take your tool and
you're gonna use this notched edge
and you're gonna place the tulle
on your neck where it meets your back
and the notches are going to sandwich
your spine
so placing your tool
here you're going to use the flat edge
and you're going to use light to medium
pressure
and begin to slowly stroke up your neck
until you reach the bone so you're in
your hairline and you've met the bone
and you give yourself a massage by
wiggling
and you're going to do this five times
or more if you like
[Music]
so we just did the back of the neck now
we're going to do the side
so take your tool use this long edge
place it flat
on your shoulder where it meets your arm
and with light to medium pressure
begin to pull the tool up
the side of your shoulder here
up your neck
until you hit bone
again when you hit bone give yourself a
massage by wiggling the tool
and do this five times or more if you
like
so after you do one side do the other
side
okay so we just did the back and the
sides now we're gonna get the front of
our neck
so you're gonna use one hand and you're
gonna place it under your collarbone
with the other hand take the long side
of the tool
and meet your fingers here make sure
your tool is turned flat
and begin by rolling over your
collarbone
pulling up with light to medium pressure
slowly
up the side of your neck until you meet
your jawbone here give yourself a
massage by wiggling the tool
you can do this five times or more if
you like
so after you do one side do the other
side
i actually really love this part of the
routine because i feel like the front of
the neck is an often neglected and
under-treated part of the body
okay so the final part of the neck is
the front center
so take one hand and place it on your
sternum
between your two collar bones
so holding firmly here
using the notched edge this time
you're going to meet the notched edge to
your fingers
using as flat as angle as possible
you're going to lightly stroke
up
your neck
until you meet the bone and here once
again you're gonna massage with a wiggle
and you're gonna do this five times
or more if you like
[Music]
so now we've completed our entire neck
and we can move on to the face so i want
you to choose one side of your face and
we're going to work through the full
steps on one side and then you'll do the
second side on your own but i will walk
you through it
okay so now we're going to start with
the jaw
so take a finger
place it on the center of your chin and
hold firmly here for support
use the notched edge of your tool
place either side of the notch on either
side of your jaw
and bring your tool to a flat angle
against your skin
use light to medium pressure
slowly
follow the angle of your jaw all the way
back
until you meet your ear
here give yourself a massage by wiggling
the
tulle and you're going to repeat this
five times
or more if you like
let's continue now onto the cheek
so take a finger
place it next to your nose
use this long edge of the tool
and touch it to your finger
make sure the tool is flat
and with light to medium pressure
begin to
pull
the tool
outward towards your ear
with a slight angle upward
and when you contact your ear
massage it with a little wiggle
and repeat this five times or more if
you like
so on a couple of these strokes you can
also
place your tool
so that it strokes under your cheekbone
and this will get some of those
muscle
or tissue adhesions and knots that are
often under the cheekbone
now let's move on to the under eye
for under eye remember to use extremely
light pressure lighter than any other
area that you've done so far
so take your ring finger
and place it under the inner corner of
your eye
and just lightly hold
here use
one of your notches
and just touch your finger under your
eye
make sure that your tool is flat
and this is
such a feather light stroke
so i'm literally just touching
my under eye and i'm just moving the
tulle
outward towards the outer corner of my
eye
when i pass the outer corner i'm to
angle the tool upward
onto my temple
and when i reach my hairline i can give
myself a massage with a wiggle
again
placing the tool to meet your finger
on the inner corner of your eye
feather feather light pressure
move
the tool out slowly
towards the outer corner of the eye
when you reach the outer corner
turn the tool upwards slightly at an
angle
moving across your temple and when you
hit your hairline massage with a wiggle
let's move on to the brow so that we get
the upper side of our eye
and you're going to use this notched
edge again
you're going to take a finger
place it in between your brow
so touch this notched edge to your
finger make sure your
tool is flat
and with light to medium pressure
just begin to follow your brow bone
with the tool
when you reach the end of your brow bone
turn the tool upward
at an angle
and move across your temple when you
reach your hairline massage with a
wiggle
and you can do this five times
or you can do more if you like
so moving on to the forehead
so take a finger and very lightly place
it under your brow bone
so you're basically on your eyeball
which is why you want to use very light
pressure
you're just supporting the skin here
and then using this long edge of your
tool
touch your fingers
[Music]
and make sure your tool is flat
and lightly begin to roll over your brow
bone
so it's almost like the skin pulls
upwards slightly
and then you're gonna move across
and up your forehead
until you reach your hairline
and here you're going to massage with a
wiggle
and as usual you're going to do this
five times
or more if you like
and this continues to open the eye
as well as address some of the lines
that we can get sometimes on our
forehead
so we got the side of the forehead now
we're going to get the center of the
forehead
so take your finger and place it in
between your brow and hold it down
gently
use this
shorter
flat edge
and
touch your fingers
make sure your tool is flat
and again with light to medium pressure
begin to pull
up towards
your hairline
making sure that it stays flat around
the curve of your forehead
when you reach your hairline massage
with a wiggle
so
this is a stroke that where you pass
through your third eye which is super
super relaxing
and this is often the time in the
routine where you probably start to feel
sleepy
okay so now you've done one full side of
your face
before moving on i want you to just stop
and observe what you feel is different
between either side
on my right side which is your left
screen notice that my brow is lifted my
eye is more open and my cheek and jaw
are more sculpted and lifted
now that you've checked in you notice
what's changed on one side of your face
let's fill in the other side
now you're going to do this on your own
at home but i'm going to walk you
through it
on the other side of your face you'll
repeat the exact same step starting with
the jaw
using the double notch edge place each
notch on either side of your jawbone
keep the tool flat and stroke back and
up toward your ear following your
jawline massage when you get to your ear
and repeat this
five times or more
remember to use light to medium pressure
only not too hard
for the cheek place the long edge of the
tool against the side of your nose angle
up toward your temple as you stroke with
the flat side of the tool
remember to do a few strokes right under
your cheekbone to release knots and
tension there repeat five times or more
with light to medium pressure
on the under eye remember to use only
feather light pressure from the inner
corner of your eyes stroke the tulle
just under your bottom eyelid towards
the outer corner
and then turn the tool upward and stroke
across the temple to the hairline and
massage
do this five times or more
with feather light pressure
next we lift the brow and open the eye
place the notches on either side of your
brow bone and with the tool flat follow
your brow until you reach the end
turn the tool upward towards the
hairline and massage
repeat this
five times or more
and use light to medium pressure
final part very gently support the skin
of your eyelid while you stroke the
tulle from under the brow bone up and
over it
continue up into the hairline lifting
the eye and smoothing the forehead
massage at the hairline
and repeat five times or more
with light to medium pressure
and now you're finished you should
notice that your skin looks smoother and
more even you're more lifted and
sculpted and most importantly that you
feel more relaxed and less tense
the more often you do facial guaza the
more results you'll see
oh and always remember to wash and store
your tool properly after each use
thank you so much for watching i really
hope that you enjoy this beautiful
ritual of skin and self-care as much as
i do
for more info or to purchase these
products and tools please visit our
website at lansheen.com
Voir Plus de Vidéos Connexes
臉上皺紋多?1次面部撥筋,勝過天天護膚,除皺祛斑,年輕10歲!【健康管理師李晓】
3 Things to DO for GLOWING SKIN! 😍 | Say goodbye to Pimples, Acne & Dark Spots ❤️
My Secret Korean skincare tips for R.E.A.L Glass skin💧
Do This 1 Minute Every Morning & Feel the Difference | Dr. Mandell
Never Do These Habits: They Make You Unattractive | PSL Gods Looksmaxxing Ep1
Migraine Headache Help with Trigger Point, Stretches and Exercises | EASE THE HEAD PAIN |
5.0 / 5 (0 votes)