Tutorial Pembuatan Sediaan Apusan Darah ( dan persyaratannya )
Summary
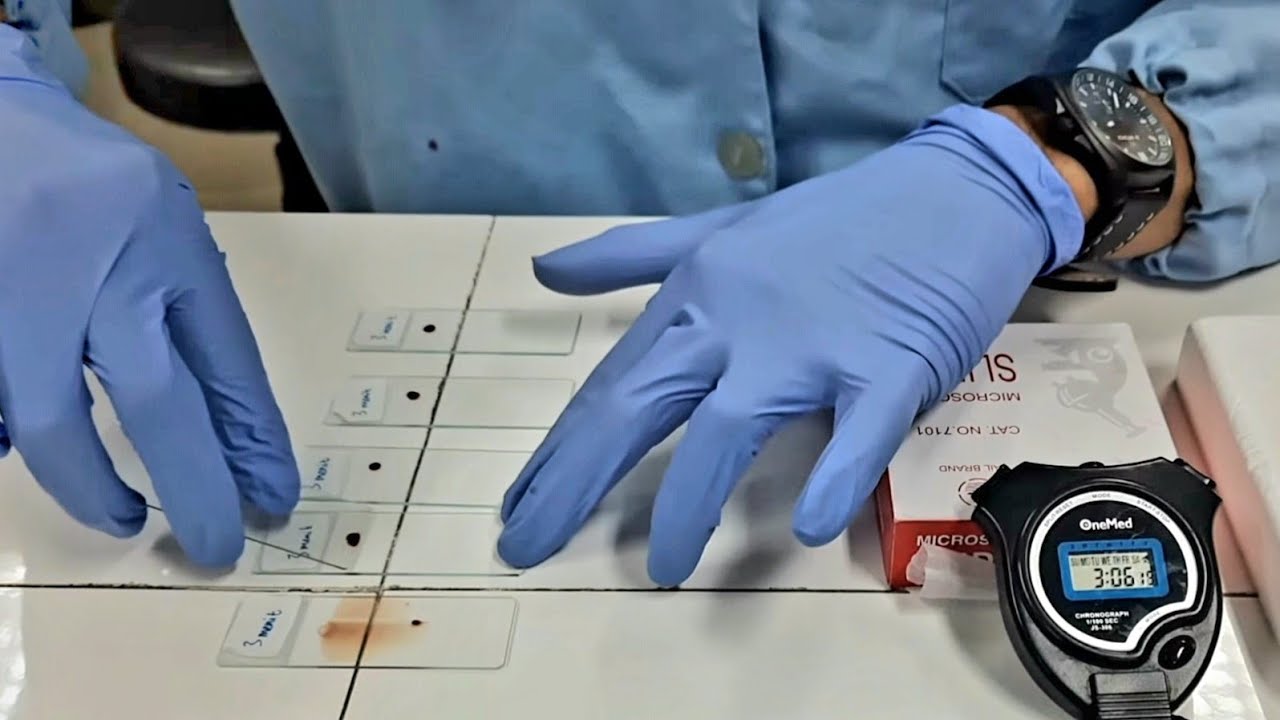
TLDRThis video demonstrates the process of preparing peripheral blood smears. It starts with instructions on cleaning the slides, removing any factory film, and labeling them. The next steps involve using a diff maker to prepare the blood sample, spreading the blood drop on the slide, and adjusting the angle of the spreader slide to ensure the smear is the correct thickness. The video emphasizes the importance of creating a smooth smear with a proper corona edge, showcasing the ideal result at the end.
Takeaways
- 😀 Wipe off factory film from slides using the cuff of your lab coat before starting.
- 😀 Label the slides before use to ensure proper identification.
- 😀 Use a diff maker with the needle side down to create a drop of blood on the slide.
- 😀 Release any positive pressure by gently rolling the tube between your hands.
- 😀 Place a drop of blood near the frosted edge of the slide, not directly on it.
- 😀 Use a spreader slide to spread the blood by backing into the drop and moving forward.
- 😀 Avoid swooping the spreader slide up at the end to prevent streaks.
- 😀 Aim for a 'Corona' (a thin, smooth edge) at the end of the smear for an ideal slide.
- 😀 If the initial smear is too thin, adjust the angle of the spreader slide to make it thicker.
- 😀 If the smear is too thick, reduce the angle of the spreader slide for a thinner result.
- 😀 A well-prepared slide should have a visible, smooth Corona at the end, indicating proper technique.
Q & A
Why do you need to wipe off the factory film from the slides before preparing the peripheral blood smear?
-The factory film left on the slides from the washing process can affect the quality of the smear, so it needs to be wiped off to ensure a clean and smooth surface for the blood smear preparation.
What is the purpose of the 'diff maker' in the process of preparing the blood smear?
-The diff maker is used to apply the blood to the slide. Its needle side is inserted into the hole, and the stopper helps control the release of pressure to avoid spilling or contamination.
How do you know the correct amount of blood to place on the slide?
-The correct amount of blood is determined by placing a drop near the frosted edge of the slide, making sure it's centered and of the right size—neither too small nor too large.
What happens if you swoop the spreader slide upwards when spreading the blood?
-Swooping the spreader slide upwards creates streaks at the end of the smear, which can lead to an uneven and less informative peripheral blood smear.
What does a 'nice corona' indicate in the peripheral blood smear preparation?
-A nice corona refers to the smooth, distinct, and even edge at the end of the smear. It indicates that the slide preparation was done correctly, ensuring the cells are spread evenly.
What should you do if the first smear is too thin?
-If the smear is too thin, you can increase the angle of the spreader slide to make it thicker. Adjusting the angle helps in spreading the blood more evenly and thickly.
What should be avoided when creating the smear to ensure quality results?
-You should avoid swooping up with the spreader slide and making the smear too thick or too thin. Both can lead to poor quality smears, impacting the ability to properly examine the cells.
How do you handle the spreader slide when preparing the blood smear?
-The spreader slide should be backed into the blood drop and then moved forward across the slide until it touches your finger. The movement should be smooth and even to ensure the correct distribution of blood.
Why is it important to dry the blood smear after preparation?
-Drying the blood smear is crucial for preserving the integrity of the sample. It ensures the cells are fixed and ready for examination under a microscope.
What can you adjust if the blood smear is too thick or too thin?
-If the smear is too thick, you can decrease the angle of the spreader slide. If it’s too thin, you can increase the angle to create a more even and appropriate smear.
Outlines

Esta sección está disponible solo para usuarios con suscripción. Por favor, mejora tu plan para acceder a esta parte.
Mejorar ahoraMindmap

Esta sección está disponible solo para usuarios con suscripción. Por favor, mejora tu plan para acceder a esta parte.
Mejorar ahoraKeywords

Esta sección está disponible solo para usuarios con suscripción. Por favor, mejora tu plan para acceder a esta parte.
Mejorar ahoraHighlights

Esta sección está disponible solo para usuarios con suscripción. Por favor, mejora tu plan para acceder a esta parte.
Mejorar ahoraTranscripts

Esta sección está disponible solo para usuarios con suscripción. Por favor, mejora tu plan para acceder a esta parte.
Mejorar ahoraVer Más Videos Relacionados


5.0 / 5 (0 votes)
