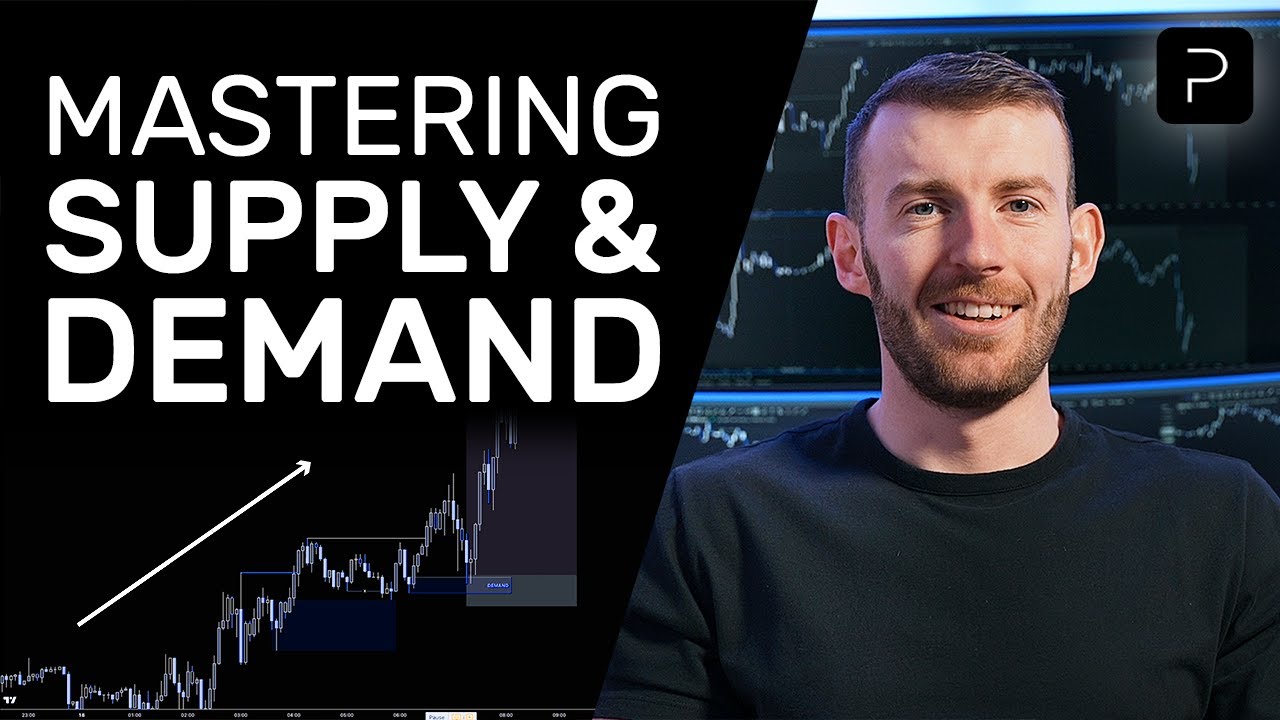
Master Supply & Demand Trading (ULTIMATE In-Depth Guide)

The Trading Geek
28 Sept 202216:38

Summary

TLDRThis video script offers an in-depth guide to mastering the supply and demand trading strategy. It explains the importance of identifying aggressive buying and selling as signals of institutional market movements. The instructor shares techniques for spotting supply and demand zones, using momentum candles and consolidation patterns. They also detail personal strategies, including combining supply and demand analysis with Fibonacci retracement levels for high-confidence trades. The script emphasizes the need for patience and confirmation before entering trades, aiming to align retail traders with the 'big boys' for profitable market movements.

Takeaways

  • 📈 Supply and demand in trading refers to aggressive buying and selling, indicating significant market movements driven by large institutions.
  • 🏦 Trading with supply and demand allows retail traders to align with the strategies of wealthy investors and institutions, potentially increasing profits.
  • 📊 To identify supply and demand zones, look for at least three consecutive momentum candles, indicating strong market sentiment in a particular direction.
  • 📉 Supply zones are areas where aggressive selling has occurred, pushing prices down, while demand zones are where aggressive buying has pushed prices up.
  • 🔍 Consolidation areas, where prices move sideways, can also indicate supply and demand zones, as prices often retest these levels.
  • 📌 Weekly rejections, where prices consistently fail to move beyond a certain level, can help identify strong supply and demand zones.
  • 🛑 Entry into trades should be based on price retesting supply and demand zones and showing confirmation of a reversal, rather than just a single touch of the zone.
  • 🚀 Using additional technical analysis tools like Fibonacci retracements can provide further confirmation for entering trades, increasing confidence in the strategy.
  • 💰 Risk management is crucial, with traders sometimes adjusting their risk percentage based on the strength of the confirmation signals, such as a confluence of Fibonacci levels and supply/demand zones.
  • 📚 Continuous learning and understanding of tools like Fibonacci retracements are essential for traders to improve their strategies and profitability.

Q & A

  • What is the main focus of the course mentioned in the transcript?

    -The course focuses on teaching the concept of supply and demand in trading, including how to identify and trade supply and demand zones, and the instructor's personal strategies for successful trading.

  • What does the instructor define as 'supply and demand' in the context of trading?

    -In the context of trading, 'supply and demand' refers to aggressive selling and buying, indicating the presence of significant market players like big banks and institutions influencing the market direction.

  • Why does the instructor emphasize not skipping through the video?

    -The instructor emphasizes not skipping through the video because it is designed to progressively build the viewer's understanding of supply and demand, and to ensure they grasp the strategies necessary for successful trading.

  • What is the significance of 'momentum candles' in identifying supply and demand zones?

    -Momentum candles, especially when they appear in a sequence, indicate aggressive buying or selling, which is a sign of the 'big boys' or significant market players entering the market. This is a key indicator for identifying supply and demand zones.

  • Why should traders pay attention to 'big boys' or market institutions in the market?

    -Traders should pay attention to 'big boys' or market institutions because they have the financial power to significantly move the market. Trading in the direction of these large players can potentially lead to more profitable trades.

  • What is the minimum number of momentum candles required to identify a supply or demand zone?

    -The minimum number of momentum candles required to identify a supply or demand zone is three in a row.

  • How does the instructor suggest identifying the start of a move for supply and demand zones?

    -The instructor suggests identifying the start of a move by looking at the previous candle before the current sequence of momentum candles and using the high and low of that previous candle to mark the supply or demand zone.

  • What is the importance of consolidation in identifying supply and demand zones?

    -Consolidation, where the price moves sideways, can be used to identify supply and demand zones. Drawing a box around the consolidation area can help predict future price behavior when it interacts with this area.

  • What does the instructor mean by 'weeks' in the context of supply and demand zones?

    -'Weeks' in this context refers to 'wicks' or the small tails at the end of a candlestick, indicating price rejection at that level. Multiple long wicks can signify a strong supply or demand zone.

  • How should traders approach entering a trade after identifying a supply or demand zone?

    -Traders should wait for the price to retest the identified supply or demand zone and look for confirmation, such as a bullish or bearish signal, before entering a trade to ensure the zone's validity and increase the likelihood of a profitable trade.

  • What additional technical analysis tool does the instructor mention using alongside supply and demand zones?

    -The instructor mentions using the Fibonacci retracement tool to provide additional confirmation for trades, especially when the retracement levels align with identified supply and demand zones.

  • What is the instructor's approach to risk management when multiple confirmations align, such as a Fibonacci retracement level coinciding with a supply or demand zone?

    -When multiple confirmations align, such as a Fibonacci retracement level coinciding with a supply or demand zone, the instructor is willing to risk more than the usual one percent per trade, possibly up to two percent, due to increased confidence in the trade setup.

Outlines

00:00

📈 Mastering Supply and Demand Trading Basics

This paragraph introduces the concept of supply and demand in trading, emphasizing its importance for identifying aggressive buying and selling in the market. The speaker explains that these market actions indicate the involvement of large players like banks and institutions, which can significantly influence market direction. The paragraph also highlights the significance of 'momentum candles' as indicators of smart money activity and contrasts them with 'small candlesticks' that lack volume and momentum from significant market players. The speaker shares their personal strategy for trading supply and demand, which involves identifying and tracking these zones to make informed trading decisions.

05:00

📊 Techniques for Identifying Supply and Demand Zones

The second paragraph delves into the methods of identifying supply and demand zones in trading charts. It describes the process of spotting 'momentum candles' and using them to establish zones where aggressive buying or selling has occurred. The speaker illustrates how to use a rectangle tool to mark the high and low of a previous candle to create a demand zone, and how to wait for the price to retest this zone before entering a trade. The paragraph also explains the use of consolidation patterns and the presence of 'wicks' on candlesticks to identify these zones, providing examples of how the price behavior can confirm the validity of these zones.

10:03

🚀 Trading Strategies Using Supply and Demand Zones

This paragraph outlines specific strategies for trading using supply and demand zones. It discusses the importance of waiting for price confirmation before entering a trade and provides examples of how to use bullish candlestick patterns, such as 'long wicks' and 'bullish engulfing candlesticks', as signals for entering a buy position. The speaker also explains the process of setting stop-loss and take-profit levels, using the last higher low or the demand zone for the stop-loss, and key resistance areas or previous supply zones for take-profit targets. The paragraph emphasizes the importance of patience and confirmation in trading, rather than reacting impulsively to price movements.

15:04

🔢 Enhancing Trading with Fibonacci Retracement

The final paragraph introduces the use of Fibonacci retracement as a complementary tool to the supply and demand strategy. The speaker explains how to apply Fibonacci levels to identify potential retracement points where the price may reverse, increasing the confidence in trading decisions. The paragraph describes a scenario where the price reaches a Fibonacci level that coincides with a previously identified demand zone, providing a strong confluence for entering a trade. The speaker also discusses adjusting the risk level based on the confidence in the trade setup and provides a brief mention of a tutorial on Fibonacci retracement for further learning.

Mindmap

Keywords

💡Supply and Demand

Supply and demand is a fundamental concept in economics that refers to the relationship between the quantity of a resource that is available and the desire for that resource among consumers. In the context of trading, it represents aggressive buying and selling, indicating significant market movements driven by large entities like banks and institutions. The video emphasizes the importance of identifying these zones to align trading strategies with the actions of 'big boys' in the market.

💡Momentum Candles

Momentum candles are a type of candlestick pattern in technical analysis that indicates strong market movement. They are characterized by large body sizes, reflecting high volume and significant price movement. In the video, the presence of green momentum candles signifies aggressive buying, while red indicates aggressive selling. These are crucial for identifying supply and demand zones.

💡Aggressive Buying and Selling

Aggressive buying and selling refer to the forceful entry of large investors into the market, driving prices up or down. The video suggests that observing these behaviors is key to understanding market dynamics and timing trades accordingly. It is used to identify when the market is being influenced by significant players, which can signal potential profitable trading opportunities.

💡Supply Zones

Supply zones are areas on a price chart where selling pressure is strong enough to push the price down. They are typically identified by a series of lower highs or a cluster of candles with long upper wicks. In the video, the instructor demonstrates how to draw supply zones by marking the high and low of a previous candle and extending it, which can then be used to predict future resistance levels.

💡Demand Zones

Demand zones are areas on a price chart where buying pressure is strong enough to push the price up. They are often characterized by a series of higher lows or a cluster of candles with long lower wicks. The video explains how to identify demand zones by marking the high and low of a previous candle and using them as potential support levels for future trades.

💡Consolidation

Consolidation in trading refers to a period where the price of an asset moves sideways, indicating a balance between buyers and sellers. The video mentions drawing a box around a consolidation area to identify a zone where the price is likely to find resistance or support, which can be used to plan trades.

💡Fibonacci Retracement

Fibonacci retracement is a technical analysis tool used to predict potential support and resistance levels by applying the Fibonacci sequence to an asset's price movement. In the video, the instructor uses Fibonacci retracement to identify key levels where the price might reverse, providing additional confirmation for entering trades.

💡Insider Information

Insider information refers to non-public, material information about a company that could affect its stock price. While the video humorously mentions it, it emphasizes that trading based on such information is illegal. The concept is used to illustrate the importance of aligning with the actions of large, informed traders.

💡Retail Traders

Retail traders are individual investors who trade for their personal accounts, as opposed to institutional investors who trade large sums on behalf of clients or funds. The video highlights the challenges retail traders face in moving the market and the importance of trading with, rather than against, the larger market forces.

💡Confirmation

In trading, confirmation refers to additional signals or indicators that support a trade decision. The video stresses the importance of waiting for confirmation before entering a trade, such as a price retesting a demand or supply zone, or additional technical indicators like Fibonacci levels aligning with the identified zones.

💡Bullish Engulfing Candlestick

A bullish engulfing candlestick is a bullish reversal pattern that occurs when a small bearish candle is followed by a larger bullish candle that 'engulfs' the previous one. In the video, this pattern is used as a confirmation signal that the market is likely to move upwards, indicating a potential entry point for a buy trade.

Highlights

Mastering supply and demand can lead to significant profits in trading.

Aggressive buying and selling indicates the involvement of major market players like banks and institutions.

Momentum candlesticks are key indicators of aggressive market movements.

Small candlesticks do not represent significant market demand or supply.

Trading with the 'big boys' means aligning with the major market players.

Supply is identified by aggressive market downturns, and demand by aggressive upturns.

Retail traders should aim to ride the wave of major market movements rather than trade against them.

Identifying supply and demand zones involves looking for at least three consecutive momentum candles.

The area of origin (AOL) of a market move is crucial for marking supply and demand zones.

Price retesting of demand zones can provide entry points for trades.

Consolidation periods can also indicate potential supply and demand zones.

Areas with multiple long wicks show price rejection and can be potential supply zones.

Waiting for price confirmation is essential before entering a trade in supply and demand zones.

Using technical analysis tools like Fibonacci retracement can add confirmation to supply and demand trading strategies.

Fibonacci retracement levels can align with demand zones for increased trading confidence.

Multiple confirmations from different technical analysis tools can enhance the reliability of supply and demand trades.

Adjusting risk based on the confluence of technical indicators can lead to more confident trades.

The importance of patience in waiting for the right confirmation before entering trades is emphasized.

Observing price behavior at retracement levels and demand zones can lead to profitable trades.

Transcripts

play00:00

you can Master supply and demand you'll

play00:03

be able to make so much more money from

play00:06

Trading these are what I'm going to be

play00:08

covering in this course but if you want

play00:11

this course to work for you and you

play00:13

really want to master supply and demand

play00:16

please do not skip through the video I'm

play00:19

gonna start off by teaching you what is

play00:21

a supply and demand why you should trade

play00:24

it and then how to draw how to find

play00:27

supply and demand zones and how to

play00:29

actually track these zones when should

play00:31

you enter for the trade last but not

play00:33

least I'm gonna teach you how I

play00:35

personally trade supply and demand my

play00:38

own secret supply and demand strategy

play00:43

so what is supply and demand supply and

play00:46

demand is basically aggressive selling

play00:49

and buying that's it we want to see

play00:53

aggressive buying and selling because

play00:56

this tells us that all the big boys like

play00:59

big Banks and institutions are entering

play01:02

into the market and pushing the market

play01:04

in that direction I want you to look at

play01:06

this candlesticks right here big fat

play01:09

momentum Candace tells us that there is

play01:11

a lot of aggressive selling that is a

play01:14

lot of momentum and volume pushing the

play01:17

price down on the right side we see

play01:19

green momentum candles which tell us

play01:22

that there is a lot of aggressive buying

play01:24

a lot of buying pressure a lot of

play01:26

momentum pushing the price up so these

play01:29

are what you should be looking for when

play01:31

trading supply and demand this momentum

play01:34

candles tell us that smart money is in

play01:37

the market on the other hand if you see

play01:39

small candlesticks just like this this

play01:42

is not demand all right this is small

play01:45

baby buyers we do not want to see small

play01:48

candles like this because there is no

play01:50

volume or momentum by the smart money at

play01:53

all why should you trade supply and

play01:55

demand let me tell you why I trade

play01:57

supply and demand because I want to

play01:59

trade with the big boys who have a lot

play02:01

of money I want to react to the price

play02:04

when this big boys enter the markets the

play02:07

best way to see them entering into the

play02:09

market is by waiting for supply and

play02:12

demand Supply is when the market is

play02:14

going down aggressively and demand is

play02:17

when the market is going up aggressively

play02:19

so I want to see this nice momentum

play02:21

candles that tell me that the big boys

play02:23

have come out to play remember we are

play02:26

retail Traders we are Brokers we do not

play02:29

have enough money to move the market

play02:31

while these guys are dealing with

play02:34

millions and billions of dollars let's

play02:37

say that you have Insider information

play02:39

and you know that the big boys smart

play02:42

money billionaire Traders whatever they

play02:44

call them are buying at this key level

play02:46

right here so will you end off or buy

play02:49

you are a dumbass if you said no of

play02:52

course you would it's literally free

play02:53

money if insider trading wasn't illegal

play02:56

because you know that these people have

play02:58

the money and the power hour to move the

play03:01

market so obviously you want to ride the

play03:04

wave with them because the last thing

play03:05

you want to do is to trade against them

play03:08

but that is what a lot of retail Traders

play03:11

do now that you have understood why you

play03:13

should trade supply and demand let's

play03:15

talk about how to actually find this

play03:18

supply and demand zones

play03:19

[Music]

play03:26

step is that you want to look for at

play03:29

least three momentum candles in a row so

play03:33

you can see right here we have spotted

play03:34

three green momentum candles in a row it

play03:37

can be more like can be four or five

play03:38

green cannons in a row but the minimum

play03:41

is at least three momentum candles in a

play03:44

row remember you do not want to see tiny

play03:46

small little candlesticks just like this

play03:48

you want momentum candles the big boys

play03:51

so in this example I will just use these

play03:53

three green momentum candles right here

play03:55

so the next step is that you want to

play03:57

find the AOL where the move started so

play04:01

this art move right here started from

play04:03

the previous candle so this is the

play04:05

previous candle right here so in this

play04:07

case what you want to do is to take out

play04:09

your rectangle tool and mark the high

play04:11

and the low of the previous candle so

play04:15

just draw like a little box and drag it

play04:17

all the way up here like this so now the

play04:20

area between these two lines will become

play04:22

the demand zone so right now what we

play04:25

want to do is to wait for price to come

play04:27

back down to disable and then enter for

play04:30

a buy but price already did that right

play04:32

price literally went down to re-test the

play04:35

demand Zone before shooting back up so

play04:38

if you enter for a buy here you have

play04:40

made a load of money just another

play04:43

example that is literally three momentum

play04:46

candles in a row right here so we take

play04:49

our box tool and Rebox the previous

play04:51

candle the high drag it all the way down

play04:53

to the low and then drag it to the right

play04:55

side just like this so this will be your

play04:58

supply Zone because the last time price

play05:00

was here it got pushed all the way down

play05:02

here so this is your supply Zone and we

play05:04

are waiting for price to come back up to

play05:06

this area and look at what happened next

play05:11

so right now price has managed to come

play05:13

back up to this area and I want you to

play05:15

observe to see what price does

play05:20

it literally collapsed you saw that I

play05:22

hope you saw that it literally went back

play05:24

up to this Supply area that we have

play05:26

drawn and collapsed so that's the first

play05:28

way that you can use to identify your

play05:31

supply and demand zones

play05:34

the next way is consolidation you can

play05:37

see right here price is just going

play05:39

sideways not going anywhere so what you

play05:42

can do is that you can draw a box to box

play05:44

up this entire consolidation and look at

play05:47

what price does price literally went up

play05:50

all the way to touch this consolidation

play05:52

box before heading back down so that is

play05:55

your second way

play05:57

the Third Way is to identify an area

play06:00

with weeks so weeks basically show us

play06:03

that price is rejecting that area right

play06:06

so you can see right here there is

play06:07

multiple long weekenders at this area

play06:09

here so what you can do is they can draw

play06:11

a box around this area here and just

play06:13

drag it all the way right here so you

play06:15

can see the next time price came back

play06:17

down to disable price literally should

play06:19

order the way up there so this was a

play06:22

very good demand Zone that is also

play06:24

another Supply area right here you can

play06:26

see there is multiple long weeks being

play06:28

formed at this area which show us that

play06:30

this area is like a very strong area

play06:32

that price is always rejecting so if you

play06:35

draw to those the right you can see that

play06:36

next time price came back all the way up

play06:38

here it literally collapsed all the way

play06:40

down to the demand zone now that we have

play06:43

understood how to identify supply and

play06:46

demand zones we have to know how to

play06:49

trade them

play06:52

so right here I have spotted three green

play06:55

momentum candles which means that the

play06:57

demand zone is somewhere right around

play06:59

here so after I spotted these three

play07:01

momentum candles I'll be looking at the

play07:03

previous candle before this up move is

play07:05

formed which is this red candle right

play07:07

here so I will take my box too and

play07:09

literally mark from the high all the way

play07:12

down to the low and drag it to the right

play07:14

just like this so this is your demand

play07:17

zone so right now we are waiting for

play07:19

price to come back down to this demand

play07:22

Zone to retest it before entering for

play07:25

the trade so there are basically two

play07:27

ways where you can trade this you can

play07:29

either place a buy order at the demand

play07:31

zone so that when the price gets down

play07:33

there your broker will automatically get

play07:35

you into a buy position or you can

play07:39

manually enter the trade after you see

play07:41

what price is doing at that level which

play07:44

is the one that I like more because

play07:46

remember no matter how strong the demand

play07:48

area is that is always a chance that

play07:50

price is going to break past it so right

play07:53

now I'll be patiently waiting for price

play07:54

to come back down to this AOL so we see

play07:57

what price does and as you can see price

play07:59

is approaching this area right now and

play08:01

the second price come back down to this

play08:03

area and touch this area you should not

play08:06

enter yet you must wait for confirmation

play08:10

that is a very important point you have

play08:13

to wait for price to show you that it is

play08:15

gonna head back up so right now you saw

play08:17

that price has came back all the way

play08:19

down here to this demand Zone and it

play08:22

gave us a long week doji and also

play08:25

multiple long week candlesticks which

play08:27

show us that price is rejecting this

play08:30

demand Zone and it's gonna shoot back up

play08:31

what does this candlesticks tell us it

play08:34

tells us indecision in the market it

play08:36

tells us that price is rejecting this

play08:39

AOL but we cannot assume that price is

play08:41

gonna go back up yet we have to wait for

play08:43

the next Candlestick or the next few

play08:45

candlesticks let's look at the next

play08:46

candlestick

play08:48

so right here price gave us a big green

play08:52

bullish engulfing candlesticks these

play08:55

tell us that you know what the buyers

play08:57

are back into this Market the big boys

play08:59

is at this demand Zone loading up their

play09:01

buy orders and and you really know price

play09:04

is going to go to the moon now so this

play09:06

is where I'll enter for a buy position

play09:08

right here place my stop bus below this

play09:11

last higher low or if you want to play

play09:13

it safe you can always place it below

play09:16

the demand zone for this example I'll

play09:18

just place my stop loss below the last

play09:20

higher low right here so for your take

play09:22

profit I want to place my take profit at

play09:24

a key resistance aerial or a key Supply

play09:27

even so I'm going to be looking towards

play09:29

the left and see where price last stop

play09:31

at if you look towards the left you will

play09:33

see that right here price gave us three

play09:36

red momentum candlesticks so right here

play09:38

that is a supply zone so how I mark up

play09:41

my Supply Zone remember is that you want

play09:43

to look at the previous Candlestick Mark

play09:44

the high to the low and literally drag

play09:46

it up just like like this so I'll place

play09:49

my take profit all the way up at this

play09:51

Supply area right here and place my stop

play09:54

bus a little bit tighter somewhere right

play09:55

around here below this bullish engulfing

play09:58

Candlestick and this is like one is to

play10:00

do let's see how this trip plays out

play10:02

price went up and smashed our Tech

play10:05

profits I want you to look at what price

play10:07

did when it came up to this Supply area

play10:09

that we have drawn here it gave us one

play10:12

week right here this upper week right

play10:13

here which show us that they will sell

play10:15

us at this point of time that was

play10:16

pushing the price down but the buyers

play10:19

are way too strong that is exactly why

play10:21

price continue to go up even further

play10:24

literally just rinse and repeat this

play10:26

strategy so after I've closed this trade

play10:28

let me just remove this and I'll just

play10:30

keep on drawing my new supply and demand

play10:32

zones since price has just broken past

play10:33

this Supply area and invalidated it I'm

play10:36

just gonna remove this and I can see

play10:37

there's another like demand Zone

play10:39

somewhere right around here because

play10:41

there is multiple weeks being formed

play10:43

right here which show us that maybe this

play10:45

is like a little demand AOL so we can

play10:47

see like right now prices came back all

play10:49

the way down here and you can see what

play10:51

price did after it came back all the way

play10:52

down to this demand event it should back

play10:54

up at this point of time price has just

play10:56

confirmed to us that this is a valid

play10:59

demand Zone because price gave us three

play11:01

green momentum candlesticks so I can

play11:04

just like redraw this little demand Zone

play11:06

because like I want to draw it at this

play11:08

previous candle you know what I mean so

play11:10

I'll just like drag it from this

play11:11

previous candle to Mark the high the low

play11:13

drag it to the right side just like this

play11:15

and right now I'm waiting for price to

play11:17

come back down to this awl and show me

play11:19

some sort of confirmation before

play11:20

entering for the trade I almost forgot

play11:23

to mention to you guys but also draw

play11:24

like a little Supply area right here

play11:26

because price gave us multiple long week

play11:29

rejection at this area so this is like a

play11:31

little Supply AOL and right now we just

play11:33

wait and see you can see right now price

play11:35

has came back all the way down to this

play11:37

demand Zone and he has broken past it

play11:39

just like a little bit so do you think

play11:42

we should end up a cell here this is

play11:43

what retail Traders are doing retail

play11:46

Traders will just enter for ourselves

play11:47

when price break through like a little

play11:48

support email or whatever and look at

play11:50

what price did next

play11:52

you went back up so this was ending up

play11:54

like a little fake out so at this point

play11:56

of time this gave us a confirmation that

play11:58

price is not breaking past this demand

play12:00

Zone this demand zone is solid and we're

play12:03

gonna head back up this is the bullish

play12:04

confirmation that we are waiting for you

play12:06

can see like the green candlesticks are

play12:08

getting bigger and bigger so at this

play12:10

point of time I'll just enter for a buy

play12:11

somewhere right around here place my

play12:13

stop loss below this demand Zone take

play12:15

profit at the supply able that is being

play12:17

formed right here and look how this

play12:19

trade payout

play12:21

okay you can see price when R wire and

play12:23

right there boys boys boys right there

play12:26

we just smash our take profit making

play12:28

this a very nice supply and demand

play12:30

strategy two wins in the back baby

play12:34

[Music]

play12:36

now since you are still watching this

play12:38

I'm gonna give you a little secret I'm

play12:40

gonna show you how I personally trade

play12:43

this supply and demand strategy my own

play12:46

strategy my own supply and demand

play12:48

strategy when I am trading I do not just

play12:51

like to rely on one confirmation I need

play12:55

multiple confirmation so what I like to

play12:57

do is that I like to use all the other

play13:00

technical analysis Tools in my Arsenal

play13:03

to give me more confirmation for me to

play13:06

enter for the trade for example this

play13:08

trade right here the moment price starts

play13:10

retracing right here just like this

play13:12

right I will pull out my Fibonacci so I

play13:14

pull up my Fibonacci reggae from this

play13:17

swing low all the way up to the swing

play13:19

high right here and literally just read

play13:21

get across like this so right now I am

play13:23

waiting for price to retrace all the way

play13:26

down to either one of these retracement

play13:28

levels I've done like a full length

play13:30

tutorial on Fibonacci retracement and

play13:33

how you can use this to get high win

play13:35

rate trades which you can check it out

play13:36

after this video but basically how these

play13:39

Fibonacci retracement 2 works is that

play13:41

I'm waiting for price to come back down

play13:43

to any of these retracement levels this

play13:46

38.2 50 61.8 and the 78.6 and then I see

play13:50

some sort of Confirmation and I will

play13:52

enter for a buy and I'll take profit at

play13:55

the negative 27 the extension level

play13:57

right here so basically the moment I

play14:00

start seeing price retracing I'll just

play14:01

pull out my Fibonacci retracement and

play14:03

I'm waiting for price to come back down

play14:04

to either one of my retracement levels

play14:07

so we still wait and see you can see

play14:09

price is like heading back down

play14:12

and it came down all the way down to

play14:14

this 61.8 level before it starts

play14:16

retracing right here at this point of

play14:18

time I'm not going to be entering

play14:19

because I know that most of the time

play14:21

when you are using Fibonacci you cannot

play14:23

be entering when price just bounced off

play14:25

one time you need to wait for price to

play14:28

come back down to re-test this same AOL

play14:30

which makes it like a more solid able

play14:33

before getting into the trade now this

play14:35

is where the real fun begins this is

play14:38

where the magic happens you can see

play14:40

right here this is the 61.8 retrace 111

play14:45

but at the same time it is also our

play14:49

demand Zone it's also a demand zone

play14:51

right here we have just discussed that

play14:53

this is our demand zone right so I'm not

play14:55

gonna explain it again obviously so

play14:57

right now we are waiting for price to

play14:59

come back down to this demand zone or

play15:01

this 61.8 level

play15:03

and give us some sort of confidence for

play15:05

us to enter for a buy somewhere right

play15:06

around here you can see this is

play15:08

literally like the additional Confluence

play15:10

that you need my Fibonacci retracement

play15:12

level lines up with my demand zone so in

play15:17

this case what I will do is that instead

play15:18

of risking my usual one percent per

play15:20

trade I would risk even more I will risk

play15:23

maybe two percent on this trade because

play15:25

right now I am more confident in myself

play15:27

so right now I'm still waiting for price

play15:30

to come back down to this AOL before

play15:32

entering for the trade so we see prices

play15:34

came back down to this AOL and you can

play15:36

see price is just showing us that like

play15:38

it's going to reverse and hit back up at

play15:40

this point of time I will have entered

play15:41

for my buy position right here once

play15:42

again place my stop loss below this 61.8

play15:45

retracement level or demand Zone

play15:47

whatever and then place my take profit

play15:48

at the negative 27 extension level you

play15:51

can see just now I place it at the

play15:53

supply zone right but now I'm gonna be

play15:55

placing it at the negative 27 extension

play15:58

level because I trust the Fibonacci it

play16:00

will do the thing it does so we wait

play16:03

and you can see price is like going up

play16:06

okay okay and right here we have just

play16:08

smashed our take profit guys it's really

play16:10

really just as simple as that you have

play16:12

to understand how to use Fibonacci

play16:14

retracement if you still don't

play16:15

understand how to use Fibonacci you are

play16:17

doing yourself a huge this service which

play16:20

is why I want you to check out this

play16:22

video next where I literally give you

play16:24

like a complete course just like this on

play16:26

the Fibonacci retracement to help you

play16:29

become profitable click on this video to

play16:31

find out more and remember you are just

play16:34

one trade away

Rate This

5.0 / 5 (0 votes)

Ähnliche Tags
Supply DemandTrading StrategiesMarket MomentumTechnical AnalysisCandlesticksInvestment TipsFinancial MarketsAggressive BuyingAggressive SellingFibonacci Trading
Benötigen Sie eine Zusammenfassung auf Englisch?