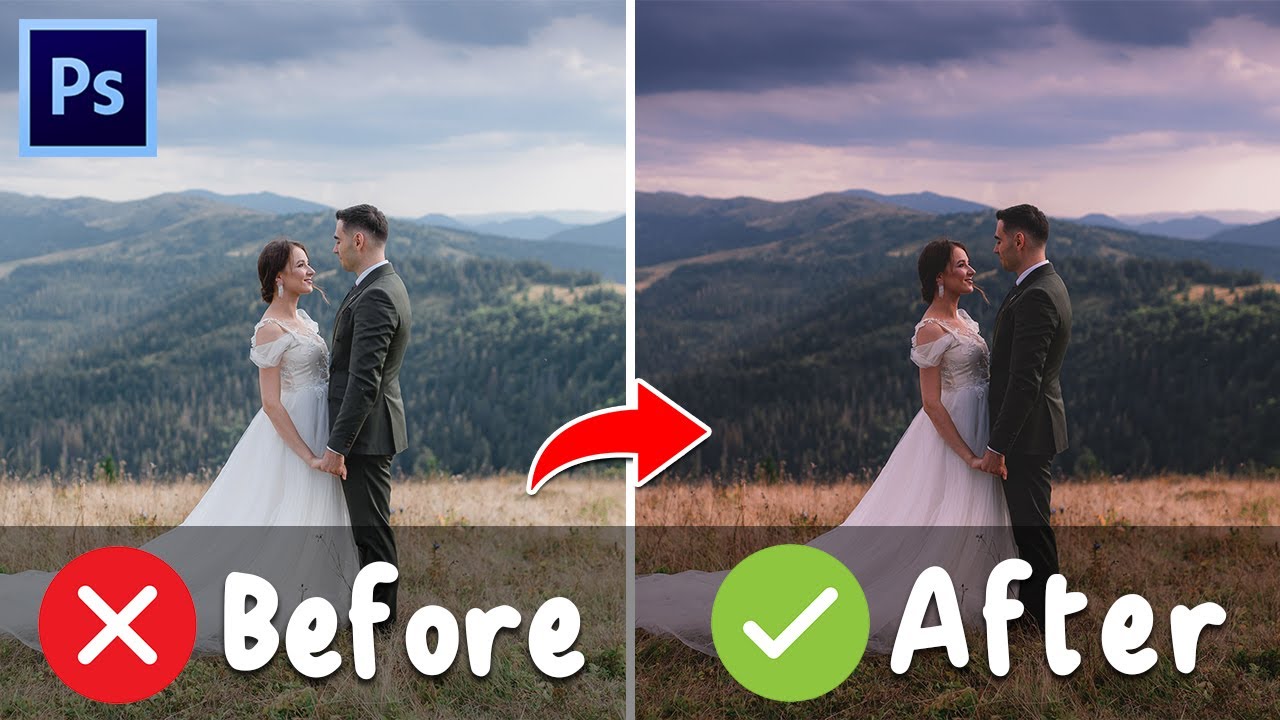
How to Color Match Images in Photoshop (FAST & EASY METHOD)
Summary
TLDRIn this tutorial, you'll learn how to color match images in Adobe Photoshop by removing backgrounds, adjusting colors using the Curves tool, and applying a color lookup adjustment for a more polished result. The process starts with selecting and masking the subject, followed by fine-tuning the image's shadows, highlights, and midtones for better color consistency. Finally, a 'Crisp Winter' color lookup is applied with a soft light blending mode to enhance the overall look. The tutorial offers practical tips and a clear before-and-after comparison for easy understanding.
Takeaways
- 😀 Use the 'Select Subject' tool in Photoshop to isolate the subject of the image.
- 😀 Add a layer mask to remove the background of the image.
- 😀 Apply a Curves adjustment layer to refine the color matching.
- 😀 Click the icon in the Curves adjustment layer to affect only the layer beneath it.
- 😀 Use the 'Auto Options' in Curves to adjust the tones and select dark, light, and mid-tone points.
- 😀 Adjust the darkest point in the image by selecting the shadows.
- 😀 Adjust the brightest point by selecting the highlights.
- 😀 You can also tweak the midtones to balance the dark and bright areas.
- 😀 Save your Curves settings as a default for future use.
- 😀 Use a 'Color Lookup' adjustment layer, such as 'Crisp Winter,' to improve color matching.
- 😀 Set the blending mode of the 'Color Lookup' to 'Soft Light' and reduce the fill for a more subtle effect.
Q & A
What is the first step to remove the background from an image in Photoshop?
-The first step is to go to 'Select' and choose 'Subject'. This will automatically select the main subject of the image, making it easier to remove the background.
How can I refine the edges of the selection after removing the background?
-Once the subject is selected, you can add a layer mask to hide the background. This makes it easier to manage the changes without permanently deleting parts of the image.
What is the purpose of adding a Curves adjustment layer?
-The Curves adjustment layer is used to fine-tune the color balance and contrast of the image. It allows you to make detailed adjustments to the image's shadows, midtones, and highlights.
How can I ensure that the Curves adjustment only affects the layer below it?
-Click on the icon between the layers (the small square with a down arrow) to link the adjustment layer to the layer below, ensuring that the Curves adjustment only impacts that layer.
What does the Auto Options setting in Curves do?
-The Auto Options in Curves helps Photoshop automatically find dark, light, and mid-tone points in the image to correct the overall brightness and contrast. It helps in creating a more balanced color adjustment.
What is the significance of unchecking 'Snap Neutral Midtones' in the Auto Options?
-Unchecking 'Snap Neutral Midtones' allows more flexibility in adjusting the image's color without being forced to neutralize the midtones. This can give more control over the image's overall color balance.
How do I select the darkest point in the image when adjusting the shadows?
-To adjust the shadows, click on the 'Shadows' button in the Curves window and select the darkest point of the background. This helps set the black point of the image.
What is the purpose of adding a Color Lookup layer in Photoshop?
-The Color Lookup layer is used to apply a preset color grading effect to the image, which can help in further color matching or creating a desired mood or tone for the image.
Why is the blending mode of the Color Lookup layer changed to 'Soft Light'?
-Changing the blending mode to 'Soft Light' allows the Color Lookup effect to blend more naturally with the underlying image, enhancing the overall color matching without being too harsh.
How do I control the intensity of the Color Lookup effect?
-The intensity of the Color Lookup effect can be controlled by reducing the 'Fill' slider. Lowering the fill will decrease the strength of the color grading applied to the image.
Outlines

Dieser Bereich ist nur für Premium-Benutzer verfügbar. Bitte führen Sie ein Upgrade durch, um auf diesen Abschnitt zuzugreifen.
Upgrade durchführenMindmap

Dieser Bereich ist nur für Premium-Benutzer verfügbar. Bitte führen Sie ein Upgrade durch, um auf diesen Abschnitt zuzugreifen.
Upgrade durchführenKeywords

Dieser Bereich ist nur für Premium-Benutzer verfügbar. Bitte führen Sie ein Upgrade durch, um auf diesen Abschnitt zuzugreifen.
Upgrade durchführenHighlights

Dieser Bereich ist nur für Premium-Benutzer verfügbar. Bitte führen Sie ein Upgrade durch, um auf diesen Abschnitt zuzugreifen.
Upgrade durchführenTranscripts

Dieser Bereich ist nur für Premium-Benutzer verfügbar. Bitte führen Sie ein Upgrade durch, um auf diesen Abschnitt zuzugreifen.
Upgrade durchführenWeitere ähnliche Videos ansehen


5.0 / 5 (0 votes)
