Chemistry Lab: Manipulation Of Glass Tubing
Summary
TLDRThis video tutorial explains how to safely light and adjust a Bunsen burner, including manipulating glass tubing for laboratory use. It covers key steps such as checking gas control, adjusting the air intake for optimal flame, and ensuring safety. The tutorial also demonstrates how to properly heat and shape glass tubing by fire-polishing and bending it at 90 degrees. Safety tips like performing hose checks and cooling glass tubing are emphasized throughout. The video makes complex processes more accessible with a hands-on, step-by-step approach.
Takeaways
- 🔥 The Bunsen burner is used for heating materials in the laboratory by controlling the gas flow and air intake.
- 🔧 The needle valve stops gas from entering the burner until the gas control knob is loosened.
- 🔄 To adjust the flame, turn the gas control knob; 'Righty Tidy' closes the valve, 'Lefty Loosey' opens it.
- 💨 Adjusting the air intake controls the flame type; more air creates a 'whooshing flame of death,' and less air creates a luminous flame.
- ✔️ Safety checks include tugging the hose, ensuring the gas control knob is off, and adjusting the air hole before lighting the burner.
- 🔥 The nonluminous flame is efficient because it has a proper oxygen-to-fuel ratio and doesn’t produce glowing, unburnt fuel.
- ⚡ The hottest part of the flame is the light blue cone, used for high-temperature tasks.
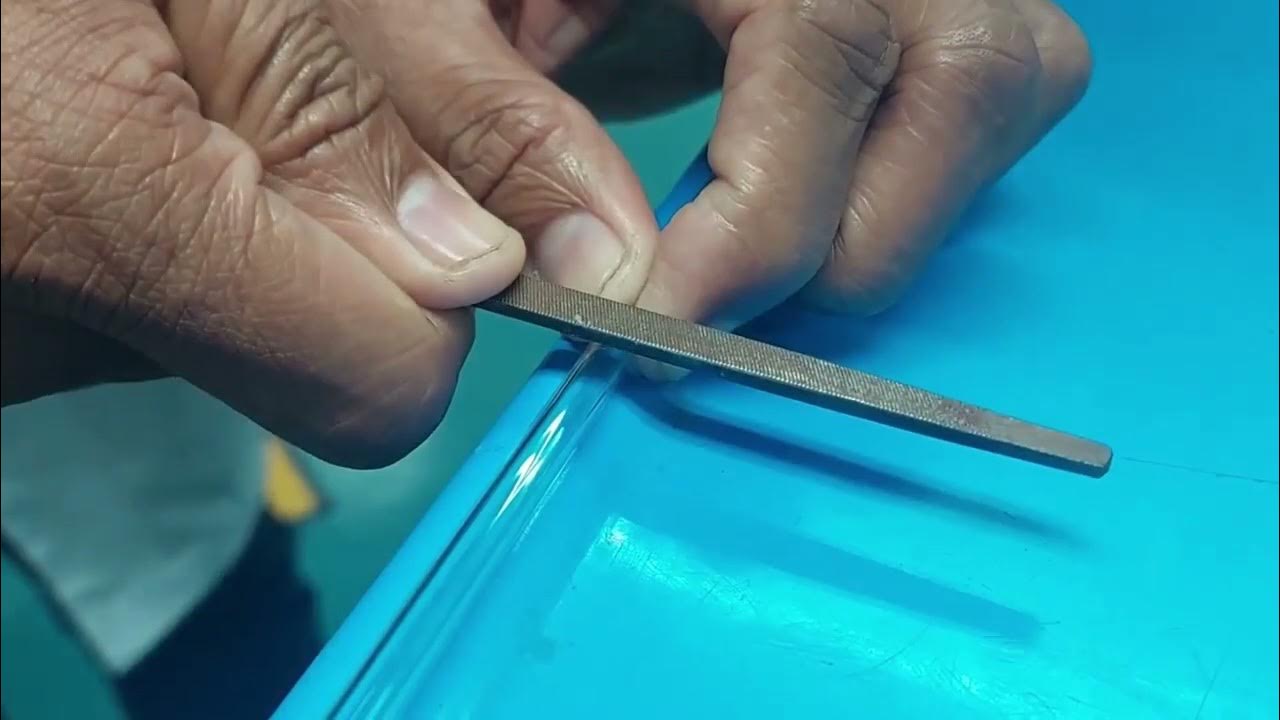
- 🔧 Glass tubing can be cut and bent by scratching it with a file and using heat from the flame to manipulate it.
- 🔥 Fire polishing is used to smooth the rough edges of cut glass tubing by heating it evenly.
- 🧊 Cooling glass slowly after heating, called annealing, prevents it from cracking by allowing molecules to settle.
Q & A
What is a Bunsen burner and its primary use in the laboratory?
-A Bunsen burner is a laboratory device used for heating substances. It operates by mixing gas with air to create a flame, which can be adjusted for different heating needs.
How does the gas control knob work on a Bunsen burner?
-The gas control knob regulates the flow of gas. Turning it 'righty tighty' shuts off the gas, while 'lefty loosey' allows more gas to flow into the burner.
What is the function of the air intake in a Bunsen burner?
-The air intake allows air to mix with the gas before it burns. Adjusting the air intake changes the type of flame, from nonluminous (blue, hotter) to luminous (yellow, cooler).
What safety checks should be performed before lighting a Bunsen burner?
-1. Tug on the hose to ensure it is secure. 2. Make sure the gas control knob is off (righty tighty). 3. Ensure there is a small air hole open for gas to mix with air.
What is a 'nonluminous' flame, and why is it important?
-A nonluminous flame is a blue flame that burns with a proper mix of gas and air, producing no light. It's important for achieving complete combustion and is used for most heating tasks in the lab.
What is the 'whooing flame of death,' and when is it used?
-The 'whooing flame of death' refers to a flame with too much air, causing a loud sound. It is used to achieve high temperatures, especially at the tip of the inner blue cone, the hottest part of the flame.
How do you properly break glass tubing?
-To break glass tubing, make a deep scratch on the surface using a file, then apply force with your thumbs directly behind the scratch to snap it cleanly.
What is fire polishing, and why is it done?
-Fire polishing involves heating the rough edges of cut glass tubing in a flame until they are smooth and rounded. This prevents the glass from cracking and allows it to pass through rubber stoppers safely.
What is annealing in glass manipulation, and why is it important?
-Annealing involves slowly cooling heated glass in a cooler flame to allow the molecules to relax, preventing the glass from cracking due to internal stress after bending or cutting.
Why is it recommended to turn off the Bunsen burner from the gas source and not the burner itself?
-Turning off the burner from the source ensures that all gas burns out of the hose and burner, preventing gas from being trapped inside, which could be a safety hazard.
Outlines
🔥 Introduction to Using a Bunsen Burner
In this section, the speaker introduces the basics of using a Bunsen burner in a lab setting. They explain the components, including the gas source, needle valve, and gas control knob. Key safety tips are highlighted, such as ensuring the gas control knob is tightly shut ('righty-tighty') to prevent gas from escaping. The process of turning the burner on is detailed, focusing on the importance of allowing enough gas through the spud (orifice) for clean combustion. The role of the air intake and barrel in controlling the air-gas mixture is described, emphasizing the dangers of too much air, which can result in the 'whooshing flame of death'. Safety checks like tugging on hoses and ensuring the gas is off are also covered.
🔥 Lighting the Bunsen Burner and Flame Adjustments
This paragraph explains the proper technique for lighting the Bunsen burner. After completing safety checks, the speaker describes turning on the gas source and adjusting the gas control knob to sustain a flame. The difference between a non-luminous and luminous flame is introduced, with non-luminous being the preferred flame due to a proper oxygen-fuel balance. The speaker also explains how the luminous flame indicates incomplete combustion. The hottest part of the flame is identified as the tip of the inner blue cone, and the process of adjusting flame height using the gas control knob is outlined. Finally, the proper method for turning off the burner by shutting off the gas at the source is explained.
🔧 Cutting and Preparing Glass Tubing
The speaker moves on to explain how to manipulate glass tubing. They detail the process of measuring and cutting the glass using a file to create a scratch. Applying pressure at the scratch point allows the glass to break cleanly. The importance of fire-polishing the rough ends of the glass tube is discussed, with instructions on heating the glass in the flame until it glows, signifying it's hot enough. Fire-polishing helps create a rounded edge to avoid cracks, and the cooling process, known as annealing, ensures the glass molecules settle in a relaxed state to prevent breakage.
🌡️ Annealing and Bending Glass Tubing
This section focuses on the final steps of handling glass tubing, particularly bending and annealing it. The speaker emphasizes heating the glass evenly by rolling it in the flame and watching for a yellow glow, indicating proper heat distribution. They explain the technique for bending the glass at a 90-degree angle and the common mistake of getting a 'double bend.' Annealing is stressed as crucial to relieve the stress on the glass caused by bending, preventing it from cracking. The speaker reflects on their example bend, noting it is functional but not perfect. The tutorial concludes with a recap of the process and its applications for transporting gases.
Mindmap
Keywords
💡Bunsen Burner
💡Needle Valve
💡Gas Control Knob
💡Air Intake
💡Luminous Flame
💡Non-luminous Flame
💡Annealing
💡Fire Polishing
💡Spud (Orifice)
💡Glass Tubing
Highlights
Introduction to Bunsen burner: explaining its purpose in the laboratory for heating substances.
Description of the Bunsen burner's gas flow: gas enters through the needle valve, controlled by the gas control knob.
Gas control knob usage: turning right (righty-tighty) shuts off the gas, and turning left (lefty-loosey) allows more gas flow.
Explanation of the air intake mechanism: air mixes with gas to ensure clean burning, adjustable via the barrel.
Safety checks before lighting: checking hose connections, ensuring the gas control knob is off, and adjusting the air intake.
Lighting the burner: instructions on turning on the gas and safely igniting the flame with a match.
Nonluminous flame: the ideal flame for most laboratory uses, indicating complete fuel combustion with proper oxygen mix.
Adjusting oxygen levels: increasing air intake creates the 'whooing flame of death,' a hotter, more efficient flame.
Demonstration of luminous flame: occurs when air is shut off, causing incomplete combustion, useful for specific applications like annealing.
Proper way to turn off the Bunsen burner: shut off gas from the source to prevent gas from staying trapped in the burner.
Glass tubing manipulation: step-by-step guide to measuring, scoring, and breaking glass tubing safely.
Fire polishing the glass: heating the rough ends of the glass tubing to round the edges, preventing cracks.
Annealing process: cooling heated glass tubing in a cooler flame to reduce internal stress and prevent cracking.
Checking if glass tubing is cool: using the back of the hand to detect residual heat before handling.
Bending glass tubing: heating the glass evenly in the light blue flame and gently shaping it to the desired angle.
Transcripts
hey guys today I'm going to show you how
to light a bunson burner how to properly
adjust it and also how to manipulate
glass tubing this is a bunson burner
it's used for heating things up in the
laboratory the source of gas comes in
right here travels along this tube where
it's stopped by a piece
called the needle valve these gaskets
prevent gas from actually entering the
burner until you loosen the gas control
knob the gas control knob is shut when
you turn it righty tidy and it won't go
anymore you don't have to go to turn it
off cuz you'll have to go to turn it
back on again nobody really wants that
so righty tidy is off Lefty Loosey let's
more in when you turn the gas control
knob on the gas comes through that tiny
little hole right in the center here
that tiny little hole is called the Spud
or orifice and it directs the gas
upwards in order order to burn cleanly
the air has to mix with the gas before
it burns so the air has to enter through
here the air intake the barrel adjusts
how much air is let in Lefty Lucy lets
more air in but this can cause the
whoosing flame of death barrel all the
way down barrel all the way down lets no
air in this is Oz the Great and terrible
before you light a burner there's a few
safety checks that you have to make
safety check number one tug on the ends
of the hose to make sure it's secure
just a light tug tug tug second make
sure that the gas control knob is off
righty tidy okay it won't go any further
that's good third safety check make sure
there's an air hole a little one is all
you need with these methane burners now
that the safety checks have been
completed turn the gas on from The
Source the gas is now coming through
this hose and is being stopped by the
needle
valve now light a
match then turn this gas control knob a
full half turn don't be shy you have to
let enough gas go through to sustain a
flame and the match can get placed into
the receptacle not in the sink you
notice how this flame isn't really
giving off much light this is called the
nonluminous flame because it's not
really generating any Flame a flame is
basically incompletely burned fuel
that's glowing because it's so hot well
because it's not glowing we know that
there isn't any incompletely burned fuel
there's a proper proportion of oxygen to
fuel what happens if I add more
oxygen this is called the whooing flame
of death there's more oxygen than the
fuel really needs to burn however we're
going to use the whooing flame of death
for a few things notice this lighter
color in inner cone right there at the
tip of the light blue cone that's the
hottest part of the flame we're going to
make use of that today if we turn the
barrel until the air hole is completely
gone we get a luminous flame this is
because since there is no air in here to
to mix with the gas the gas has to burn
with the air out here which it does
incompletely the incompletely burned gas
glows in the heat of the flame causing
this visible or luminous flame aluminous
flame is good for doing things like
annealing I'll show you that process and
know it has nothing to do with getting
on your knees on the floor or anything
for most things we want a nice luminous
flame to make the flame higher just
simply Lefty Lucy on the gas control
knob to make the flame lower righty tidy
on the gas control
knob to turn the burner off you turn it
off from the source not at the burner
this way you turn it off at the source
all this gas will burn out first you
turn it off here the gas will stay
trapped in here and won't burn
off and now to deal with the glass
tubing if you want to make glass tubing
to run through a rubber stopper and into
something else first thing you need to
do is measure out the length of the
piece of glass tubing that you need one
file's length is generally all you need
then place the file perpendicular to the
glass tube at a 90° angle cuz that's
what perpendicular means and then push
down and across once deep
scratch now we have a scratch on our
glass tube that's all you need to break
it the scratch is facing the camera my
thumbs are directly behind the scratch
together to put the most Force directly
into the scratch
push into the
scratch if it doesn't break right away
that's because your scratch isn't deep
enough so go back into your scratch and
just make it a little
deeper don't
saw again all the force directed into
the scratch from the other side of the
glass tube and it just falls apart it's
amazing now this end of the glass tube
is extremely rough so we're going to
need to fire polish it if we're going to
be able to put this through a rubber
stopper to fire polish it we're going to
heat it now as we heat it you're going
to see yellow flame that yellow comes
from sodium that's in the glass and
that's how we know the flame is getting
hot enough to do the job tug tug righty
tidy air hole we're ready to
go now I want a decent size
flame and I want a whooing flame of
death I'm going to heat the tip and just
the tip in the tip of the light BL blue
flame until it
glows rotating the glass tube to
maintain even
heating now we have a rounded Edge to
prevent it from cracking we're going to
cool it off slowly in the cooler
flame this is called ailing it allows
the molecules a chance to slide back
into a more relaxed position so that the
glass doesn't crack when it
cools then place the glass tube down on
a piece of wire gauze to cool while
waiting for it to cool place a wing tip
also known as a flame spreader on top of
the bunson burner you can't tell when
the glass tube is cool unless you put
the back of your hand over a top why the
back of your hand well the front of your
hand is kind of curved and it's not
terribly sensitive to heat the back of
your hand is actually more sensitive to
heat put the back of your hand over the
piece of glass tubing not on it just
over it if you still feel heat it's too
hot to touch mine is cooled down it's
now time to
continue when you put your glass tubing
in you have to be really careful you
notice how this flame is Hollow in the
middle you want to heat it on either
envelope of light blue flame if you heat
it in the middle it won't heat it all
roll the glass tubing in your fingers to
evenly heat it then look for the yellow
glow it's kind of like yellow snow
except completely
different once you get a yellow glow you
want to find The Sweet Spot the spot
where the glow is along the entire
length of the tube it will bend wherever
it's glowing if it only glows on the
ends you'll get a double Bend that's the
most common one mistake people
make when the glass gets all WGY you can
actually see it woing around pull the
two ends toward you
gently until you've got a
90°
Bend and then
immediately turn off the
air and anneal it in the cooler
Flame by bending it you're putting
stress on the long chain molecules that
make up glass the this will allow those
molecules to slide back into a more
relaxed
position and lay it
down to cool this piece of glass is okay
it's not a Great Bend I've got kind of a
double Bend in it it's bent a little
here and a little here uh it's not the
best Bend I've ever done uh but it's not
too bad it is
90° and it would definitely get the job
done transporting gases from one place
to another and that is how to light a
bunson burner how to play with a bunson
burner and how to manipulate glass
tubing
5.0 / 5 (0 votes)