How do I get 1.1 Numbering in Word | Create a multilevel list in Word.
Summary
TLDRThis video tutorial guides viewers on creating multilevel numbering in a document. It explains step-by-step how to define new multilevel lists, customize numbering styles, and set alignment and indentation for each level. The script also covers changing line levels using the Tab and Shift+Tab keys, and emphasizes the importance of using heading styles for auto-numbering chapters and sections to maintain document hierarchy. The tutorial concludes with a demonstration of adding new text and applying heading styles for automatic numbering.
Takeaways
- 📝 To format text with multilevel numbering, use the 'Multilevel numbering' command and define a new list.
- 🔢 For Level 1, set the number style, alignment, and position, with the text indent being 0.25 inches from the left margin.
- 📐 When defining Level 2, include the Level 1 number and adjust the text indent to be 0.625 inches, based on the Level 1 indent.
- 🔗 Level 3 should include both Level 2 and Level 1 numbers, with the text indent set to 1.125 inches, following the same pattern as Level 2.
- ✅ Ensure all levels are aligned to the left for consistency in the document's formatting.
- 🔄 To change the level of a numbered line, use the Tab key to increase the level and Shift + Tab to decrease it.
- 📚 For long documents, use heading styles instead of the tab key to maintain chapter and section hierarchy.
- 🔗 Link each multilevel list level to a corresponding heading style (e.g., Level 1 to Heading 1, Level 2 to Heading 2, etc.) for automatic numbering.
- 📈 By using heading styles, new text added to the document will automatically inherit the correct numbering hierarchy.
- 🎥 The video provides a visual guide on how to find the value of text indent, with the link to the video given in the description box.
- 💡 The script emphasizes the efficiency of using heading styles for document organization and the automatic application of multilevel numbering.
Q & A
What is the first step to format text as a multilevel number?
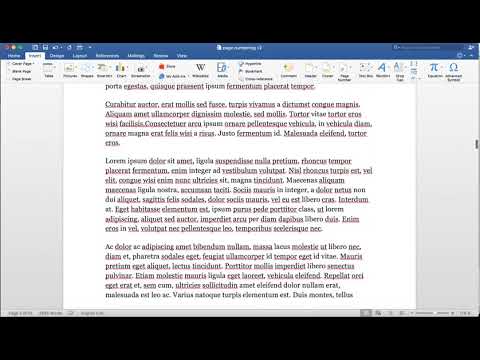
-Place the cursor anywhere on the text you want to format as a multilevel number.
How do you access the option to define a new multilevel list?
-Click the Multilevel numbering command and from the menu, choose 'Define New Multilevel List' option.
What should you do after the new window opens?
-Click the 'More' button for extra options.
How do you customize the formatting for Level 1?
-Choose Level 1, click on 'Enter formatting for number', delete the default text, choose a numbering style, and put a dot. Set Number Alignment to left, Position of the Number Aligned at 0 inches, and Text Indent to 0.25 inches.
What is the process to set up Level 2 numbering?
-Choose Level 2, click on 'Enter formatting for number', delete the default text, choose a numbering style, and put a dot. Include level number from Level 1, set Number Alignment to left, copy the text indent value from Level 1 (0.25 inches) and paste it here. The text indent value will be 0.625 inches.
How do you set up Level 3 numbering?
-Choose Level 3, click on 'Enter formatting for number', delete the default text, choose a numbering style, and put a dot. Include level number from Level 2, then from Level 1, set Number Alignment to left, copy the text indent value from Level 2 (0.625 inches) and paste it here. The text indent value will be 1.125 inches.
What command should you use to apply multilevel numbering to selected text?
-Select the text, click on Multilevel numbering command, choose 'Define New Multilevel List', and press ok.
How can you change the level of a line in a multilevel list?
-Place the cursor at the beginning of the line, press the Tab key to increase the level, and hold Shift and press the Tab key to decrease the level.
Why is it recommended to use heading styles for auto-numbering chapters and sections?
-It is recommended to use heading styles to maintain their hierarchy in a long document rather than using the tab key.
How do you link a level to a heading style in multilevel numbering?
-Choose the desired level, and from the 'link level to style' menu, pick the appropriate heading style (e.g., Heading 1 for Level 1, Heading 2 for Level 2, and Heading 3 for Level 3) and click ok.
How can you apply auto-numbering with hierarchy to new text added to the document?
-Place the cursor on the text and choose the appropriate heading style from the gallery. The hierarchy level with auto-numbering will be applied automatically.
Outlines

هذا القسم متوفر فقط للمشتركين. يرجى الترقية للوصول إلى هذه الميزة.
قم بالترقية الآنMindmap

هذا القسم متوفر فقط للمشتركين. يرجى الترقية للوصول إلى هذه الميزة.
قم بالترقية الآنKeywords

هذا القسم متوفر فقط للمشتركين. يرجى الترقية للوصول إلى هذه الميزة.
قم بالترقية الآنHighlights

هذا القسم متوفر فقط للمشتركين. يرجى الترقية للوصول إلى هذه الميزة.
قم بالترقية الآنTranscripts

هذا القسم متوفر فقط للمشتركين. يرجى الترقية للوصول إلى هذه الميزة.
قم بالترقية الآنتصفح المزيد من مقاطع الفيديو ذات الصلة

Word: Lists
Numbered Headings and Subheadings | Microsoft Word Tutorial

How to create your own Habit Tracker in Google Sheets - TUTORIAL + FREE TEMPLATE
Start Page Numbering at a Specific Page in Word on a Mac

Cara Membuat Nomor Halaman di Word (Romawi & Angka biasa)

NUMÉROTER à partir de l'INTRODUCTION (ou autre page) dans WORD : tutoriel simple
5.0 / 5 (0 votes)
