CARA MEMASAK NASI ALA NASGOR SEMERBAK
Summary
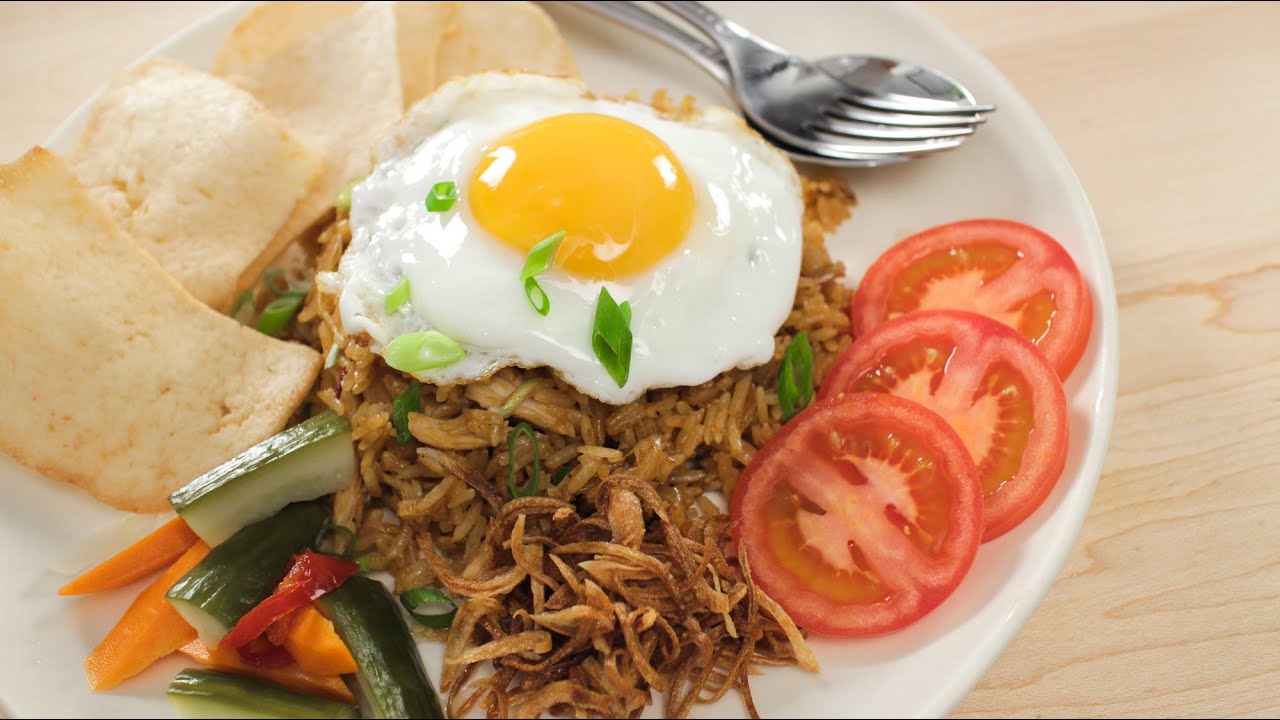
TLDRThe video script provides a detailed guide on preparing rice for nasi goreng. It describes using a mix of two types of rice (Pera and pulen) in a 3:1 ratio. The rice is washed thoroughly and then steamed in boiling water. After partially cooking the rice, more boiling water is added, and the process is repeated to ensure even cooking. Once fully cooked, the rice is cooled quickly using a fan and spread on a stainless-steel table. Finally, the cooled rice is stored appropriately to prevent clumping, ensuring it’s ready for making nasi goreng.
Takeaways
- 🍚 There are two types of rice required for making Nasi Goreng Merbak: Pera and Pulen, with specific cup measurements for each.
- 📏 The amount of rice can be adjusted according to the brand and personal preference, as recommended in the detailed ingredient list.
- 🌾 The script specifically mentions using Solo's original rice for the Pulen variety.
- 💧 The rice should be washed thoroughly with clean water until it is clear and not too murky.
- 🔥 Before cooking, it's important to prepare and heat water separately to ensure quick boiling when the rice is ready to be cooked.
- 🍳 The water level in the pot should be adjusted to half the rice line to prevent excess water from affecting the cooking process.
- ⏰ Cooking the rice involves a timed process, starting with a 15-minute wait after the initial boiling point is reached.
- 💦 After the initial cooking, additional boiled water is added to the rice to ensure even cooking, with the amount carefully measured.
- 🕒 A second timer is set for 6 minutes after adding the additional water, followed by a 7-minute wait for even cooking.
- 🥄 Stirring the rice is crucial to ensure even cooking and to prevent clumping, which should be done carefully to avoid burning.
- 🧊 Cooling the cooked rice is an essential step, which can take around 30 minutes with the help of a fan, and should be done until the rice is completely cool to prevent clumping when fried.
- 📦 Once cooled, the rice should be stored on a clean plastic sheet to facilitate better cooling and can be kept in a refrigerator or chiller for later use.
Q & A
What are the two types of rice mentioned for making Nasi Goreng Merbak?
-The script mentions two types of rice: one is Beras Pera, which is used for the ratio, and the other is Beras Pulen, which is used for cooking. Beras Pulen is specifically mentioned to be Beras Asli Solo.
What is the ratio of Beras Pera to Beras Pulen for cooking?
-The ratio mentioned is 3 cups of Beras Pera to 1 cup of Beras Pulen.
How should the rice be washed before cooking?
-The rice should be washed with clean water, either in a kitchen sink or a dishwashing area, until it is clean and the water is not too murky.
What is the purpose of preparing hot water before cooking the rice?
-The hot water is used to steam the washed rice. It is important to have the water boiling at the same time as the rice is washed to ensure that the rice can be cooked immediately after washing.
How much water should be added to the rice in the pot?
-The water should be added up to half the line on the pot, which is not specified in detail but implies a moderate amount that is not too much.
What is the recommended cooking time for the rice after it is placed in the pot?
-The rice should be left to cook for about 15 minutes after being placed in the pot.
How should the water be added to the rice after the initial 15 minutes of cooking?
-After the initial 15 minutes, hot water should be poured over the rice. The amount of water should be adjusted based on the desired consistency of the cooked rice.
What is the purpose of stirring the rice after adding the hot water?
-Stirring the rice helps to ensure even cooking and prevents the rice from clumping together.
How long should the rice be cooked after adding the hot water for the second time?
-The rice should be cooked for an additional 15 minutes after adding the hot water for the second time.
What is the purpose of cooling the cooked rice before using it for Nasi Goreng Merbak?
-The rice needs to be cooled to prevent it from becoming too sticky when fried. Cooling the rice also helps in achieving a better texture for the fried rice.
How can the cooling process be facilitated for the rice?
-The cooling process can be facilitated by using a fan or by placing the rice on a clean plastic sheet in a well-ventilated area.
Outlines
🍚 Preparing Rice for Nasi Goreng Merbak
The script begins with a detailed explanation of preparing rice for Nasi Goreng Merbak. It mentions two types of rice, with a preference for using Pera rice. The ratio is specified as 3 cups of Pera rice to 1 cup of water. The rice is then washed thoroughly with clean water, either in a kitchen sink or a washbasin. The next step involves preparing hot water for steaming the rice. It is suggested to heat the water separately to ensure it is ready when the rice is cleaned. The amount of water in the pot should be adjusted to halfway up the rice. After adding the rice, the pot is covered and allowed to steam for 15 minutes. The use of a timer is recommended to ensure accuracy. The script also emphasizes the importance of not using too much heat to prevent uneven cooking.
🔥 Cooking and Cooling the Rice
This paragraph continues the process of cooking the rice, focusing on the addition of boiling water to the already washed and steamed rice. The water is poured slowly and evenly over the rice to maintain its texture. The pot is then covered again and allowed to cook for another 15 minutes. After this period, the rice is stirred gently to ensure even cooking. The script advises on the importance of cooling the rice before using it for Nasi Goreng. The cooling process should be done on a large surface with the help of a fan for faster cooling. The rice is then transferred to a clean plastic sheet to facilitate the cooling and to prevent sticking. The cooling time is estimated to be around 30 minutes with the help of a fan, but can be adjusted based on the actual temperature of the rice.
🧊 Final Cooling and Storage of Rice
The final paragraph discusses the importance of completely cooling the rice before storing it for later use. It advises on the potential issues of overcooling, which can make the rice dry and hard. The script suggests wrapping the cooled rice in plastic to prevent it from drying out and to facilitate easy storage. The rice can be stored in a refrigerator or a chiller for future use. The wrapping should be done carefully to ensure that the rice remains moist and ready for cooking. The script also mentions that the rice should be used when it is cool to prevent clumping and uneven cooking when making Nasi Goreng.
Mindmap
Keywords
💡Nasi Goreng Merbak
💡Beras
💡Pera
💡Air Panas
💡Dandang
💡Mengukus
💡Air Matang
💡Penggunaan Api
💡Penyimpanan
💡Plastik Bersih
💡Kipas Angin
Highlights
Introduction to making nasi goreng merbak (fried rice).
Two types of rice are used: Pera for the main rice and beras pulen for the side.
The rice ratio is 3 cups of Pera to 1 cup of beras pulen.
Rice brand recommendations are provided with a link to raw materials.
Beras asli Solo is used for beras pulen.
Rice should be washed thoroughly with clean water.
Rice is washed until it is clean and the water is not too cloudy.
Prepare hot water for cooking the rice.
The water level in the pot should be adjusted to half the line.
Rice is added to the pot and spread evenly.
Cook the rice for 15 minutes with a timer.
Use a moderate flame to ensure even cooking.
After 15 minutes, add boiling water to the rice.
The added water serves as additional water for cooking the rice.
Adjust the water amount based on the rice's cooking needs.
Close the pot and cook for another 6 minutes.
After 7 minutes, open the pot and add more boiling water.
Mix the rice thoroughly to ensure even cooking.
Cook for another 15 minutes after adding water.
Turn off the heat and mix the rice to ensure even cooking.
Cool the rice on a clean plastic sheet.
Ensure the rice is completely cooled before using it for fried rice.
Use a fan to speed up the cooling process.
Cooling time is estimated to be 30 minutes with a fan.
If the rice is not cool enough, extend the cooling time.
Wrap the cooled rice with plastic to prevent drying out.
Transcripts
oke nah Ini selanjutnya terkait dengan
pembuatan nasi untuk nasi gorosa merbak
ada dua jenis beras yang pertama di sini
yang sebelah kanan atau e yang diambil
adalah beras
Pera untuk perbandingannya 3 B1 atau 3
Cup bras Pera dan s cup untuk bras
pulennya untuk beras PRnya sendiri bisa
disesuaikan merek dengan yang ada di
Bapak Ibu sekalian nah terkait
rekomendasi mereknya sudah sesuai dengan
ee Link yang ada pada detail bahan baku
nah ini untuk beras pulen beras pulen
kami gunakan beras asli Solo untuk
takarannya e tadi ya kak ya 3 Bing
1 bisa disesuaikan dengan e berapa kali
atau berapa yang ingin Bapak Ibu
sekalian masak per
harinya
Nah untuk step selanjutnya beras yang
sudah kita takar dan kita campurkan bisa
dicuci menggunakan air bersih baik itu
mau di westaple ataupun di dapur ya E
dengan air bersih Nah untuk stepnya di
sini kita biasanya cuci sekitar 5 sampai
dengan tu kali yang penting sampai e
berasnya bersih atau
Ee tidak terlalu keruh untuk airnya nah
sebelum memasukkan beras yang sudah
dicuci alangkah baiknya kita menyiapkan
air
panas untuk mengukus beras yang tadi
dicuci di
dandang kalau untuk hacknya ya kak ya E
kakak bisa membuat atau memanaskan air
terlebih dahulu di tempat yang berbeda
dengan
dandang yang akan digunakan untuk masak
nasinya penggunaan api
e untuk Air ini itu bisa besar agar
cepat mendidih ya kak ya supaya nanti
ketika berasnya selesai dicuci bersamaan
dengan mendidihnya air dan bisa langsung
dimasak Baik untuk selanjutnya terkait
dengan air yang ada di dalam dandangisa
sesuaikan sampai dengan setengah garis
saja enggak perlu Terlalu banyak ya
Bapak Ibu sekalian nah apabila air juga
itu nanti bisa dijaga ee khawatir ketika
masak airnya kurang
nah beras dimasukkan secara
perlahan kemudian bisa diratakan ke
seluruh bagian dari dandang sehingga
nanti matangnya bisa merata dan tidak
berkumpul di satu tempat nah kemudian
beras yang sudah dimasukkan bisa
ditutup dan bisa kita tunggu hingga 15
menit Jangan lupa untuk memasang
timer
Oke untuk penggunaan api sendiri ketika
memasak dandang bisa
dibesarkan tapi jangan terlalu besar
karena
khawatir tidak matang secara merata Nah
setelah 15 menit berlalu dan alarmnya
sudah bunyi lalu kita masukkan air dan
kita siramkan e air yang tadi kita rebus
ya kak ya ke dalam beras yang sudah kita
kukus Nah untuk air yang kita siramkan
di sini berfungsi
sebagai tambahan air untuk memasak
nasinya tapi airnya harus disesuaikan ya
kak ya jangan terlalu banyak untuk
patokannya karena memasak nasi bisa
disesuaikan juga air yang kita masukkan
itu harus samp terliat ya kak ya di
Bagan kukusannyaang Lebi seper
ini J tidak tenggelam tidak juga
e terlalu sedikit lalu kita tutup
kembali setelah ditutup jangan lupa
untuk memasang timer sekitar 6
menit dan kita bisa tunggu kembali 7
menit ya Kak mohon
maaf ketika alarmnya sudah berbunyi at
timernya sudah berbunyi kita buka
kembali nasinya kemudian kita masukkan
kembali air yang tadi sudah matang ya
Kak Ya ini kita masukkan perlahan-lahan
dan disiramkan ke seluruh bagian dari
nasi yang ada di dandang fungsinya juga
untuk
mempertahankan kematangan dari nasi
tersebut nah kurang lebih sama ya kak ya
sama-sama seperti yang tadi
air dimasukkan sampai dengan nasi ee
sudah terendam tapi juga tidak
menenggelamkan nasi yang ada kemudian
diaduk secara keseluruhan supaya
matangnya merata jadi yang bawahnya kita
aduk supaya ke atas begitu juga yang
atas diaduk
supaya merata ke seluruh
bagian
nah
diaduknya bisa perlahan-lahan ya Kak Ya
ini agak panas Jadi harap
berhati-hati nah kurang lebih seperti
ini jadi air yang tadi kita masukkan
juga sudah
diratakan setelah itu bisa kita tutup
kembali dan kita tunggu sampai
dengan 15 menit Jangan lupa untuk
memasang timer supaya sesuai
dengan waktunya ya kak ya
oke setelah alarmnya berbunyi atau
timernya berbunyi kita matikan
dulu nasinya kemudian kita buka perlahan
hati-hati ini agak
panas kemudian kita aduk ya secara
merata untuk ngaduknya sama seperti yang
sebelumnya ya kak ya supaya matangnya
secara merata nah ini sudah
terlihat matang namun
penggunaannya harus didinginkan terlebih
dahulu kita aduk seperti
ini
kemudian
kemudian kita bawa
ke atau kita pindahkan ke tempat yang
luas kemudian siapkan plastik bersih
kalau belum ada plastik bersih bisa
disobek ya kak ya Nah ukurannya seperti
ini Ini fungsinya untuk alas lebih baik
memang ee di meja yang bahannya
stainless seperti ini karena
untuk penyaluran suhunya dari nasi bisa
lebih cepat Kak kalau misalkan di meja
stainless atau meja besi seperti ini Nah
kita ambil nasinya kemudian kita simpan
di atas plastik yang
bersih dan kita ratakan di seluruh
bagian
meja lebih baik apabila di lokasi
ruangan
Kakak sudah tersedia kipas untuk
membantu pendinginan yang lebih
cepat seluruh nasi yang ada dalam
dandang harus dikeluarkan ya kak ya
kalau bisa jangan disisakan karena
memang yang akan kita gunakan ketika
masak nasi gorengnya adalah nasi yang
suhunya sudah dingin supaya ketika
digoreng nasi tidak menggumpal Kak
seperti
itu
Oke untuk proses pendinginan nasi ini
bisa
dilakukan sampai dengan nasinya sudah
tidak panas lagi atau tidak mengeluarkan
uap dalam hal ini kalau di pusat
Biasanya sih sekitar 30 menit dan itu
pun dengan bantuan kipas angin nah
apabila Kakak sekalian atau Bapak Ibu
Mitra ee melakukan pendinginan nasi
tanpa bantuan dari kipas
angin untuk waktunya
pun bisa disesuaikan Kalau 30 menit
belum dingin silakan Bisa disepare lagi
bisa e sekitar 15 menitlah sampai suhu
sudah turun drastis alias sudah dingin
lah jadi bentuk nasinya pun bukan nasi
yang menggumpal seperti ini ya kak
ya untuk penyimpanan nasi ini ee kita
dinginkan estimasinya di 10 menit ya
Bapak Ibu sekalian dengan bantuan kipas
angin kalau sekiranya 10 menit ternyata
belum mencapai e dingin yang merata gitu
ya e jadi bisa ditambahkan lagi estimasi
waktunya sekitar 5 sampai dengan 10
menit yang penting jangan terlalu lama
karena kalau terlalu lama bisa kering
nasinya Kak kalau kering nasinya nanti
ketika
dimasak teksturnya akan
berbeda dan dia turnya akan lebih keras
ya Kak Ya makanya kalau misalkan sudah
dingin nih suhu nasinya nanti plastik
yang digunakan sebagai alas bisa
membungkus seluruh nasi yang ada di atas
meja setelah dibungkus mau
dipindahkan
ke bakul nasi bisa ataupun Kakak mau
nyimpan sebagai sebagiannya di kulkas
atau Chiller itu pun bisa ya sebagai
stok apabila nasi yang dibakul sudah
habis Nah untuk yang ini Apabila nasinya
sudah dibungkus bisa menggunakan plastik
ya yang digunakan sebagai alas pada saat
nasinya itu sedang didinginkan ya Bapak
Ibu
sekalian
浏览更多相关视频
السفة بالروز للضيافة❤️فاخرة وصفتي مبتكرة بتخليطة جهنمية كتحمق حصريًا على قناتي بطريقة كتوجد فنص ساعة
RESEP NASI KUNING GURIH WANGI COCOK UNTUK TUMPENG
چگونه ميتوان برنج كته را مثل برنج آبكش دان در آورد جوادجوادي
How I Cook 20 Healthy Meals in 1 HOUR
Di kecam teruk !!! Nasi Goreng Itik ini mampu terjual 1000 bungkus hanya beberapa hari sahaja !!!
मशरूम फ्राइड राइस | Mushroom Fried Rice Recipe in Hindi | Easy & Quick Delicious Mushroom Fried Rice
5.0 / 5 (0 votes)