Trading Course Day 10: How to Mark Up
Summary
TLDRIn this video, the speaker breaks down how to effectively mark up trading charts, focusing on identifying swing highs and lows. Emphasizing simplicity, they suggest only marking key levels from the past 1-3 trading sessions to avoid cluttered charts. The video highlights the importance of avoiding 'no trade zones' and cautions against trading based on breakout indications alone. With practical insights and a focus on market structure, the speaker encourages traders to use common sense, risk management, and clean, clear charting for more successful trades.
Takeaways
- 😀 Clear your charts for a fresh start: Don't clutter your charts with too many levels. Focus on marking swing highs and swing lows from the last 1 to 3 sessions.
- 😀 Don't overcomplicate with indicators: You don't need many indicators; focus on price action and structure. The swing highs and lows are key markers.
- 😀 Identify key price levels: Mark the levels where price reacts, like swing highs and lows, and use these as support and resistance levels.
- 😀 No Trade Zone: When price has a clear high and low but no indication of direction, avoid trading. Patience is key in these zones.
- 😀 Indication is not a trade signal: A breakout is an indication that price might continue in a certain direction, but don't trade it immediately. Wait for confirmation.
- 😀 Wait for confirmation: After a breakout or indication, wait for price to close above/below a key level to confirm the trend before entering a trade.
- 😀 Use higher timeframes for structure: Markups on the 1-hour time frame should follow the same structure as those on the 15-minute or 5-minute charts. The price action doesn't change.
- 😀 Price reacts to levels: Price doesn't go further down once it hits a level of support. When price breaks a swing high or low, it indicates a potential move in that direction.
- 😀 Be mindful of risk-to-reward: When placing trades, assess risk-to-reward. A good trade setup balances both for the best outcome.
- 😀 Focus on trends: Look for trends and react to price action that breaks previous highs or lows. These moves provide clearer entry points.
- 😀 Stay disciplined: Avoid jumping into trades when price is in a no-trade zone. Discipline in waiting for proper setups is essential to trading success.
Q & A
Why should traders avoid overcomplicating their charts with too many levels?
-Traders should avoid overcomplicating their charts because too many levels create confusion and clutter. Focus on key levels like swing highs and swing lows to keep things simple and effective.
What is the significance of swing highs and swing lows in trading?
-Swing highs and swing lows are critical because they help identify areas of potential reversal or continuation in the market. These points act as support and resistance levels, providing traders with key decision-making tools.
How many sessions should traders typically focus on when marking up their charts?
-Traders should typically focus on 1 to 3 sessions when marking up their charts. This range is enough to identify swing highs and swing lows, providing a solid foundation for trade analysis.
What is a No Trade Zone, and why should traders avoid it?
-A No Trade Zone occurs when there is no clear indication of price direction despite having a swing high and swing low. Traders should avoid these zones because they lack actionable price movement, increasing the risk of making poor trades.
How can traders identify an indication to enter a trade?
-An indication to enter a trade occurs when price breaks a swing high or swing low and shows signs of continuation. However, traders should not immediately trade the breakout; instead, wait for confirmation, such as a strong candle close in the direction of the breakout.
Why is it important to avoid trading breakouts without confirmation?
-Trading breakouts without confirmation is risky because many breakouts fail, leading to losses. Confirmation, such as a candle closing above or below a level, ensures that the breakout is more likely to result in a sustained move.
What role does volume play in confirming a trade?
-Volume plays a crucial role in confirming a trade. When price breaks a level and volume picks up, it indicates that there is strong market participation, which increases the likelihood of a successful trade in that direction.
How can traders use higher time frames to confirm trades on the 1-hour chart?
-Traders can use higher time frames, like the 4-hour chart, to confirm their bias. If price action is consistent across multiple time frames, it adds confidence to the trade setup, as market structure remains the same regardless of the time frame.
What is the importance of marking support and resistance levels when identifying trades?
-Marking support and resistance levels is vital because they help determine where price is likely to reverse or continue. These levels provide reference points for entries, exits, and stop-loss placements, improving the precision of trade decisions.
How should traders handle risk-to-reward when entering trades?
-Traders should always ensure that their risk-to-reward ratio is favorable. This means setting stop losses in appropriate positions (e.g., below support for long trades) and targeting areas that offer a good reward in relation to the risk taken on the trade.
Outlines

此内容仅限付费用户访问。 请升级后访问。
立即升级Mindmap

此内容仅限付费用户访问。 请升级后访问。
立即升级Keywords

此内容仅限付费用户访问。 请升级后访问。
立即升级Highlights

此内容仅限付费用户访问。 请升级后访问。
立即升级Transcripts

此内容仅限付费用户访问。 请升级后访问。
立即升级浏览更多相关视频

ICT Mentorship Core Content - Month 1 - Equilibrium Vs. Premium

Master Support & Resistance Levels (ALL YOU NEED TO KNOW)

Trading Transformation Day 6: Highs, Lows, and Trends

2022 ICT Mentorship [No Rant] ep. 11 - Reinforcing Past Lessons & Trading Executions

STOP Trading Sebelum Paham Liquidity! Ini Kunci Market Structure

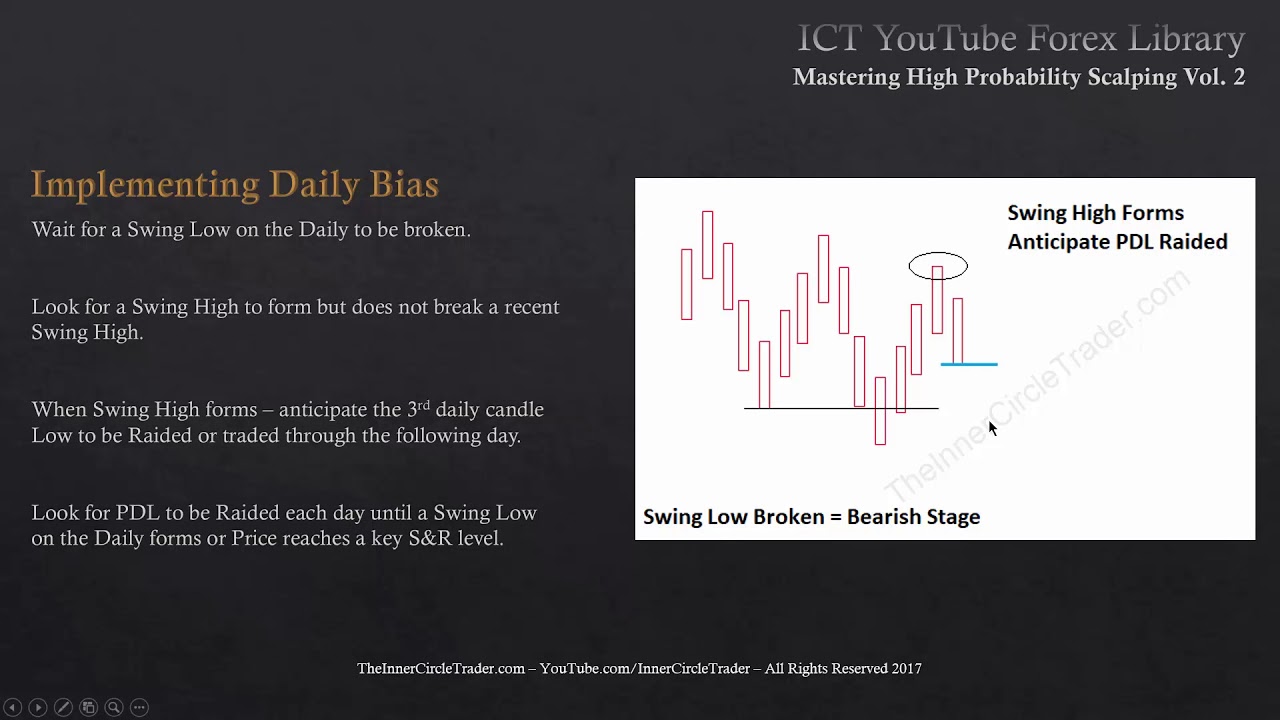
ICT - Mastering High Probability Scalping Vol. 2 of 3
5.0 / 5 (0 votes)
